• Please visit and share your knowledge at our sister communities:
  • If you have not, please join our official Homebrewing Facebook Group!

    Homebrewing Facebook Group

inr brewing - basement brewery build

Homebrew Talk

Help Support Homebrew Talk:

This site may earn a commission from merchant affiliate links, including eBay, Amazon, and others.
Really nice job so far. I was just wondering if you were planning to leave the bare wood inside the keezer? I left a "temporary" piece of raw plywood in the bottom of my kegerator that turned black before long. Of course on the bottom it did see some moisture. The piece I spray painted hold the taps still looks like the day I put it in. Hope your brewing soon!

no plans to do anything with it. the exposed wood is oak and on the collar. lots of folks don't even insulate the collar so i figure i'll be okay. worst case, i can throw some poly on it or something like that. plus, i will have air movement and an eva dry unit in there.
 
http://www.amazon.com/dp/B00Y0OTQHA/?tag=skimlinks_replacement-20


i was having a heck of a time finding a silicone mat large enough to fit under my pot. they make round cork ones that are big enough but i had concerns about cork getting wet and swelling, splitting, etc. largest round silicone mats i was finding were 10". that probably would have worked but then i stumbled across this large square one.


Thanks dude. I have had, and still do, the same problem - a silicone mat big enough to fit under the pot. Mine are 17.5" diameter, so this wouldn't work as the width side is under 16". I will keep looking!
 
Last edited by a moderator:
Thanks dude. I have had, and still do, the same problem - a silicone mat big enough to fit under the pot. Mine are 17.5" diameter, so this wouldn't work as the width side is under 16". I will keep looking!

what type of kettles do you have? mine are 17.7" wide but have a stepped bottom so the diameter that would touch the table is a little over 16". there is some very slight overhang but good enough for me.
 
6/3/2016 update

more packages!

20160603_174410_resized_zpsra3uabnf.jpg


mash stir paddle, keg lube, oxygenator kit and starter stir bars from adventures in homebrewing:

20160603_174533_resized_zpsvu4xvsjn.jpg


another big package from aih:

20160603_175629_resized_zpst8srkryq.jpg


well protected:

20160603_175653_resized_zpsrjgyql7s.jpg


5 liter flask for starters:

20160603_175731_resized_zpsbfkqgur3.jpg


ph meter, calibration and storage solutions from amazon:

20160603_175521_resized_zpsrqqkovlc.jpg


o-rings for the ro/di canisters:

20160603_174607_resized_zpsxs12fxk4.jpg


the o-ring i got a few days ago didn't fit. i was going bananas trying to find some info online about what size i needed. then i stumbled across a website that had industry-standard o-ring templates that could be printed out to scale. found the 341 o-ring to be the closest. it was a little larger than the one that came with the canister but the way the threads set, it should be okay. only problem was they had to be ordered in massive quantities (couldn't get just one). smallest quantity i could find was 25 so i got way more than i will likely ever need. it was only $7 for all of those shipped to my door so no biggie. tried it out that night and works like a charm.
 
6/4/2016 update

just getting random stuff now. stopped by the lhbs to pick up some more supplies. grabbed some light dme for starters, carboy handles and carboy drying racks. also grabbed some distilled water from the grocery store for rinsing the ph meter probe::

20160604_101324_resized_zpsvn8frf5s.jpg


also got my replacement sight glass tubes from spike. for some reason, i didn't take a photo of the tubes themselves, just the shipping container! anyway, the etching is much darker than the previous versions and easy to read. spike offered these up free of charge so good customer service there:

20160604_160707_resized_zpswiel7nng.jpg
 
6/5/2016 update

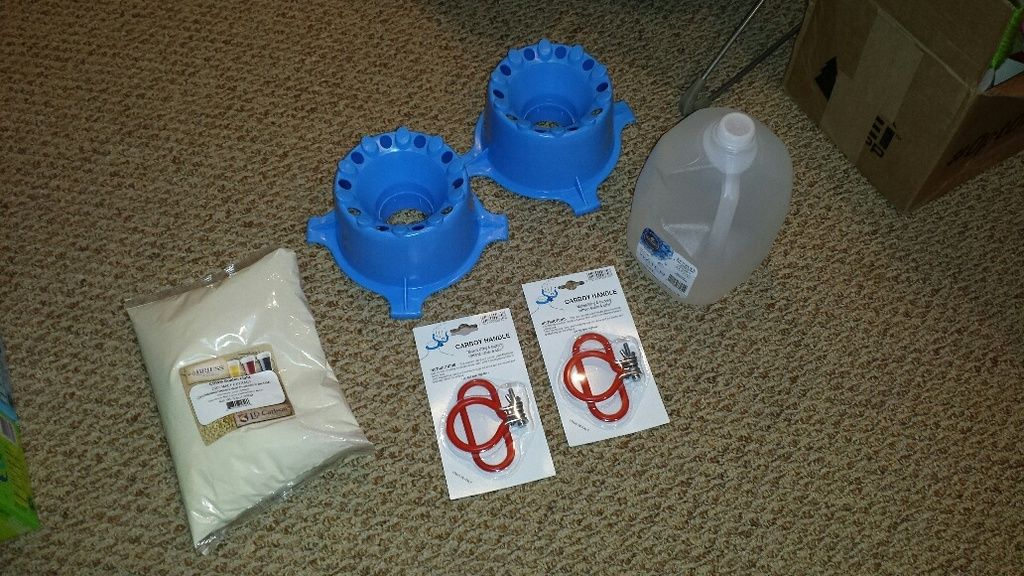
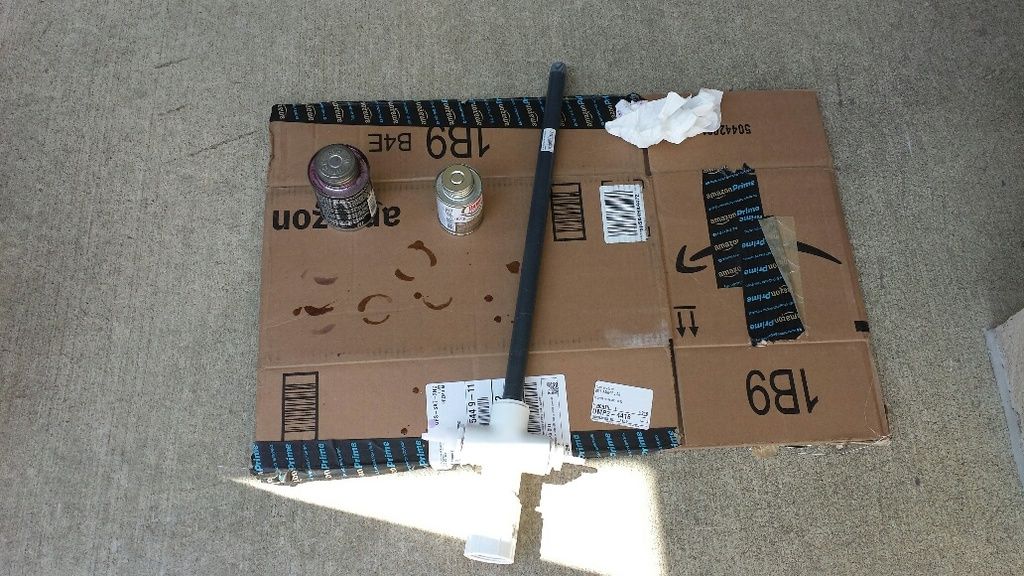
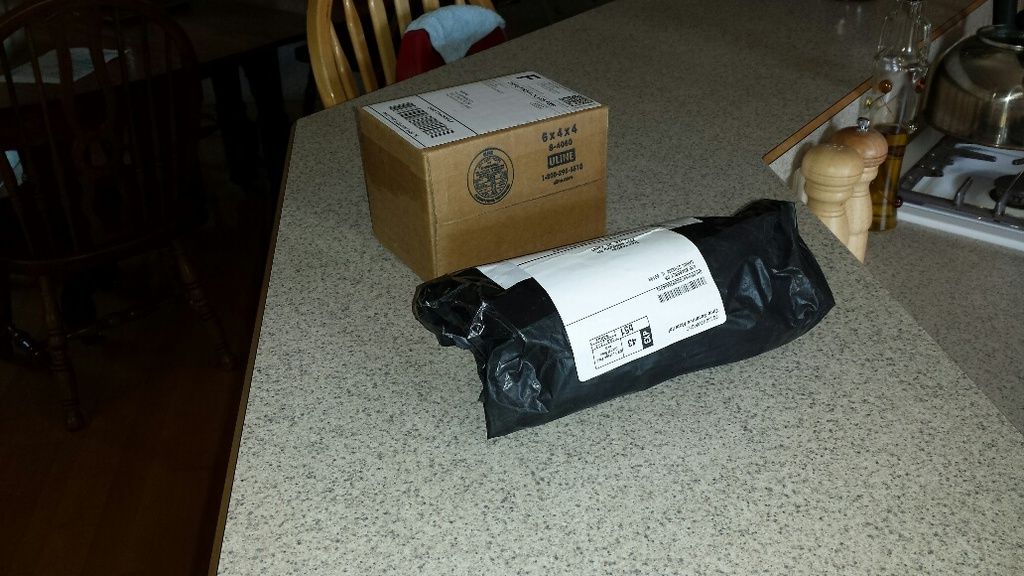
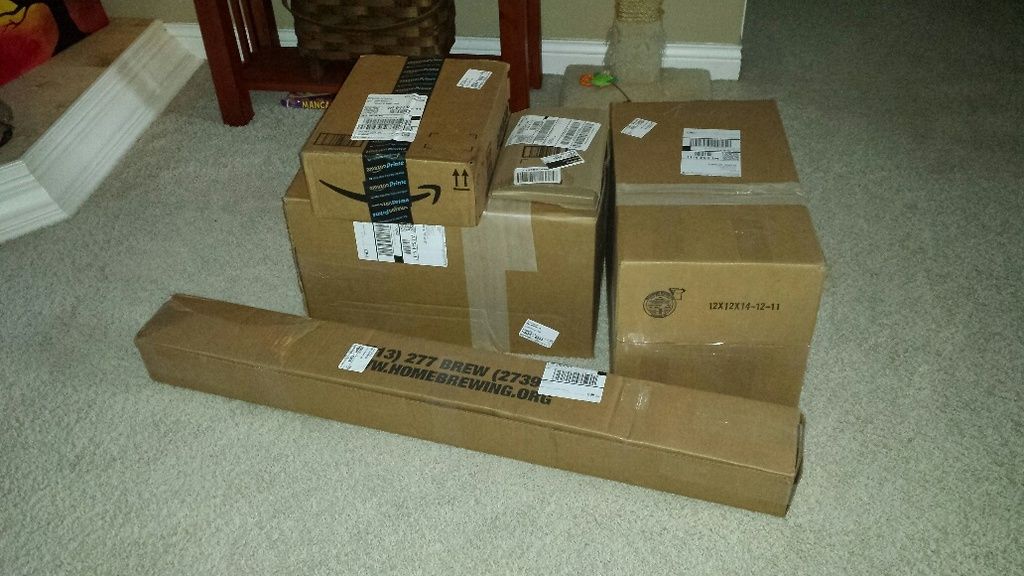
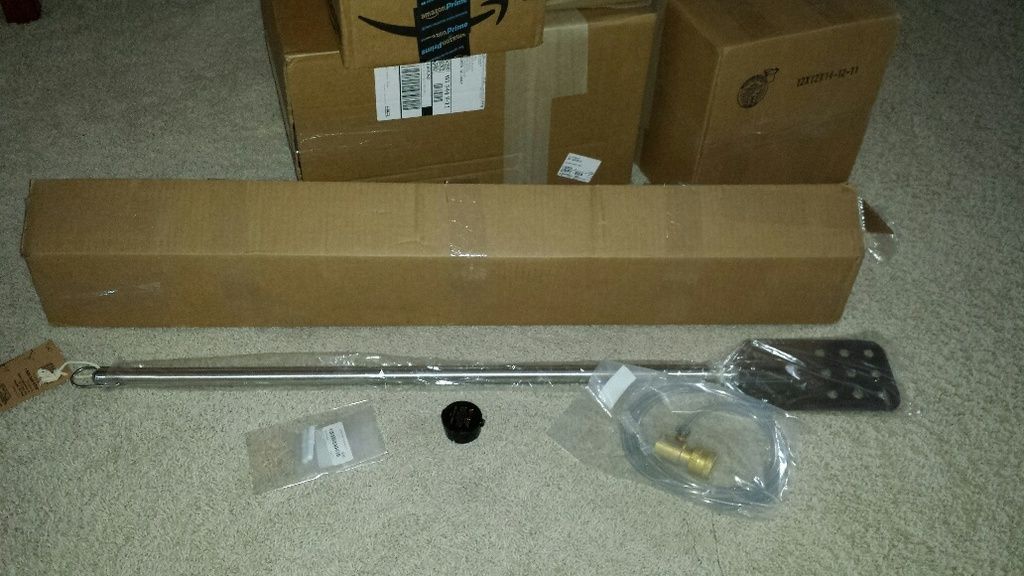
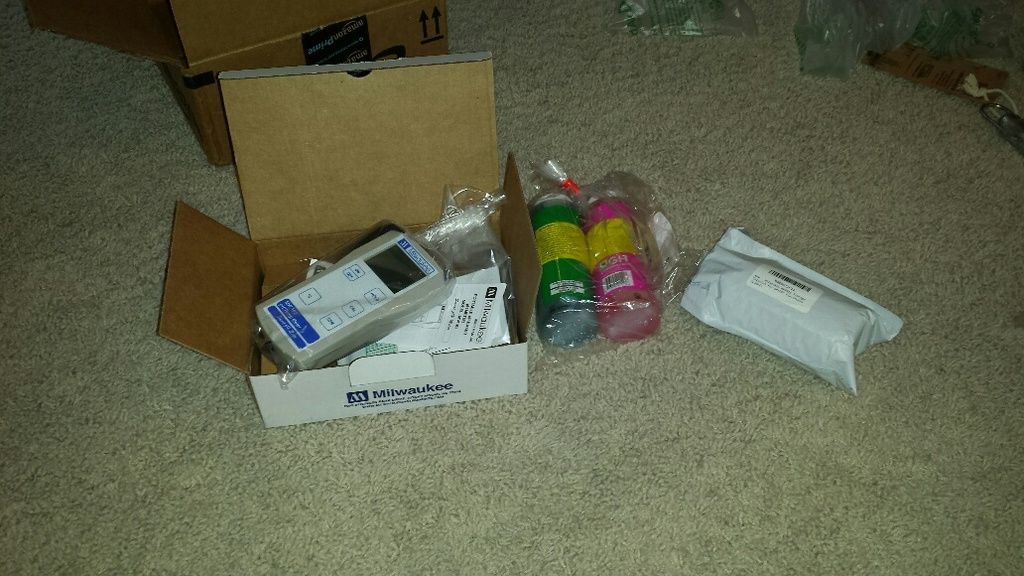
after a several week wait, menards finally had one of their 11% off sales. ran there in the morning to grab the parts for my keg/carboy cleaner build. starting with parts:

20160605_104417_resized_zpse9urmzxb.jpg


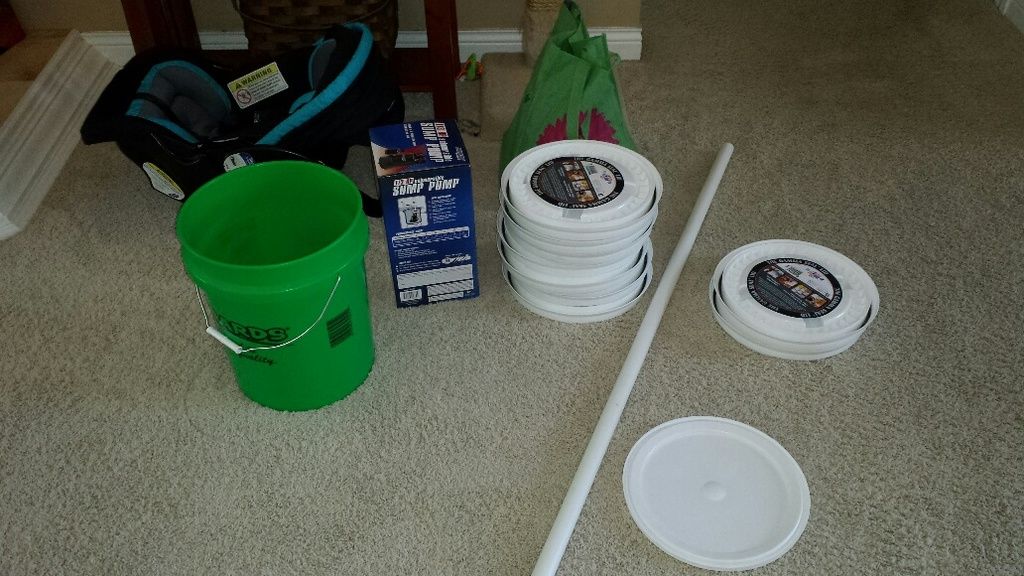
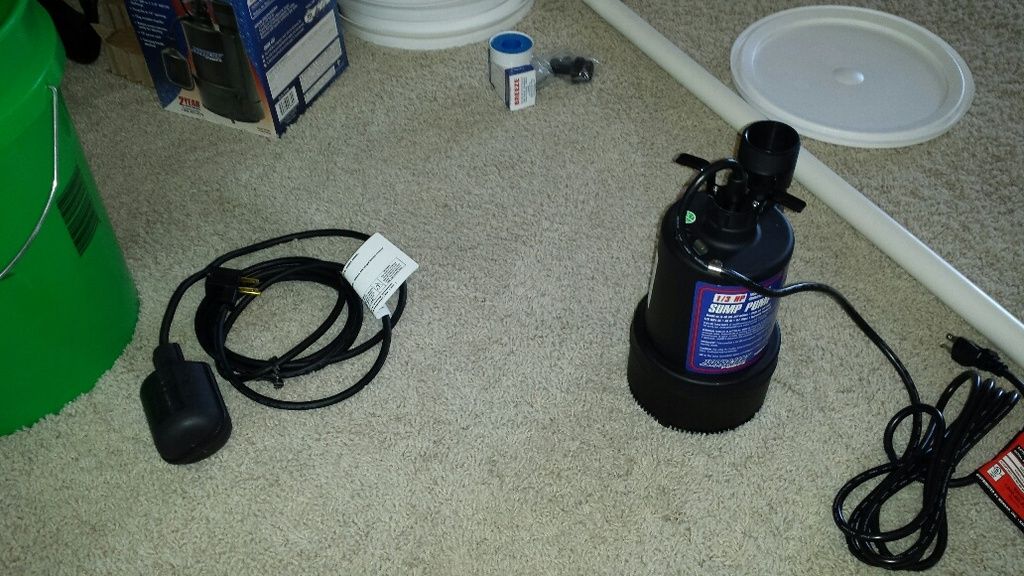
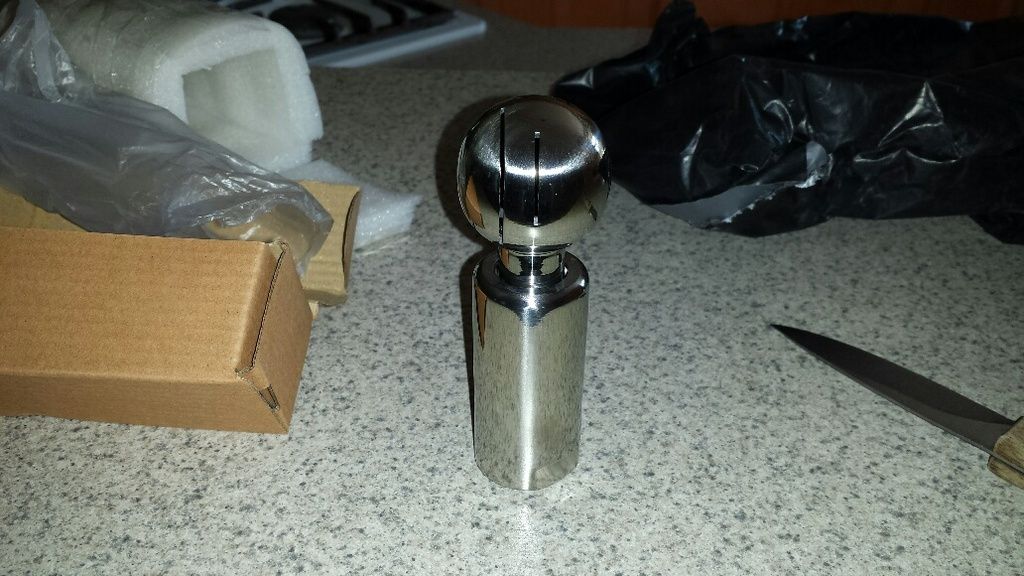
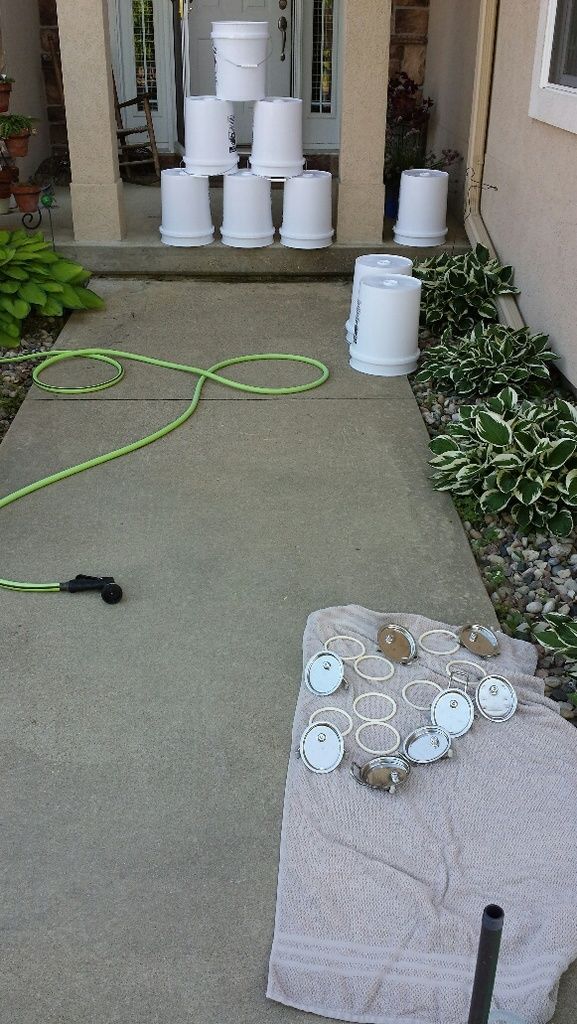
turns out menards also sells gama lids so i grabbed some of those and some food-grade buckets for grain storage. start with the pump:

20160605_104731_resized_zps4lltjcng.jpg


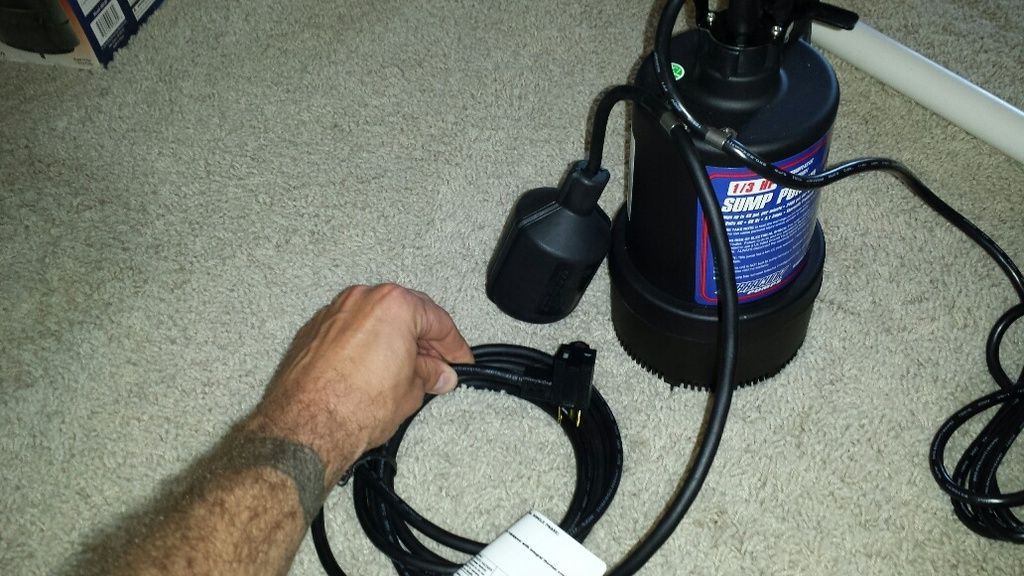
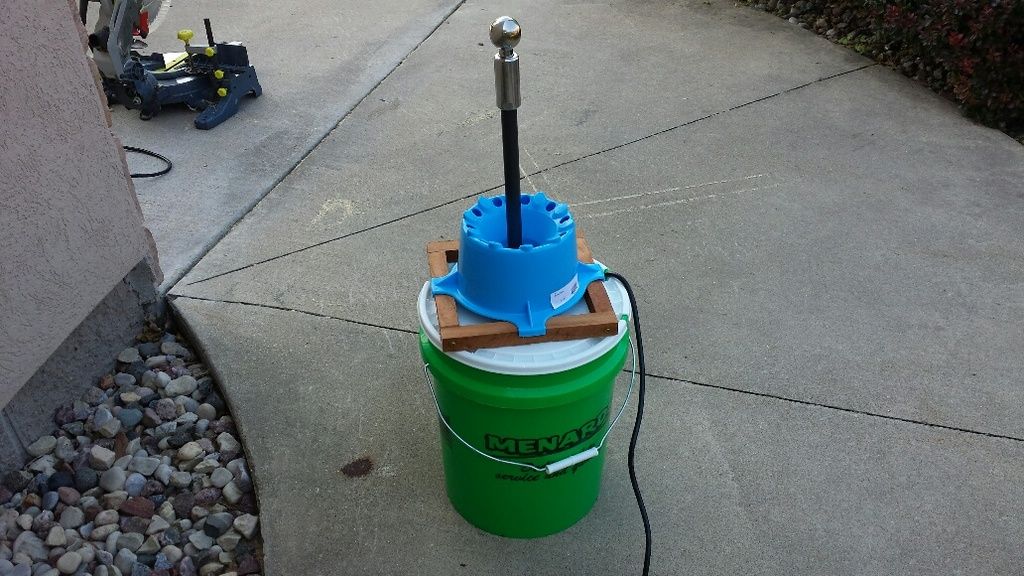
the pump includes a float switch with receptacle on the end for plugging in the pump itself. switch floats to the top of the sump, closes the internal switch and starts the pump. but the pump can also be plugged directly into a wall receptacle or extension cord (always on function). i don't need the float so i took it off (s simply clamp which held the float cord to the pump housing:

20160605_104909_resized_zpsrpiqrfte.jpg


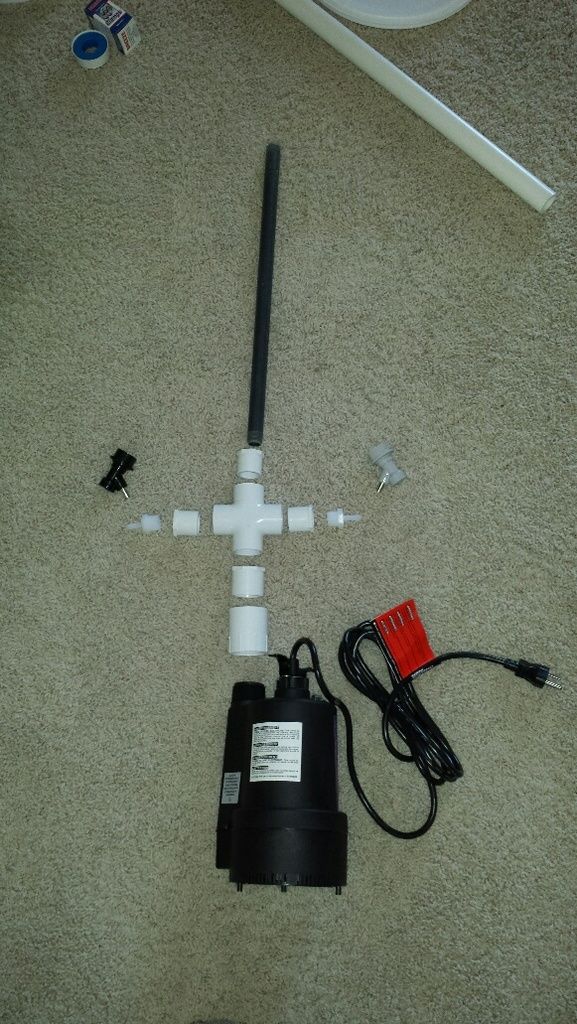
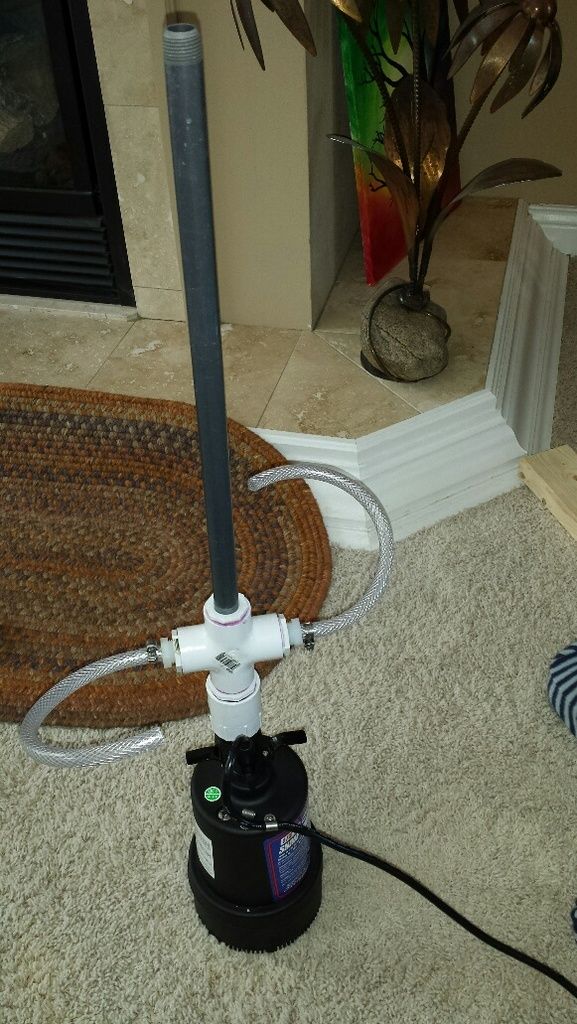
rough idea of what the assembled components will look like:

20160605_105215_resized_zpswjvvddwh.jpg


pump discharge goes into a cross-fitting. the left and right branches are for keg disconnects, to clean posts and dip tubes while the main cavity is being cleaned (there will be hose between the barb fitting on the tee and the disconnect). the 'top' of the tee discharges out the top of a pip into the carboy/keg. the whole assembly (aside from the gray pipe) will be inside the bucket.

20160605_110029_resized_zpso16abmlt.jpg


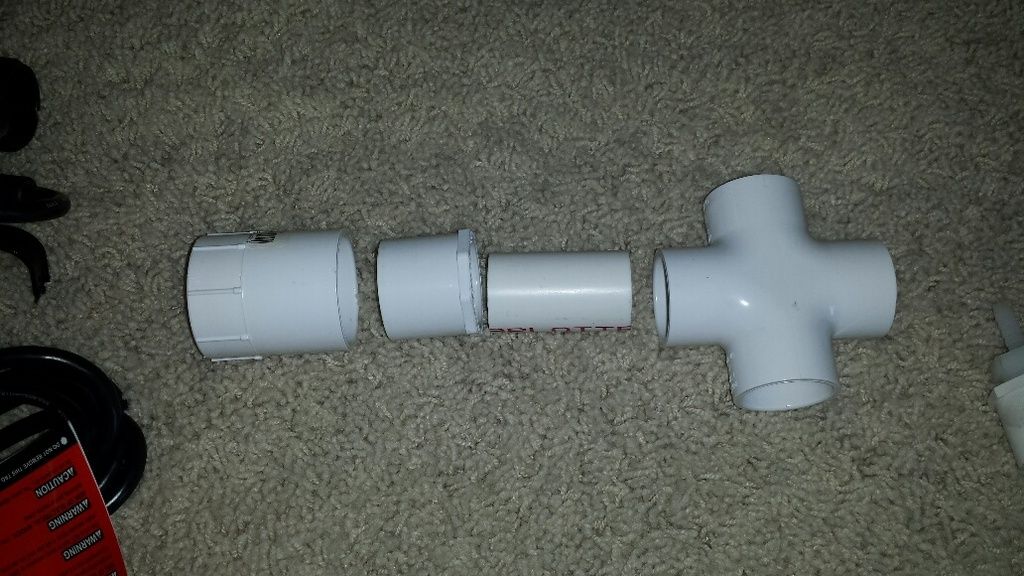
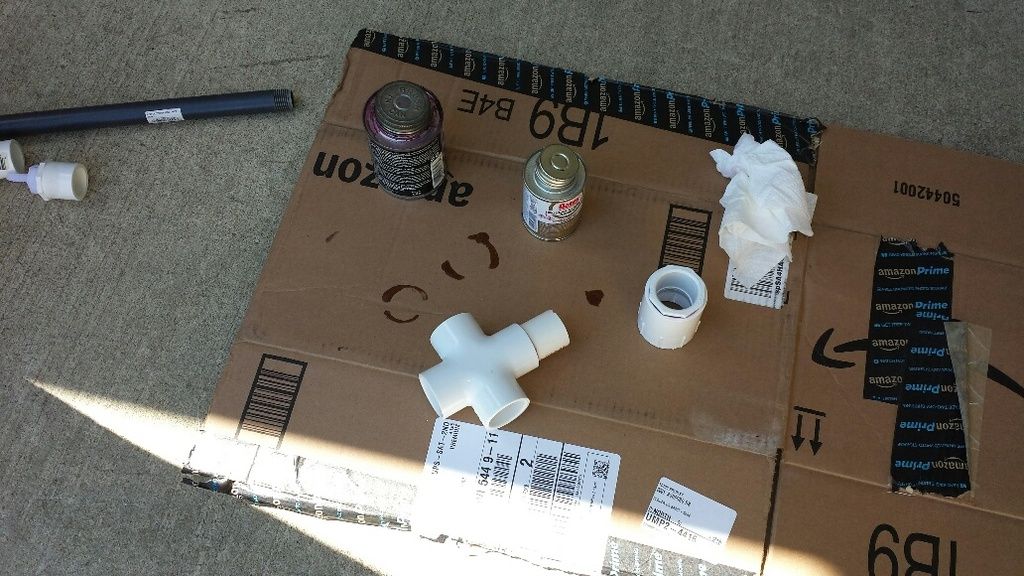
discharge of the pump is 1-1/4" male threaded discharge. so left-to-right in the above photo is a 1-1/4" female adapter, 1-1/4" to 1" reducing bushing, short length of 1" piping and 1" cross-fitting. gluing parts and pieces outside, with some cardboard to catch any primer/glue drips:

20160605_110628_resized_zpsuazlay9t.jpg


and all glued up. the side connections are 1" glued to 1/2" female threaded adapters. then there are 1/2" male to 1/4" barb nylon fittings threaded in. the top discharge is another 1" glued to 1/2" female threaded adapter with an 18" long, 1/2" pvc-80 nipple:

20160605_111248_resized_zpsot00dsuv.jpg


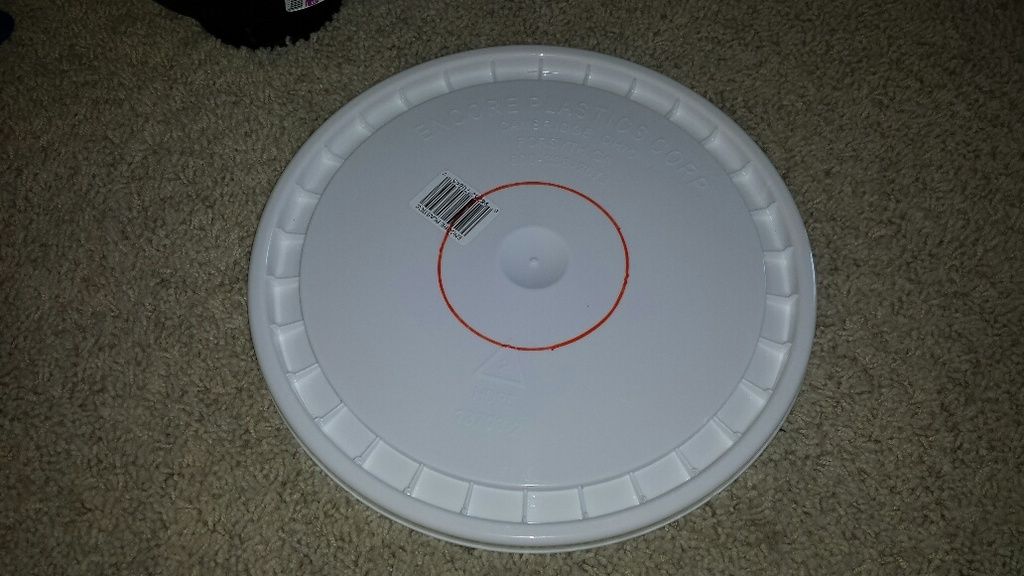
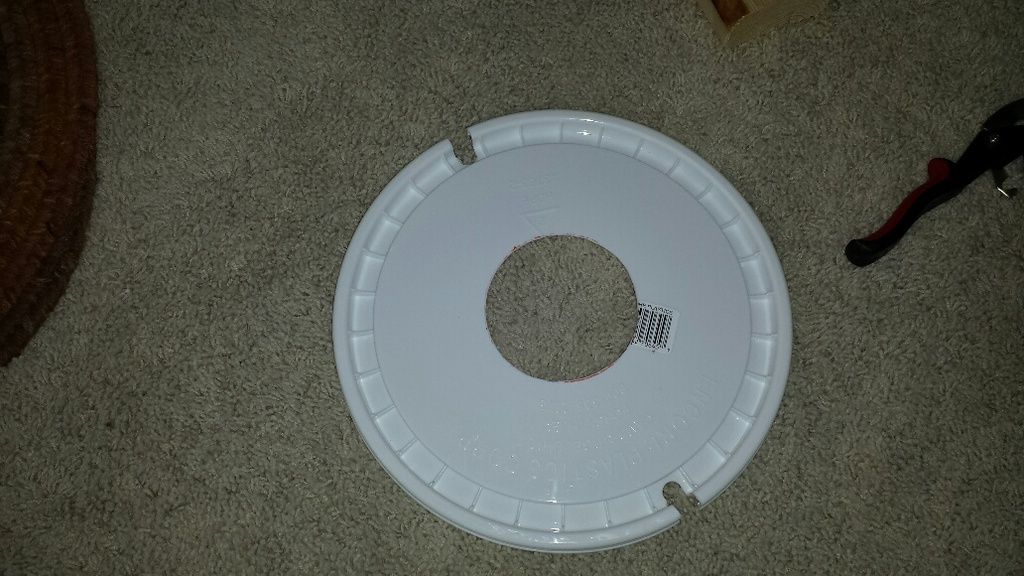
lid marked for cutting:

20160605_111925_resized_zpson7i34zn.jpg


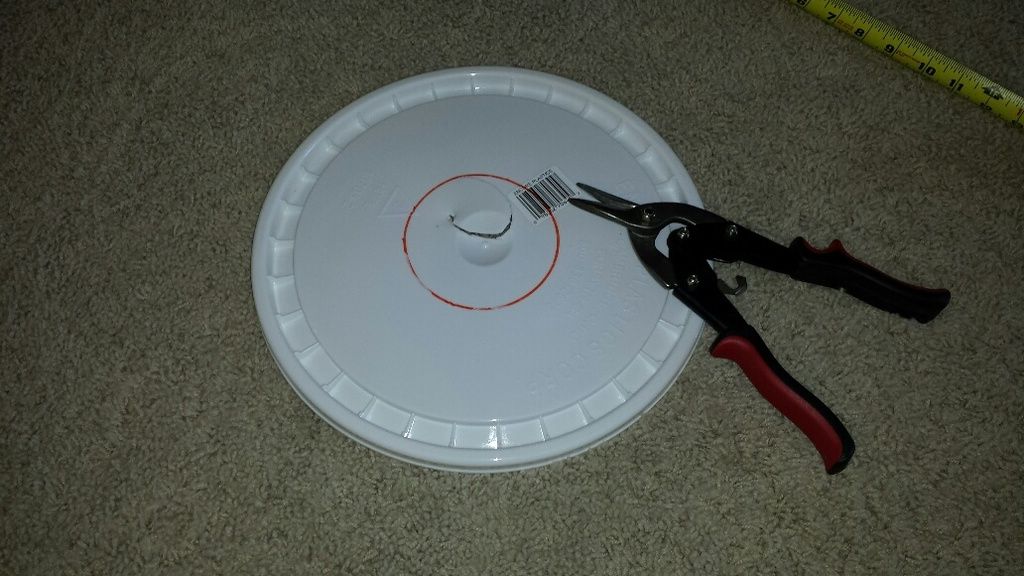
mid-cut. some left-hand cutting shears made for nice, clean cuts:

20160605_112102_resized_zpsur79qivw.jpg


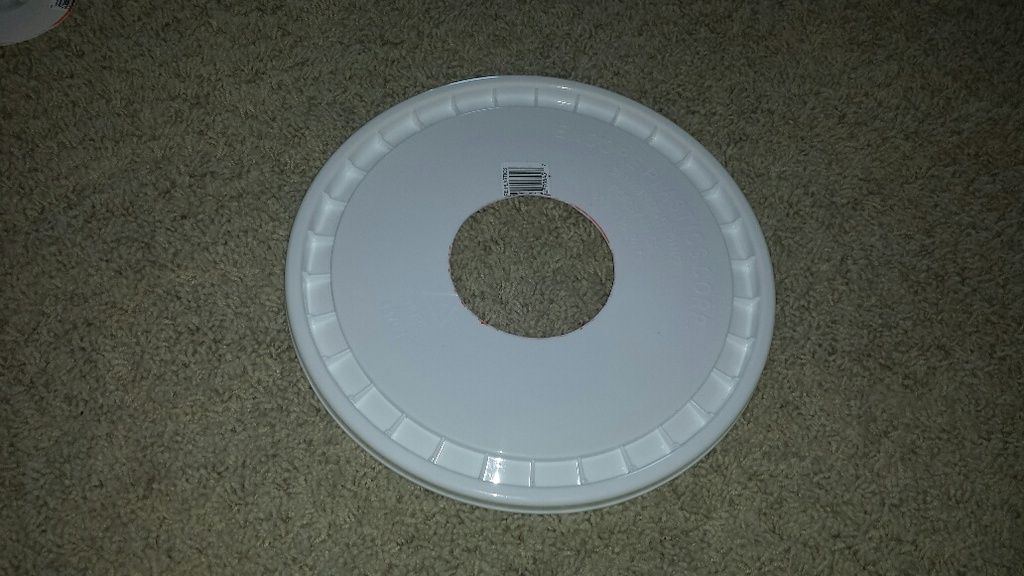
and the final product:

20160605_112516_resized_zpsykugeh2u.jpg


holes cut for the keg connection tubing:

20160605_120352_resized_zps4qcrdu8u.jpg


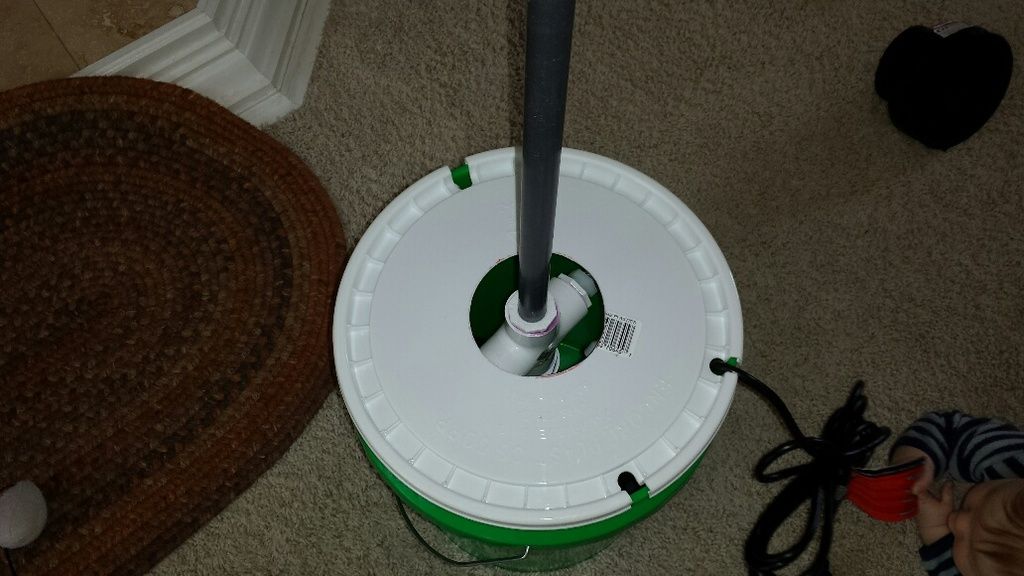
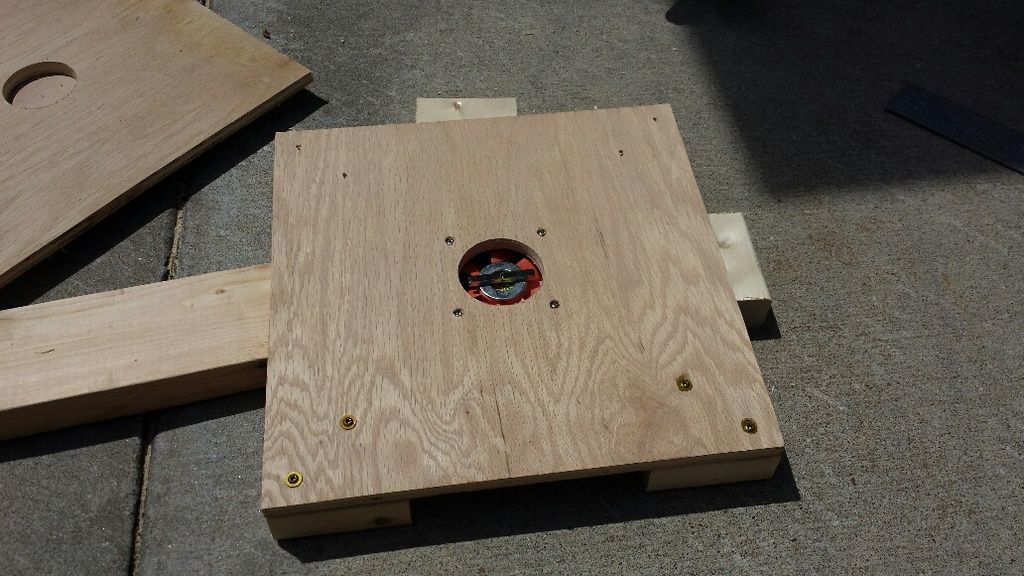
hole cut in the lid for the cord. assembly set in the bucket and lid attached:

20160605_121131_resized_zpss8eaboyd.jpg


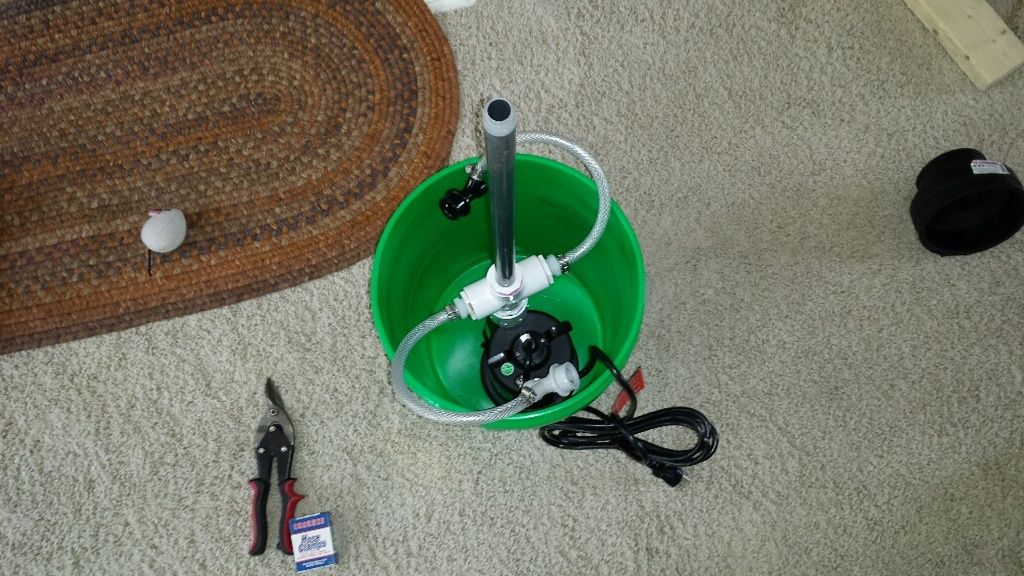
hoses cut to length. note sure what the pressure of the pump would be so i got reinforced vinyl tubing. probably overkill but it is cheap:

20160605_115400_resized_zpsc19zzrem.jpg


tubing attached to pump assembly:

20160605_120853_resized_zpsgpco3p5j.jpg


and disconnects attached:

20160605_121103_resized_zpsoibrsnia.jpg


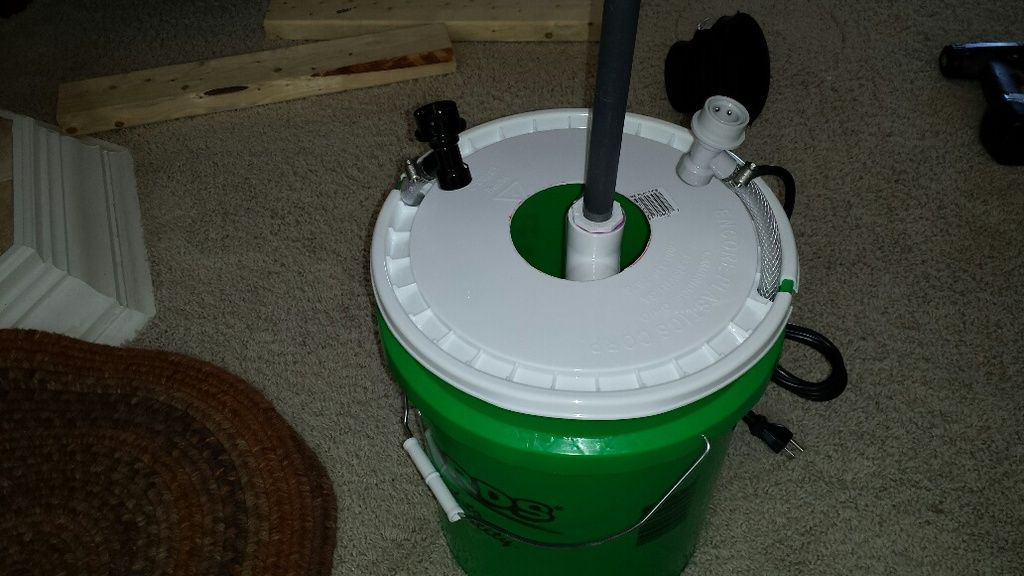
lid on, ready to go:

20160605_121232_resized_zps8ce0jacg.jpg


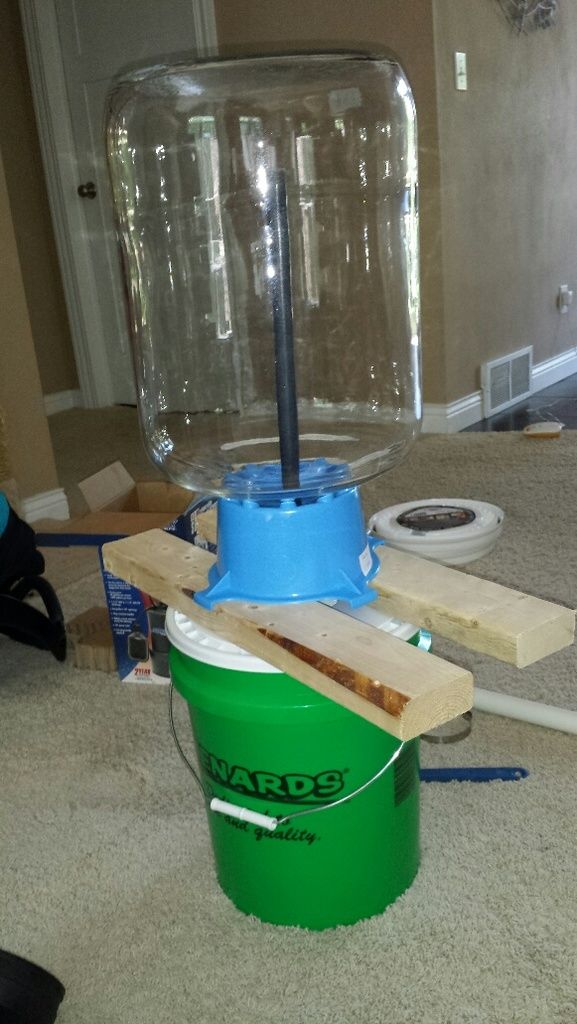
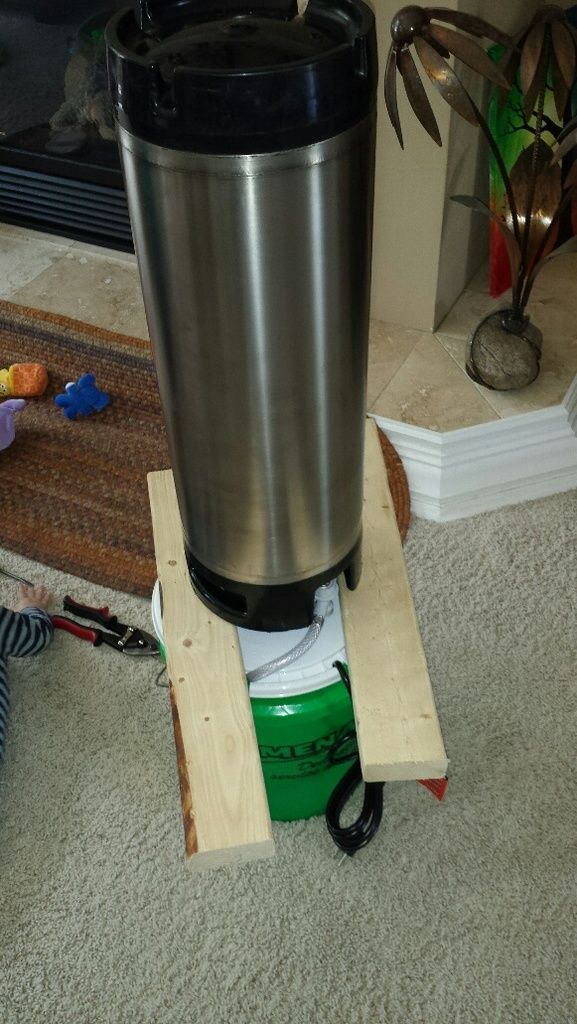
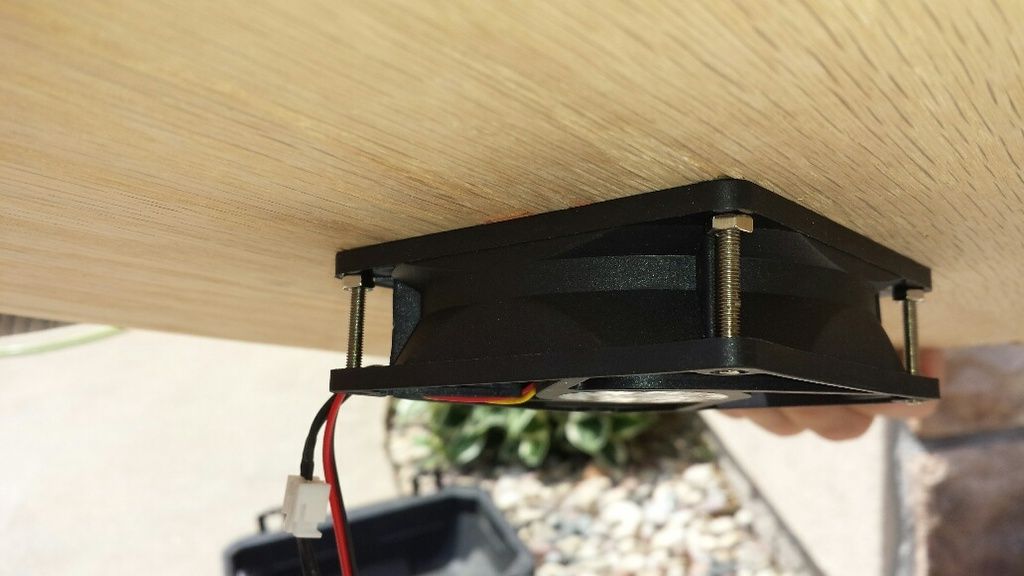
test fitting with the carboy stand. the 'feet' on the stand are at just a touch narrower diameter than the flat surface of the lid. it was a little wobbly so i stuck a couple 2x4s under it, much more stable:

20160605_114918_resized_zpsduricsg3.jpg


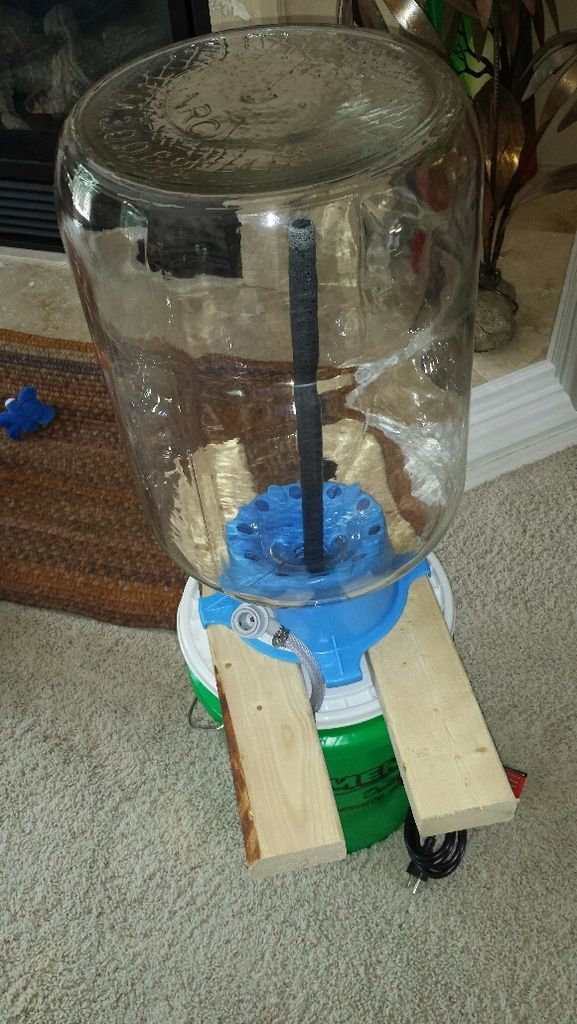
and with a carboy in place:

20160605_121818_resized_zpsxipqf9ux.jpg


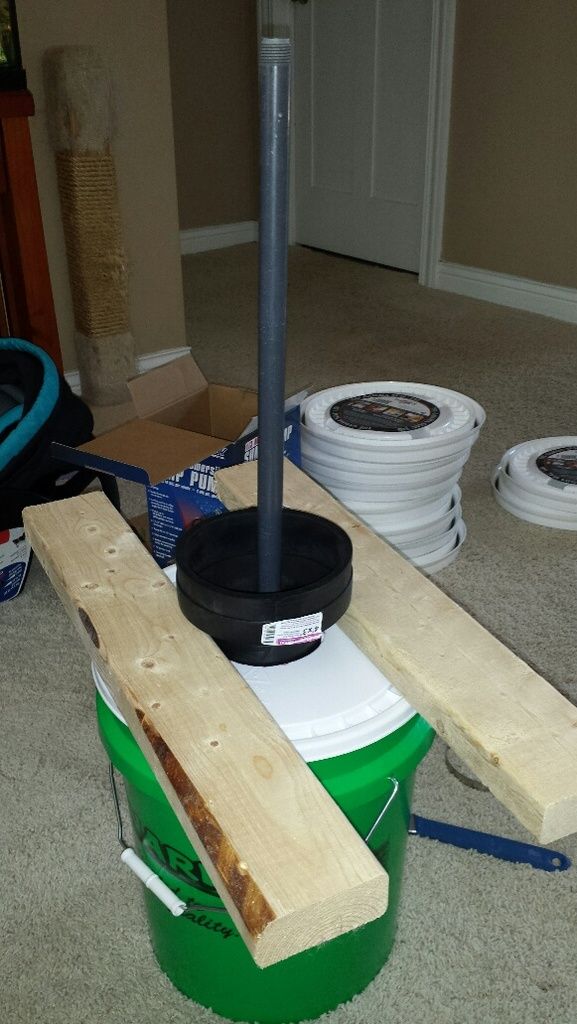
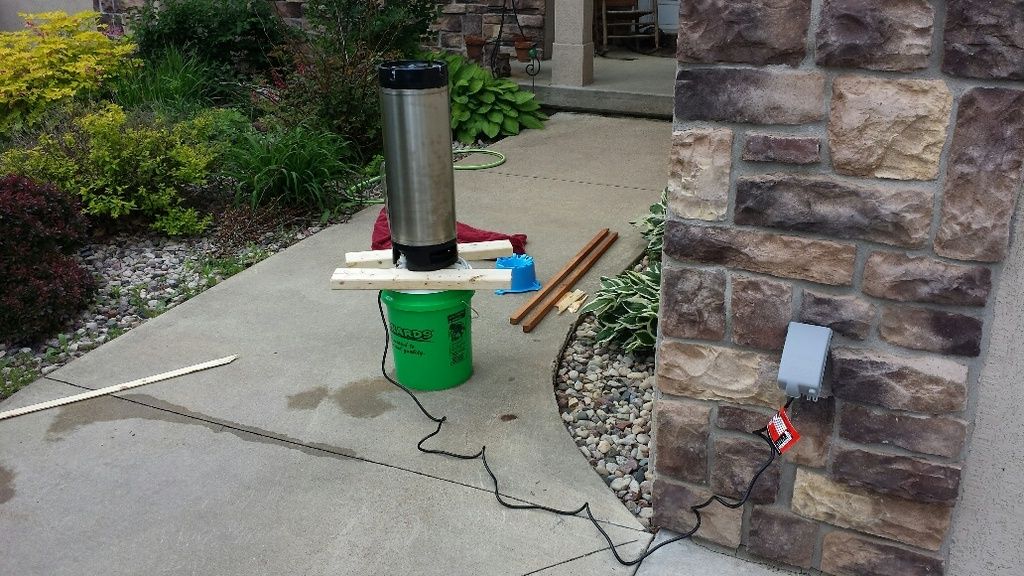
and the setup for kegs. that's a 3" to 4" clay pipe adapter. the 4" side fits nicely over the keg opening and the 3" portion nests down into the bucket. the keg is raised above the lid surface to allow for easier disconnect connections:

20160605_114949_resized_zpsvkse1zdw.jpg


and with a keg in place:

20160605_121702_resized_zpsyckq5peo.jpg


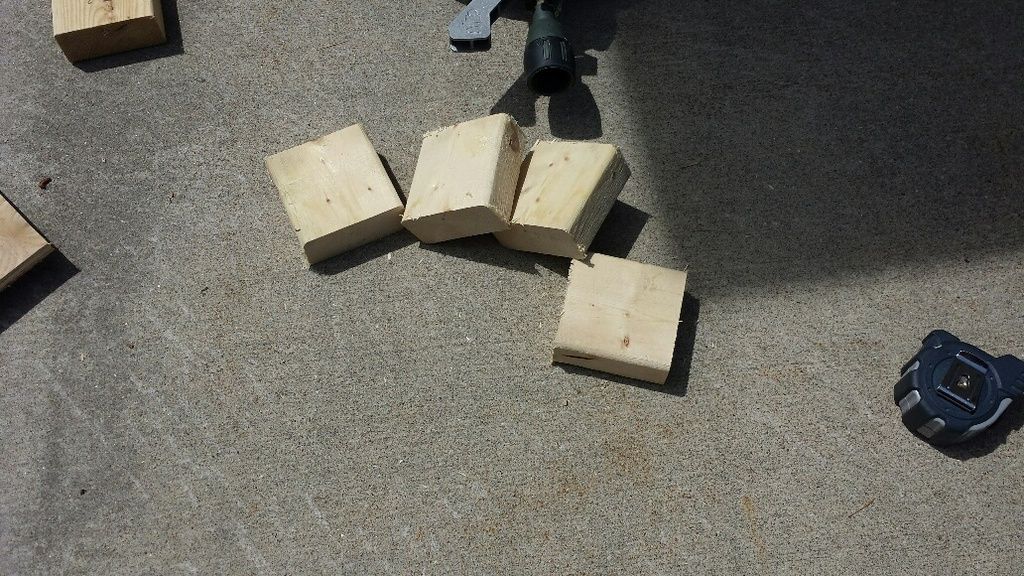
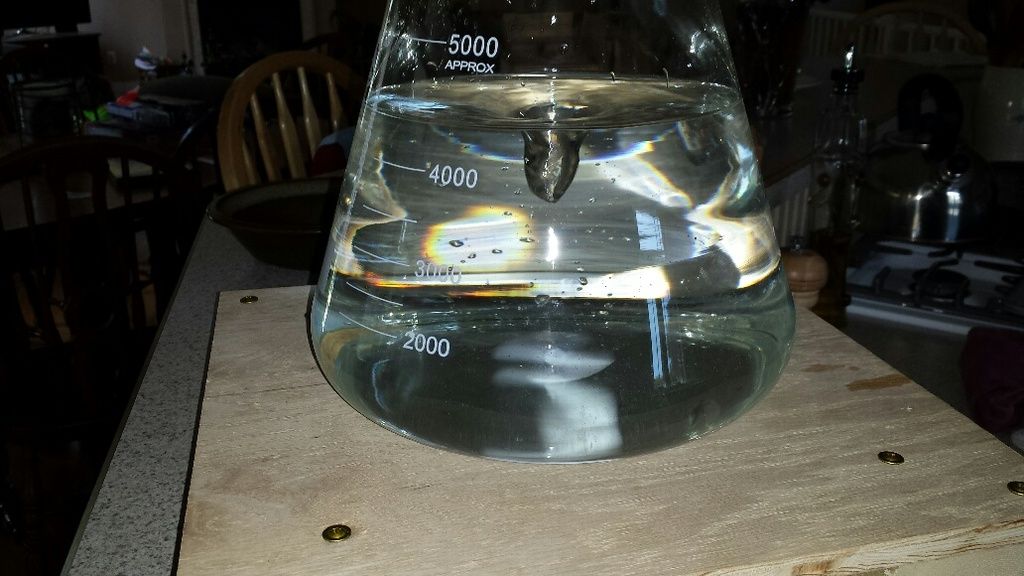
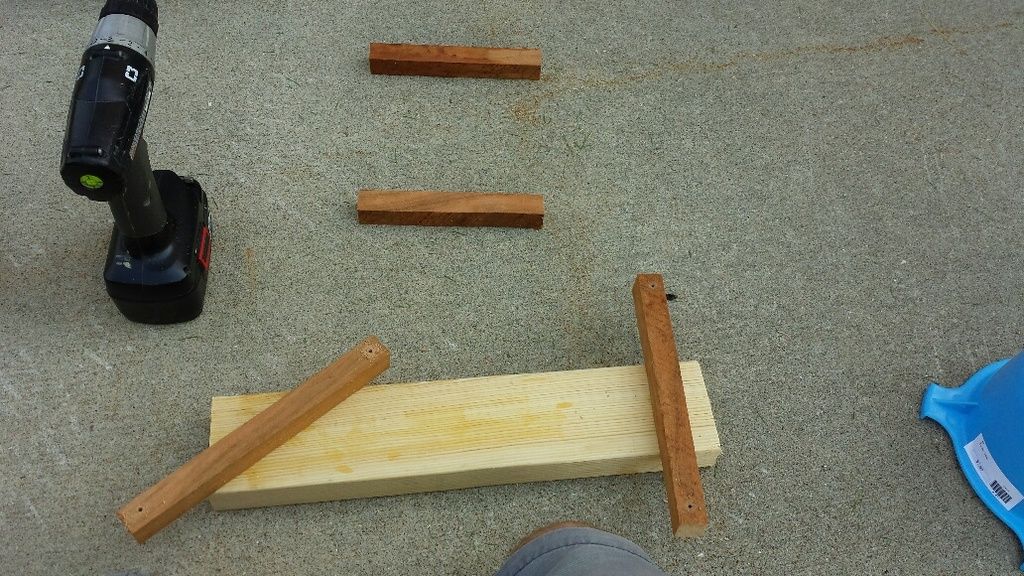
time for a water test! first carboy test was a wreck. the carboy drying stand was 1.5" above the lid surface (because of the 2x4s) and water spilled everywhere as it drained out the bottom. so i put that clay pipe adapter in there but then the 2x4s were in the way (couldn't spread them far enough apart to accommodate the adapter and still have the 'feet' of the racks extend beyond the edge of the 2x4). solution was some 1x1s:

20160605_123931_resized_zpsacwn0jhy.jpg


20160605_123921_resized_zpsziyphi7e.jpg


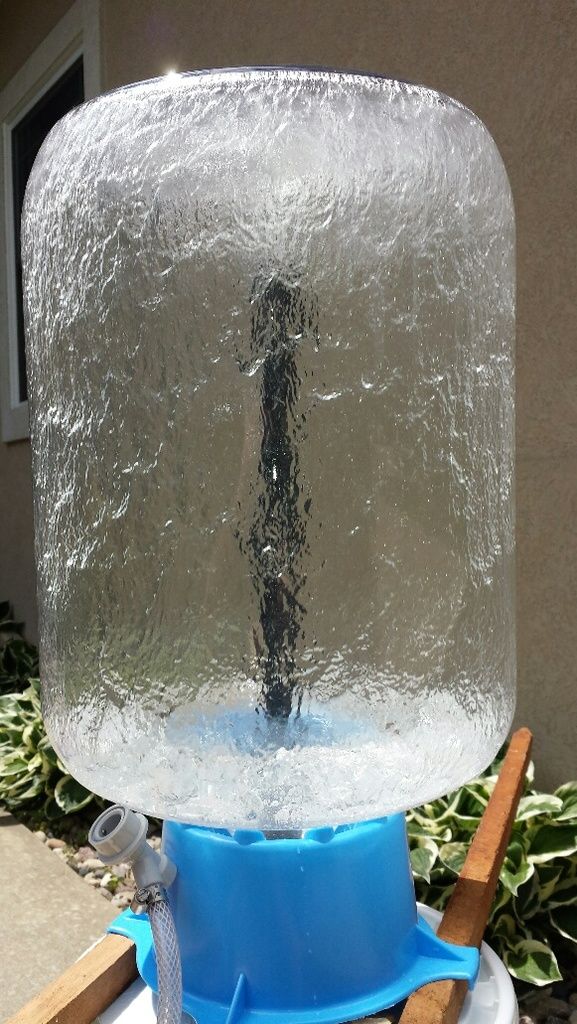
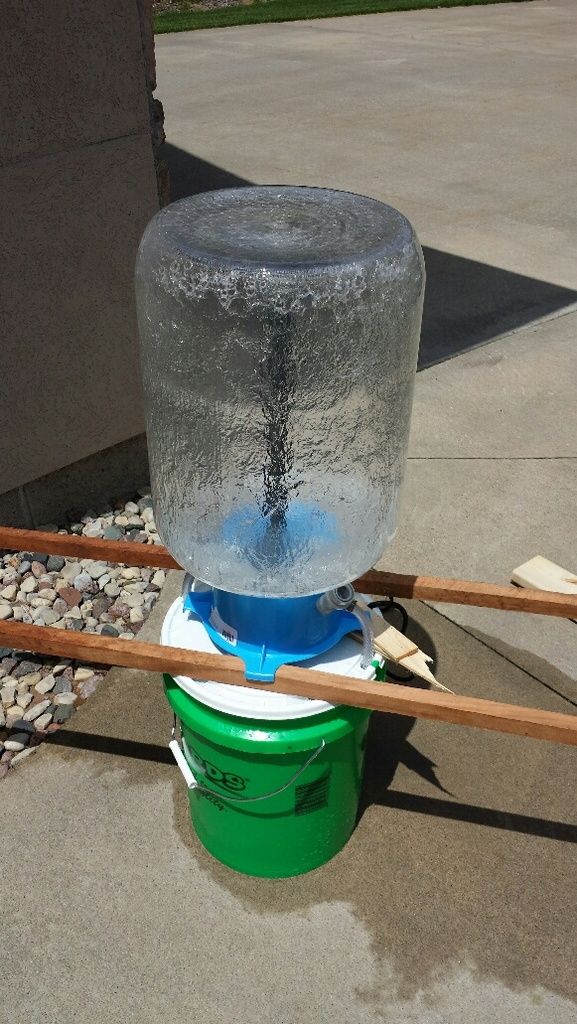
sort of a janky setup. the 1x1s allows for the clay pipe adapter to fit but they are not at all stable for the carboy drying rack when only supported on two sides. i'll need to trim those 1x1s down and make a square frame for the drying rack to rest on. flow is incredible, the entire inside surface is coated. glad i went with the 1/3 hp pump. setup with a keg:

20160605_124258_resized_zpslgb784l2.jpg


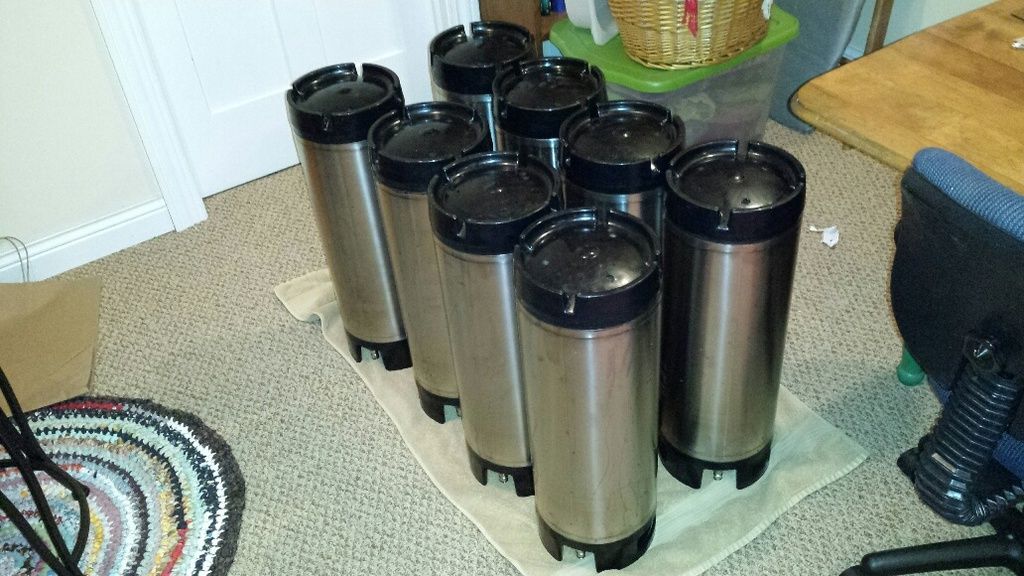
with a functioning system, i spent the rest of the afternoon washing kegs. the kegs are new but they definetly have some manufacturing oils and similar inside of them. i mixed up two gallons of hot water with some pbw and washed each keg for 10 minutes. i washed four kegs before making fresh cleaning solution. sure enough, there was a noticeable sheen in the waste water, glad i washed them. then i set them up to dry:

20160605_185924_resized_zps7b9y4yv5.jpg
 
6/11/2016 update

i was out all last week for business so no progress. i was supposed to be home on friday night but weather got me a bonus stay, sort of hosed my saturday but progress continues. started with more stuff in the mail:

20160611_081242_resized_zpseisf9epm.jpg


rotating cip sprayball for my keg/carboy cleaner:

20160611_081442_resized_zps4zd7qpaf.jpg


and some new magnets for my stir plate build:

20160611_081323_resized_zpsytb5kn4k.jpg


i really wanted to get a starter going so i tackled the stir plate project. similar to others, computer fans with magnets in a case of some type. started by removing the protective grills from the fans:

20160605_073941_resized_zpszz3zqgo4.jpg


grills and speed adjustment removed:

20160605_074046_resized_zpsixtc9olg.jpg


idea is to glue a steel washer to the fan and attach magnets to the washer:

20160611_103230_resized_zpsecse33go.jpg


20160611_103905_resized_zps4lxhfivk.jpg


next comes the 'case' for the fan. i didn't have any boxes or similar lying around but i have scrap wood. plan is for a plywood 'top' on 2x4 'feet'. cutting the plywood to size:

20160611_111022_resized_zpsz0forjyy.jpg


center of board marked for drilling:

20160611_111327_resized_zpsnh6esipp.jpg


hole drilled:

20160611_111514_resized_zpsjpbkbsmi.jpg


mounting holes for the fan drilled and countersunk:

20160611_114012_resized_zpsn8nea5d0.jpg


fan installed (with magnets):

20160611_114424_resized_zps1irdui3s.jpg


a view from below. due to the thickness of the plywood, the bolts that held the protective grills on there are not long enough to pass through both sets of mounting holes at each corner of the fan. so i just nutted them through one mounting hole. this stir plate won't be seeing daily use so it should be fine:

20160611_114436_resized_zpsnmiz8w03.jpg


scrap 2x4 cut up for the 'feet'. these are to raise the plywood off the surface it will rest on and keep space around the fan for air movement. the fan is one inch think so a 2x4 allows for a half inch of free air space under the fan:

20160611_115207_resized_zpsk3ahzcbf.jpg


mounting the feet to the corners:

20160611_120121_resized_zpsjmz0ctja.jpg


and the plate in action:

20160611_120826_resized_zpsog61abl2.jpg


time to start some real brewing activities. boiling up some light dme for a starter. it has been about 12 years since the last time i boiled up some dme, the smell took me back to our tiny apartment in chicago:

20160611_124651_resized_zpshnawlonf.jpg


wort cooled, poured into sanitized flask, yeast pitched and stir plate in operation:

20160611_133022_resized_zpsz372hzuw.jpg


since i had my wood tools out, i figured i would make a small frame for my keg/carboy cleaner, for the carboy drying rack to rest on for stability. cutting scrap 1x1 to length:

20160611_160714_resized_zpswmeq72on.jpg


and the completed frame, with stand attached. notice the fancy spray ball as well. alas, i cannot use it to the fullest, the carboy opening is too narrow to slide over the ball! damn! oh well, it still works with kegs. i'll just need to thread it on-off each time:

20160611_162521_resized_zpsghadlrm9.jpg


since i had the washer setup, i took the opportunity to wash all my carboys (four).
 
6/12/2016 update

my starter hadn't shown too much activity when i went to bed the previous night but was looking good in the morning:

20160612_080341_resized_zpsxmc9oclj.jpg


and pitched into sanitized mason jars. the two in the front will be used for my upcoming brew day (one jar for each carboy) and the one in the back is overbuilt yeast for a future starter. after this pic it was off to the fridge:

20160612_101309_resized_zps3xf82gdt.jpg


more general cleanup ahead of the first brew day. washing out grain storage buckets and cleaning keg lids:

20160611_185850_resized_zpssmzbluo4.jpg


i also got some other misc tasks performed:
  • installed the new sight glass protectors on my kettle sight glasses
  • stripped down all eight kegs and put keg lube on all the o-rings
  • ran 20 gallons of hot pbw through all three kettles to get manufacturing oils off
  • tightened up a few nagging leaks on kettle fittings

first brew day is targeted for this coming saturday. i am out for work again starting this afternoon but friday it is off to the lhbs to grab grain, hops and some miscellaneous parts (e.g. airlocks, stoppers, racking canes, etc.) a little area cleanup, milling grain and turning on the ro/di system to fill my hlt on friday night and i should be able to hit the ground running on saturday morning.
 
well, the day has finally come! it has been a nine month process but the inaugural brew day is here. strike water heating as i type, getting ready to mill the grain.

wish me luck!:mug:
 
Wow.... looks like a lot of work and prep to get to this day. Of course, the one down side to doing such a great job on your system and set up, is if your beer does not turn out great, there is nothing to blame it on;)

Hope you have a great brew day man - looks like you deserve it with all the time and effort:mug:
 
well, the day has finally come! it has been a nine month process but the inaugural brew day is here. strike water heating as i type, getting ready to mill the grain.

wish me luck!:mug:

Congrats! you have more patients then I that's for sure. Enjoy and have fun!:ban:
 
good news, i'm alive! lots of photos but those will have to wait but wanted to give an update. some things went good, some not so good...

problems started almost immediately, not a good sign. i'm using ro water so in an effort to keep it simple, i was going to treat all my hlt water with salts. started transferring strike water to the mash tun and realized i forgot to add any of the salts. i hadn't added the grain yet so rather than recalculate how much to add to just the mash, i decided to pump the water back into the hlt. not that big a deal but while screwing around with it, i turned off the recirc in the hlt. the rtd cooled and the system thought it was too cold so was firing the heating element constantly. by the time i realized what had happened and started circulating again, hlt temp had shot up to 172. well, guess i'm waiting for that to cool off...

so i move on to milling the grain. i set the gaps but then when i checked the first run of grain, it was hardly broken at all. most of the kernels didn't even look touched. look down at the rollers, looks like one of the set screws came loose leaving a huge gap on one side. reset the screw and the same thing happened again. wtf. finally realize that there is a nut on the screw preventing the screw from setting tight against the roller guide. loosen that, re-tighten and everything looks good. but now no grain goes through, everything just spins. grrr. finally discovered that a piece of grain had gotten stuck along the edge of the non-driven roller, preventing it from spinning. got that fixed and ran everything through. something was still wrong though, my crush was finer than i wanted. whatever, time to move on. good thing i had to wait for the hlt to cool down because it took about a half hour to mill about 12 lbs of grain.

okay, water cooled down and time to dough in. this went well as did the mash. pid controllers and temps worked awesome. my ph was a little low but i had a decent amount of roasted malts so i wasn't worried about it. no need for any lactic acid.

fly sparge went well but i might have gone too fast, only took 45 minutes. still, i was super-stoked to hit my pre-boil gravity numbers, 1.030 measured vs 1.031 calculated. i was a little nervous with that since i went all in on an assumed 95% efficiency. boil went excellent as well. heated up quick, pid kept a nice, rolling boil.

chilling was an issue. i have a stainless counterflow chiller so i was expecting a few extra minutes to chill compared to copper but damn, it took almost an hour to cool off the 12 gallons. i did the job but seemed very slow. no issues at all with the hopstopper but to be fair, i only had two ounces of hops in the whole batch.

trouble at the gravity reading before pitching the yeast. read only 1.032. huh? that's only 2 points higher than pre-boil. i boiled off damn near two gallons of liquid so either my pre-boil measurement was off or my post-boiled reading was off. right now calculating at 82% efficiency with a 2.7 expected abv. it is a mild but that's a little too mild, should have been closer to 1.037 og. i guess i'll see what shakes out after fermentation.

anyway, pitched the yeast and it is rolling along at 67 in my fermentation keezer. including clean up, it was a nine hour day. i consider that not bad for a first try. the milling/salt addition time alone should shorten the brew day but at least 45 minutes.

i'll try and post photos tomorrow.
 
chilling was an issue. i have a stainless counterflow chiller so i was expecting a few extra minutes to chill compared to copper but damn, it took almost an hour to cool off the 12 gallons. i did the job but seemed very slow.
You're probably doing this, but make sure to flow wort and water in opposite directions through the CFC (it's a common mistake).

trouble at the gravity reading before pitching the yeast. read only 1.032. huh? that's only 2 points higher than pre-boil.
What did you use to measure gravity? Did you compensate for temperature?

Kal
 
You're probably doing this, but make sure to flow wort and water in opposite directions through the CFC (it's a common mistake).


What did you use to measure gravity? Did you compensate for temperature?

Kal

yep, definitely flowing in the opposite direction. how long should it normally take to cool 12 gallons? i'm in central wisconsin, groundwater temps are in the upper 50s (f).

measured gravity with a refractometer. i calibrated it that morning with distilled water and it has atc. once the drops are placed on the viewing plate, they go to room temp pretty darn quick. i check pre and post boil measurements twice each and still have the same numbers. i'll probably end up getting a hydrometer for comparison.

goods news is, 18 hours after pitch and i have a nice, frothy krausen with good airlock activity.
 
Well, you definitely are getting the kinks out! Congrats on the first brew day! No one's first brew day on their new systems goes off without any hitches. It's a new process and your system will do some things that are unique to your system. Keep a note of your boil off rate, a lot of people seem to miscalculate that, plus you do loose some wort in your hoses, chiller, etc. This way you can better estimate the total volume you need in the boil kettle next time, for the batch size you want to go into the fermenter. If you use BeerSmith or other software it will help you with that.

All in all you did well. Happy Father's Day! You made some beer!

John
 
yep, definitely flowing in the opposite direction. how long should it normally take to cool 12 gallons? i'm in central wisconsin, groundwater temps are in the upper 50s (f).
Depends on the target temp you're trying to achieve. I usually aim for a fast chill to get the wort to 70F or below and with ground water in the 50's it's only about 20 mins, maybe even less.

measured gravity with a refractometer. i calibrated it that morning with distilled water and it has atc. once the drops are placed on the viewing plate, they go to room temp pretty darn quick. i check pre and post boil measurements twice each and still have the same numbers. i'll probably end up getting a hydrometer for comparison.
Probably not a bad idea. Not sure what went wrong, but I find that 99% of the time when people have issues with gravity measurements, a refractometer's involved.

Kal
 
just checked my tap water, it is at 64 degrees. i'm going to try some experiments with hot water to see if i can find a good compromise between speed and temperature. maybe try to chill down to 80 or so and then finish it off in the fermentation keezer before pitching yeast. i've read about others doing that who have high groundwater temps. i'm starting to suspect the inner tubing isn't convoluted.
 
just checked my tap water, it is at 64 degrees. i'm going to try some experiments with hot water to see if i can find a good compromise between speed and temperature. maybe try to chill down to 80 or so and then finish it off in the fermentation keezer before pitching yeast. i've read about others doing that who have high groundwater temps. i'm starting to suspect the inner tubing isn't convoluted.

Are you trying to get the whole body of waterto the appropriate temp? or are you chilling, and transferring after 15-20 mins to your carboy/bucket?

I wonder if this is your issue. I chill with a CFC, and after 10-15 mins i move the wort out hose to the fermenter - as its at temp already, then chill and transfer from there.?
 
Are you trying to get the whole body of waterto the appropriate temp? or are you chilling, and transferring after 15-20 mins to your carboy/bucket?


I wonder if this is your issue. I chill with a CFC, and after 10-15 mins i move the wort out hose to the fermenter - as its at temp already, then chill and transfer from there.?


This is the same thing I do - recirculate for a short time, then throttle back the output on the CFC and go straight to the fermenter(s) at whatever my desired temp is...
 
just checked my tap water, it is at 64 degrees. i'm going to try some experiments with hot water to see if i can find a good compromise between speed and temperature. maybe try to chill down to 80 or so and then finish it off in the fermentation keezer before pitching yeast. i've read about others doing that who have high groundwater temps. i'm starting to suspect the inner tubing isn't convoluted.

Stainless or copper. When I used my copper CFC, I could get to 70. My stainless I been around 80 or higher. I actually run a shell and tube and my stainless CFC in series to get better cooling efficiency.
 
Are you trying to get the whole body of waterto the appropriate temp? or are you chilling, and transferring after 15-20 mins to your carboy/bucket?

I wonder if this is your issue. I chill with a CFC, and after 10-15 mins i move the wort out hose to the fermenter - as its at temp already, then chill and transfer from there.?

i'm presently using a hopstopper and i've read the recirculating can cause clogging problems with cold break material. it is a stainless cfc. yeah, yeah, copper is a radically better heat conductor compared to stainless but at the metal thicknesses in play, it shouldn't make that big a difference.
 
Back
Top