Igloo 7.1 cu ft FRF795 Black Keezer Build

Homebrew Talk - Beer, Wine, Mead, & Cider Brewing Discussion Forum

Help Support Homebrew Talk - Beer, Wine, Mead, & Cider Brewing Discussion Forum:

This site may earn a commission from merchant affiliate links, including eBay, Amazon, and others.
Feeding off your guys builds! I have the same freezer I'm building into keezer. Please keep the info/pics coming! Dimensions would be great as I have yet to do the woodworking! I have four all SS Perlick 630s coming from Birdman that shipped yesterday so will let you know how they are. Cheapest price I've found $63 ea! Built a temp controller for my ferm fridge as well thanks to this site!View attachment 247001

Beverage factory has the perlicks with SS shanks for 56.00. That's where I got my 3. Now I'm looking for a good priced stout faucet for my fourth
 
do you have pics of the hinge system you used on the back and where did you get them? Also I have read that some are having problems with the lid interfering with the keg on the compressor hump. I have the 705 as well and need to know if you ran into any issues! thanks!:rockin:

This is the the back where the existing hinges are attached. I used a router to take out about 1/8th inch because the lid did not quite sit right on the bare face of the wood.

And the bottom photo is the finished collar with holes drilled for the shanks. The hardware will be in this coming Tuesday so the finished build should be ready next week.

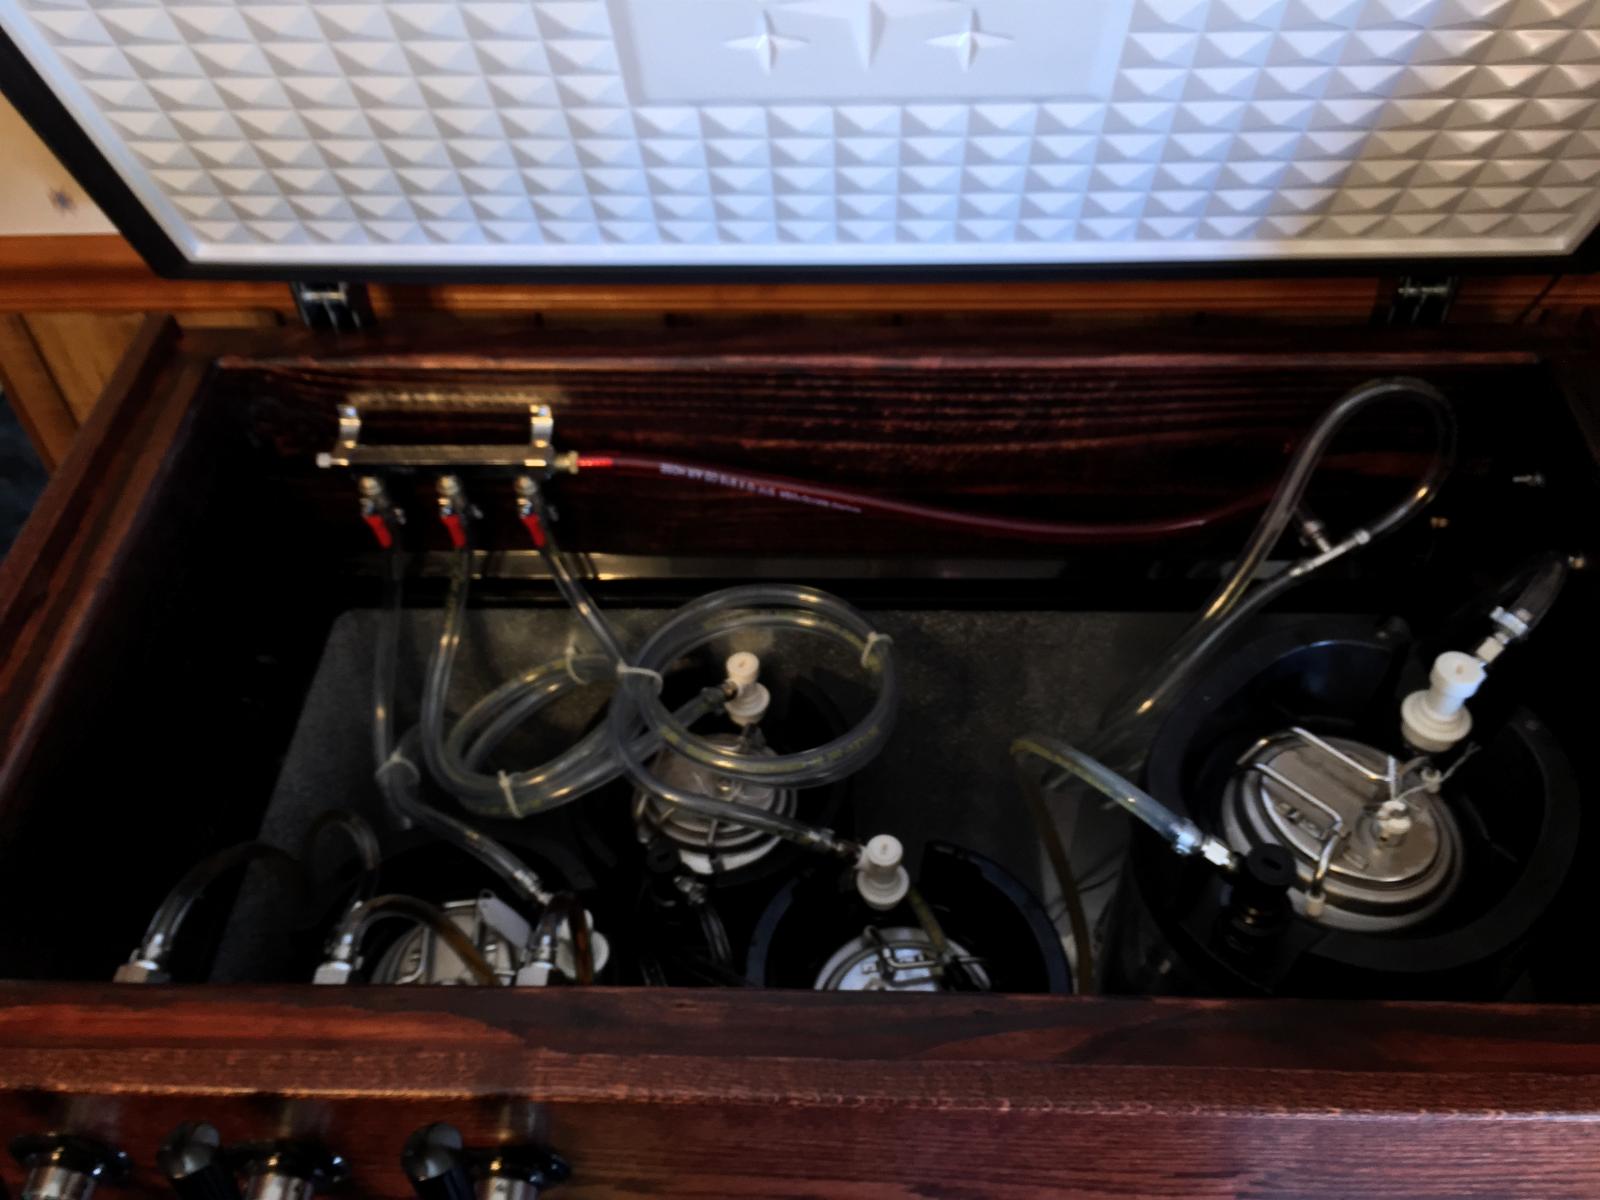
I still need to attach the gas distributor and make the temp controller and a few more holes to run the gas lines. The temp controller and co2 will be mounted on the back outside.

003.jpg


004.jpg


002.jpg
 
Well, my mitered corners aren't perfect. I'm going to try a few things to fix it, but I may have to buy another 2x10 and do it with non mitered edges.

Would a 1x10 be better (I'd use more insulation with 1x10).
 
I've got the same freezer and been keeping an eye on everyone's builds. They're all looking great.

Has anyone considered that the label on the back of the freezer says that the startup load is 20 amps? The STC-1000 says it is only rated up to 10 amps. I have heard that the relays inside are rated to 15 amps. I was running my freezer off the STC for a little while, but to avoid the risk of burning up the relays and starting a fire, I decided to go with a Johnson Controls A419.
 
Well, my mitered edges were off. My problem with the mitered edges was I only have a circular saw and only a modicum of skill. When I put them together and bracketed them on, my priority was to make the edges align well (they aligned OK - fixable, but OK). But, I neglected to watch the angle. The angle was off slightly, making more of a parallelogram than a rectangle. That messed things up a bit.

But, I came up with a solution. I broke apart the glue, and reattached them making sure the angles were as perfect as possible (and not caring about aligning the edges). Then, I'm going to put some corner moldings over the edges (painted black to match the freezer). I think it will look good, and will cover up my mistakes.
 
I've got the same freezer and been keeping an eye on everyone's builds. They're all looking great.

Has anyone considered that the label on the back of the freezer says that the startup load is 20 amps? The STC-1000 says it is only rated up to 10 amps. I have heard that the relays inside are rated to 15 amps. I was running my freezer off the STC for a little while, but to avoid the risk of burning up the relays and starting a fire, I decided to go with a Johnson Controls A419.

Shouldn't be an issue. They always error on the high side when publishing load specs. And the initial start-up load only lasts for a split second.

In the remote chance it does cause an issue with the STC relay, an external relay would be a quick fix.

Here is another build if interested...

https://www.homebrewtalk.com/f252/another-one-509936/
 
You're right about the start-up load only being a split second. I thought about the external relay fix, but decided to just bite the bullet and go for the A419.

jbb3 your coffin build looks great. I don't have access to a shop like I used to so I'm going to stick with a collar build for my apartment, and perhaps in the future I'll build an entire cabinet when I know what decor the S.O. decides it has to match...
 
So many people use the basic STC-1000 build and you almost never hear a problem with them. So I really dont think its an issue.
 
For everyone who had built the collar did you make the inner collar inside the small lip or directly out to the edge? If inside the lip did it effect the outer collar?
 
For everyone who had built the collar did you make the inner collar inside the small lip or directly out to the edge? If inside the lip did it effect the outer collar?

I haven't made mine yet but the way I see it you have two options.
1 - make the main/inner collar flush with the outside edge of the plastic trim on the freezer. That way you can attach your outer trim piece directly to the main collar.
2 - make the main/inner collar just inside the small lip. In which case you will need to use spacers when you mount your trim piece to the collar.
I plan to make mine flush with the outside edge. When I attach the weather stripping to the bottom of the collar, it should raise it up enough so the little lip doesn't interfere. If not, I'll chamfer the bottom edge of the collar so it doesn't hit the lip. It's going to be covered up anyway.
 
I used 2x10 for my collar. The upper corners need to be trimmed a bit as the white part of the lid will hit it. Looking back on it, a 1x10 may have been better.
 
I haven't made mine yet but the way I see it you have two options.
1 - make the main/inner collar flush with the outside edge of the plastic trim on the freezer. That way you can attach your outer trim piece directly to the main collar.
2 - make the main/inner collar just inside the small lip. In which case you will need to use spacers when you mount your trim piece to the collar.
I plan to make mine flush with the outside edge. When I attach the weather stripping to the bottom of the collar, it should raise it up enough so the little lip doesn't interfere. If not, I'll chamfer the bottom edge of the collar so it doesn't hit the lip. It's going to be covered up anyway.

I made mine flush with the outer edge of the trim piece. Now the outer 1x10 fits snugly and holds the collar in place. I also placed the outside wood so it was about 3/4" about the inner collar so it hid the weather stripping on the lid.
 
I used 2x10 for my collar. The upper corners need to be trimmed a bit as the white part of the lid will hit it. Looking back on it, a 1x10 may have been better.

Ya I ran a router around the inside edge so the white plastic cleared and allowed the lid to close completely.
 
I used 2x10 for my collar. The upper corners need to be trimmed a bit as the white part of the lid will hit it. Looking back on it, a 1x10 may have been better.

The important thing is the type and position of the hinges. The pivot point of the hinge needs to be raised slightly in relation to the top edge of the collar so the lid lifts up before it starts to move back when it is opened.

I bet if you re-position your hinges and raise them up slightly, the lip will clear the collar when it's opened.
 
The problem for me is getting perfect 90 degree angles. If one angle is less than 90 degrees, it pulls the 2x10 in toward the center and will hit the white plastic. I had to chisel out one of the corners to fix this (I don't have much in the way of skill or in tools).

If it looks too bad, I can go buy a 1x10 for about $5.
 
New pictures. I'm almost done. I need to find a better way to adhere the collar to the freezer. It needs to be removable without damaging the freezer and provide a good seal for insulation purposes. Then, I need to do the tubing inside and out. It looks good, given my skill and severe lack of woodworking tools. I've added the pictures to my album, but I'll post the new ones here.


That looks great man. I suppose you decided to put the tank on the outside? Is that gas plumbing on the right side and if so, where did you get it?
 
Yes. Gas on the outside, so I can adjust as necessary. The plumbing can be bought at any homebrew store.
 
Nice miter job. I've had to play cover-up for all my mistakes, but the cover-up actually looks good. My adhesive for the collar to freezer failed, so I have to come up with another alternative. The holes I drilled for the gas tubing were too close (didn't take into account the cover for the holes), but that is workable. If I had to do it again, I would use 1x10 and not miter. That would solve many problems.
 
View attachment 250192
Finally got started. Collar just stained this morning. It's made of 2x8 oak from a sawmill here in Missouri. Since this thread has been my inspiration I'll throw some shots up as I get things movin

Beautiful!

And heavy! ;) Oak is a bad ass wood. I assume you're going to mount it solid and not hinge it? Maybe use some plates in place of the hinges to hold it in place and use some chalk to seal it against the freezer and gravity to hold it in place. Is that your plan?

Very nice!! :mug:
 
The Miters took me and the wife forever to get perfect. Thankfully the boards were super straight. Still had small gaps but we mixed wood glue and the sawdust and filled em in. Gonna put three coats of poly on before I attempt to mount it to the freezer. Any suggestions out there for getting a solid seal to the freezer. I've got plumbers caulk now.
 
The Miters took me and the wife forever to get perfect. Thankfully the boards were super straight. Still had small gaps but we mixed wood glue and the sawdust and filled em in. Gonna put three coats of poly on before I attempt to mount it to the freezer. Any suggestions out there for getting a solid seal to the freezer. I've got plumbers caulk now.

I would use a good silicone caulk. Plumbers putty will harden after exposure over time.
 
So, I'm trying to dig the factory insulation out of the lid to get it to fit on my collar. I gotta say this has got to be the most time consuming part of the project so far
 
Well, since I wanted to preserve the freezer (in case we want to use it for something else), I didn't want to use caulk to adhere the collar to the freezer. I used 3M double sided sticky tape, that is removable. It is kinda like the thing they have for hanging pictures (that sort of sticky "tape", and it appears to be working.

I've redone my tubing (the tubes needed to be shorter) and and I'm going to install the distributors (after I get a couple parts) and hook up my CO2 tank to the freezer and give it a test run.

For non-porous materials like the plastic on the rim of the cooler, as long as it's applied on a clean surface, silicone should peel right off if you decide to remove it later. Yet it holds very well through a suction type grip. That's what makes it so useful in applications like this.

The double sided tape will be a PITA to remove. It'll take a LOT of scrapping and a LOT of Goof Off to remove it completely.

But both solutions should work great for attaching and sealing the collar.

Sounds like you're getting close!
 
The "tape" is designed for easy removal. I didn't know that about the caulk, but too late now.

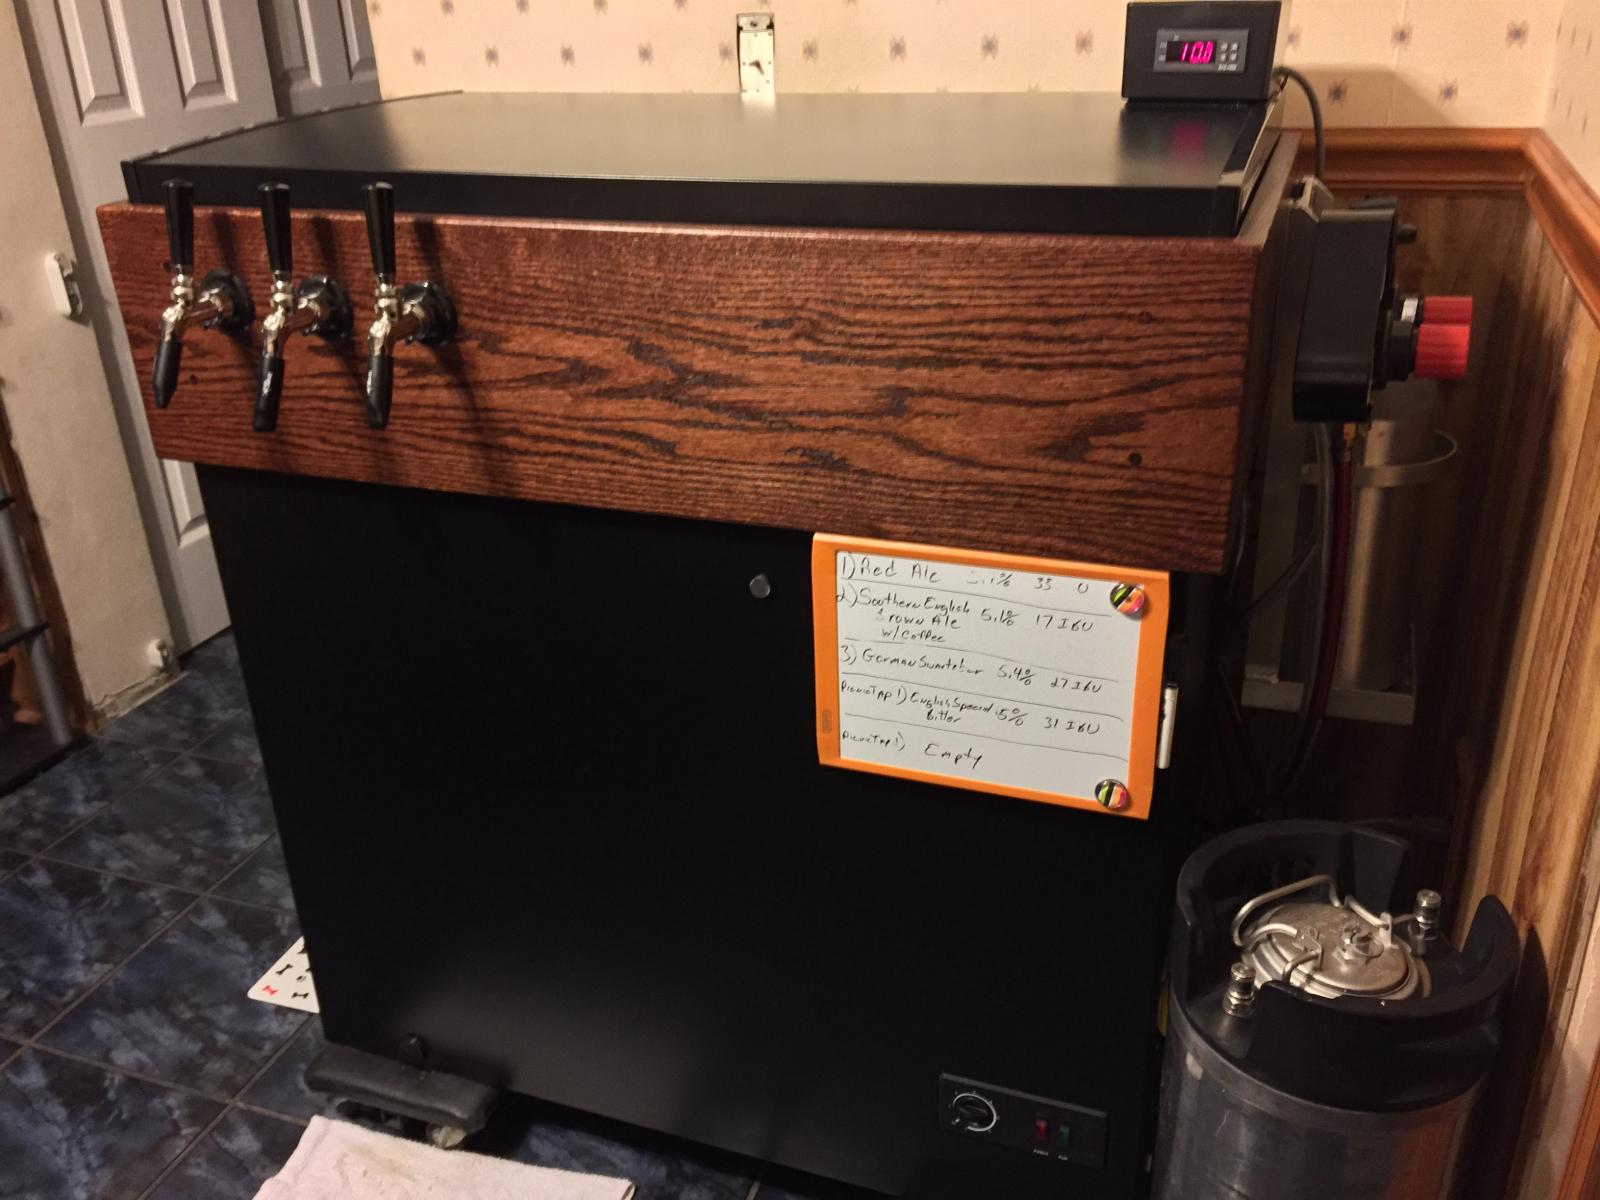
Well, pretty much done. Everything is installed and looks good (not perfect). I just need to leak-check all the tubing. Here are the final pictures:


The "tape" is designed for easy removal. I didn't know that about the caulk, but too late now.

Well, pretty much done. Everything is installed and looks good (not perfect). I just need to leak-check all the tubing. Here are the final pictures:

Congrats! :mug:

I hope to join you soon with my completed build. Maybe another week I hope!?

BTW, That soda will rust your pipes... ;)
 
So, I'm trying to dig the factory insulation out of the lid to get it to fit on my collar. I gotta say this has got to be the most time consuming part of the project so far

Is digging the insulation out of the lid common practice when building a keezer? I guess I haven't read many people doing this and it caught me off guard. Also, do you think it will not keep it as cold by doing this?? I'm planning on starting my build within the next couple weeks so I'm trying to learn all I can and this one surprised me. Thanks!

Tim
 
I had to take the insulation out of mine in order toget the lid to seal with the collar. I don't know if everyone has had to or not. I replaced my insulation with the same foam board I'm using to insulate the collar and I sealed it all off with silicone and aluminum tape. The lid had a hump inside so I cut the hump out with a razor and left the actual seal in place. I'll be mounting it tomorrow or Wednesday so I'll toss some pics up as I move forward
 
I had to take the insulation out of mine in order toget the lid to seal with the collar. I don't know if everyone has had to or not. I replaced my insulation with the same foam board I'm using to insulate the collar and I sealed it all off with silicone and aluminum tape. The lid had a hump inside so I cut the hump out with a razor and left the actual seal in place. I'll be mounting it tomorrow or Wednesday so I'll toss some pics up as I move forward


That makes sense. Thanks for sharing your advice! Looking forward to seeing your build.
 
I seem to remember seeing some used a chamfer bit on a router and routed the inside corner of the 2x collar off. Not sure if that would give you enough room to clear?
 
I didn't want to mess with the collar anymore because it's solid oak and it's killed one saw blade and three drill bits including a spade already. Didn't wanna take a chance on router bits.
 
I didn't want to mess with the collar anymore because it's solid oak and it's killed one saw blade and three drill bits including a spade already. Didn't wanna take a chance on router bits.

Like I said; It's a bad ass wood... ;)
 
I seem to remember seeing some used a chamfer bit on a router and routed the inside corner of the 2x collar off. Not sure if that would give you enough room to clear?

I used a router to knock down the inside corner so the lid would seat. didnt have to take much off to allow it to seat. But I used 2 x 8 pine for the inside and 2 x 10 oak on the outside overlapping the top and bottom. This way I didnt have to glue it to the freezer to keep it secure.

008.jpg
 
I glued mine and put polystyrene on the inside to help keep it insulated.
 

Latest posts

Back
Top