• Please visit and share your knowledge at our sister communities:
  • If you have not, please join our official Homebrewing Facebook Group!

    Homebrewing Facebook Group

Igloo 7.1 cu ft FRF795 Black Keezer Build

Homebrew Talk

Help Support Homebrew Talk:

This site may earn a commission from merchant affiliate links, including eBay, Amazon, and others.
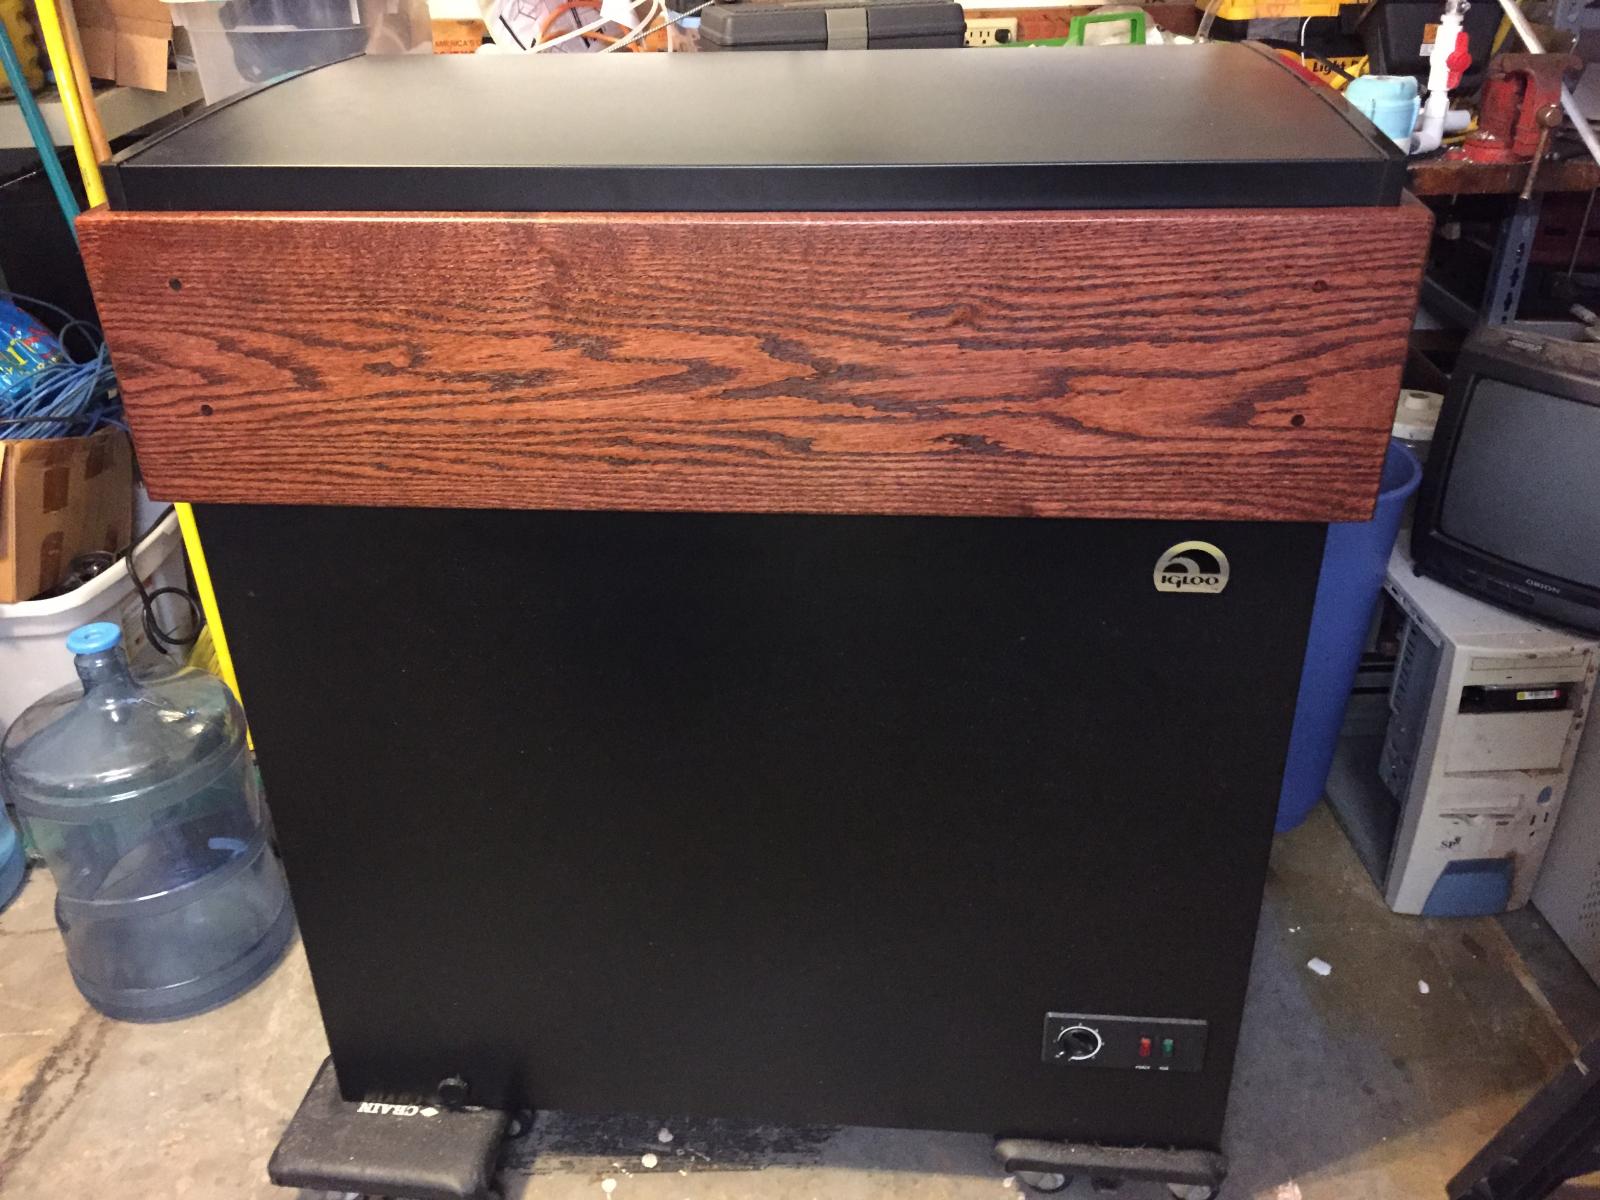
Still a work in progress. This one is a FRF705 but i think it is identical to the previous models. The shanks and faucets should be shipped today from homebrew.org and the STC-1000 is in the mail.

Eventually I will add a platform on the bottom for castors and a 1x4 skirt on the same material as the collar.

067.jpg


069.jpg


083.jpg


085.jpg


095.jpg


102.jpg
 
Still a work in progress. This one is a FRF705 but i think it is identical to the previous models. The shanks and faucets should be shipped today from homebrew.org and the STC-1000 is in the mail.

Eventually I will add a platform on the bottom for castors and a 1x4 skirt on the same material as the collar.
Purdiful!!
 
Looking great. Hopefully, if real life doesn't intervene (again), I'll be gluing and bracketing my collar tonight.
 
Still a work in progress. This one is a FRF705 but i think it is identical to the previous models. The shanks and faucets should be shipped today from homebrew.org and the STC-1000 is in the mail.

I was going to order my faucets about three weeks ago but decided to wait until closer to build time. Went to place the order this weekend and now they are out of stock... DOH!

Eventually I will add a platform on the bottom for castors and a 1x4 skirt on the same material as the collar.
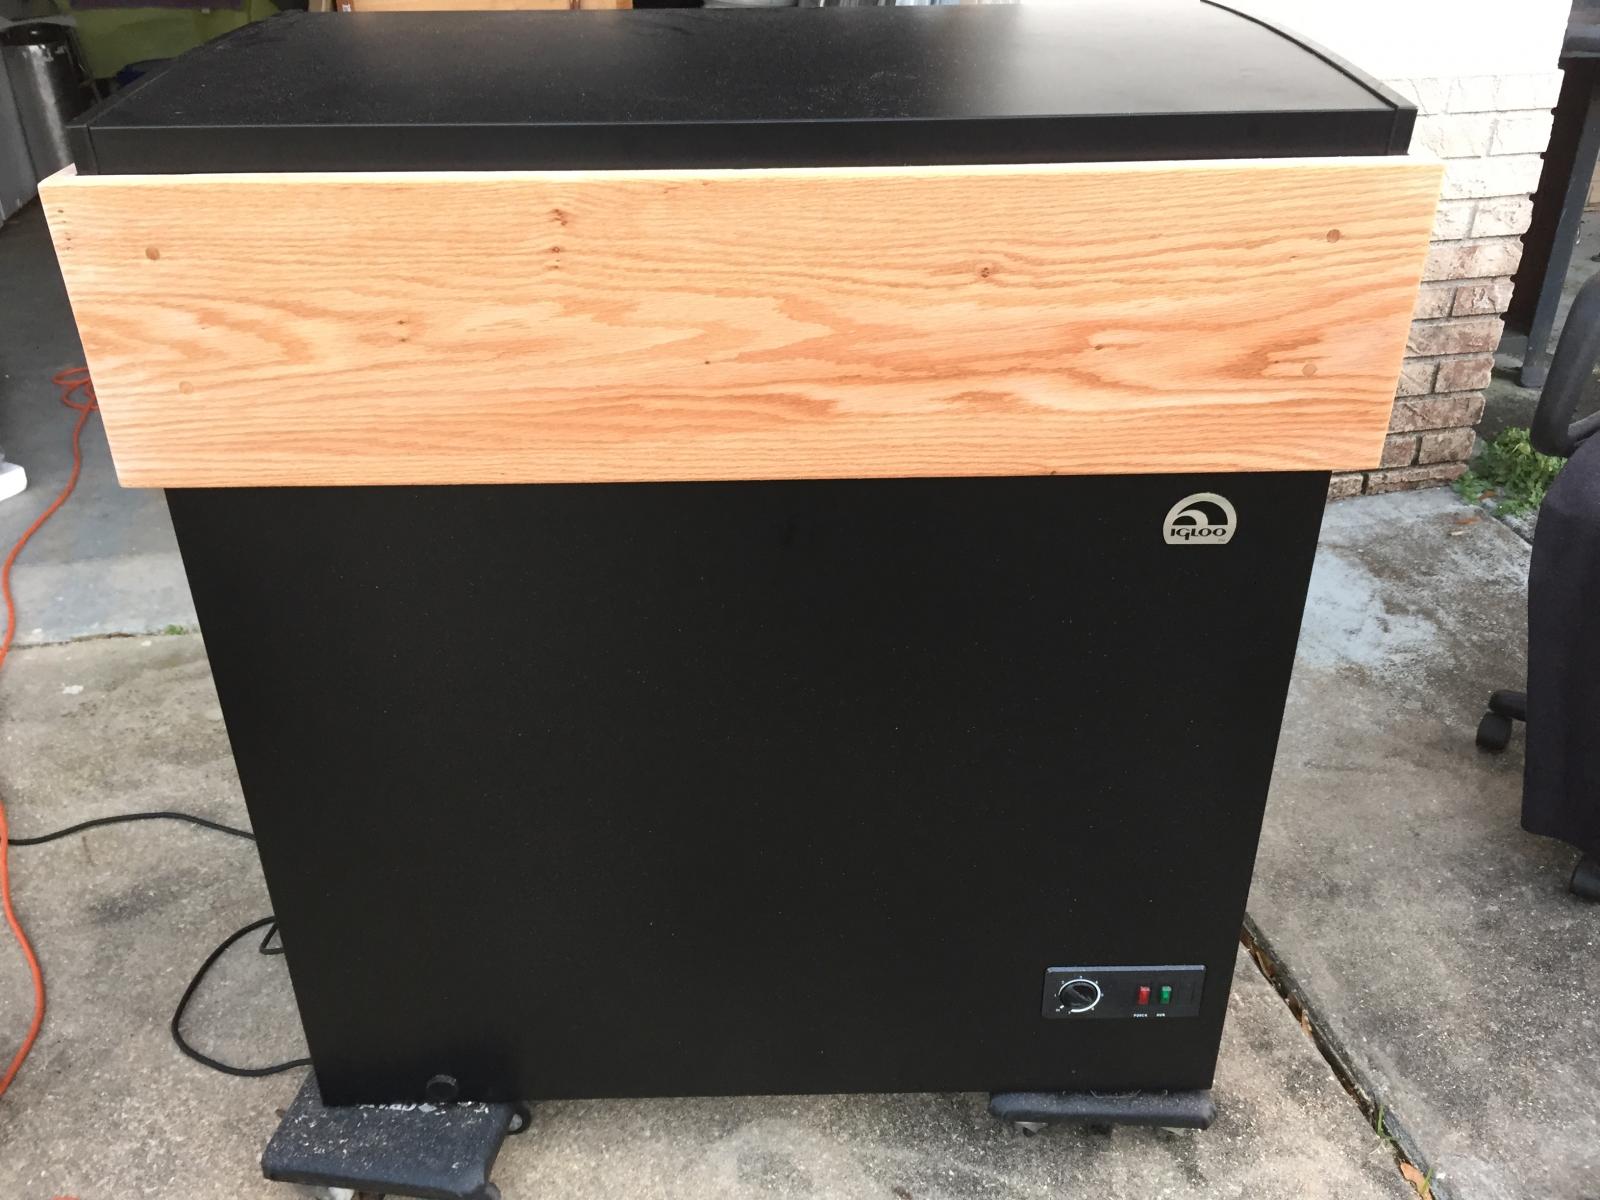
Kinda like this?? :mug:

Base Frame with casters.jpg

Drain Plug Cutout.jpg

Attach Skirt to base.jpg

Stained skirt.jpg

Installed base.jpg
 
I was going to order my faucets about three weeks ago but decided to wait until closer to build time. Went to place the order this weekend and now they are out of stock... DOH!


Kinda like this?? :mug:


Exactly Like that!!!! :rockin:


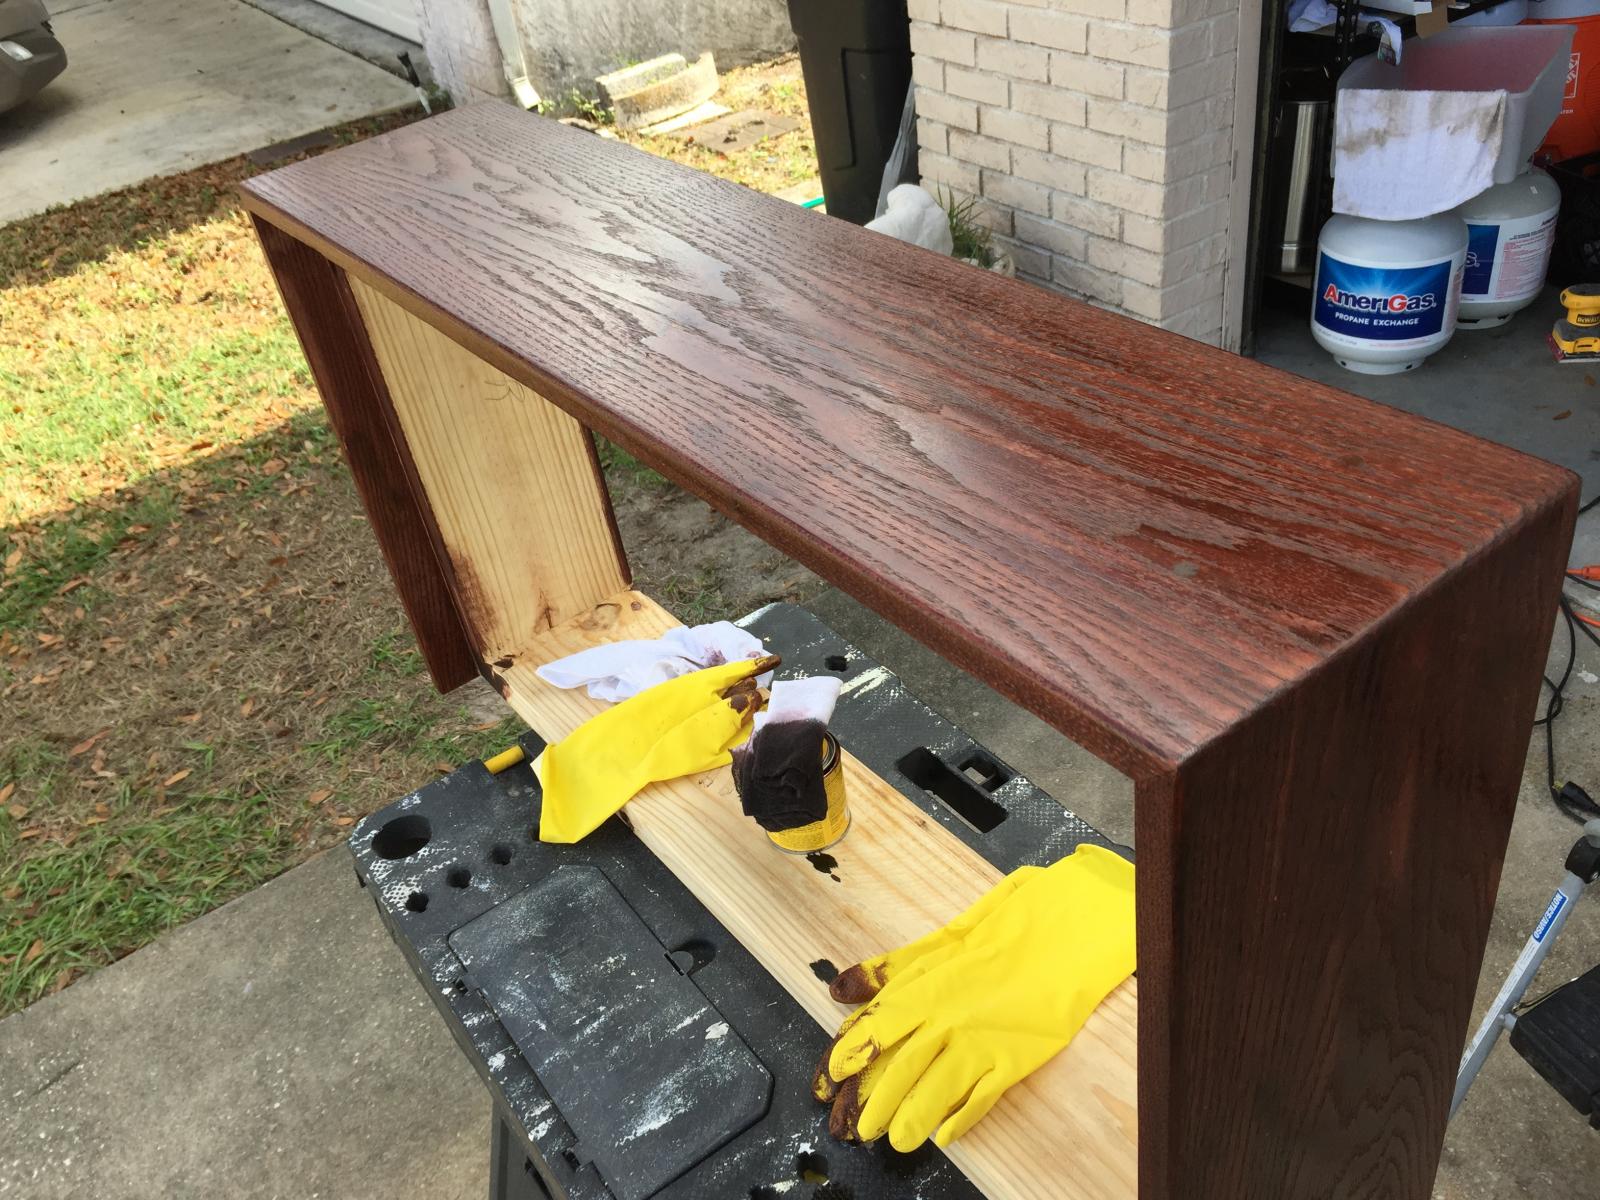
I put the final polyurathane coat on this morning so in a day or two I will assemble the collar. I need to add some sort of strap to the back using the existing screws for the hinges and attaching it to the collar.
 
Feeding off your guys builds! I have the same freezer I'm building into keezer. Please keep the info/pics coming! Dimensions would be great as I have yet to do the woodworking! I have four all SS Perlick 630s coming from Birdman that shipped yesterday so will let you know how they are. Cheapest price I've found $63 ea! Built a temp controller for my ferm fridge as well thanks to this site!View attachment ImageUploadedByHome Brew1420583837.610015.jpg
 
Still a work in progress. This one is a FRF705 but i think it is identical to the previous models. The shanks and faucets should be shipped today from homebrew.org and the STC-1000 is in the mail.

Eventually I will add a platform on the bottom for castors and a 1x4 skirt on the same material as the collar.
do you have pics of the hinge system you used on the back and where did you get them? Also I have read that some are having problems with the lid interfering with the keg on the compressor hump. I have the 705 as well and need to know if you ran into any issues! thanks!:rockin:
 
do you have pics of the hinge system you used on the back and where did you get them? Also I have read that some are having problems with the lid interfering with the keg on the compressor hump. I have the 705 as well and need to know if you ran into any issues! thanks!:rockin:

I used the existing hinges screwed into the collar. I will get some pics up after I assemble it. I was giving the polyurathane a few days to completely dry before I put it together.

and from eyeing it out the lid may hit the hoses on the disconnects. Im not sure yet, but its going to be close. I may have to raise the collar up another inch.
 
Feeding off your guys builds! I have the same freezer I'm building into keezer. Please keep the info/pics coming! Dimensions would be great as I have yet to do the woodworking! I have four all SS Perlick 630s coming from Birdman that shipped yesterday so will let you know how they are. Cheapest price I've found $63 ea! Built a temp controller for my ferm fridge as well thanks to this site!View attachment 247001

Beverage factory has the perlicks with SS shanks for 56.00. That's where I got my 3. Now I'm looking for a good priced stout faucet for my fourth
 
do you have pics of the hinge system you used on the back and where did you get them? Also I have read that some are having problems with the lid interfering with the keg on the compressor hump. I have the 705 as well and need to know if you ran into any issues! thanks!:rockin:

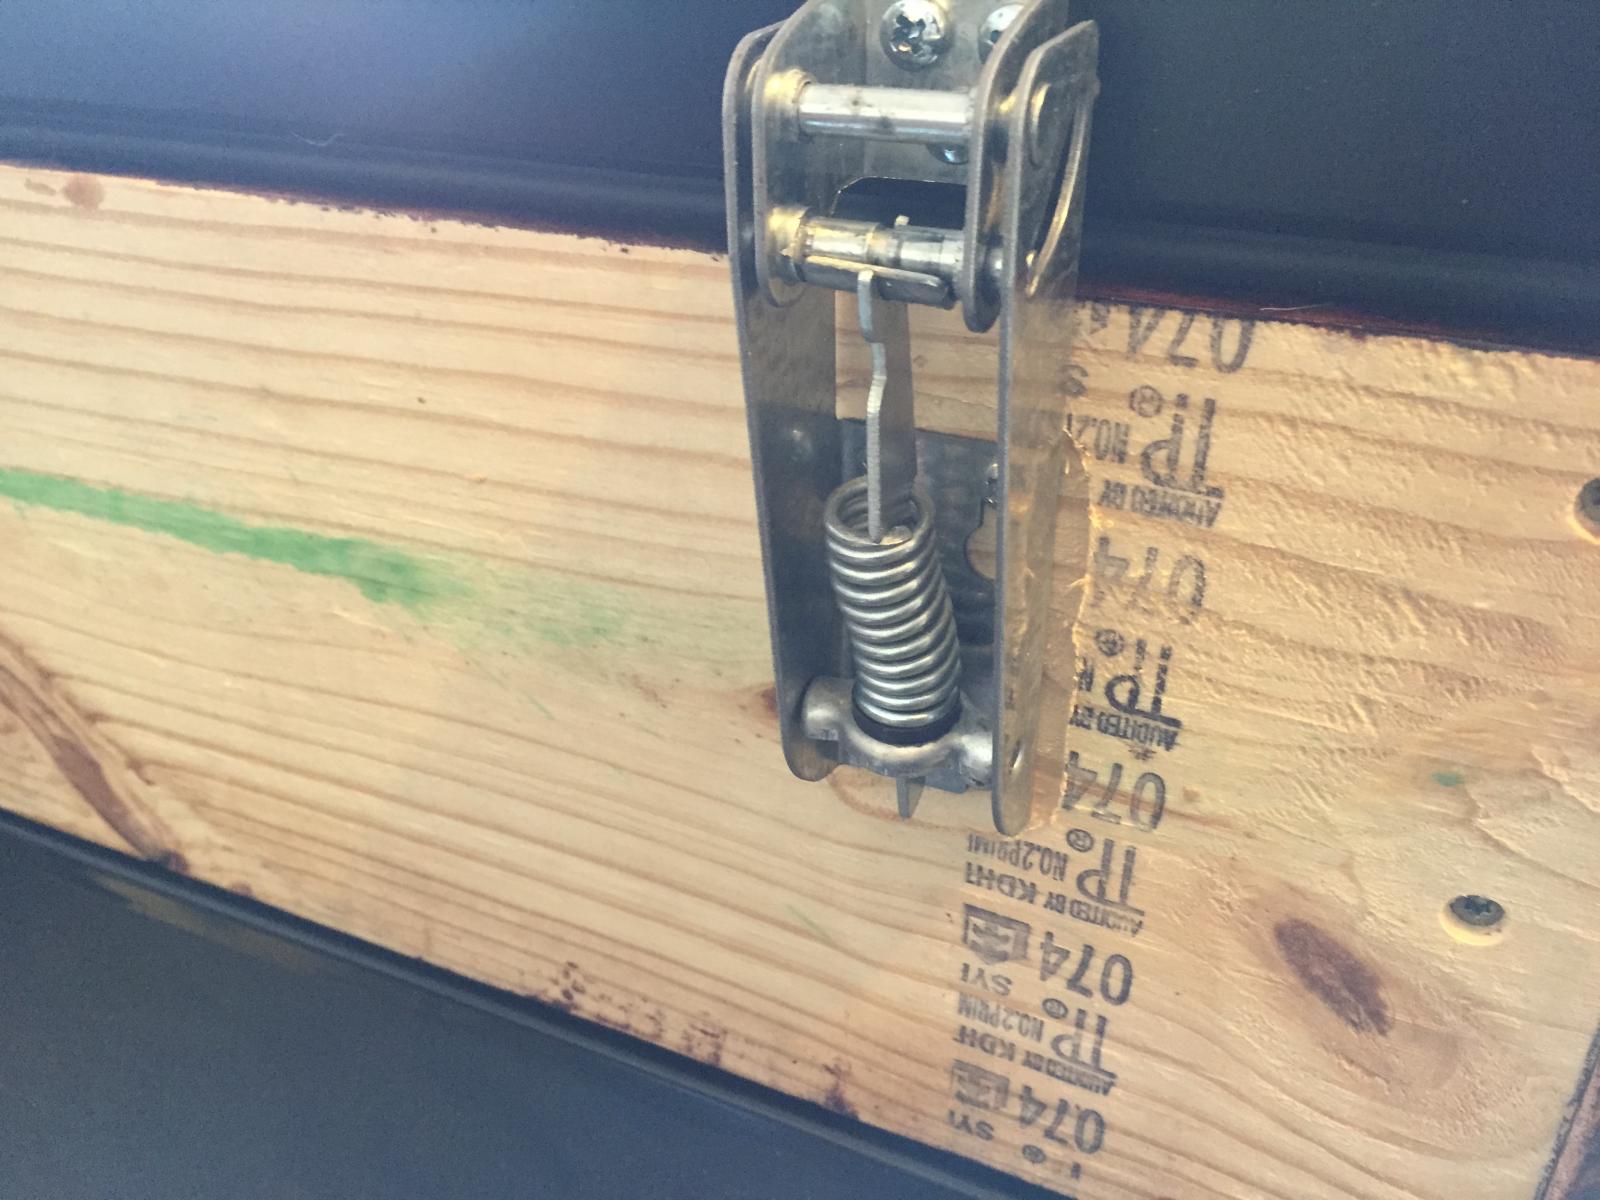
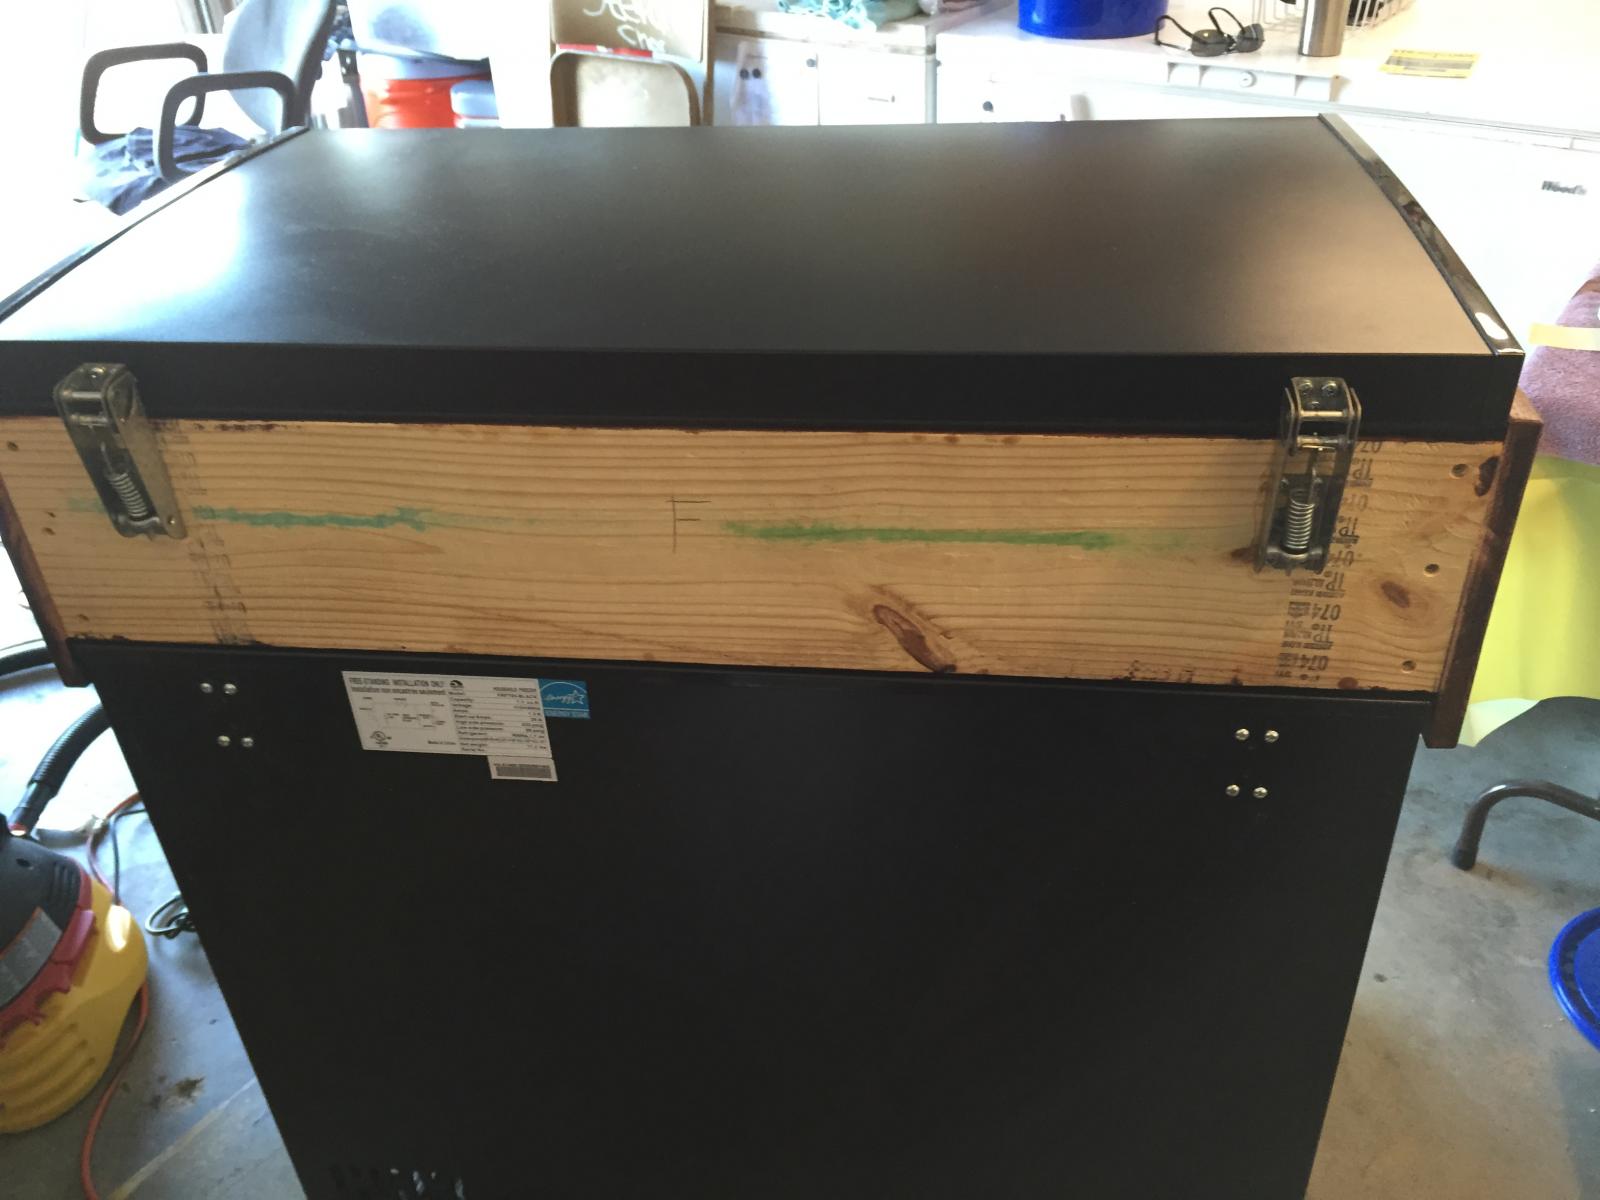
This is the the back where the existing hinges are attached. I used a router to take out about 1/8th inch because the lid did not quite sit right on the bare face of the wood.

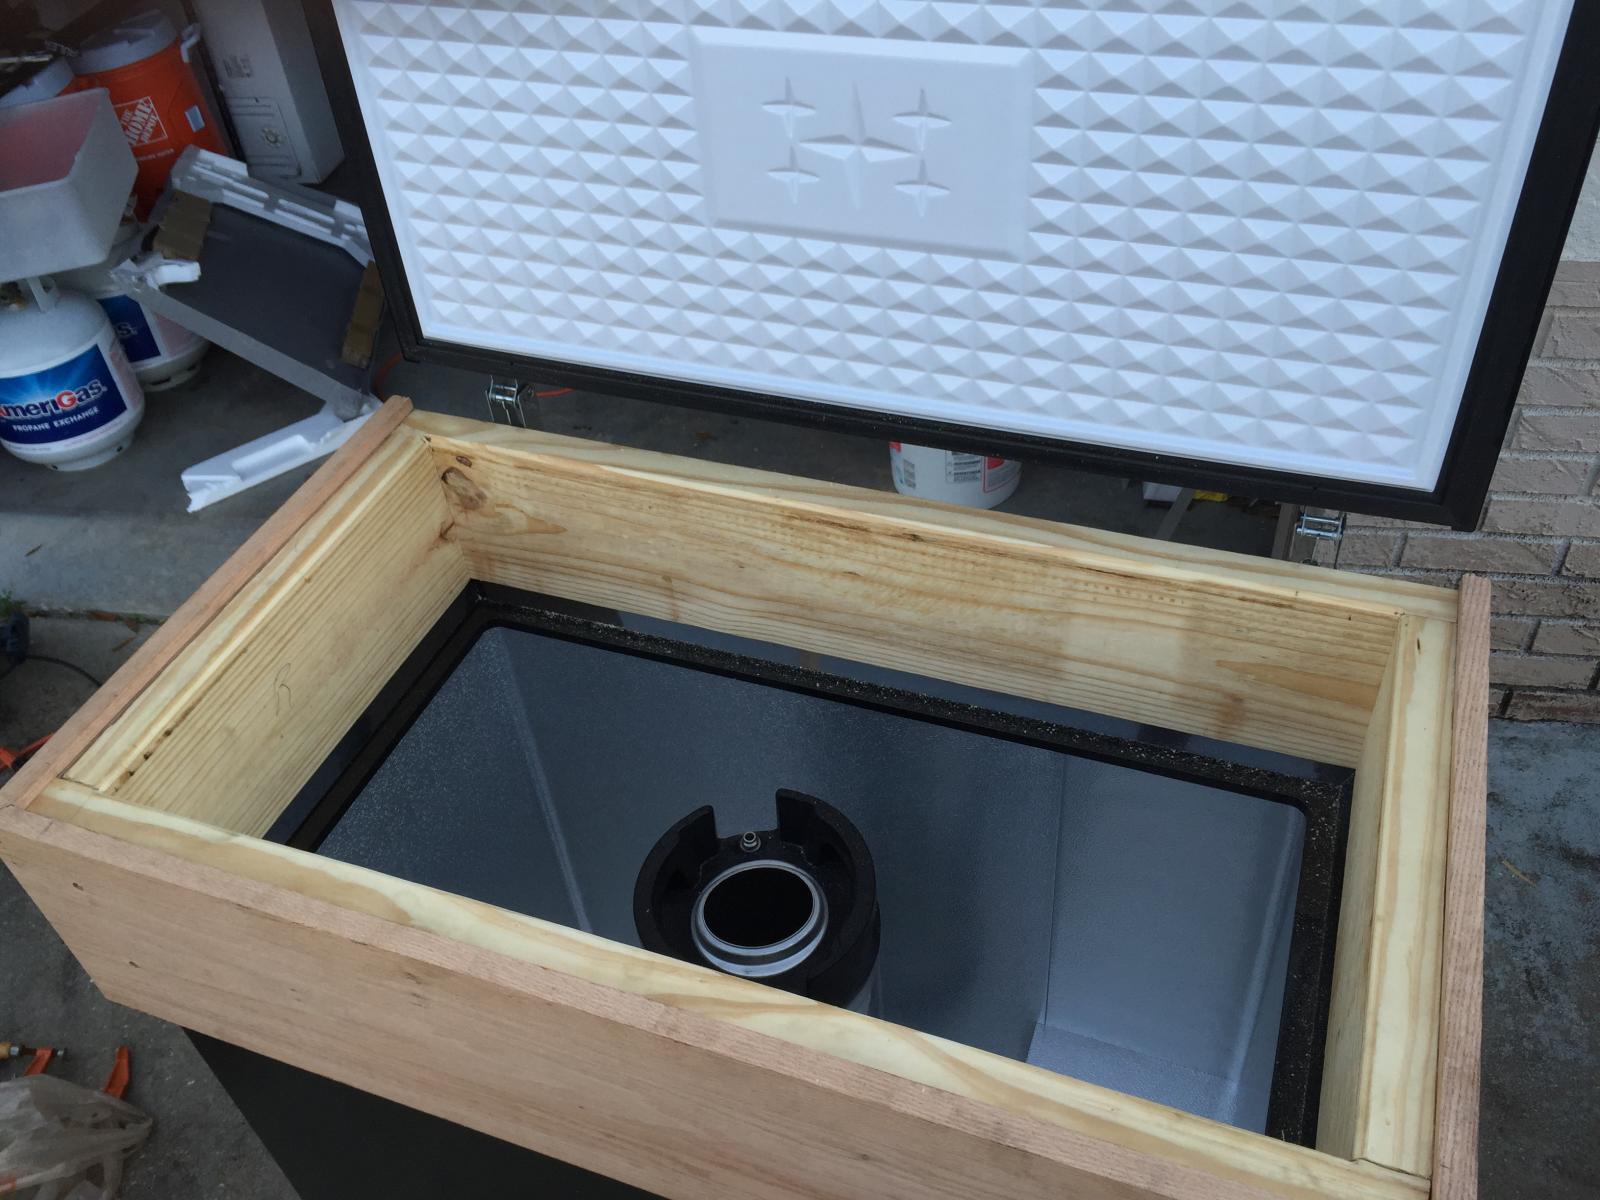
And the bottom photo is the finished collar with holes drilled for the shanks. The hardware will be in this coming Tuesday so the finished build should be ready next week.

I still need to attach the gas distributor and make the temp controller and a few more holes to run the gas lines. The temp controller and co2 will be mounted on the back outside.

003.jpg


004.jpg


002.jpg
 
Well, my mitered corners aren't perfect. I'm going to try a few things to fix it, but I may have to buy another 2x10 and do it with non mitered edges.

Would a 1x10 be better (I'd use more insulation with 1x10).
 
I've got the same freezer and been keeping an eye on everyone's builds. They're all looking great.

Has anyone considered that the label on the back of the freezer says that the startup load is 20 amps? The STC-1000 says it is only rated up to 10 amps. I have heard that the relays inside are rated to 15 amps. I was running my freezer off the STC for a little while, but to avoid the risk of burning up the relays and starting a fire, I decided to go with a Johnson Controls A419.
 
Well, my mitered edges were off. My problem with the mitered edges was I only have a circular saw and only a modicum of skill. When I put them together and bracketed them on, my priority was to make the edges align well (they aligned OK - fixable, but OK). But, I neglected to watch the angle. The angle was off slightly, making more of a parallelogram than a rectangle. That messed things up a bit.

But, I came up with a solution. I broke apart the glue, and reattached them making sure the angles were as perfect as possible (and not caring about aligning the edges). Then, I'm going to put some corner moldings over the edges (painted black to match the freezer). I think it will look good, and will cover up my mistakes.
 
I've got the same freezer and been keeping an eye on everyone's builds. They're all looking great.

Has anyone considered that the label on the back of the freezer says that the startup load is 20 amps? The STC-1000 says it is only rated up to 10 amps. I have heard that the relays inside are rated to 15 amps. I was running my freezer off the STC for a little while, but to avoid the risk of burning up the relays and starting a fire, I decided to go with a Johnson Controls A419.

Shouldn't be an issue. They always error on the high side when publishing load specs. And the initial start-up load only lasts for a split second.

In the remote chance it does cause an issue with the STC relay, an external relay would be a quick fix.

Here is another build if interested...

https://www.homebrewtalk.com/f252/another-one-509936/
 
You're right about the start-up load only being a split second. I thought about the external relay fix, but decided to just bite the bullet and go for the A419.

jbb3 your coffin build looks great. I don't have access to a shop like I used to so I'm going to stick with a collar build for my apartment, and perhaps in the future I'll build an entire cabinet when I know what decor the S.O. decides it has to match...
 
So many people use the basic STC-1000 build and you almost never hear a problem with them. So I really dont think its an issue.
 
For everyone who had built the collar did you make the inner collar inside the small lip or directly out to the edge? If inside the lip did it effect the outer collar?
 
For everyone who had built the collar did you make the inner collar inside the small lip or directly out to the edge? If inside the lip did it effect the outer collar?

I haven't made mine yet but the way I see it you have two options.
1 - make the main/inner collar flush with the outside edge of the plastic trim on the freezer. That way you can attach your outer trim piece directly to the main collar.
2 - make the main/inner collar just inside the small lip. In which case you will need to use spacers when you mount your trim piece to the collar.
I plan to make mine flush with the outside edge. When I attach the weather stripping to the bottom of the collar, it should raise it up enough so the little lip doesn't interfere. If not, I'll chamfer the bottom edge of the collar so it doesn't hit the lip. It's going to be covered up anyway.
 
I used 2x10 for my collar. The upper corners need to be trimmed a bit as the white part of the lid will hit it. Looking back on it, a 1x10 may have been better.
 
I haven't made mine yet but the way I see it you have two options.
1 - make the main/inner collar flush with the outside edge of the plastic trim on the freezer. That way you can attach your outer trim piece directly to the main collar.
2 - make the main/inner collar just inside the small lip. In which case you will need to use spacers when you mount your trim piece to the collar.
I plan to make mine flush with the outside edge. When I attach the weather stripping to the bottom of the collar, it should raise it up enough so the little lip doesn't interfere. If not, I'll chamfer the bottom edge of the collar so it doesn't hit the lip. It's going to be covered up anyway.

I made mine flush with the outer edge of the trim piece. Now the outer 1x10 fits snugly and holds the collar in place. I also placed the outside wood so it was about 3/4" about the inner collar so it hid the weather stripping on the lid.
 
I used 2x10 for my collar. The upper corners need to be trimmed a bit as the white part of the lid will hit it. Looking back on it, a 1x10 may have been better.

Ya I ran a router around the inside edge so the white plastic cleared and allowed the lid to close completely.
 
I used 2x10 for my collar. The upper corners need to be trimmed a bit as the white part of the lid will hit it. Looking back on it, a 1x10 may have been better.

The important thing is the type and position of the hinges. The pivot point of the hinge needs to be raised slightly in relation to the top edge of the collar so the lid lifts up before it starts to move back when it is opened.

I bet if you re-position your hinges and raise them up slightly, the lip will clear the collar when it's opened.
 
The problem for me is getting perfect 90 degree angles. If one angle is less than 90 degrees, it pulls the 2x10 in toward the center and will hit the white plastic. I had to chisel out one of the corners to fix this (I don't have much in the way of skill or in tools).

If it looks too bad, I can go buy a 1x10 for about $5.
 
New pictures. I'm almost done. I need to find a better way to adhere the collar to the freezer. It needs to be removable without damaging the freezer and provide a good seal for insulation purposes. Then, I need to do the tubing inside and out. It looks good, given my skill and severe lack of woodworking tools. I've added the pictures to my album, but I'll post the new ones here.


That looks great man. I suppose you decided to put the tank on the outside? Is that gas plumbing on the right side and if so, where did you get it?
 
Yes. Gas on the outside, so I can adjust as necessary. The plumbing can be bought at any homebrew store.
 
Nice miter job. I've had to play cover-up for all my mistakes, but the cover-up actually looks good. My adhesive for the collar to freezer failed, so I have to come up with another alternative. The holes I drilled for the gas tubing were too close (didn't take into account the cover for the holes), but that is workable. If I had to do it again, I would use 1x10 and not miter. That would solve many problems.
 
Back
Top