You are using an out of date browser. It may not display this or other websites correctly.
You should upgrade or use an alternative browser.
You should upgrade or use an alternative browser.
HOWTO - Make a BrewPi Fermentation Controller For Cheap
- Thread starter FuzzeWuzze
- Start date

Help Support Homebrew Talk:
This site may earn a commission from merchant affiliate
links, including eBay, Amazon, and others.
- Status
- Not open for further replies.

Lord_BeerMeStrength
Member
- Joined
- Aug 11, 2018
- Messages
- 19
- Reaction score
- 2
Wanted to thank everyone for their help. Its been almost four days without issue. I believe the big thing - in my case - was proper grounding. I found it is important to keep the sensor and arduino ground separate and not earth ground.
Happy brewing!
Happy brewing!
Lord_BeerMeStrength
Member
- Joined
- Aug 11, 2018
- Messages
- 19
- Reaction score
- 2
Wanted to thank everyone for their help. Its been almost four days without issue. I believe the big thing - in my case - was proper grounding. I found it is important to keep the sensor and arduino ground separate and not earth ground.
Happy brewing!
So with everything working, I foolishly tried to put the fridge "back together" (i.e. place the wires in their final position, move the parts from outside the case to inside the case, general clean-up - POWER OFF THE WHOLE TIME) and, wouldn't you know it, the sensors stopped working! So I checked all the wires - replaced the wires that appeared suspect - and ultimately replaced the sensors and .... they heated up until they were too hot to touch and stopped working.
*sigh*
Its a good thing I love beer, brewing beer, and fooling around with linux and electronics otherwise I might have quit a long time ago.
Reversed voltage/gnd at the ds18b20s will do that (bt/dt - once - sending that probe to an early grave).
Sorry...
Sorry...
Lord_BeerMeStrength
Member
- Joined
- Aug 11, 2018
- Messages
- 19
- Reaction score
- 2
Reversed voltage/gnd at the ds18b20s will do that (bt/dt - once - sending that probe to an early grave).
Sorry...
I understand that but unless the color of the wires differs from one sensor to the next - from the same manufacturer, packaged together - they are wired correctly.
I've decided to order new sensors and the required parts to utilize mini-xlr connectors in hopes of making my job easier when in the future the sensors fail again
There has been some variance in the wire colors in the past. Whether it was within the same manufacturer, I can't say.
Regardless of wire color, if it got hot it wasn't wired properly. While I've gotten lucky in the past, usually it kills the sensor and it's recommended to replace it once it heats up like that.
ETA: I bring this up only to recommend that you double check the wiring so that you don't do the same to any new sensors.
Last edited:


$479.00
$559.00
EdgeStar KC1000SS Craft Brew Kegerator for 1/6 Barrel and Cornelius Kegs
Amazon.com


$176.97
1pc Commercial Keg Manifold 2" Tri Clamp,Ball Lock Tapping Head,Pressure Gauge/Adjustable PRV for Kegging,Fermentation Control
hanhanbaihuoxiaoshoudian


$172.35
2 Inch Tri Clamp Keg Manifold With Ball Lock Posts, Pressure Gauge, PRV (0-30 PSI) – Homebrew, Fermentation, Kegging System
wuhanshijiayangzhiyimaoyiyouxiangongsi


$53.24
1pc Hose Barb/MFL 1.5" Tri Clamp to Ball Lock Post Liquid Gas Homebrew Kegging Fermentation Parts Brewer Hardware SUS304(Liquid Hose Barb)
Guangshui Weilu You Trading Co., Ltd


$7.79 ($7.79 / Count)
Craft A Brew - LalBrew Voss™ - Kveik Ale Yeast - For Craft Lagers - Ingredients for Home Brewing - Beer Making Supplies - (1 Pack)
Craft a Brew

$58.16
HUIZHUGS Brewing Equipment Keg Ball Lock Faucet 30cm Reinforced Silicone Hose Secondary Fermentation Homebrew Kegging Brewing Equipment
xiangshuizhenzhanglingfengshop

$22.00 ($623.23 / Ounce)
AMZLMPKNTW Ball Lock Sample Faucet 30cm Reinforced Silicone Hose Secondary Fermentation Homebrew Kegging joyful
无为中南商贸有限公司


$53.24
1pc Hose Barb/MFL 1.5" Tri Clamp to Ball Lock Post Liquid Gas Homebrew Kegging Fermentation Parts Brewer Hardware SUS304(Liquid Hose Barb)
yunchengshiyanhuqucuichendianzishangwuyouxiangongsi


$33.99 ($17.00 / Count)
$41.99 ($21.00 / Count)
2 Pack 1 Gallon Large Fermentation Jars with 3 Airlocks and 2 SCREW Lids(100% Airtight Heavy Duty Lid w Silicone) - Wide Mouth Glass Jars w Scale Mark - Pickle Jars for Sauerkraut, Sourdough Starter
Qianfenie Direct

$20.94
$29.99
The Brew Your Own Big Book of Clone Recipes: Featuring 300 Homebrew Recipes from Your Favorite Breweries
Amazon.com


$44.99
$49.95
Craft A Brew - Mead Making Kit – Reusable Make Your Own Mead Kit – Yields 1 Gallon of Mead
Craft a Brew


![Craft A Brew - Safale BE-256 Yeast - Fermentis - Belgian Ale Dry Yeast - For Belgian & Strong Ales - Ingredients for Home Brewing - Beer Making Supplies - [3 Pack]](https://m.media-amazon.com/images/I/51bcKEwQmWL._SL500_.jpg)

$10.99 ($31.16 / Ounce)
Hornindal Kveik Yeast for Homebrewing - Mead, Cider, Wine, Beer - 10g Packet - Saccharomyces Cerevisiae - Sold by Shadowhive.com
Shadowhive


Lord_BeerMeStrength
Member
- Joined
- Aug 11, 2018
- Messages
- 19
- Reaction score
- 2
There has been some variance in the wire colors in the past. Whether it was within the same manufacturer, I can't say.
Regardless of wire color, if it got hot it wasn't wired properly. While I've gotten lucky in the past, usually it kills the sensor and it's recommended to replace it once it heats up like that.
ETA: I bring this up only to recommend that you double check the wiring so that you don't do the same to any new sensors.
Any way to test the sensors other than trial and error? They aren't terribly expensive but if I'm buying bag after bag of sensors the whole build gets silly
Any way to test the sensors other than trial and error? They aren't terribly expensive but if I'm buying bag after bag of sensors the whole build gets silly
There was some talk in this thread about how to test them to determine the wiring. Which sensors are you buying? Have you posted any pictures of your current setup?
Lord_BeerMeStrength
Member
- Joined
- Aug 11, 2018
- Messages
- 19
- Reaction score
- 2
These are the ones I just bought.
https://www.amazon.com/gp/product/B01JKVRVNI/?tag=skimlinks_replacement-20
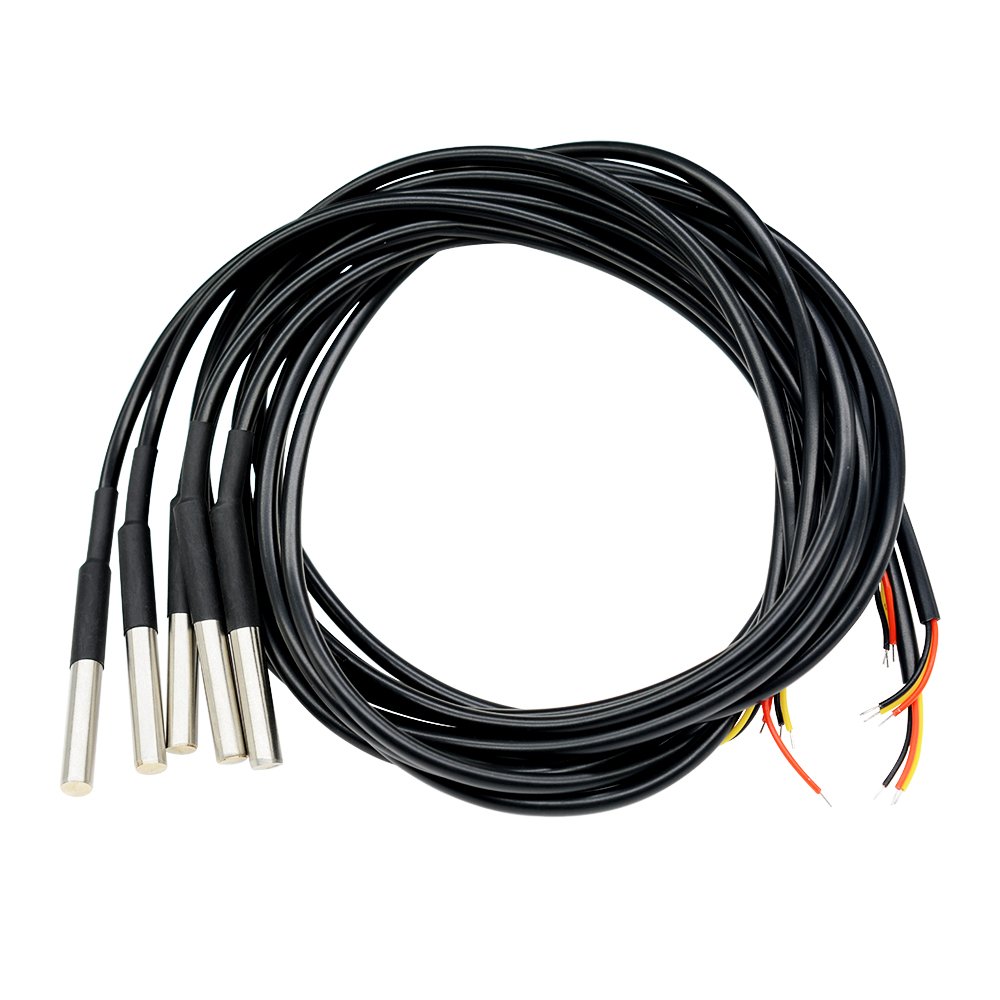
I had bought these: https://www.amazon.com/gp/product/B00KUNKR3M/?tag=skimlinks_replacement-20
 (none of the wires were yellow though)
https://www.amazon.com/gp/product/B01JKVRVNI/?tag=skimlinks_replacement-20
I had bought these: https://www.amazon.com/gp/product/B00KUNKR3M/?tag=skimlinks_replacement-20
Last edited by a moderator:
Strange, they both have the same wiring scheme listed. I would use your arduino and a test sketch to test them prior to installing them permanently. I would also check (and re-check) your wiring.
Maybe even post a picture of it here so we can have a look.
When I've heated one up in the past, I've been able to re-wire it and use it. Sometimes, it was within 1/2 a degree of a known good sensor. So it's possible it's still good.
Maybe even post a picture of it here so we can have a look.
When I've heated one up in the past, I've been able to re-wire it and use it. Sometimes, it was within 1/2 a degree of a known good sensor. So it's possible it's still good.
narcolepticsniper
Member
- Joined
- Jun 4, 2013
- Messages
- 9
- Reaction score
- 5
I'm about to screw this up tomorrow using an old laptop... wish me luck. I'll try to chronicle the process for troubleshooting.
OreCreekBrewery
Member
- Joined
- Aug 12, 2017
- Messages
- 24
- Reaction score
- 5
I'm about to screw this up tomorrow using an old laptop... wish me luck. I'll try to chronicle the process for troubleshooting.
So I just clicked on to this thread and I had to sacroll down 185 pages to get to the end!
What is wrong with this board? Why is the first thread posted first! like back in 2014 ?
Probably some "Next Unseen" thing. If you mark the threads in this forum Read it's unlikely to ever happen again.
btw, you can jump to the very end of any thread by clicking on the last Page number shown at the bottom of the page...
Cheers!
btw, you can jump to the very end of any thread by clicking on the last Page number shown at the bottom of the page...
Cheers!
Lord_BeerMeStrength
Member
- Joined
- Aug 11, 2018
- Messages
- 19
- Reaction score
- 2
[Original Question Redacted]
[New Question]
Has anyone setup the BrewPi to use an LCD (20x4)? I've seen the mega thread that utilized the LCD connected to the Arduino Uno however, for practical reasons, I'd prefer to run it off of the RaspberryPi. Connecting it seems easy enough based on the tutorials I've studied but I don't know how to get the info onto the screen (the same info that is shown on the LCDs that are connected to the Arduino Uno in the above-referenced example).
Any ideas? Thank you!
Last edited:
I think I understand why one would want to do this, but I expect it would require some significant user-generated code on the host (RPi) side as there's no native support for it...
Cheers!
Cheers!
Lord_BeerMeStrength
Member
- Joined
- Aug 11, 2018
- Messages
- 19
- Reaction score
- 2
I think I understand why one would want to do this, but I expect it would require some significant user-generated code on the host (RPi) side as there's no native support for it...
Cheers!
Thank you, I suspected as much and, honestly, I just want to put this project to bed. I have LED indicators for the 2x Relay, on/off switch for the Arduino, and a suspend button for the RPi. I think that is enough customization for this project. I know it will be worth it but this has been one of the most frustrating - albeit informative and beneficial - project I've ever tried.
Thank you all for all your selfless assistance!
Lord_BeerMeStrength
Member
- Joined
- Aug 11, 2018
- Messages
- 19
- Reaction score
- 2
Well, I think I have finally done it. First and foremost, thank you, thank you, thank you from the bottom of my heart for a) FuzzeWuzze's DIY, and b) everybody's help. I literally could not have started or finished this otherwise. I went barebones except for the following additions:
1. Power is from the original fridge cord. I spliced everything into the + / - / Earth.
2. Added LED lights for:
1. Support for the shelving in the fermenter
2. Fix Shutdown program for Raspberry Pi (every time heater or compressor kicks on, RPi shutdowns haha)

Finished with this (old license plate to cover hole in door):


Screenshot:

Heat on:

Cool on:

Heating element:

Inside the door:

The hardworking bits, below:

1. Power is from the original fridge cord. I spliced everything into the + / - / Earth.
2. Added LED lights for:
a. Arduino ON
b. Compressor ON
c. Heater ON
d. Raspberry Pi ON
3. Added Power switches for:b. Compressor ON
c. Heater ON
d. Raspberry Pi ON
a. Arduino Uno
b. Raspberry Pi (Program for on/off currently broken)
Left to do:b. Raspberry Pi (Program for on/off currently broken)
1. Support for the shelving in the fermenter
2. Fix Shutdown program for Raspberry Pi (every time heater or compressor kicks on, RPi shutdowns haha)
Started with this:
Finished with this (old license plate to cover hole in door):


Screenshot:

Heat on:

Cool on:

Heating element:

Inside the door:

The hardworking bits, below:

Mikmonken
Well-Known Member
- Joined
- Mar 28, 2013
- Messages
- 423
- Reaction score
- 101
[Original Question Redacted]
[New Question]
Has anyone setup the BrewPi to use an LCD (20x4)? I've seen the mega thread that utilized the LCD connected to the Arduino Uno however, for practical reasons, I'd prefer to run it off of the RaspberryPi. Connecting it seems easy enough based on the tutorials I've studied but I don't know how to get the info onto the screen (the same info that is shown on the LCDs that are connected to the Arduino Uno in the above-referenced example).
Any ideas? Thank you!
I have added an LCD touch screen direct to the RPI and used Kiosk to Permanently display the temperature LCD that you have on the web interface. It’s a bit bigger that the 20x4 but it did plug and play pretty easily.
It’s worth looking at. If you want that.
So, is this likely to be stable enough to tuck away the Raspberry Pi away in an enclosure and do everything through a webserver? I'm sort of dreading the idea of occasionally dragging out a monitor and keyboard to reboot/relaunch software/etc.
CadiBrewer
Well-Known Member
Yep, I run my pi with no monitor for much of the time. You can access everything remotely through your computer of choice on your network or even over the internet if you set your router up correctly. You can even do all of the setup via ssh.So, is this likely to be stable enough to tuck away the Raspberry Pi away in an enclosure and do everything through a webserver? I'm sort of dreading the idea of occasionally dragging out a monitor and keyboard to reboot/relaunch software/etc.
I have a bunch of RPi systems from Zero-W up through 3+ models serving various functions including my RaspberryPints keezer tap list, and BrewPi management of the keezer and three chambers. I can manage them anywhere I can grab an internet connection. The only systems with local consoles are the keezer system and its backup clone that runs on my desk.
As for "tucked away" enclosures, the RPi that runs the tap list and multiple BrewPi instances has lived under my keezer for the last four years. So I'm pretty confident about it at this point
Between the temperature channels, flow meter channels, fan power, gas lines, etc, it's pretty darned busy back there...

Brewery controller slid out, lid removed...

Cheers!
As for "tucked away" enclosures, the RPi that runs the tap list and multiple BrewPi instances has lived under my keezer for the last four years. So I'm pretty confident about it at this point
Between the temperature channels, flow meter channels, fan power, gas lines, etc, it's pretty darned busy back there...
Brewery controller slid out, lid removed...
Cheers!
Always great to see your pics day_trippr. Ive had an old pi running headless on a LAN cable to the wifi router that runs a couple of arduino wifi. I did have to use a screen for first setup till I learned how to se Putty to be able to log into the raspi from any other computer. Been ticking over for years now without an issue. Sorry I lie I had to replace a beer probe I drowned in some 1084 Irish ale yeast that escaped the airlock and flooded the thermowell
Thanks for the kind words, they're appreciated.
My Pi fleet depends on Putty and WinSCP. Invaluable duo for remote maintenance. That and port forwarding.
I'm down in northern NJ for a week but can see all of my wee machines and could tweak any of them if needed...
Cheers!
My Pi fleet depends on Putty and WinSCP. Invaluable duo for remote maintenance. That and port forwarding.
I'm down in northern NJ for a week but can see all of my wee machines and could tweak any of them if needed...
Cheers!
After years of running 2 BrewPi's, I am now getting a strange ip address (inet addr)
ifconfig or sudo ip addr show, comes back with 20.10.10.100 under wlan0, where it always was a string like 192.168.1.##
This strange address gets me no where, and just times out....
I do not know the programming of all this, or the abbreviations you all may know, so if someone may know what happened here in simple "Old Man" lingo, please do so!
thanks
- Joined
- Nov 26, 2013
- Messages
- 9,924
- Reaction score
- 24,089
I see that in windows when DHCP gets confuzzled -- try reboot for networking to get itself righted.
I rebooted everything....still getting 20.10.10.100
Running 2 Rpi's with BrewPi active on both fermenter's. Never had this problem before.
sudo rebooted Pi's, Router, Modem, to no good.
Also did a sudo shutdown now, and tried to fire back up to see if I could get an IP address so I could remote view my RPi's from my office Windows desktop.....nope go
Thanks balrog
fortunately the scripts keep on chugging along nice and the young beers along !
gump
Member
my brain hurts this is way over my head
CadiBrewer
Well-Known Member
To my knowledge, 0.2.11 was only available for the Spark and not for Arduino. I think Elko stopped updating the Arduino branch once the Spark came out.Anybody have the 0.2.11 hex for arduino? Need to calibrate my sensors and that doesn't work in 0.2.10.
You can get the temp probe calibration feature by migrating to Fermentrack, though. @Thorrak built that functionality into the software.
I think there is also a way to do it outside of the hex, but I'm at work and don't have my notes available on that.
- Status
- Not open for further replies.
Similar threads
- Replies
- 10
- Views
- 2K
- Replies
- 3
- Views
- 2K
