Ok, so here’s my hair-brained idea for a hop dropper, and I’m sure I’m not the first to think of this design. Placement will be at the 3” TC port on the top of my 7-gallon SSB unitank. I normally just pull the 3” PRV plate off the top and drop my hops in late in the fermentation cycle to take advantage of some CO2 production to scrub the O2 introduced when I opened the top. I’ve never been able to dry-hop after fermentation without the risk of introducing O2.
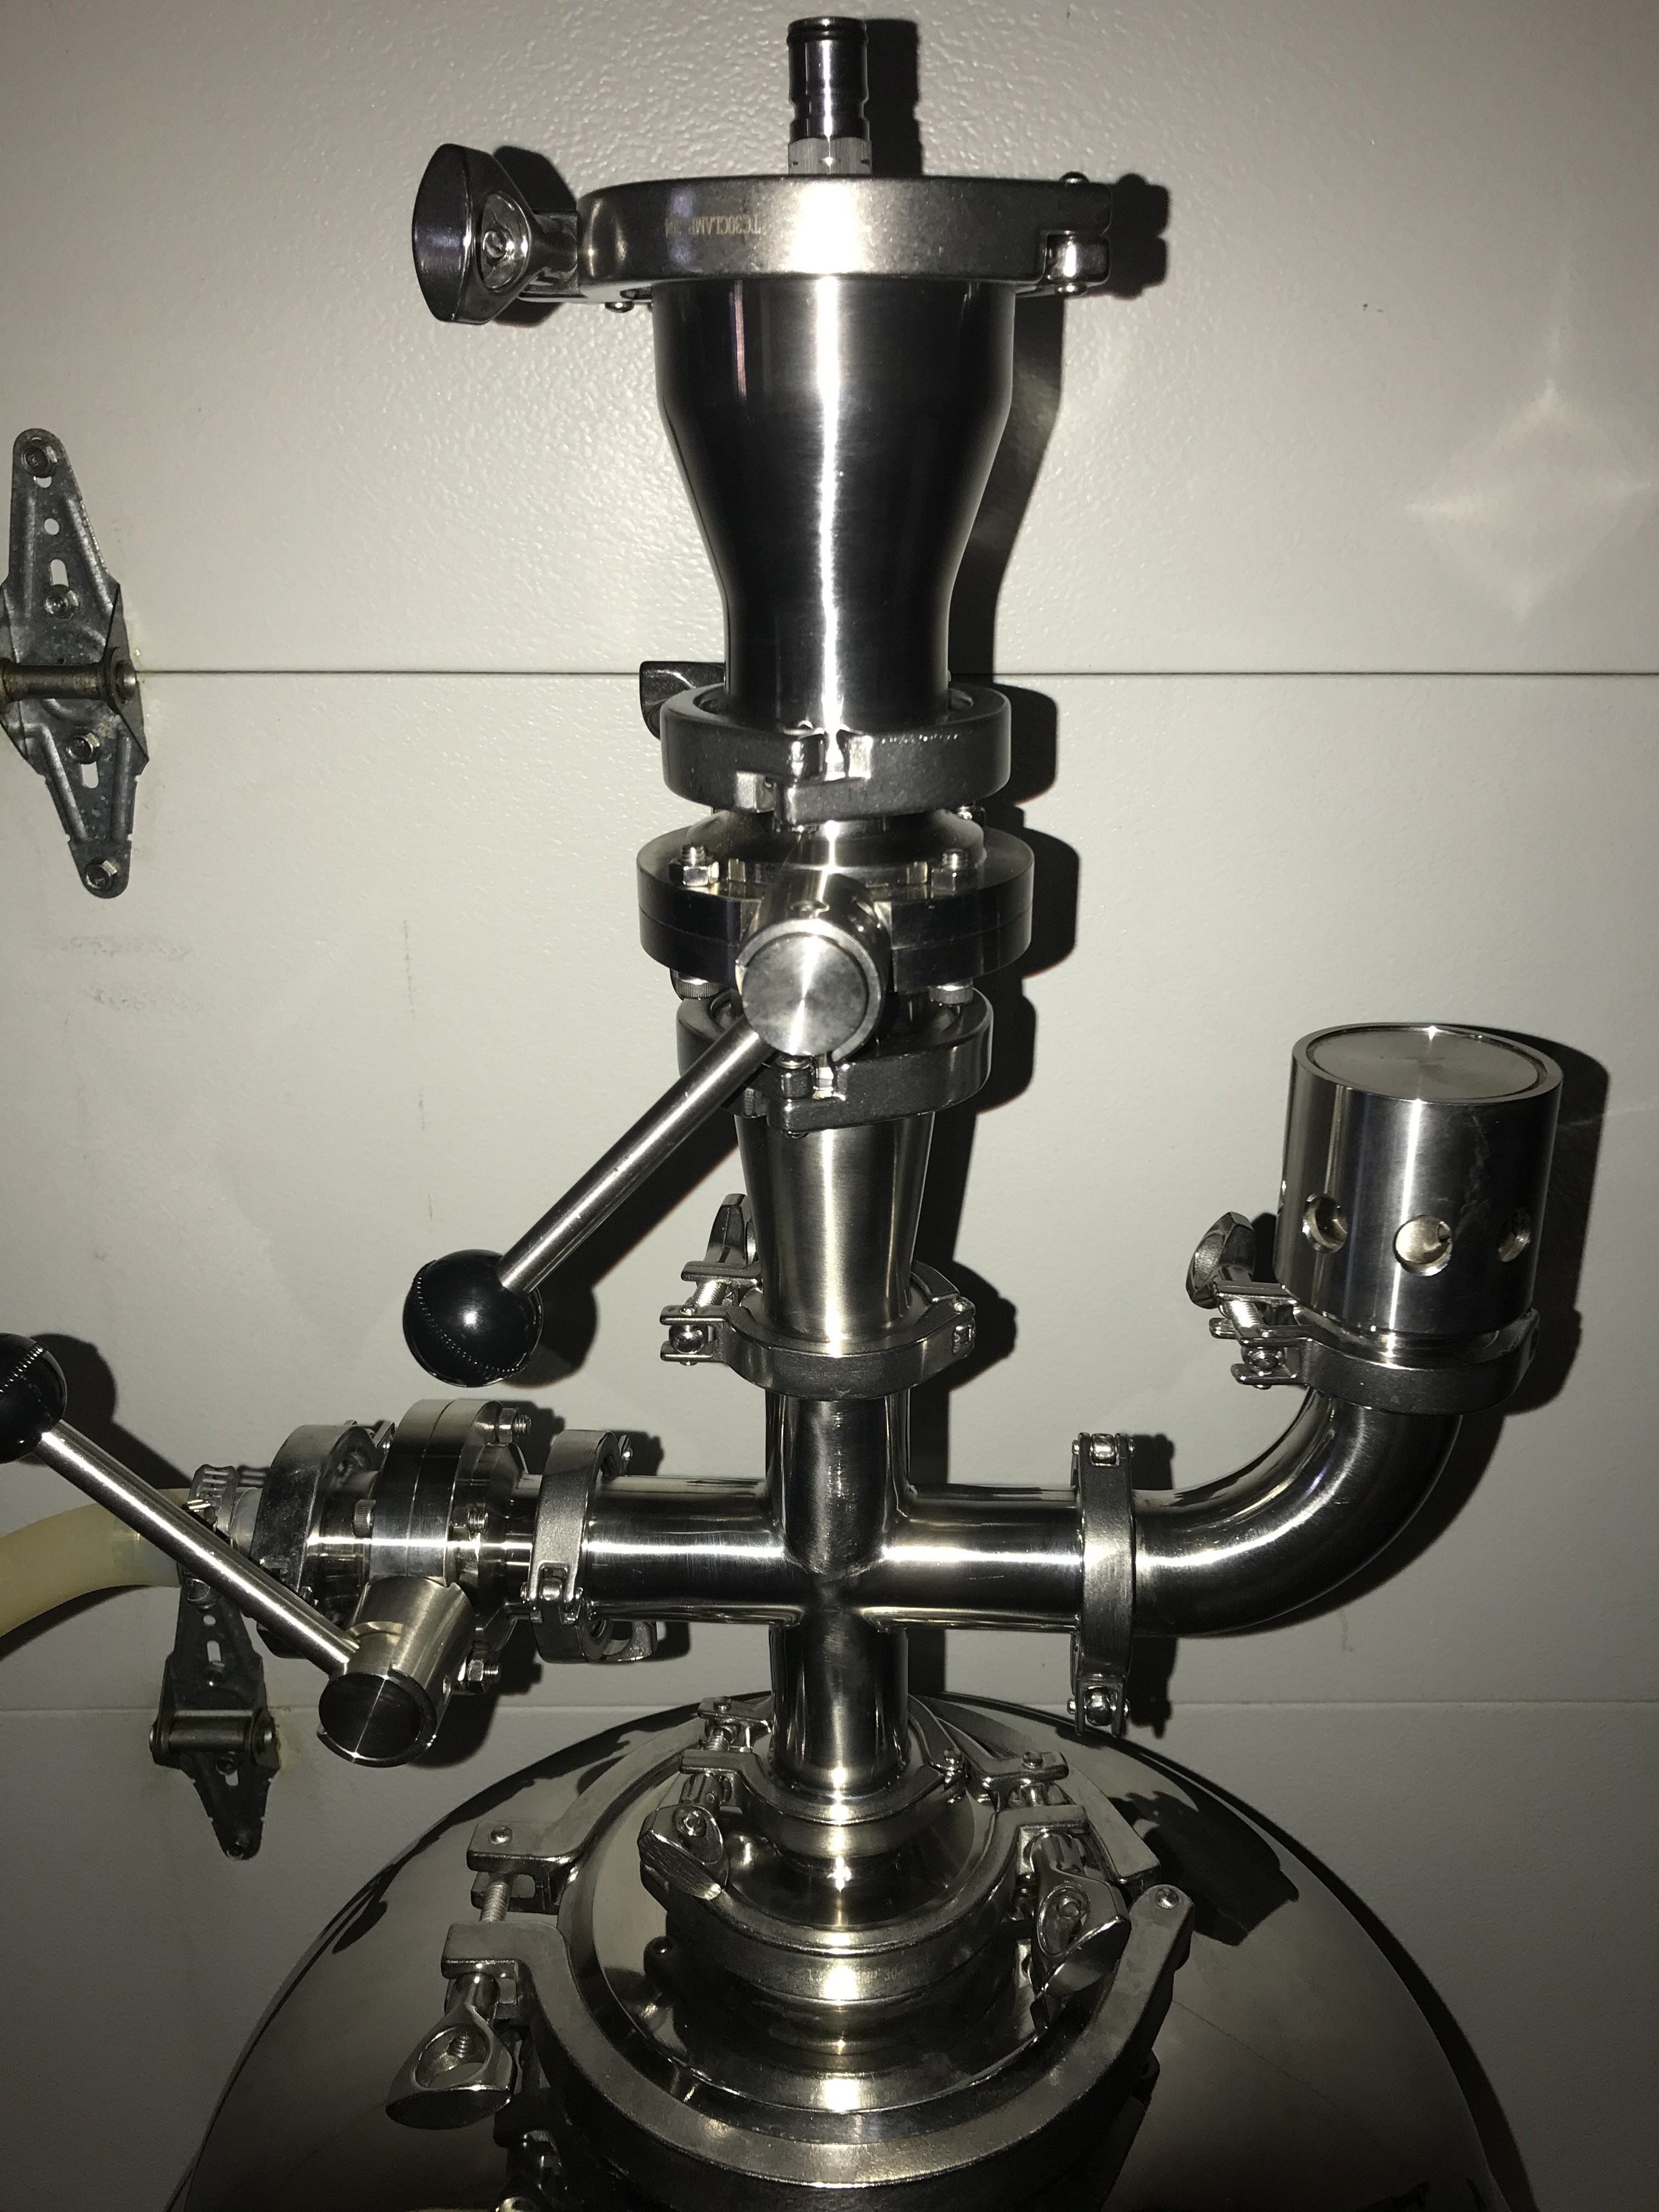
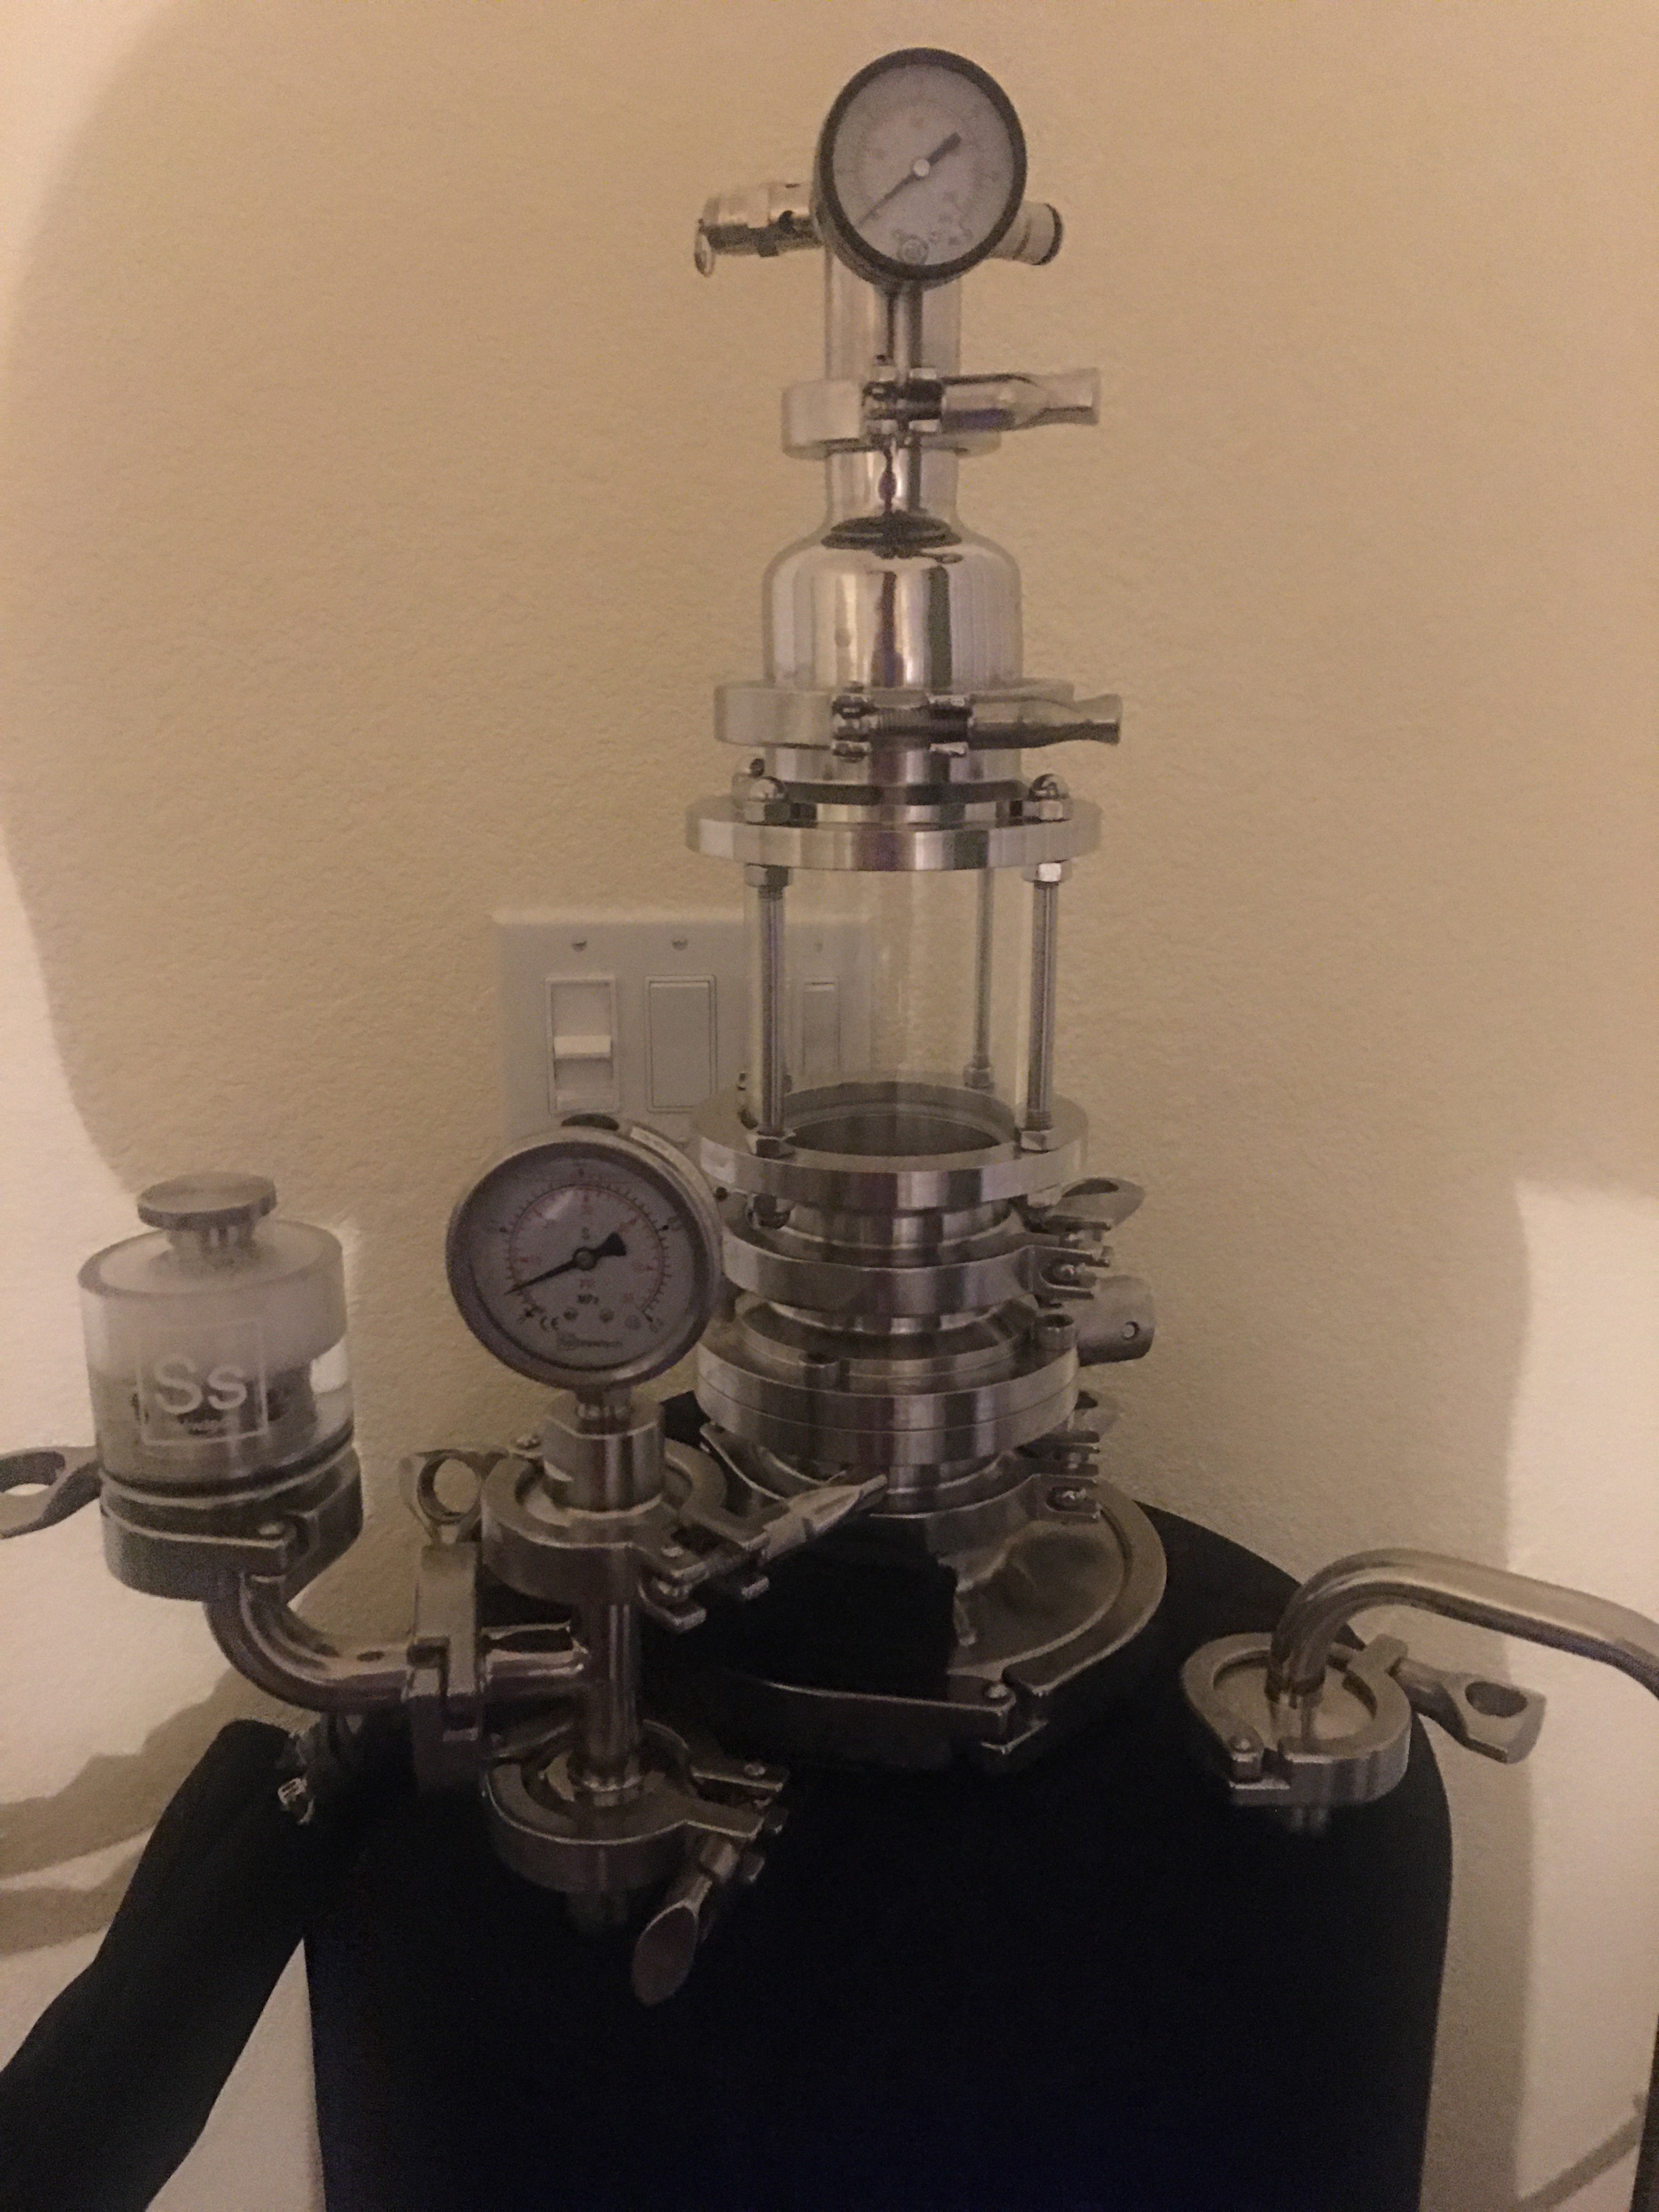
Imagine these components oriented vertically starting with a 3” butterfly valve clamped to the unitank, coupled to a 3” TC Spool of 4 or 6 inches in length (depending on the anticipated hop charge), capped at the top with a 3” TC cap with integral gas-in post and adjustable PRV (a gauge would also be nice) so I can purge with CO2 prior to dropping the hops.
Load with hops, button it up, purge a bunch of times, slowly open the butterfly valve and voila! Hops can go in without introducing O2. Sanitary design, only a few parts and all comes apart for cleaning/sanitizing.
Anyone done this yet?


![Craft A Brew - Safale BE-256 Yeast - Fermentis - Belgian Ale Dry Yeast - For Belgian & Strong Ales - Ingredients for Home Brewing - Beer Making Supplies - [3 Pack]](https://m.media-amazon.com/images/I/51bcKEwQmWL._SL500_.jpg)