• Please visit and share your knowledge at our sister communities:
  • If you have not, please join our official Homebrewing Facebook Group!

    Homebrewing Facebook Group

Help me understand how a plate chiller is supposed to be setup

Homebrew Talk

Help Support Homebrew Talk:

This site may earn a commission from merchant affiliate links, including eBay, Amazon, and others.

guitarguy6

Well-Known Member
Joined
Aug 20, 2014
Messages
241
Reaction score
12
Location
Winnipeg
Hey guys, I found a used plate chiller for sale cheap and am wondering how it should be set up in order to not get trub in the carboy. From my brief research it seems like the wort is taken from the kettle, put through the plate chiller and dumped into the carboy. Wouldn't this get all your trub into the carboy? The other setup I came across was going from the kettle to the plate chiller and then back to the kettle. This makes more sense to me as once you hit your fermentation temp you could whirlpool and then syphon into your carboy. I'm assuming this is only possible with a pump. What pump would you recommend? Anything else I'm missing? This is the plate chiller I'll be purchasing. http://fermentap.com/products/wort-chiller-shirron-plate.html
 
With a plate chiller you'd be best to whirlpool. I personally prefer the chugger pump with the stainless steel head. Other things you probably would want to look into is either a false bottom, a dip tube or a combination of both to keep anything floating around in there out of the plate chiller.

Honestly though, an immersion chiller + whirpooling is easier and less cleaning. If you use hop pellets the plate chiller is going to clog unless you're using a hop bag or something to keep the hops from getting into it. You can make a 50' immersion chiller for $40 to $50. I think a plate chiller is more work than it's worth, but that's just my 2 cents.
 
I currently have an immersion chiller but it takes 25min to cool a 5 gallon batch. I can get the plate chiller for $30 so I think I'll give it a try. I guess I could have 2 carboys sanitized, collect the wort in 1, let it settle and syphon into the other carboy.
 
I use a bazooka screen on the other side of the valve on my kettle with the pump and plate chiller and it works pretty good for keeping almost all of the trub out. If I use a lot of hop pellets it may clog the screen up a little right at the end, but it's usually right about when I need to kill the pump anyways. Then I connect the pump and chiller up to a bucket with a valve on it and cycle oxy-clean solution through it for about 5 minutes to really clean the entire system out.
 
I use a bazooka screen on the other side of the valve on my kettle with the pump and plate chiller and it works pretty good for keeping almost all of the trub out. If I use a lot of hop pellets it may clog the screen up a little right at the end, but it's usually right about when I need to kill the pump anyways. Then I connect the pump and chiller up to a bucket with a valve on it and cycle oxy-clean solution through it for about 5 minutes to really clean the entire system out.

I have a bazooka screen inside my kettle as well so hopefully that will help. Do you go straight from kettle to primary? What do you do about the cold break material?
 
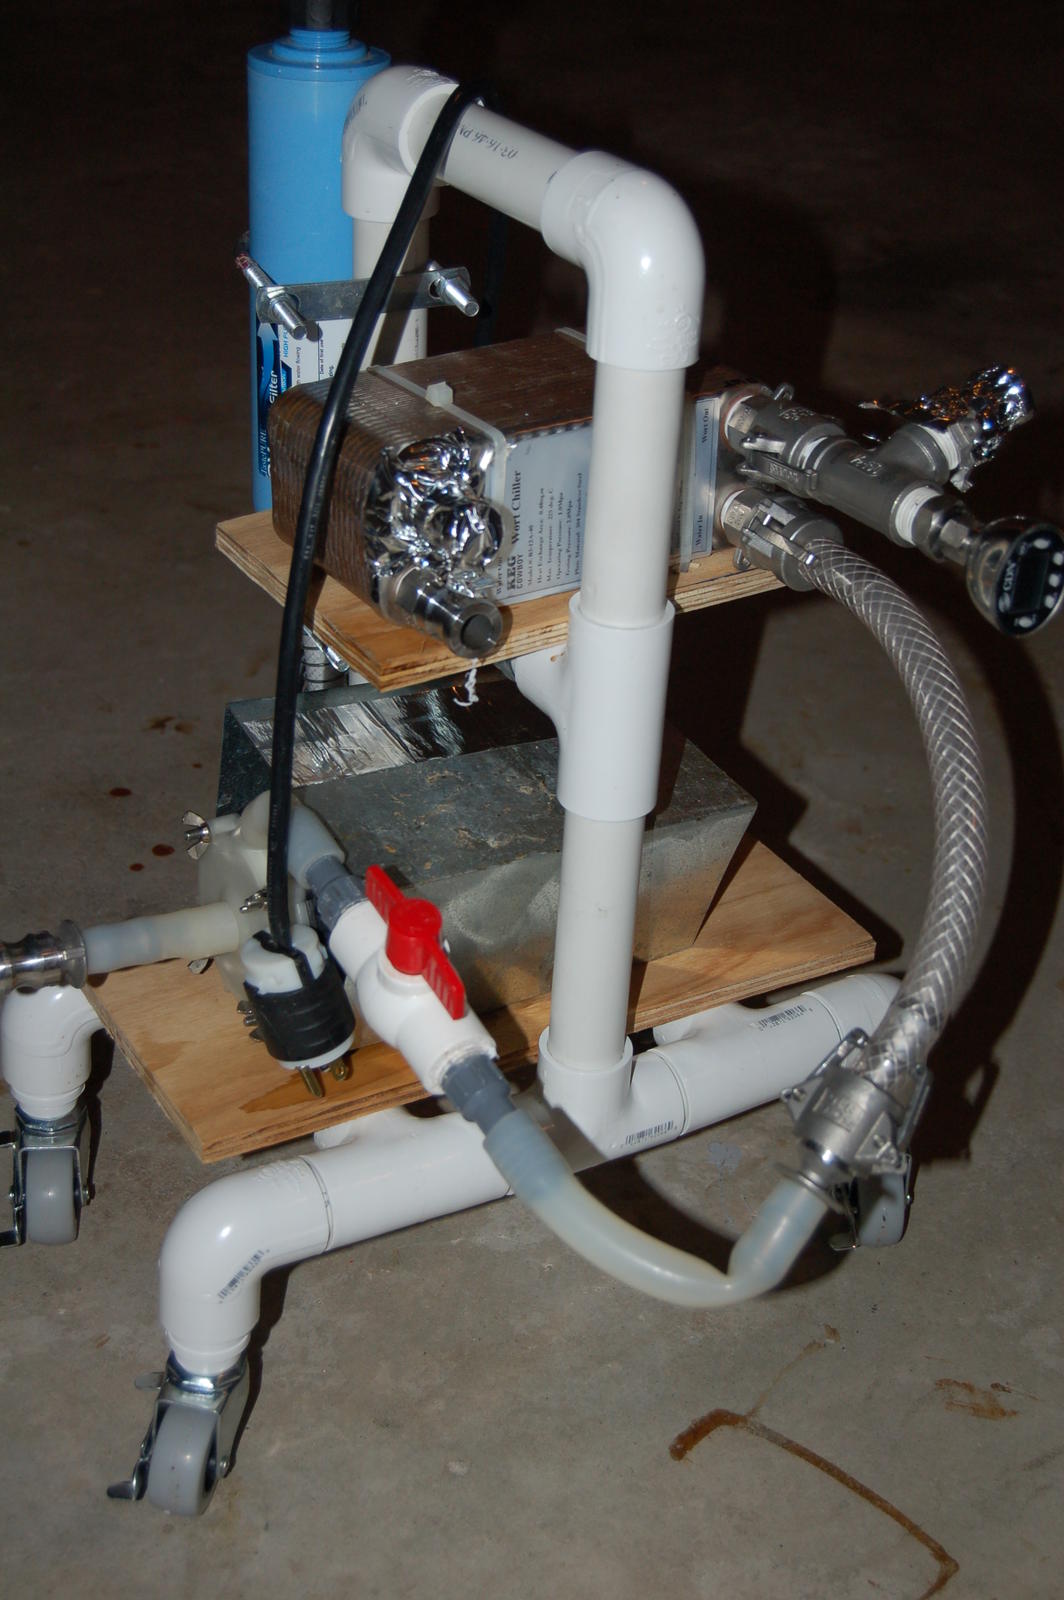
I use a stainless steel hop basket that hangs onto the kettle and a 40-plate chiller. So far, I have not had any trouble. A hop bag will work just as well as the stainless basket. I also built a semi-cloned chill wizzard. I copied another members build (the wheels were my idea). I use one of my 10gal beverage coolers as a reservoir and fill it with 2-3 bags of ice and water in the summer. It knocks down the temp in no time and I use less than 10-gal of water in the process.

I used to use an immersion chiller and I still have one. But, I noticed that water from the hose connection was sometimes leaking and running right down that coiled chiller into my brew kettle. That is when I bought the 40 plate chiller.

DSC_0054.jpg
 
Yeah, you gotta filter the junk somehow before you run it through your chiller.
I use a household water filter housing with a rolled up 300 micron screen in it for an element. Cheap and easy.
 
I'm not enthusiastic about plate chillers........... They have internal and invisible nooks and crannies that cannot be cleaned. No amount of flushing will actually clean these areas. These are identical to typical diesel oil coolers, which I have cut apart, so I know what accumulates in them. YOU know what sticks to the outside of your immersion chiller....... You can see it and you can clean it. If you subscribe to the "what you don't know won't hurt you"........ a plate chiller is for you. If I owned one.......... and I have no intention of ever owning one........ I'd keep it flooded with starsan between uses!

Consider more footage of immersion chiller, and using ice to supplement it. I use ketchup bottles weighted so they float vertically and filled with ice. My 2.5 gallon batches chill in 7 minutes, and I can clean everything....... I can see everything that needs to be cleaned. That matters to me. I also don't need a pump........ keep it simple!


H.W.
 
So let me jump in right................. here.

I am trying to finish the design specs for me new brew rig. I built a "decent" 20' copper immersion chiller with 1/2" tubing, but I also purchased a Therminator. My intention is to place the immersion chiller into a large bucket of ice (5 gallon pickle bucket) and run my 70 degree ground water through the chiller before it hit the Therminator.

Wort -> Chugger -> Therminator -> whirlpool back into keggle
Follow this flow setup until desired temp is almost there, and then pull off the whirlpool to the following flow chart:
Wort -> Chugger -> Therminator -> Primary Fermenter

Does this sound pretty viable? Is the immersion chiller an unnecessary step? I expect that it will only drop my ground water from 70 to maybe 55-60.
 
I would just use ground water until chilled to ground water temp, then go with the ice bucket thing.

Where is the pre-filter in your description.
Like myself and others have said, it's really not an option to use a plate chiller without one.
 
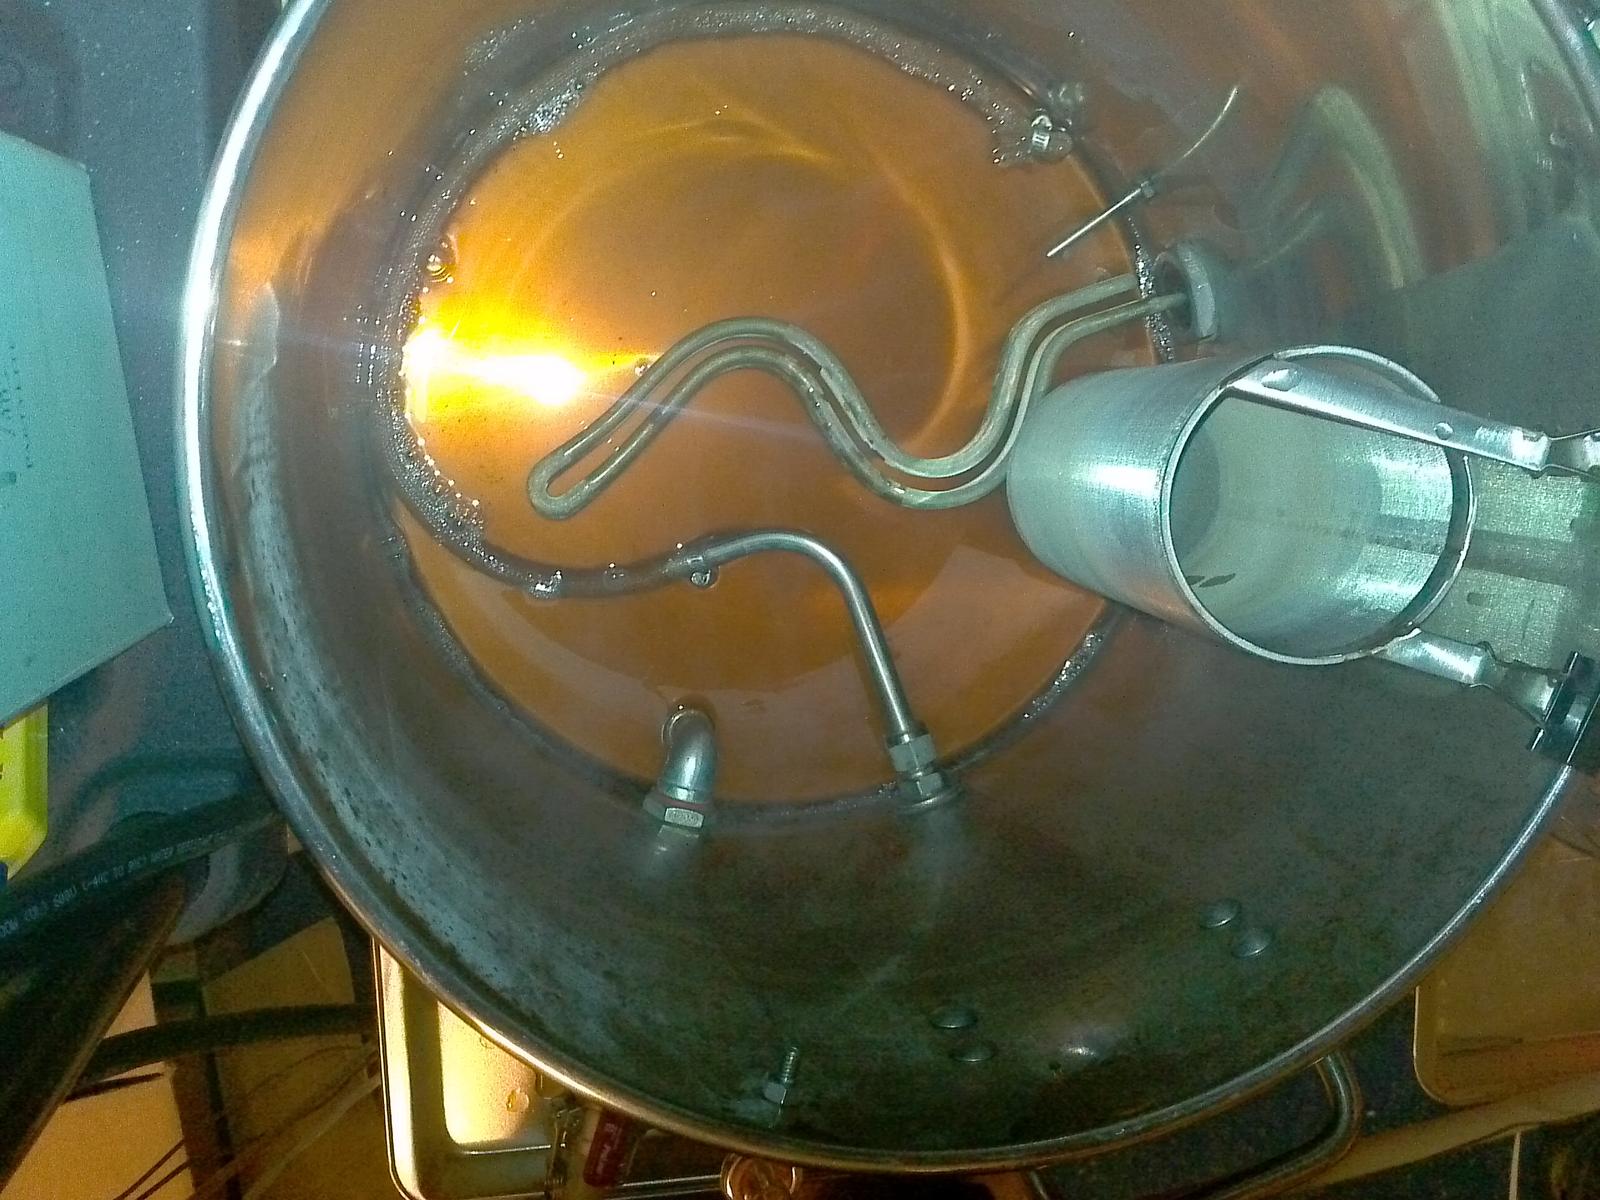
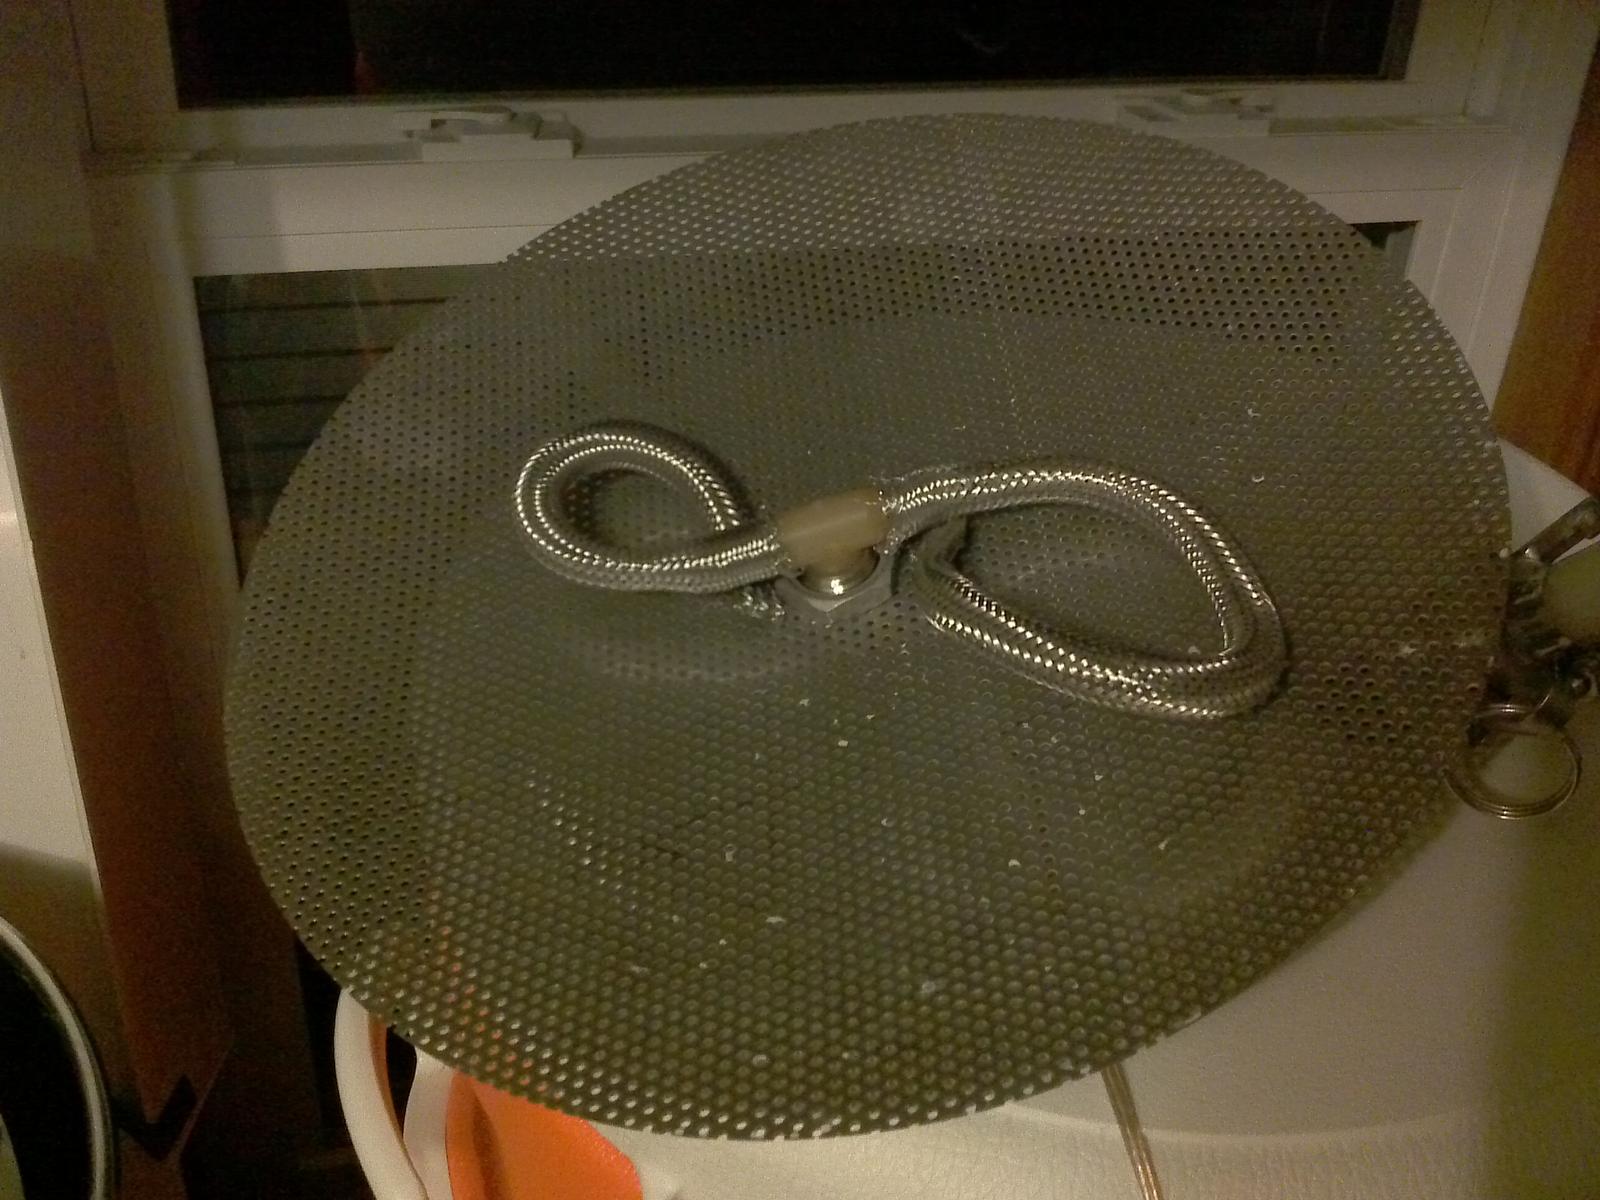
I use stainless braid (about 30" of it coiled around the bottom diameter of my pot where filters my protein break grub and whatever hops get through my 6x14 300micron stainless hop spyder I bought from arbor fabrication. I also recirculate through my rims for the entire mash period which gives me pretty crystal clear wort.

here is an old pic showing my smaller hop spyder I've since upgraded as well as my older braided copper filter which is now stainless but as you can see the recirculating of the wort (done with my old herms setup in the first pic) makes it crystal clear.
second pic is of my new false bottom for the my which replaced a bazooka tube with a copper braided tube as a finer secondary folter inside of that... worked well but I wanted to see if this works better.
I also recirculate hot sort through my plate chiller for the last few mins of the boil to sterilize it before use.... I run hot water through it after every use and stars an every once in a while... never had anything ugly come out of it so It works for me.

IMG_20140304_2016251639346398.jpg


IMG_20141016_201922-1773618019.jpg


IMG_20141016_201713147793433.jpg
 
So here is what I've been doing and it works great if your ground water isn't from somewhere in california or texas.

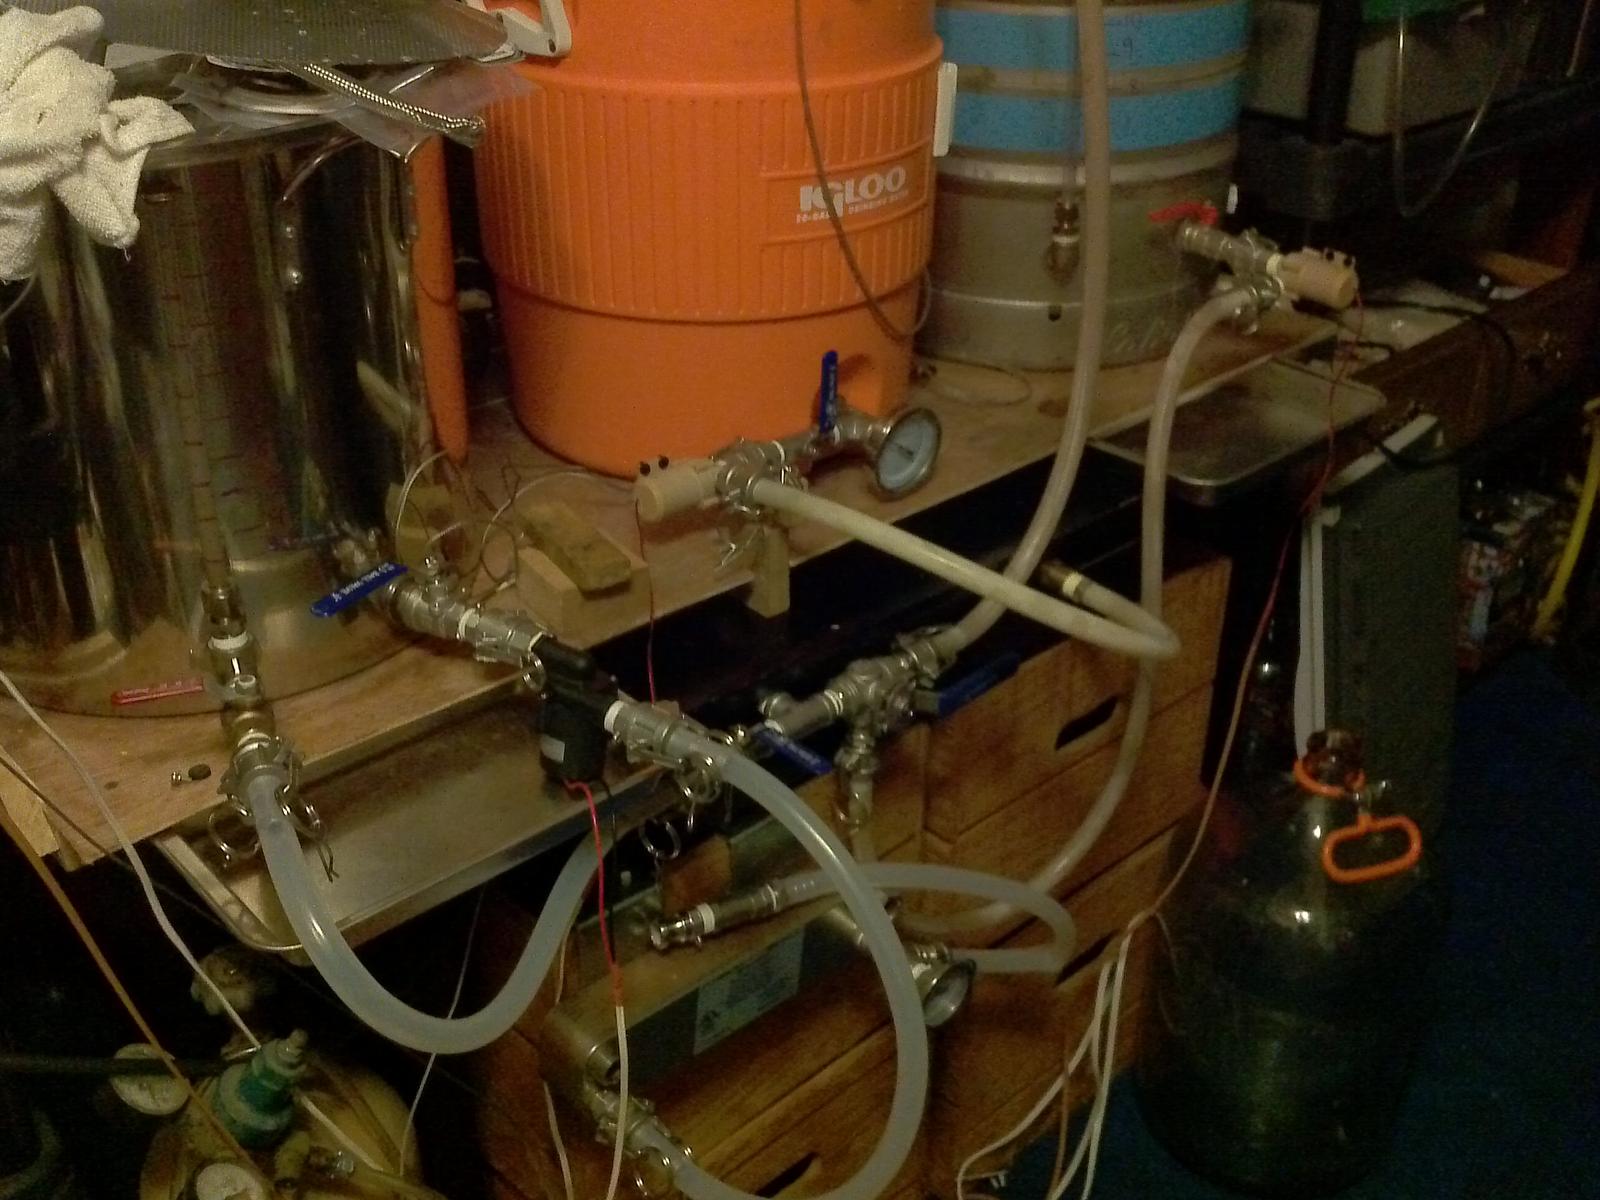
I recirculate without the plate chiller for 5 minutes first to setup the false bottom with whatever solid materials I've got floating around. I have NorCal false bottoms and they are beasts.

Then, I recirculate by draining from BK ----> Pump ----> Plate Chiller -----> BK and basically keep recirculating until the temp coming out reads the temp that I want in my fermenter. Kill the pump, move the recirc hose to my fermenter, and then start the pump back up again. Last weekend when I did this the total volume temp got down to about 95F after maybe 15 mins of recirculating (could have been shorter), and then maybe 5 mins to fill the fermenter. Went in at a perfect 62F for my S-04. The ball valve allows me to tweak the flow a little and helps to not drain the chiller completely when I change hoses around.

IMG_0290.JPG
 
So here is what I've been doing and it works great if your ground water isn't from somewhere in california or texas.

I recirculate without the plate chiller for 5 minutes first to setup the false bottom with whatever solid materials I've got floating around. I have NorCal false bottoms and they are beasts.

Then, I recirculate by draining from BK ----> Pump ----> Plate Chiller -----> BK and basically keep recirculating until the temp coming out reads the temp that I want in my fermenter. Kill the pump, move the recirc hose to my fermenter, and then start the pump back up again. Last weekend when I did this the total volume temp got down to about 95F after maybe 15 mins of recirculating (could have been shorter), and then maybe 5 mins to fill the fermenter. Went in at a perfect 62F for my S-04. The ball valve allows me to tweak the flow a little and helps to not drain the chiller completely when I change hoses around.
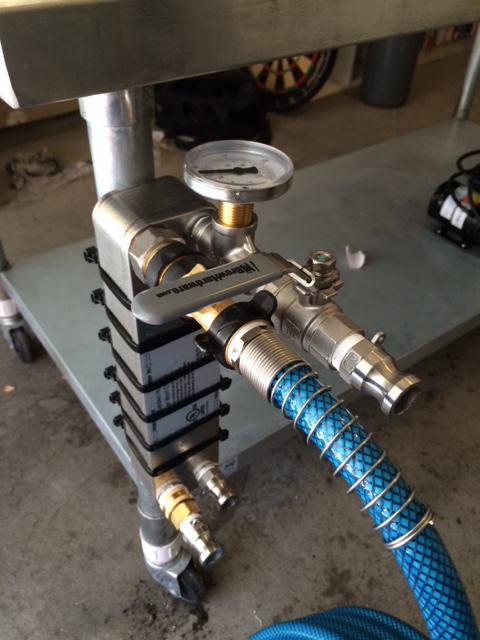
curious as to why you put the plate chiller exit on the top like that? doesn't that leave your chiller full of wasted wort that way? they hold quite a bit...
 
curious as to why you put the plate chiller exit on the top like that? doesn't that leave your chiller full of wasted wort that way? they hold quite a bit...

It's not a huge chiller, I haven't measured how much it holds, but its not a lot. Maybe a little more than a pint. I use a 14' hose to transfer to my fermenter across the room and that holds more. I can just unhook the wort in connection and allow the remainder to gravity drain out, collect it in something sanitary, then add it to the fermenter.
 
It's not a huge chiller, I haven't measured how much it holds, but its not a lot. Maybe a little more than a pint. I use a 14' hose to transfer to my fermenter across the room and that holds more. I can just unhook the wort in connection and allow the remainder to gravity drain out, collect it in something sanitary, then add it to the fermenter.
I have the same chiller... I wondered if you collected it somehow by pulling the bottom hose...
 
Brett,

How did you install that nice thermometer at the T-junction from your plate chiller? I was foolish and did NOT buy a thru-mometer when I purchased my Therminator (Northern Brewer)... so I still need to do some additional configuration.

I see that you have a valve from brewhardware.com, so I assumed that you purchased that set-up from Bobby. It looks like you just threaded it into the T-junction with a brass fitting? Does that mean the probe is something less than 2 inches?

I have almost the same setup if you look you can barely make it out on mine however I used a longer probe and just threaded it in the staight through section of the T and the outlet is in the T part.
I put the ball valve on the exit end of my hose however.
I bought my components mostly from bargainfitting.com and ebay.

Oh yeah... I see it. Very swanky! I think this will have to be implemented in my set-up. Still trying to configure the arrangement of hoses and cam-locks in my head.

Plate chiller exit -> T-junction with temp probe / Male Cam-lock -> Silicon tubing that returns to whirlpool.

I would place the ball valve at the "base" of the T-junction while the "end" of the T would either attach tot eh chiller or dead-stop at the thermometer.

That sounds doable. Throttle capabilities...

no wait. nevermind. Ball Valve would be at the out-flow of the pump. No point in having a second one.
mine is there to shut off flow without draining the chiller.... I recirculate hot wart through the chiller while boiling to sterilize it also I had the extra stainless ballvalve with camlock fitting So I decided to put it to use.
 
Brett,

How did you install that nice thermometer at the T-junction from your plate chiller? I was foolish and did NOT buy a thru-mometer when I purchased my Therminator (Northern Brewer)... so I still need to do some additional configuration.

I see that you have a valve from brewhardware.com, so I assumed that you purchased that set-up from Bobby. It looks like you just threaded it into the T-junction with a brass fitting? Does that mean the probe is something less than 2 inches?

It's a T fitting coming directly off the chiller, and yep, 2" probe, which is just perfect, any longer wouldn't fit. But like augie said you could do it both ways, I just like it that way with the thermometer pointed up. I found the thermometer on ebay for I think $15, so, $5 T, 15 for the thermo and the ball valve for $12'ish. Got all the fittings from Bobby.

I have the same chiller... I wondered if you collected it somehow by pulling the bottom hose...

Yep, I didn't intentionally setup my chiller this way, but like stealth mentioned it does help with any air bubbles and it's been working good for me so far.

mine is there to shut off flow without draining the chiller.... I recirculate hot wart through the chiller while boiling to sterilize it also I had the extra stainless ballvalve with camlock fitting So I decided to put it to use.

Same for me, closing that top ball valve blocks air from coming in the top and letting everything out all at once when you move hoses.
 
Depending on how you chill, (Single pass or Multi Pass) ultimately determines on how you should setup up your chiller. If you do single pass chilling you need the "Throttle Valve" to slow down the wort out of the pump so it will chill to pitching temp in one pass.

When I clean my chiller after brewing, I run a 180F PBW cycle for 30 mins. Then Rinse/flush with same temp water. Then run Star San through it. I have a ball valve on my inlet and outlet that "Locks" the sanitizer in the system.

On brew day, I hook it all up but keep it locked. I do a manual whirlpool with a paddle, cover the kettle and let settle for 30 mins. Then I turn on the pump chiller setup with the throttle valve set very low (about 1/2 gallon a minute) and pump. After the star san is out of the system, I put the wort directly into the fermenter.

I have a side pick up in my kettle with no screen or anything. all the trub and hop material is left behind (In the center of the kettle) from the settling of the whirlpool.

I leaned this technique while helping out at a commercial brewery a friend was starting up. Super simple, keeps trub and hop material out of the chiller and no risk of infection.

One note: I tend to brew alot in a short amount of time(twice a week or so for a few weeks), then not at all for a while (maybe 6 months) due to my job. When I know I wont be brewing for a long time, the star san gets dumped at the end of the cleaning cycle. I leave it in there when I know I'll be brewing in the next few days.
 
Back
Top