• Please visit and share your knowledge at our sister communities:
  • If you have not, please join our official Homebrewing Facebook Group!

    Homebrewing Facebook Group

GE 7 CF (FCM7SUWW) keezer conversion

Homebrew Talk

Help Support Homebrew Talk:

This site may earn a commission from merchant affiliate links, including eBay, Amazon, and others.
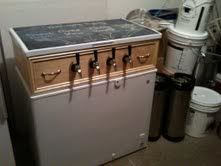
Oh, for anyone following this and making their own, i popped out the little plug in the back of the lid, drilled a hole in the plastic towards the back center of the lid, and that made a nice hole to feed the temp probe through. I didn't really bother insulating the hole that I knocked out of the ceiling, as I don't see a lot of cold air rising up and out of it, but it does save the drill and spray foam step.

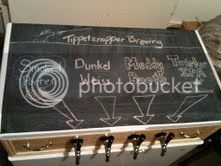
For a finished outside look, I drilled out the tiny center hole a little bit, and made a small 1mm wide cut to the center so I could slide the wire into it.

Going to pull the trigger on the fan, thanks again.
 
I was wondering if you ended up pulling that plug and digging around in there. I avoided the lid as I didn't want to have to mess with the insulation. Same for not carving out the hump.
 
Tom, Radio Shack workers are not very helpful on component parts without an exact name or part number. I got that variable voltage dc adapter, and have decided that the 7.5 or 9 will work best for me, but I can't for the life of me google up the female half of that connection, where I would solder in the two lines from the fan, and then plug the dc adapter in to that. You happen to have any ideas of what I should be asking for?
 
I just cut the end of and crimped the wires right to each other. If you want to keep the plug you can get the other end from Radio Shack and attach it to the fan leads. Just bring in the end you have and show them or root around in the components section.
 
You are right... 4 on the floor if you really jam them and one on the hump. Not enough room to squeeze a second one up there. It is a lot tighter than I thought. Still works for me though... anything over 4 is bonus.

MaxLoad.JPG

TomSD,

How hard did you work to jam 4 kegs into your freezer? I've got the same model and it feels like I'm about 1/4" shy of them fitting like that. I can run 3 on the floor and one of the hump if I have to but I'd prefer to have all 4 on the floor so I'll have the hump free for carbing whatever beer is next.
 
It is a tight fit for sure. The hard part about it is the hump can be bulging out from manufacture. Everything fit but I made it fit better with a mallet, lol. And yeah I still have to juggle them all and give the one I am putting in a twist and a good shove to get it down.
 
This is a great looking keezer, thanks for taking the time to post this.

Quick question: Are the ~10 coats of poly the only thing you did to treat the wood? It almost looks like it was stained. Thanks!
 
Oops I didn't mention the stain when I posted that step did I? lol

I fixed it for future readers, thanks for the heads up.

Yeah I put like four or five applications of Golden Pecan wood finish (Minwax) until it got to the color I wanted before slapping on a ton of poly.
 
just wanted to post my not-so-great pic of my keezer. Finished it this weekend, took a lot of 'inspiration' from this thread.

So thanks!

photo.JPG
 
I love the chalkboard paint. You primed first? How smooth did the paint go on to a coat of primer? I skipped priming and it took some work to get a decent coat... I'm thinking that was a mistake.
 
I used a roller for both the primer and the chalkboard paint (valspar). It was all super smooth, and I only needed 2 coats to get a good cover.

I want to turn the weatherstrip black, or at least darker. It just stands out too much right now against the darker colors. Not sure how to go about it, other than maybe using a sharpie... which will probably end up looking horrible. Any thoughts?
 
Wow, no real idea on that one. Not sure if a sharpie would hold. It would be worth running a couple lines down along the back or inside and let it sit for a day or two then see if it rubs off. If it holds get one of those monster sharpies and run a stripe around the whole thing. I would think you would need to do it two or three times to get full coverage. I've had my best luck with color retention/permanence with sharpie brand for what that is worth.
 
I want to turn the weatherstrip black, or at least darker. It just stands out too much right now against the darker colors. Not sure how to go about it, other than maybe using a sharpie... which will probably end up looking horrible. Any thoughts?

I'm pretty sure the Sharpie will be very streaky. Did you already glue down the weatherstripping? If not I bet spray paint would work well, you could probably still spray it with a small can and a thorough tape job. The question is when the rubber moves will it crack.
 
Your best bet is not to color the weatherstrip but to conceal it with a piece of trim.
 
I want to turn the weatherstrip black, or at least darker. It just stands out too much right now against the darker colors. Not sure how to go about it, other than maybe using a sharpie... which will probably end up looking horrible. Any thoughts?


I hinged my original cover to the collar (kept original weatherstrip) then hinged the collar to the body of the freezer. I used black weatherstripping from home depot. (exterior door section) It has adhesive backing and goes on in a minute. :)
 
All good points I bought some weatherstripping for the old freezer I got of CL for fermenting. Was cheap and pretty sure I saw black there too when I picked it up.
 
I'm getting this same freezer delivered in the next 30 minutes, so it's great as I can use this thread for background though I'm going to try to build a split top so I can have a faucet tower. I'm bummed to learn though that I paid more than some others who got it on sale. I bought mine at HD, which doesn't charge for delivery. I originally went to Sears and BestBuy who would have charged me for delivery ($80). So I'm happy to give a plug for HD.
 
i am about to start a keezer build, but i was wondering if i can just put a tower on the chest freezer lid? is it possible to hole drill a hole on the top of the lid or are there coolant line in the lid? i notice lots of people are building collars thats why
 
i am about to start a keezer build, but i was wondering if i can just put a tower on the chest freezer lid? is it possible to hole drill a hole on the top of the lid or are there coolant line in the lid? i notice lots of people are building collars thats why

You can definitely get away with doing a tower......I think part of the reason why a lot of people construct a collar is because you can fit 5 corneys and a 5# CO2 once you build it up.

The other thing you need to address with a tower is that you will need to make sure you get the cold air up thru the tower with some sort of circulating system.
 
There are some great tower and/or coffin builds on this board too. The biggest issue I have seen is, as saucemanpc mentioned, cooling the tower. Other than that there is no reason not to go through the lid as there is nothing in it but insulation.
 
Wanted to send a quick shout out to Tom for this thread. Have been a long time "lurker" and recently started my keezer project. This weekend I knocked out the trolly and built, stained and insulated the collar. I can't thank you enough for posting all the specifics, as it really has helped a noob like me. I have no advanced skills but thus far, I am proud of myself. :mug:

I will happily post a pic or two once I complete the build - which will hopefully be sometime this week.

thanks again to Tom and everyone else offering great advice!

Butcherbrew
 
Hey Tom....Forgot one thing and sorry if I missed it in the forum. How did you attach the weather stripping to the collar? Staples, Silicon, etc? I am about to complete this step before attaching the collar.

Thanks!!
 
I reused the weatherstripping from the original freezer. It was the rubber strip type that folds over so I just moved the main part out of the way and stapled it down underneath.

As for your questions about the hinges from your PM... I lined everything up then drilled the holes out and installed the bolts. Once I was sure it was all lined up I bolted the hinges down on the collar first. Since the hinge has keyhole style holes on the bottom I was able to loosely install everything then slot the hinge onto the freezer and tighten everything down. I advise doing this before you install your hardware/insulation inside the collar as it becomes near impossible to do so once everything is in. I would have to disassemble my secondary regulator and blower then remove all of the insulation from the collar before I could get to the back of those bolts, lol.

Also, on the hinge. Install large washers or even a drilled plate as the wood is thin and there is quite a bit of torque applied to the hinge when you open it specially if you aren't careful. Even if you are careful it is a lot of weight to be slinging around on such thin wood. I was far more worried about the collar itself giving way than the hinges or any other hardware failing.
 

Latest posts

Back
Top