Garage Brewery Build

Homebrew Talk - Beer, Wine, Mead, & Cider Brewing Discussion Forum

Help Support Homebrew Talk - Beer, Wine, Mead, & Cider Brewing Discussion Forum:

This site may earn a commission from merchant affiliate links, including eBay, Amazon, and others.

tmurph6

Well-Known Member
Joined
Dec 5, 2010
Messages
445
Reaction score
61
Location
katy
Yet another brewery build, but thought I'd share my build like so many others before me. I'm doing a couple of things a bit out of the ordinary, but essentially everything in the build should be similar to any HERMS build.

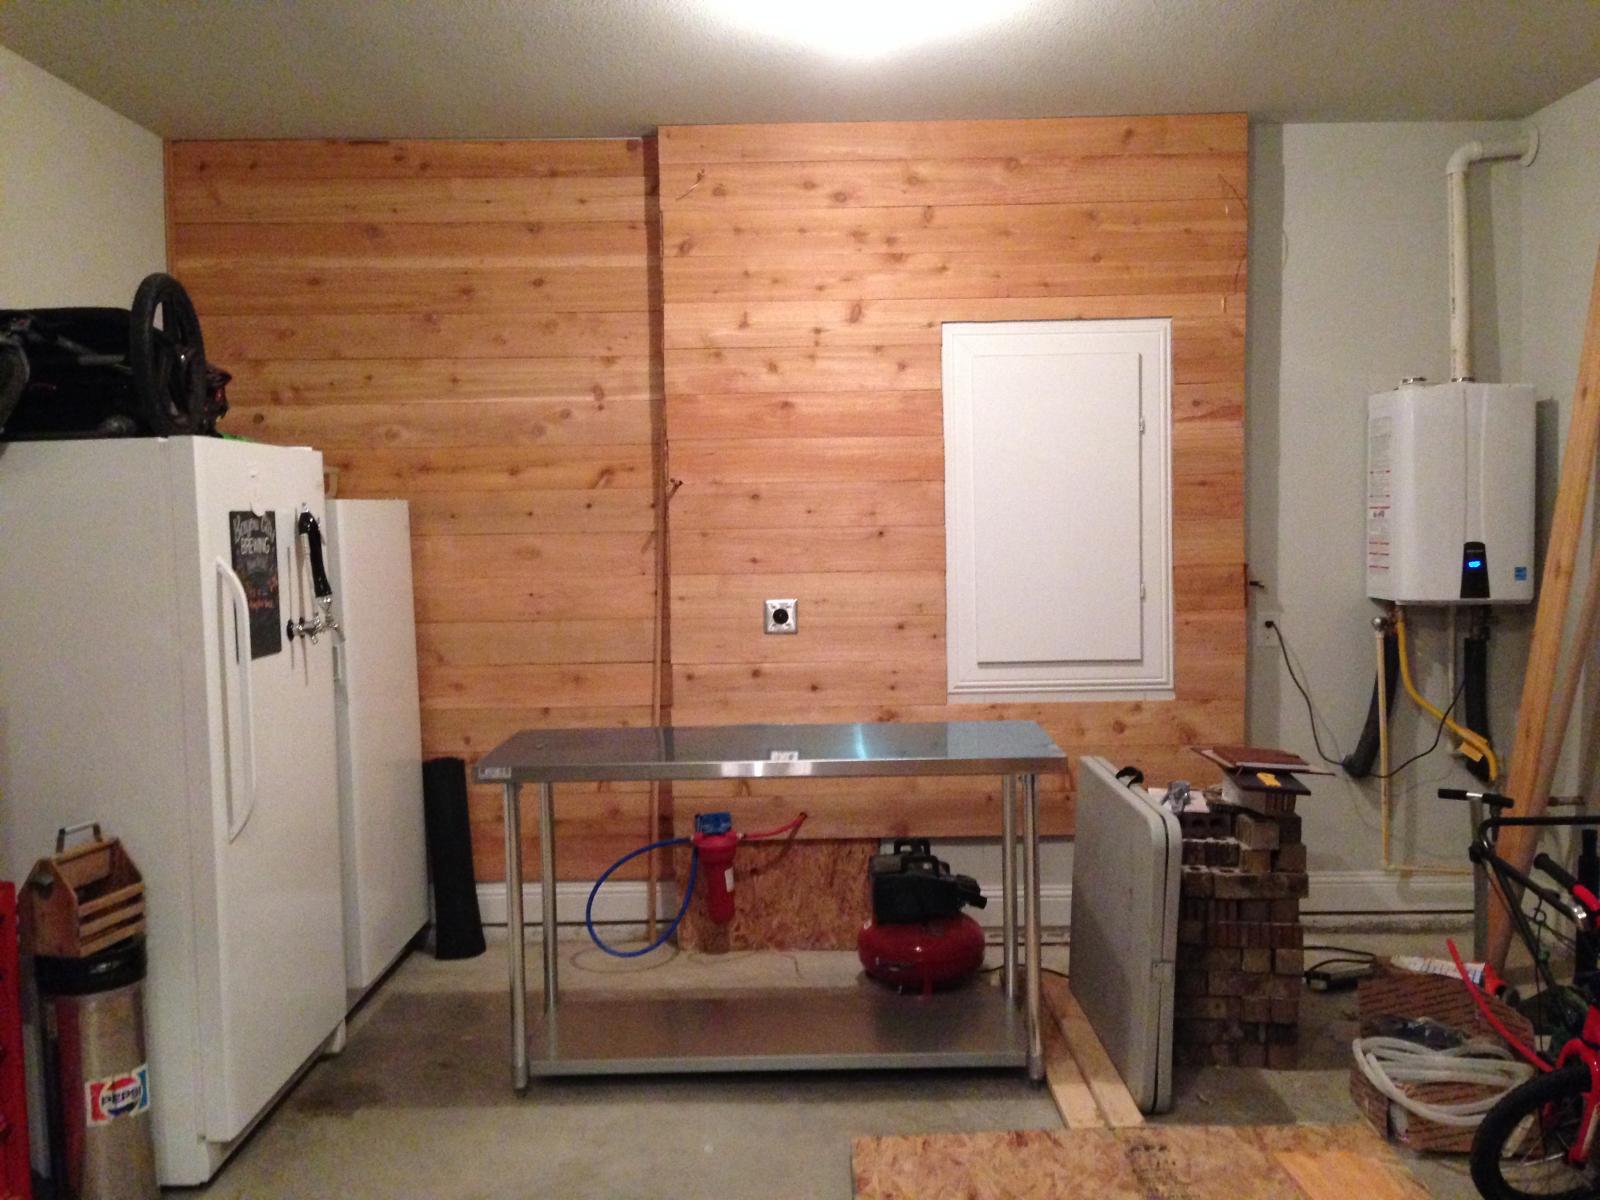
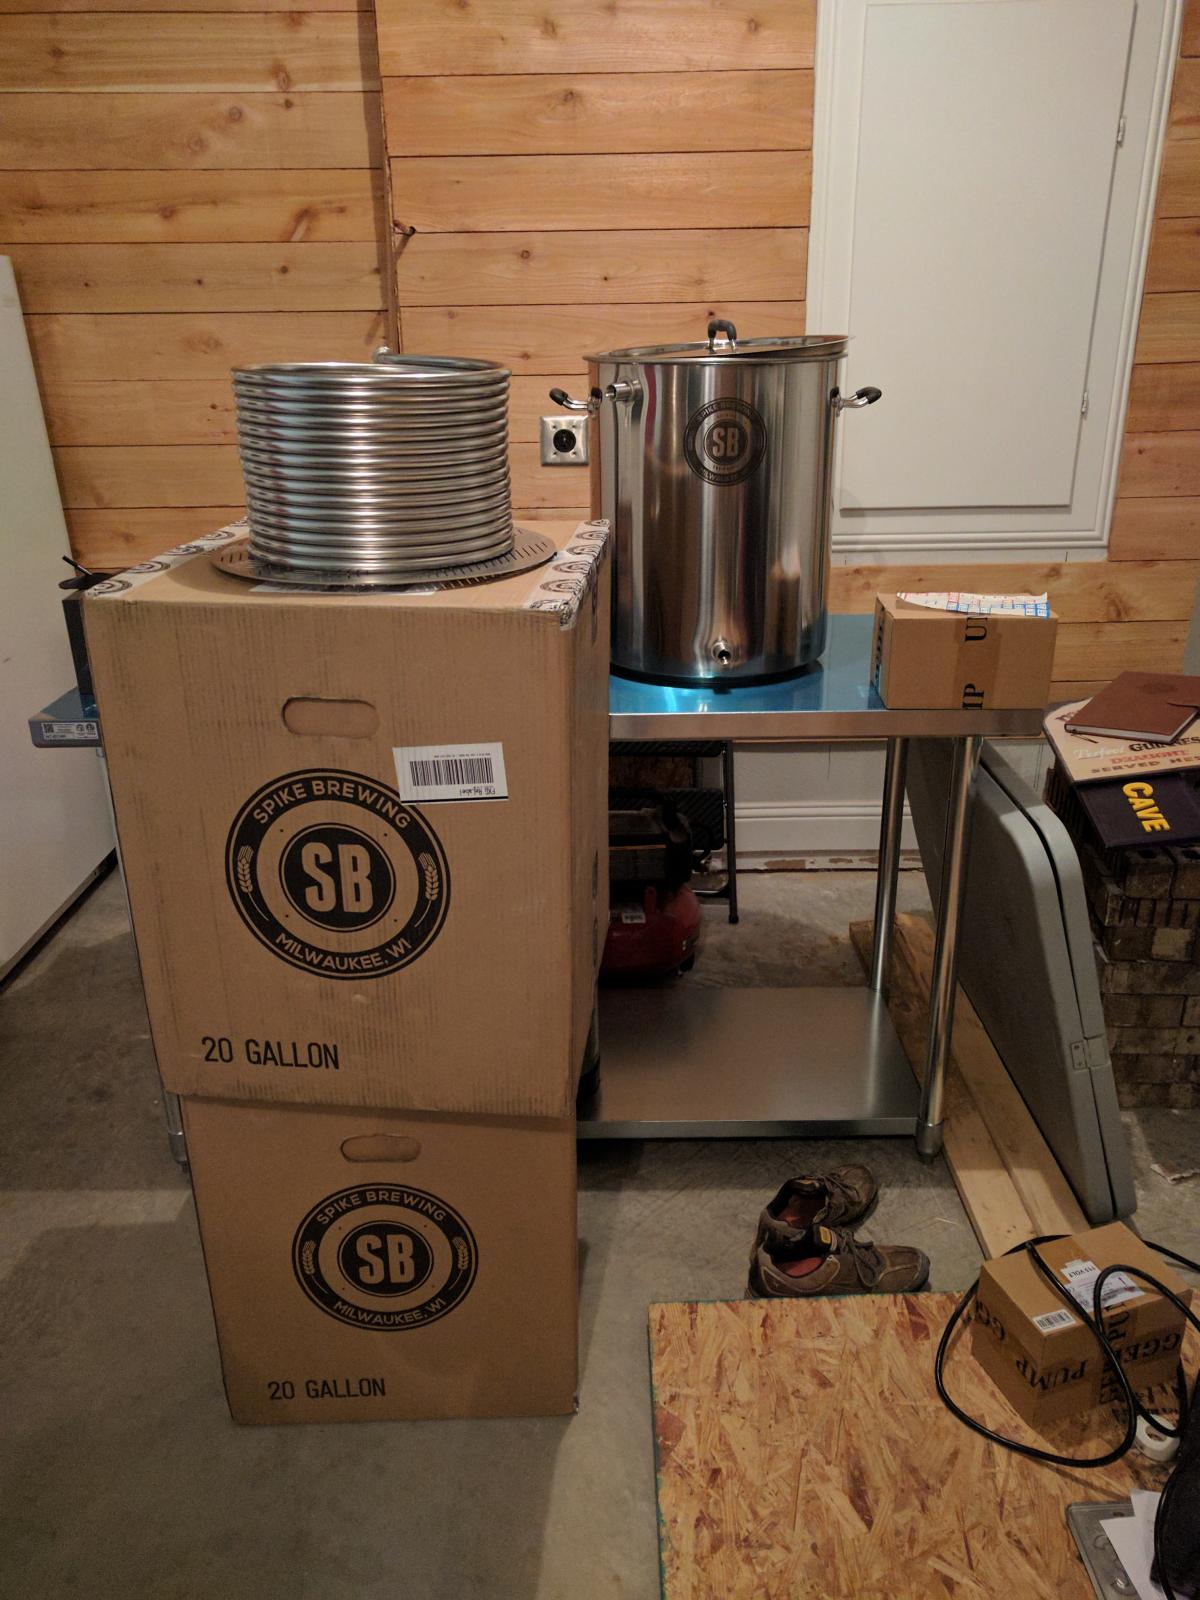
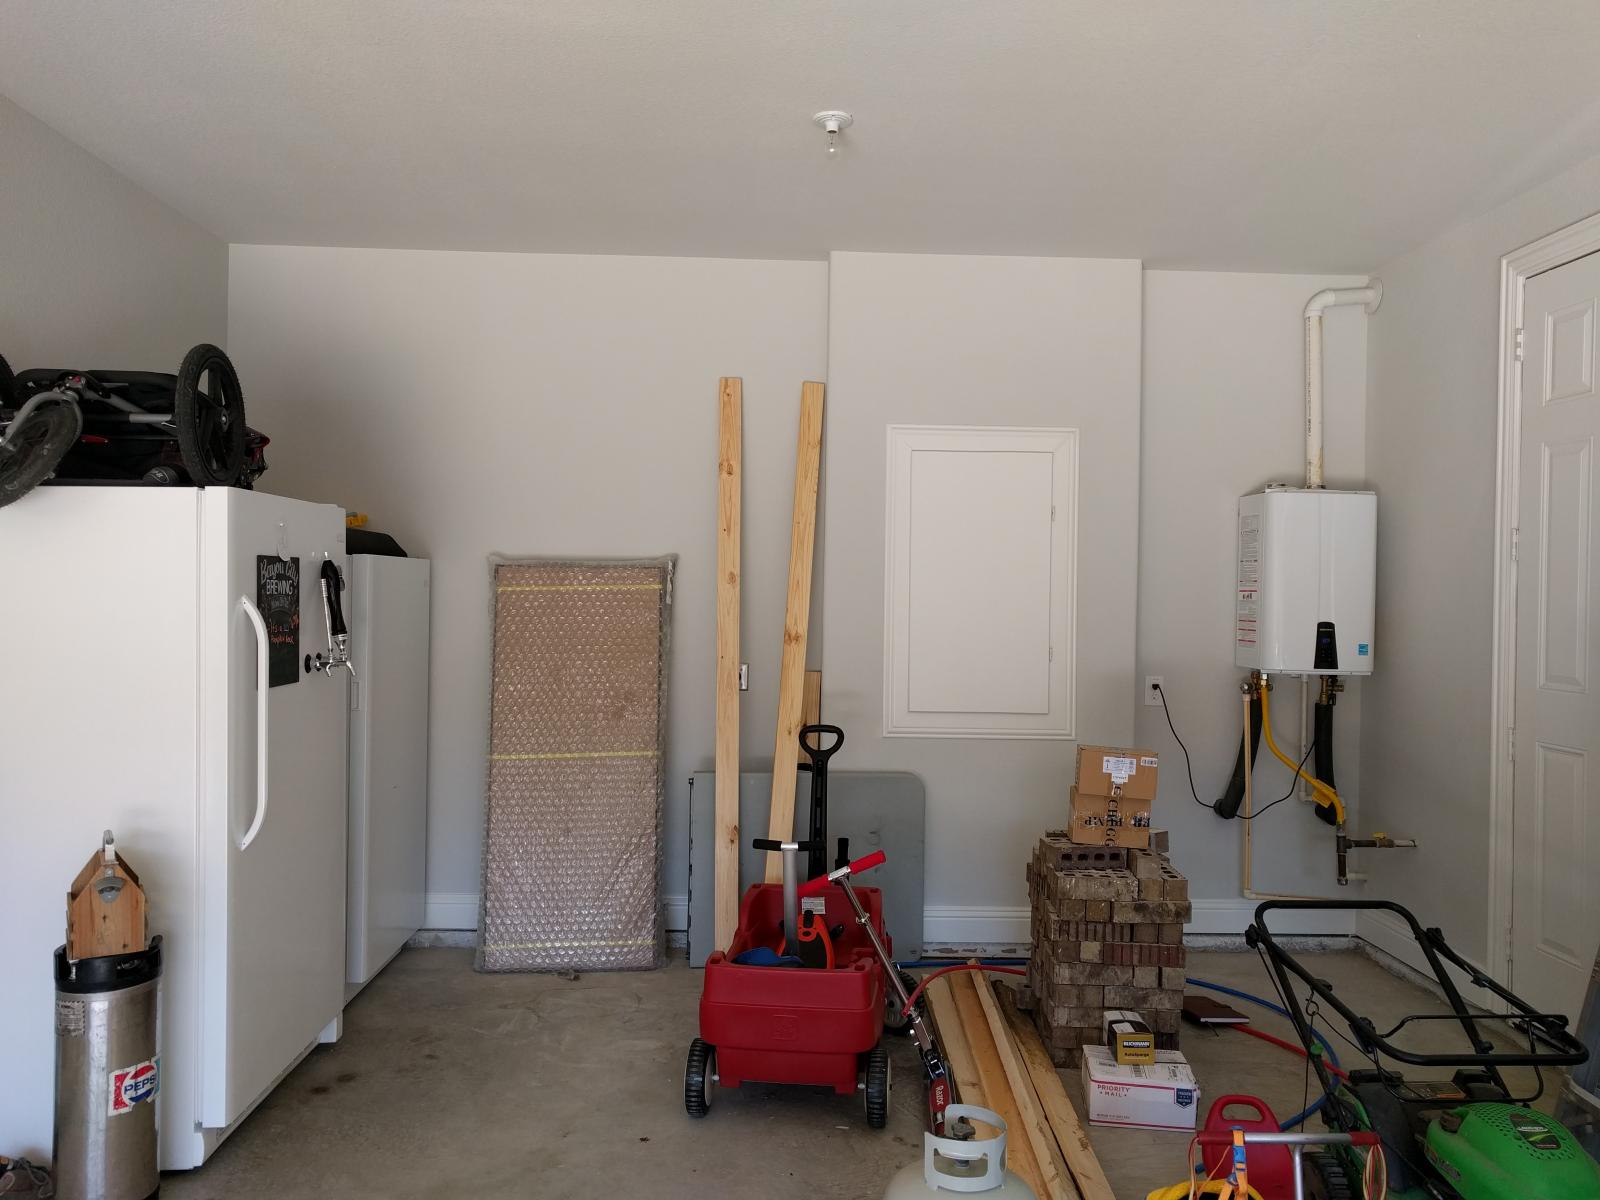
First picture is the before. Inside the large cardboard box is my 60" stainless work table where my kettles will sit.

The second photo shows my hot and cold water lines. One of the benefits of building your house is you can plan for the garage brewery. The cabinet has a water distribution manifold, which makes it handy to pull hot water straight off my on demand hot water heater for brewing water. The cold water line I'll use exclusively for chill water.

The third picture is where I left the brewery after working all weekend on it, I decided last minute to run the cold water off to the right side of the manifold vs the left side since that's where my brew kettle will be, so it's more handy to have the cold water valve over there. The hot water I routed down into a hot water filter, which is interesting as it's not a carbon block filter, but more of a 5 micron cotton filter with a stainless core and some kind of descaling beads, which I'm kind of unsure what that's going to do. In any case I'm going to send a sample of the post filtered water to ward labs to get my brewing water tested, hopefully the 'descaling beads' lower the calcium content in my already very hard water. Lastly, I have a copper stub out about 6 ft off the floor which will essentially fill my HLT and Mash tun with filtered hot brewing water. Of course in the middle is a 30A 220V outlet, nothing special there.

Ultimately, the entire back wall except the portion near the hot water heater will be cedar planked, but haven't gotten that far yet (you can see the first cedar plank went on where the water filter is and all the planks stacked up in the picture).
IMG_20170107_131621.jpg


IMG_20170107_141320.jpg


IMG_20170108_162617.jpg
 
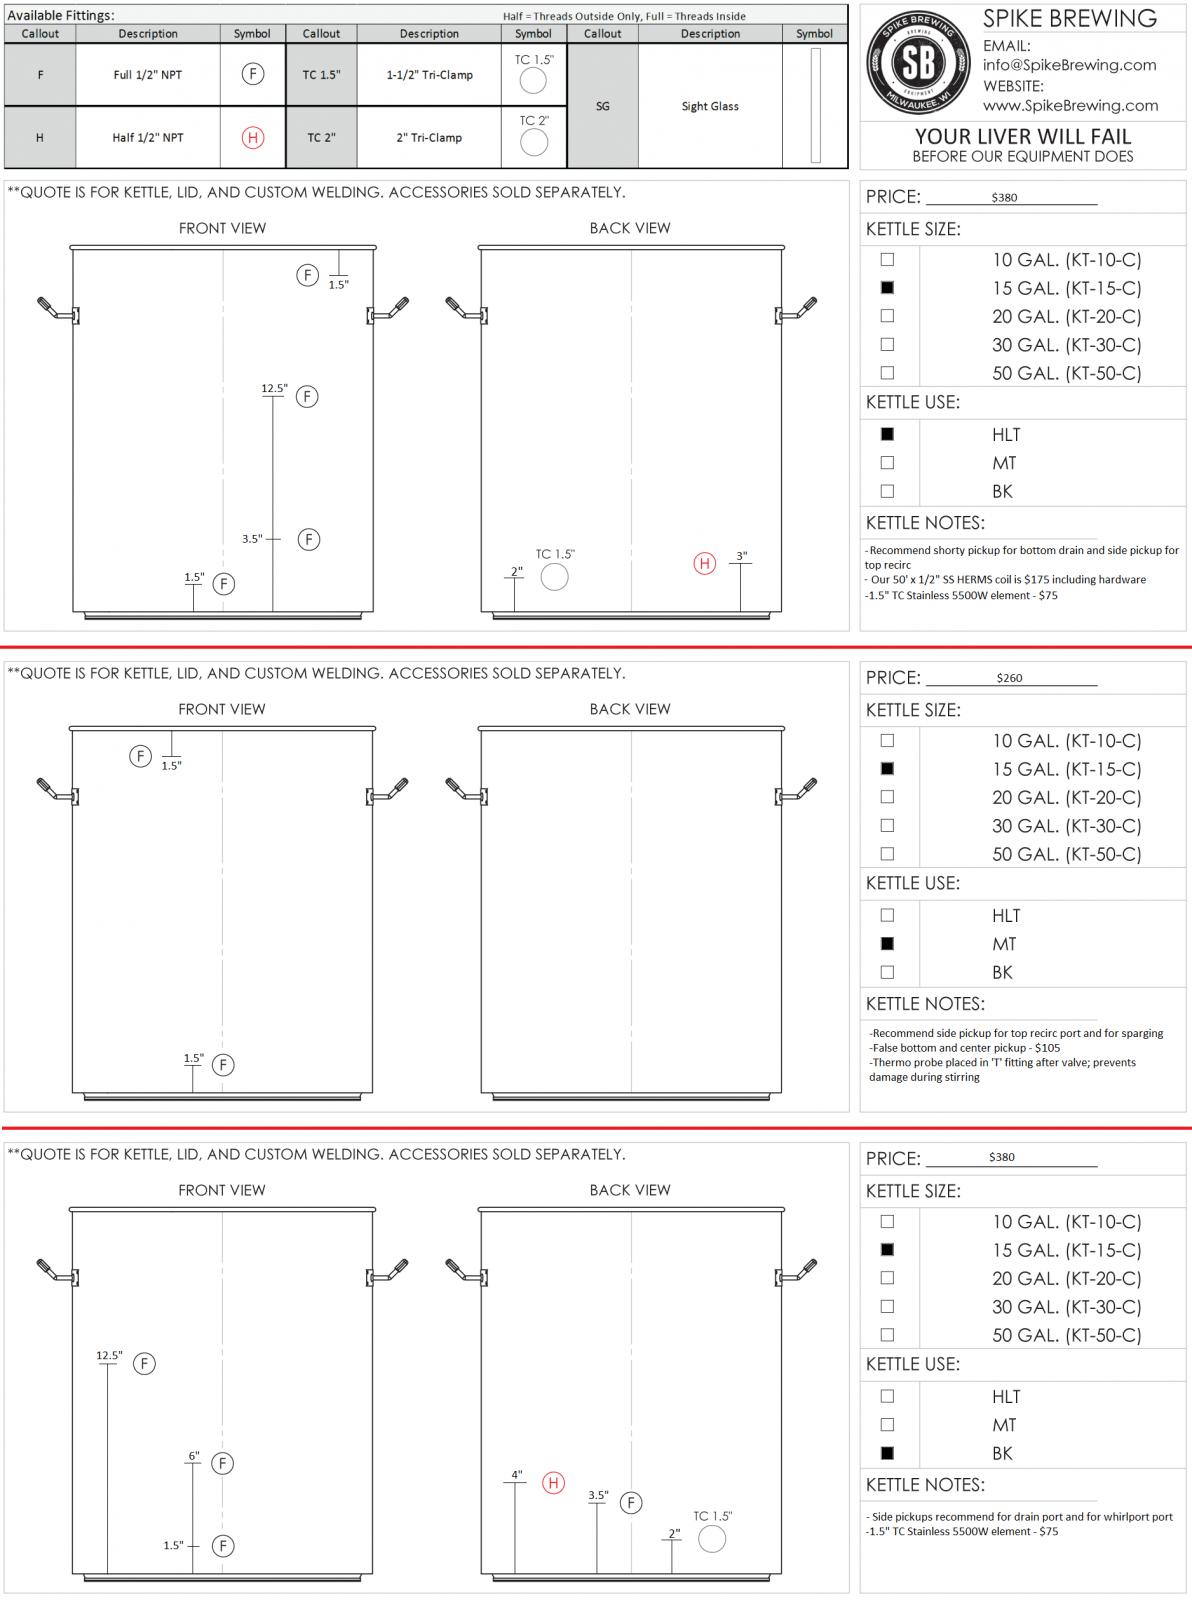
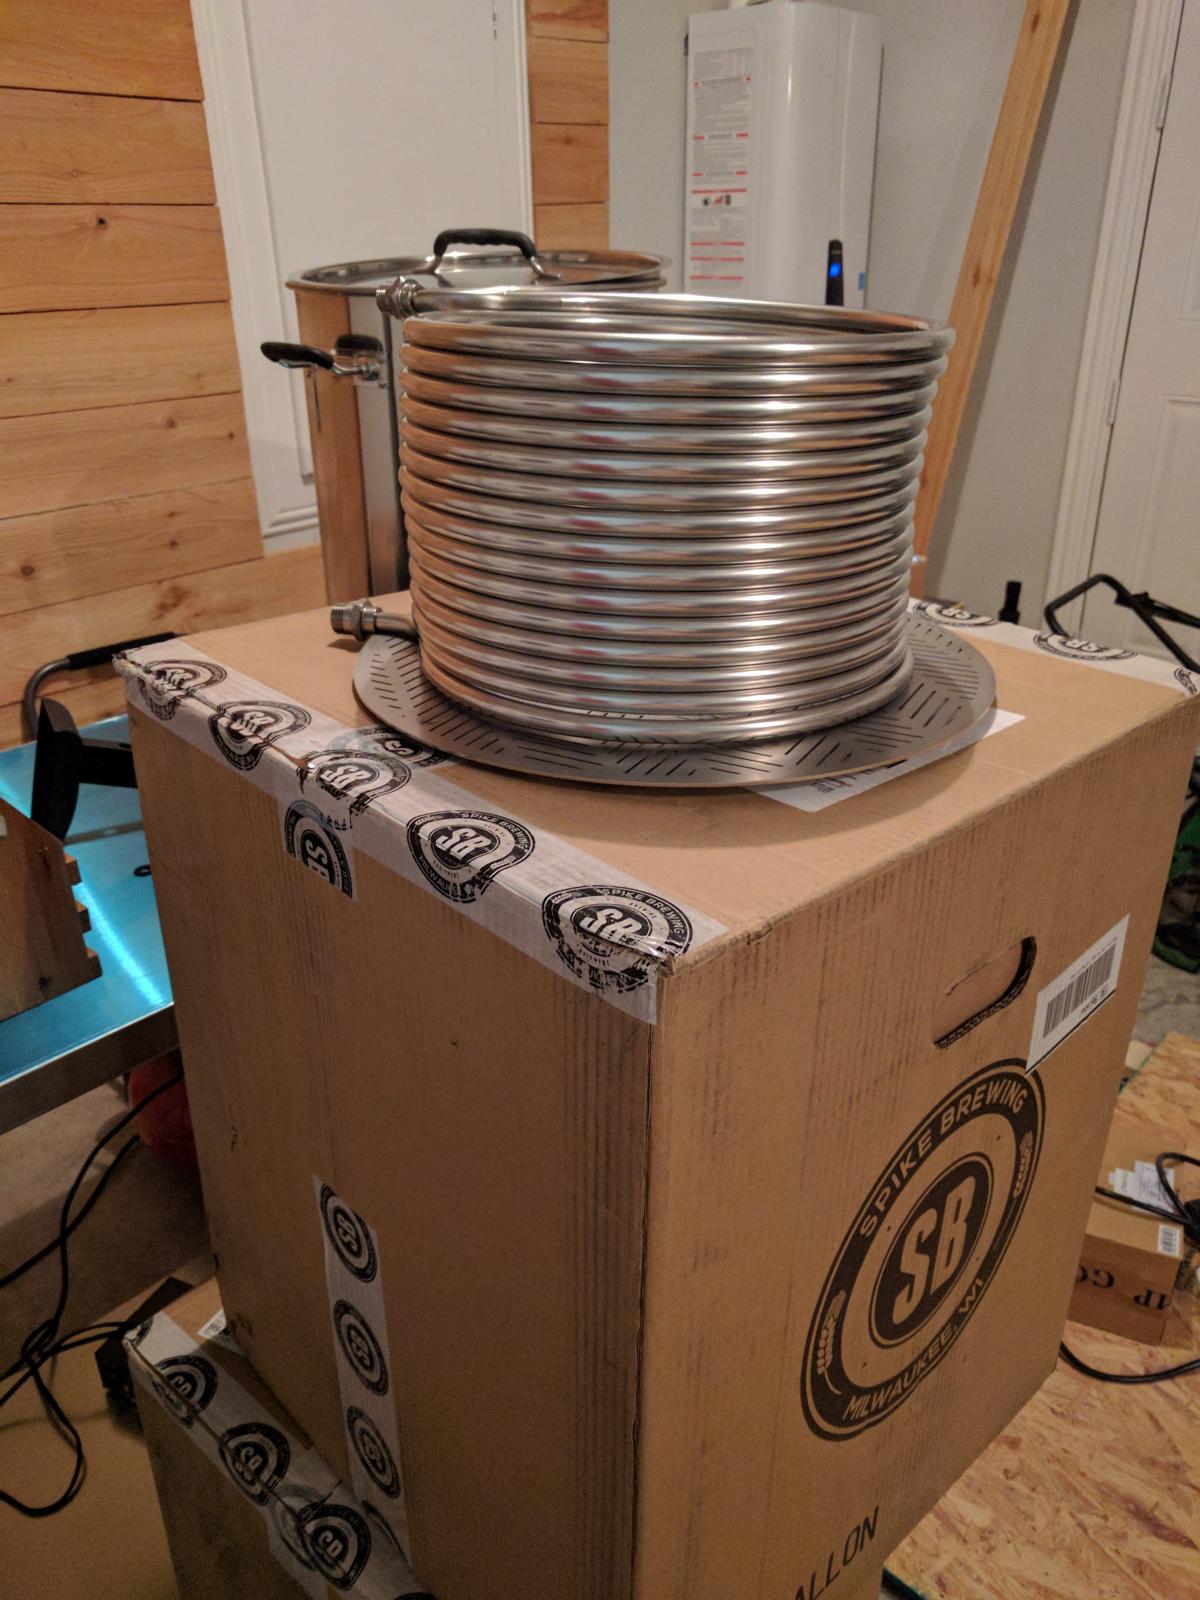
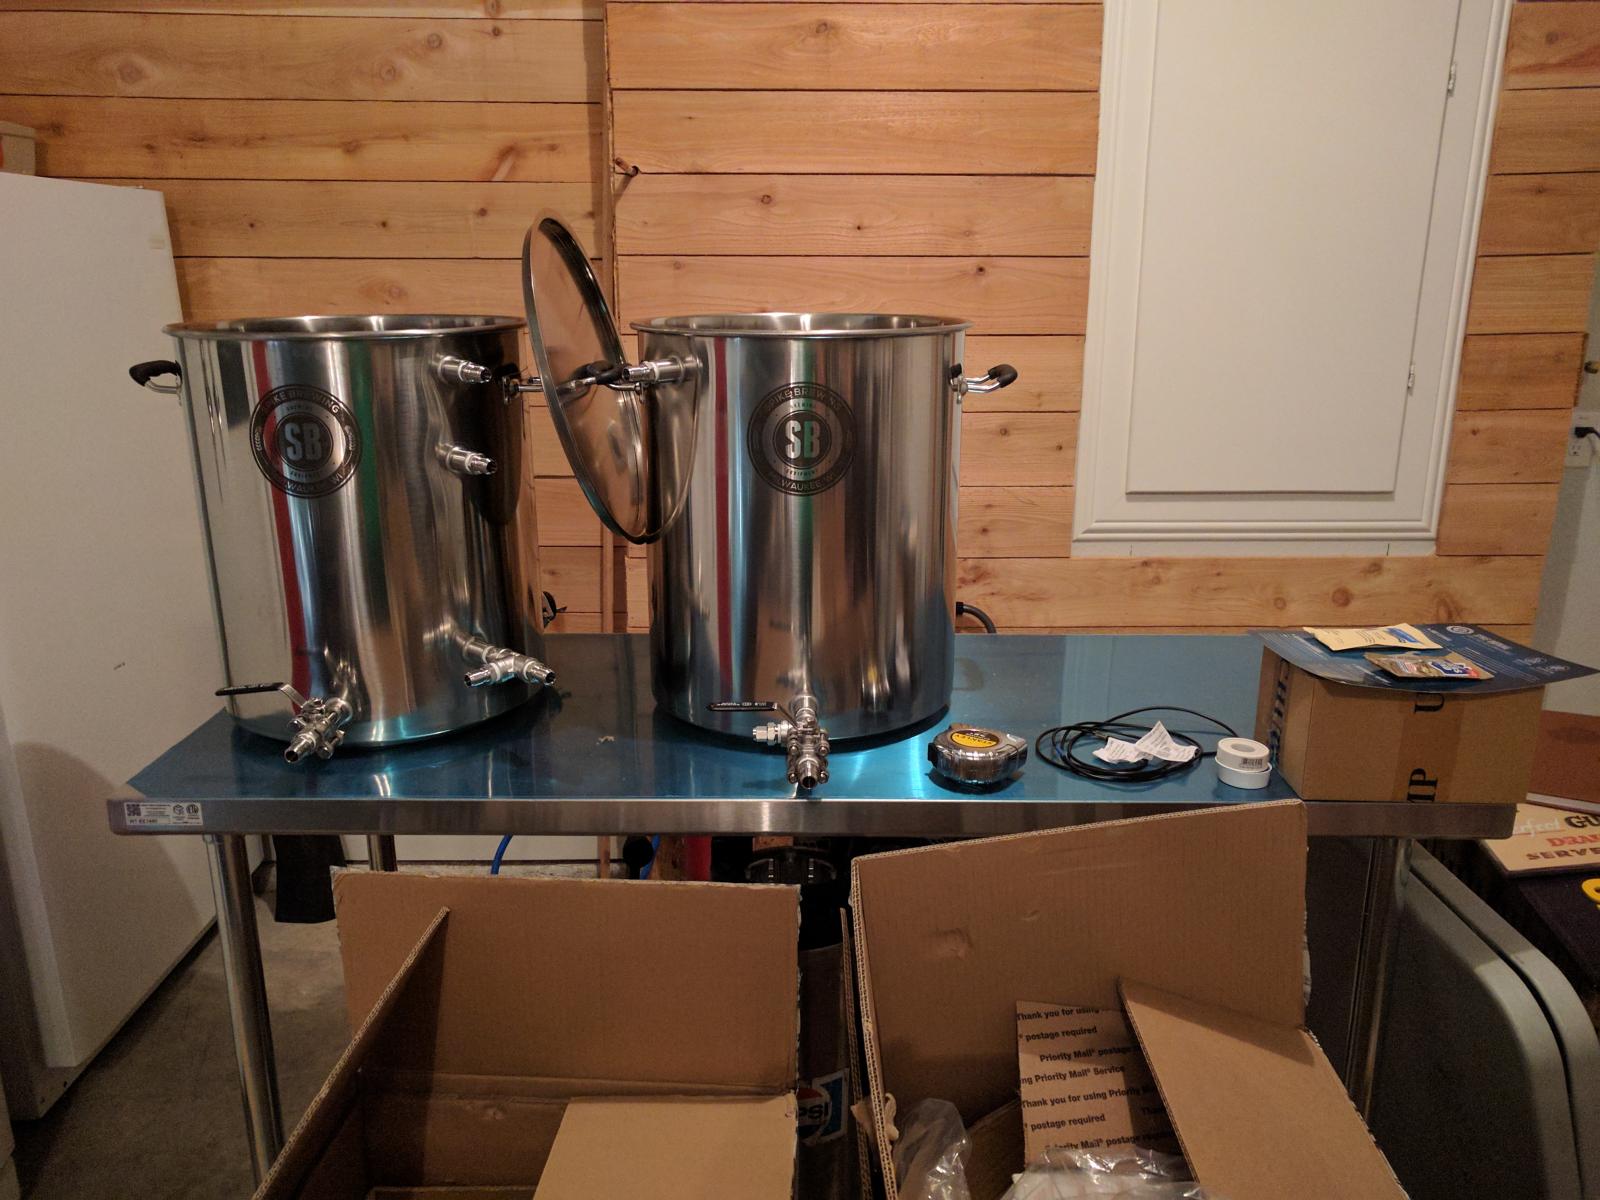
Thought I'd share the kettle design as well since they haven't come in yet. Three 15 gallon custom kettles from Spike brewing, i was especially interested in the welded fittings they provided as it was one less thing to worry about.

The HLT has your standard ports, recirc port, TC port for heating element, two ports for herms coil, valve port, and a port for the thermo probe

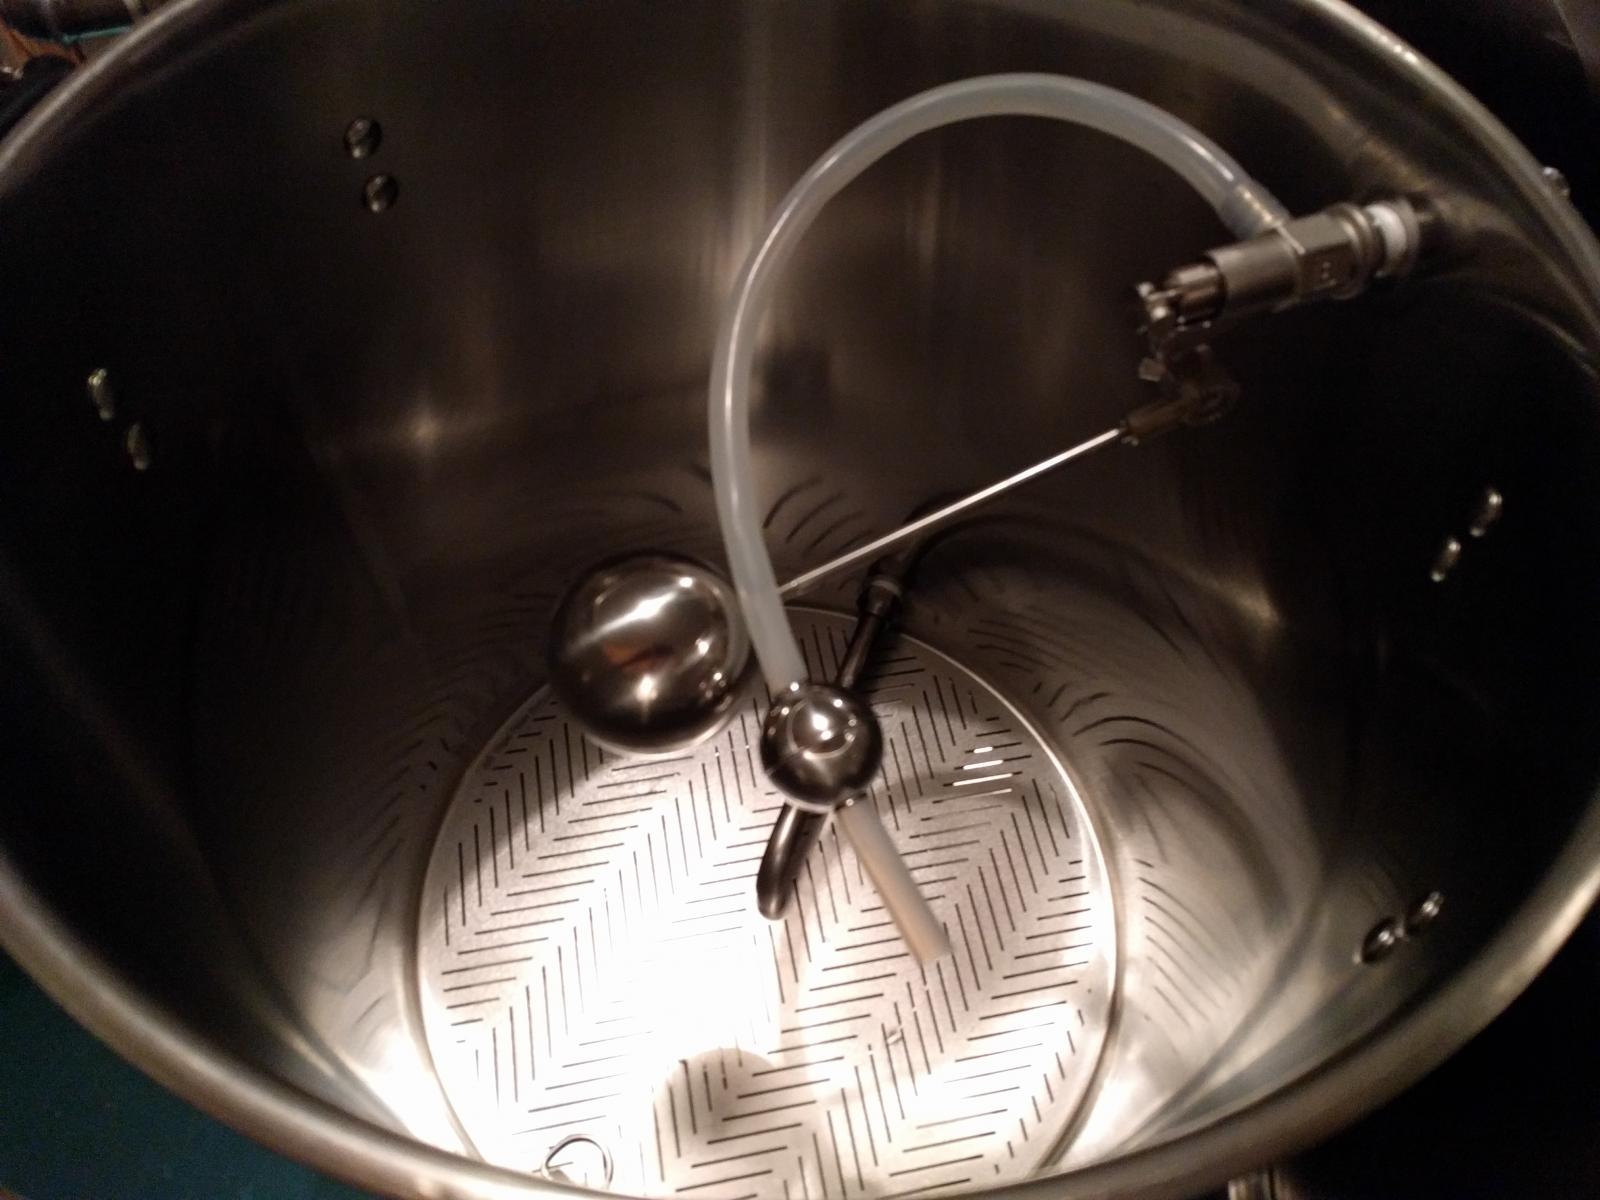
The MT just has the valve port and the recirc which will have an autosparge installed on it so I can more easily dial in my sparge rates.

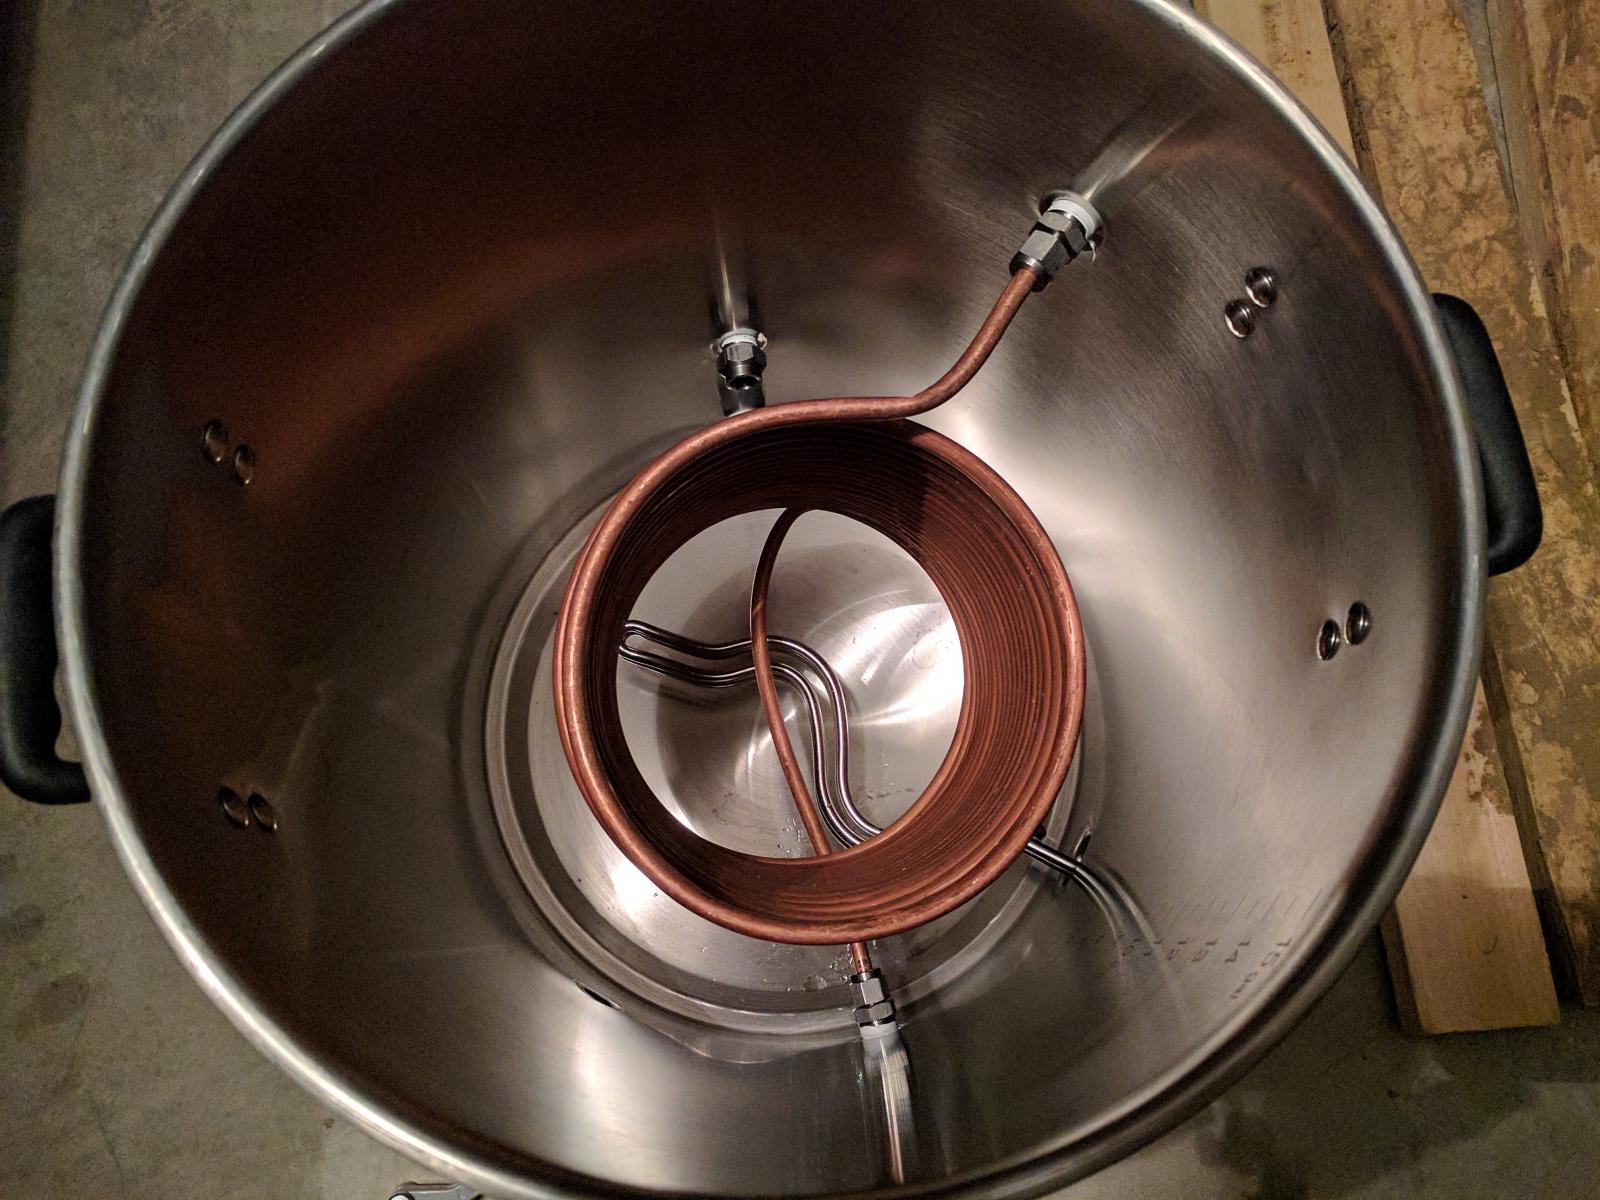
BK has a valve port, whirlpool/fill port, TC port for heating element, thermo probe port, and the two other ports 4" and 12.5" from the bottom of the kettle will be used to permanently(ish) install my 50' copper immersion chiller. I'll be using two compression fittings that will hold the copper coil in place, that way I just hook up my cold water supply via QC and start chilling.

Custom_Tim.jpg
 
Got a little more progress this weekend. Added some of the cedar planking, still need to install a bit more near the bottom where the water filter is and install some trim around the rough edges at the corners and around the water manifold cabinet. Also thinking about framing around the refrigerators and cedar planking that to give them a bit more of a built in look.

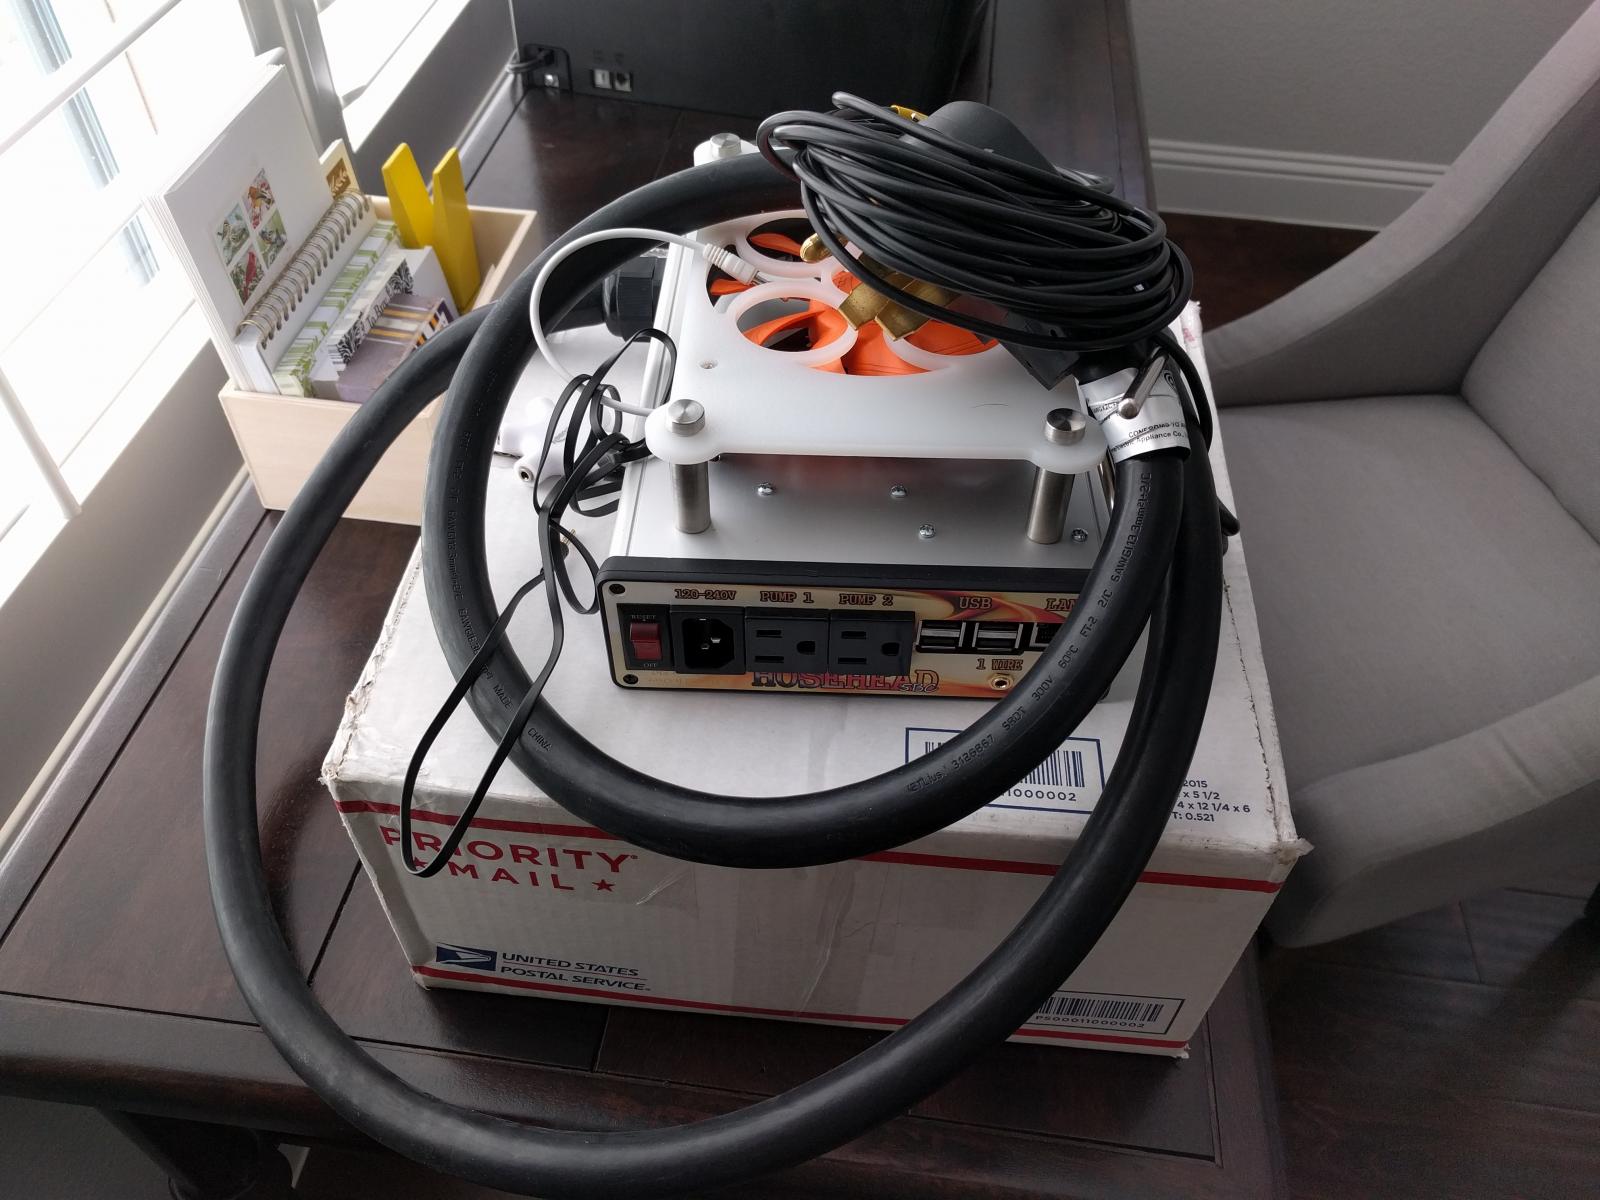
Kettles arrive tomorrow, and I'll start posting some actual brewery pictures. Also received my hosehead controller, really excited about getting that up and running.

IMG_0002.jpg
 
I went with the hosehead controller for a few reasons:

1. Cost, less than $500 is a great value for a computer to control the system.
2. I'm more comfortable troubleshooting a computer than I am a physical controller
3. I like the idea of the flexibility to do other things on it as well such as logging fermentation temperatures or using other brewery control software.
4. Importing BeerXML files for automatic mash schedules was quite appealing.

Attached are pics of the unit. I've yet to set it up yet.

IMG_20170124_121907.jpg


IMG_20170124_121912.jpg
 
Really like water distribution manifolds..Wish this place had one, last house did and it made working on plumbing a snap..Flip a valve and shut off water to THAT fixture while still having water to the rest of the house..Not here..Water off for WHOLE house if I have to do plumbing work..

Brewery is looking great...Miss my garage come to think of it now, too...LOL
 
Hey tmurph6, nice build going on. I'm just getting back into brewing after about a 7 year absence, I have a 5 gallon setup for extract brewing but am now going full grain. I have been researching for awhile now and settled on 15Gal, Herms, electric system. I have looked at the Spike system but at $5000 don't want to spend that now. Why did you choose the Spike kettles? They are nice I'm leaning that way. Also I have looked at building a control panel like the "Electric Brewery" but to start I want something less expensive. So if I understand the "hosehead" controller right it will control the temps on your kettles (using elements) and give you temperature readouts on kettles and run the pumps just like a big controller panel but through a computer program? That seems like the way I would go just because of the cost savings. Thanks for your time I'm not new to brewing but new to getting this "electric brewing" stuff going. So many kettle choices and systems, pre made or DIY aaugh. Jeff
 
I chose the spike kettles for a couple of reasons, main one for what they are they are a great value. I also liked the idea of them coming fully fabricated and welded up just need to thread on valves and fittings, no drilling on my end.

The hosehead controller is a raspberry pi computer and yes will work just like a physical panel like you researched from the electric brewery. The main disadvantage of the hosehead is you don't have physical switches to throw, which may not seem like a big deal but if your computer doesn't register button clicks you basically have to shut the whole brewery down and reboot during a brewday. The advantage of the computer is flexibility and mash automation though.

Hope this helps.
 
Getting close to having a functional brewery. Alright so this weekend I got all three kettles completed! The hardest part was modifying my wort chiller to fit into the kettle, big job, lots of learning experiences, and the end product wasn't exactly the cleanest nicest product, but as long as it functions I guess that's really what matters. My only hope is that the compression fittings seal, if they don't, well, not sure what I can do...

Anyway here are the pics.

Picture 1 is my boil kettle with built in copper wort chiller. The chiller is held in via stainless 3/8 compression fittings with nylon ferrules. Reason for that choice was the nylon will collapse before the copper so I can theoretically remove the chiller then reinstall it. That probably won't happen often though if I'm being honest with myself. Cold water in is via quick connect fittings on the outside of the kettle, and water discharges out of another quick connect which will discharge out to the street via some PVC piping in the garage.

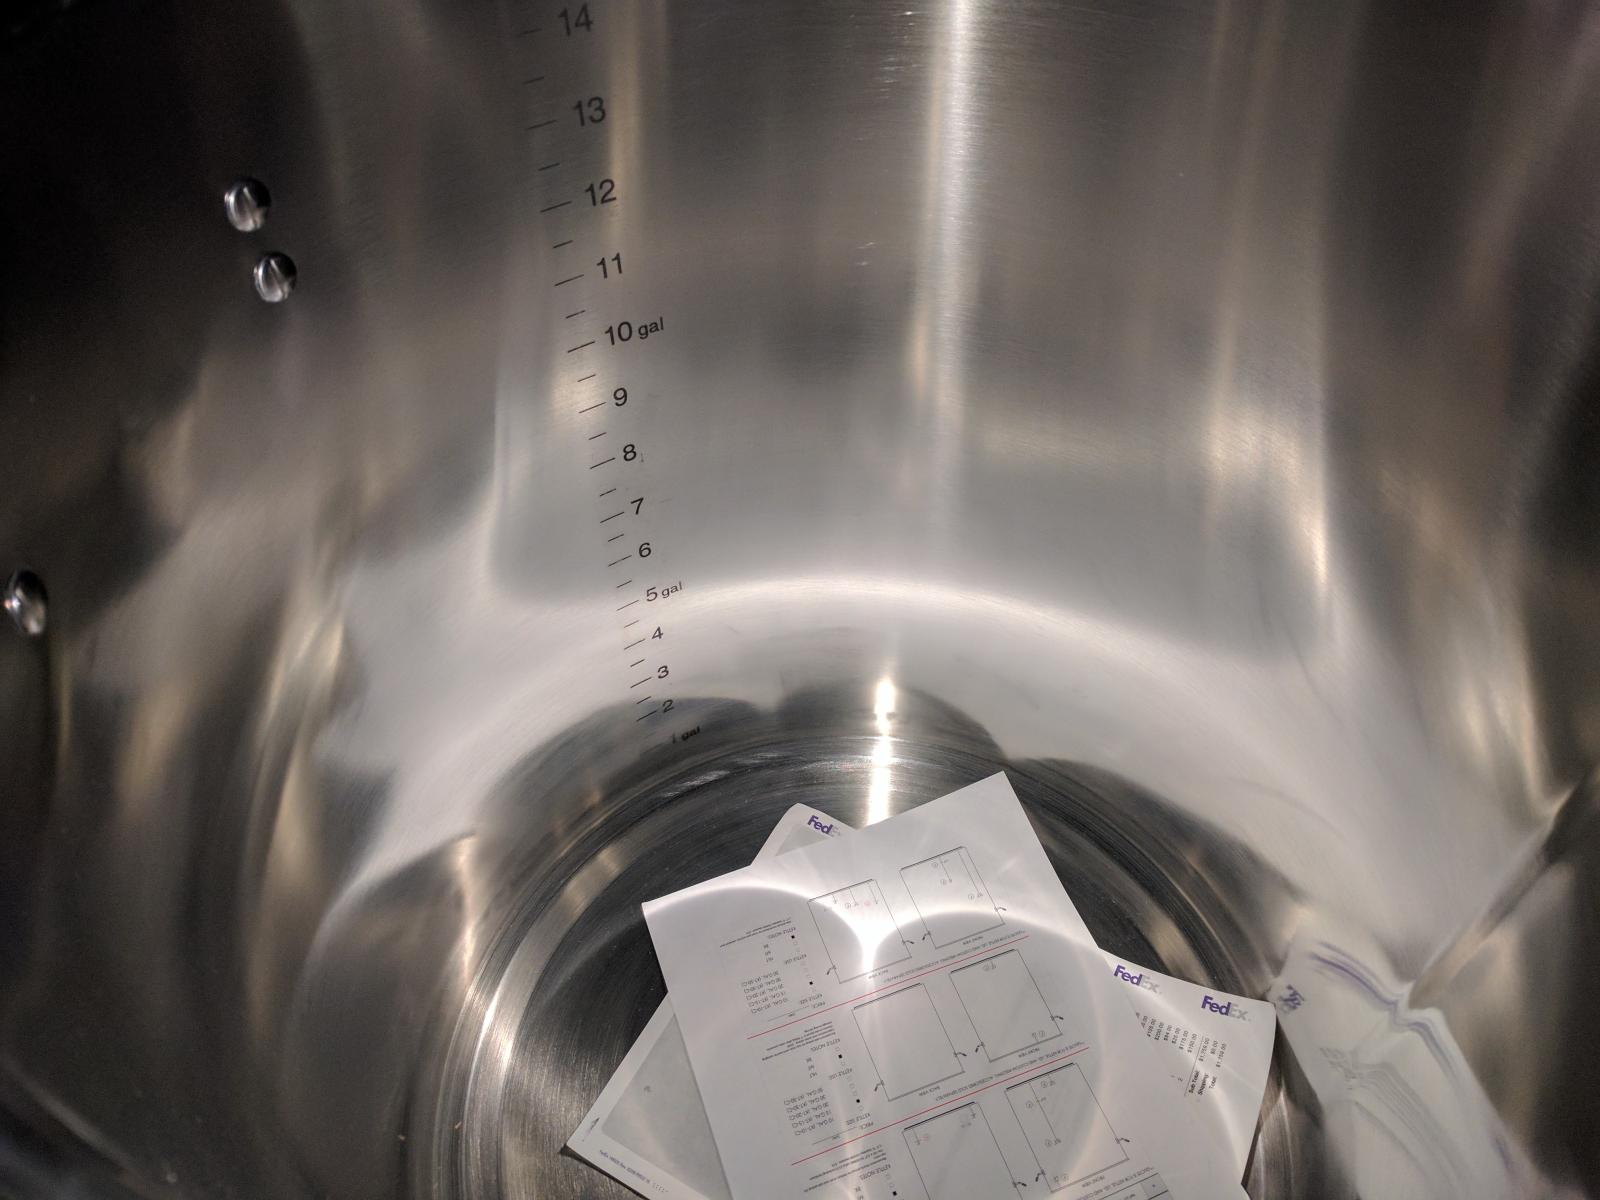
Picture 2 is the inside of my mash tun. In the foreground is a blichmann autosparge, which will be handy as I really only have to control the flow into the kettle and the autosparge will take care of the rest. In the background, you'll notice I went with the Spike false bottom, which is awesome 1/4" plate stainless steel with laser cut slots. Seems very sturdy although I wish it was rounded or softened on the edges as it is a bit sharp.

Picture 3 is just an overview of all three kettles on the table, looks awesome!

Also, if anyone reading this is curious about the push to connect fittings, they are a great idea, but only function if the inside o-ring and pickup tube are wet, found that out the hard way by shredding o-rings trying to do the push to connect fittings dry. My .02, I think they would function a bit better if the insertion end of the pickup tubes were beveled slightly to help guide the tube through the o-ring on the inside of the fitting.

IMG_20170129_224906.jpg


IMG_20170129_231040.jpg


IMG_20170129_231022.jpg
 
Eh, I guess we'll see. I have a couple of strategies for cleaning, either soap and water and sponge to see how that works, or barkeepers friend and rinse, or recirc pbw or abw through the system. Ultimately, I've never really been that concerned with keeping my chiller squeeky clean since it does get boiled in the wort in this case for the entire duration.
 
This is exactly what I'm planning on building this summer, but in my basement. I have a similar quote from spike. I was originally looking at a PID controller from highgravity brewing but am now leaning more towards the hosehead controller. Let me know how you like it.

I've got my excel spreadsheet together with my quotes and what I expect the build to cost, but do you mind sharing your costs just for the brew house aspect, not the full brewery buildout. I'm just curious if my numbers for all the valves, pickup tubes, elements etc is correct.

With your system during mash will you constantly be circulating the mash or is there a setting with the hosehead to only turn on the pump when the mash temp needs adjustment?
 
Eh, I guess we'll see. I have a couple of strategies for cleaning, either soap and water and sponge to see how that works, or barkeepers friend and rinse, or recirc pbw or abw through the system. Ultimately, I've never really been that concerned with keeping my chiller squeeky clean since it does get boiled in the wort in this case for the entire duration.

Don't really want to use soap it can leave a residue which is hard to rinse off, then causes havoc with the brew.
 
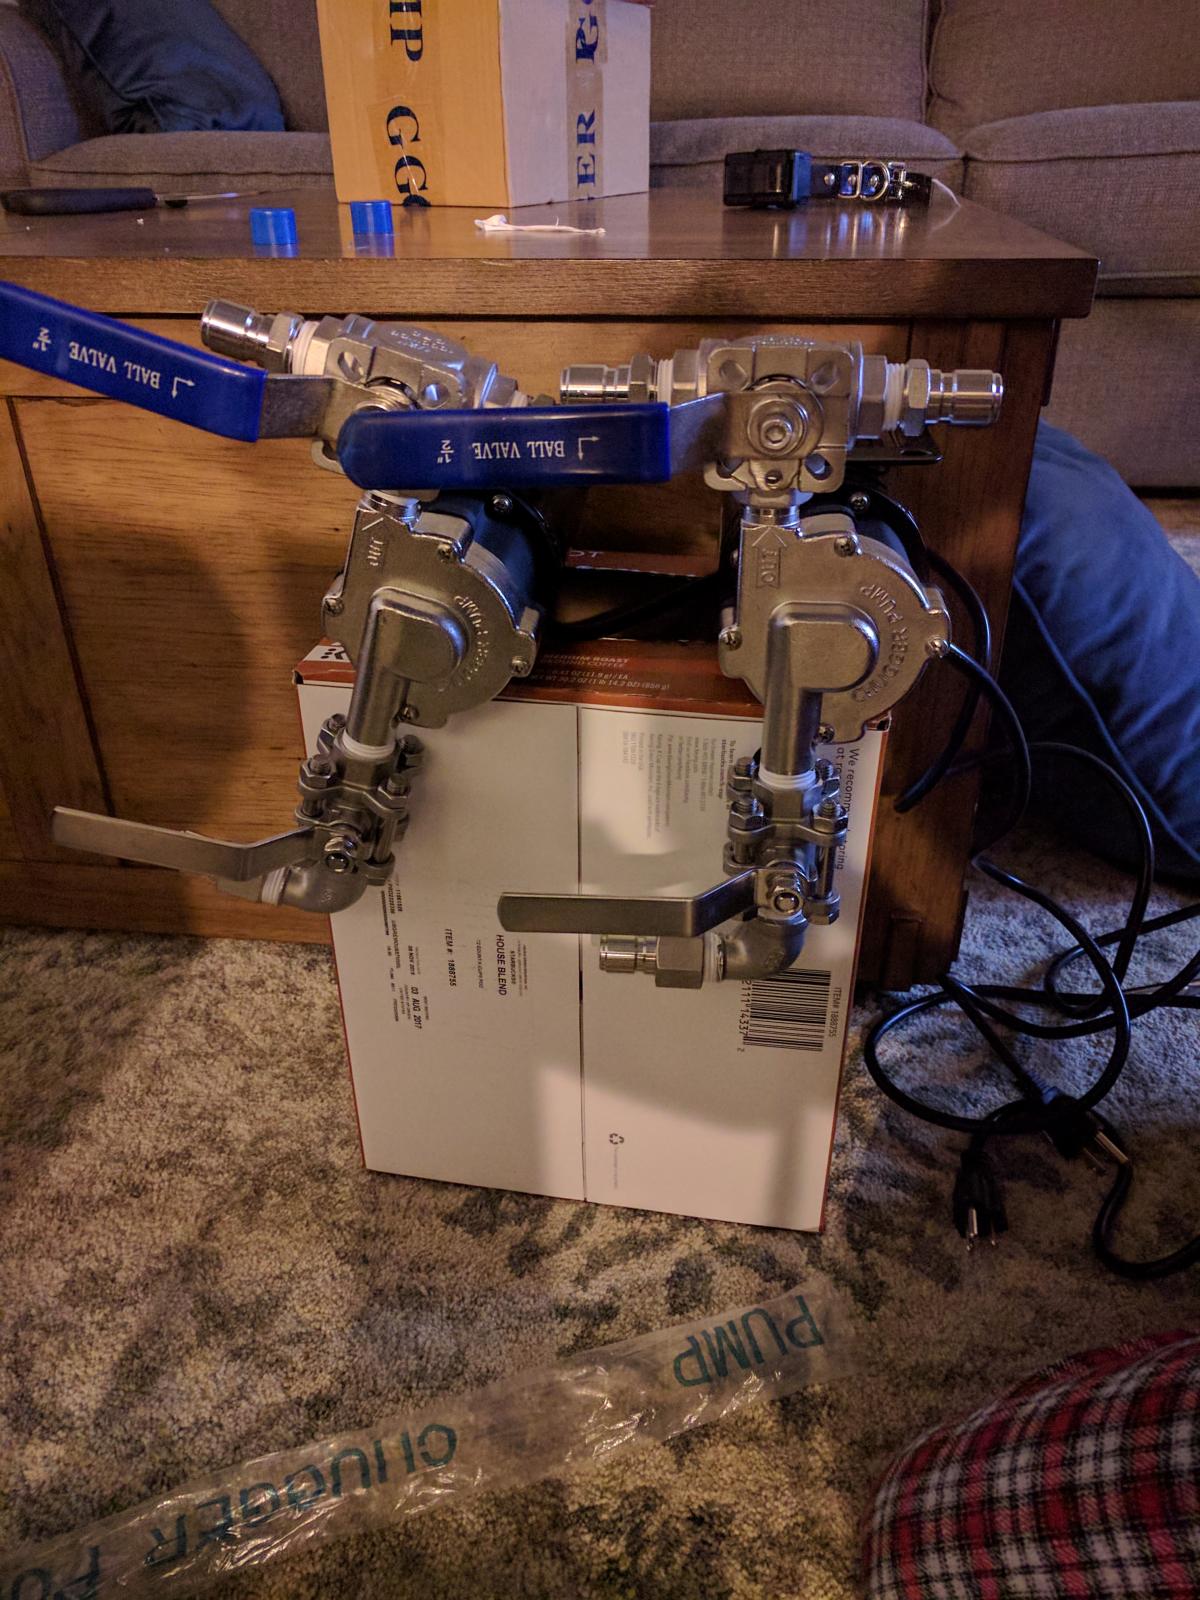
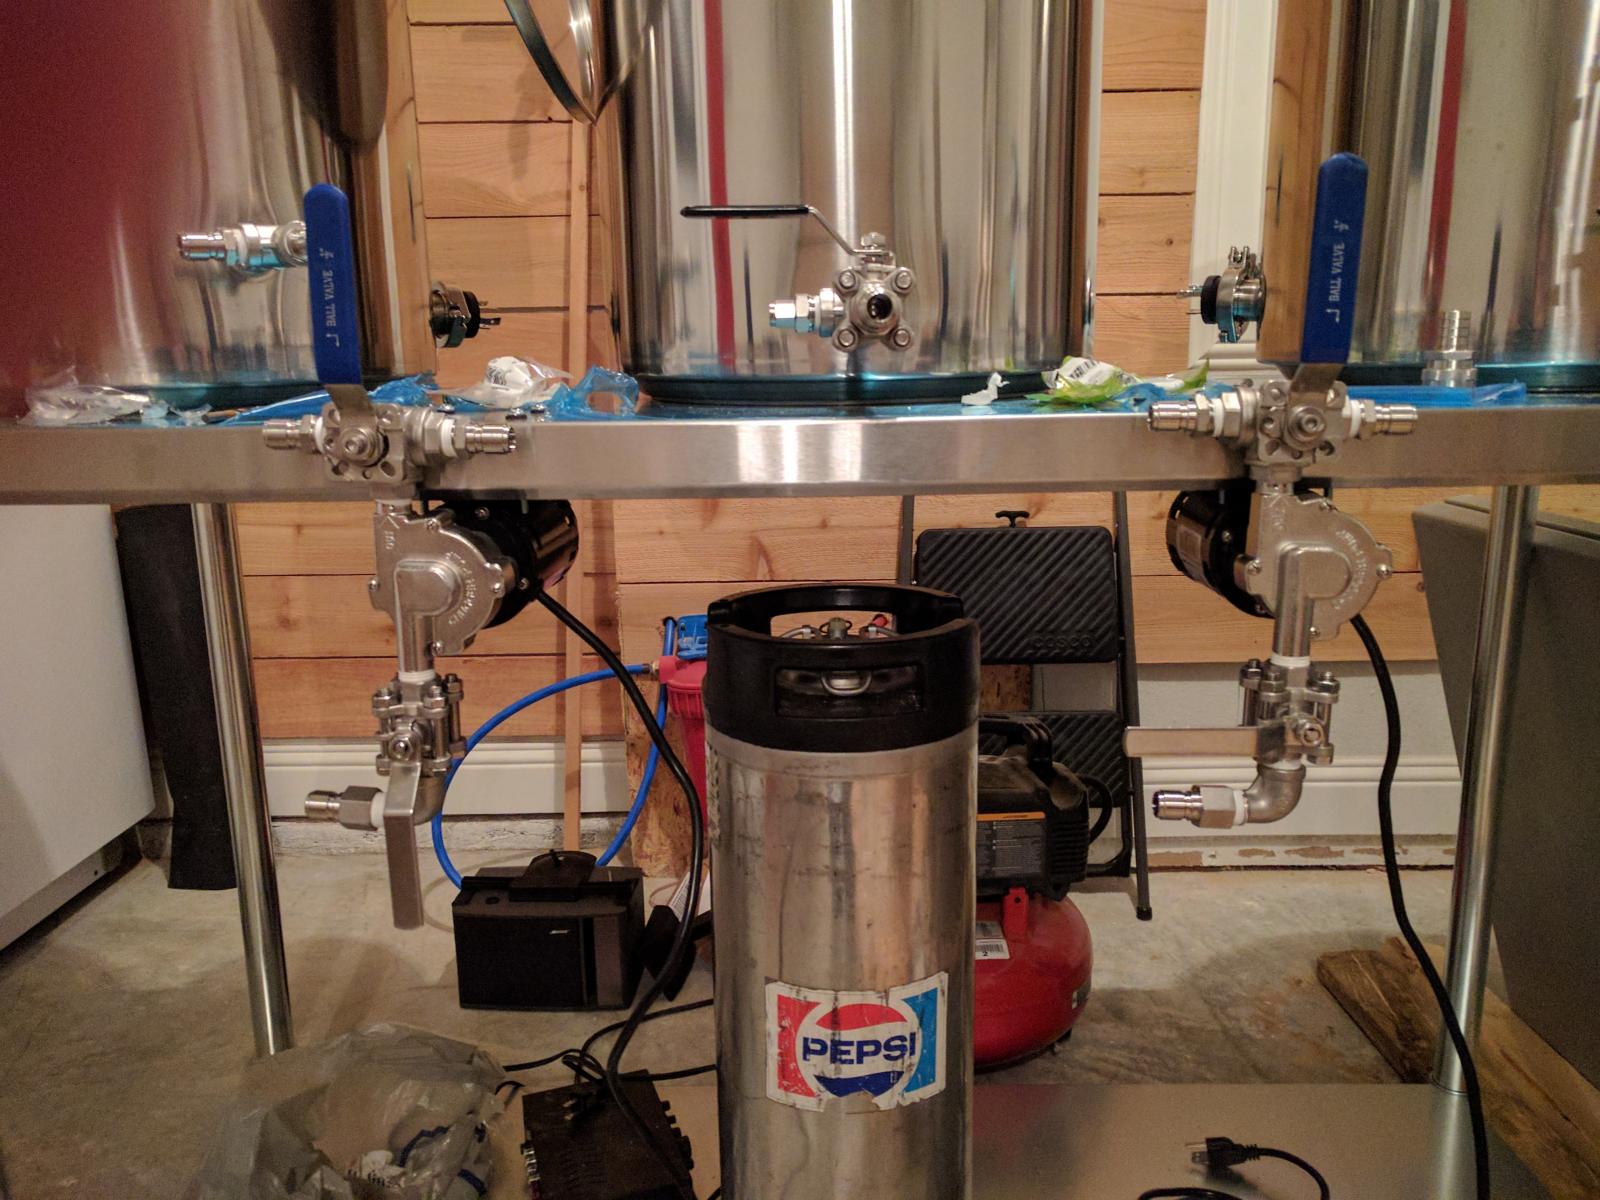
Pumps are built. Bad pic I know, the top valve is a 3 way valve that will serve 2 purposes, it will allow me to air bleed the system and allows me to throw the valves one direction for mashing then the other direction for sparging.

The way the picture is taken will be how they are mounted to the underside of the table top.

IMG_20170203_225726.jpg
 
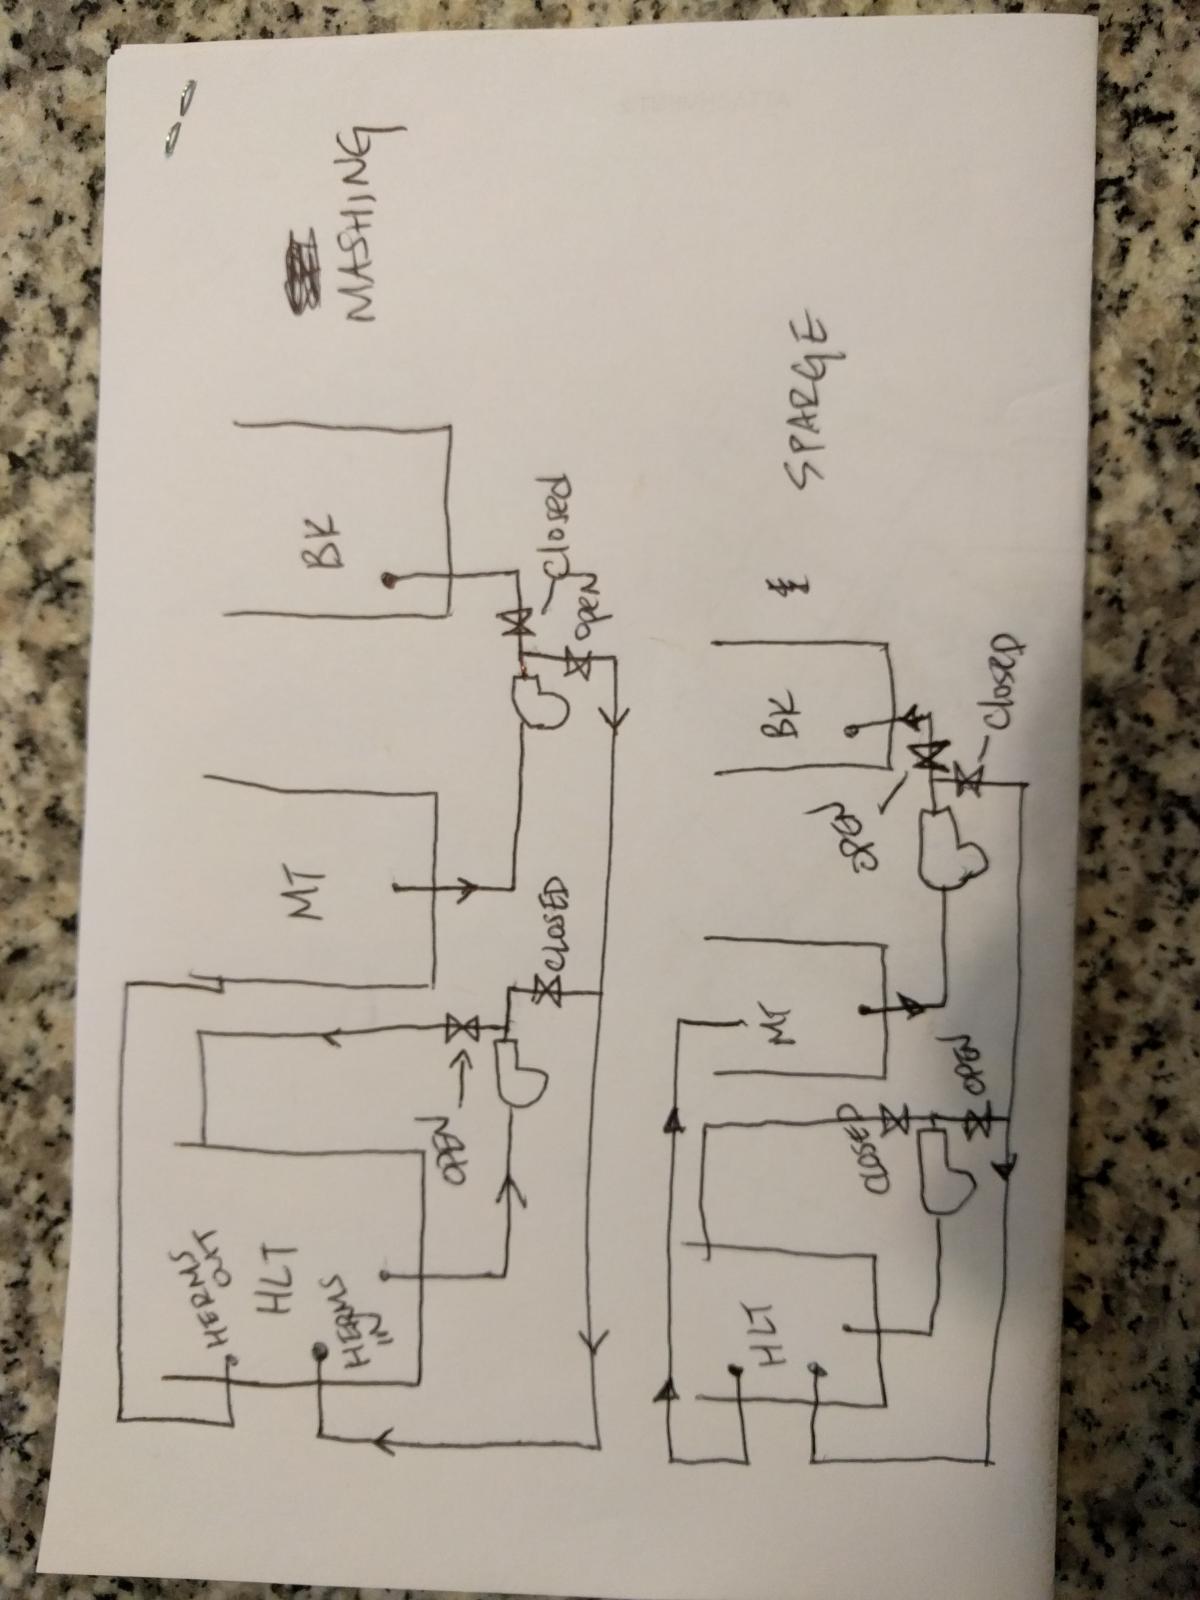
If you're willing, I'd be curious to see some sort of diagram on how the 3-way valves work with the whole system.

Not sure I'm understanding how the valve switch between Mash and Sparge works out
 
Where do you plan to mount/put your hosehead controller? I've seen people put them on the shelf under their kettles, and I'm wondering if thats such a good idea. Electric controller under kettles full of water/wort?
 
It may not be good to throttle the pump intake. At lower temps it isn't an issue but if you run near boiling liquid through, the pressure change across it will cause cavitation and possibly loss of prime.

I'm not going to use the intake valve to throttle, just going to be an on off valve.
 
If you're willing, I'd be curious to see some sort of diagram on how the 3-way valves work with the whole system.

Not sure I'm understanding how the valve switch between Mash and Sparge works out

Here's the diagram, I showed the three way valves downstream of the pumps as 2 valves cause it was easier.

Also, in regards to the hosehead mount. I'm not 100% sure yet but I'm thinking of fastening it directly to the underside of the table top that way even if I have a boil over it's protected by the top of the table.

IMG_20170204_090607.jpg
 
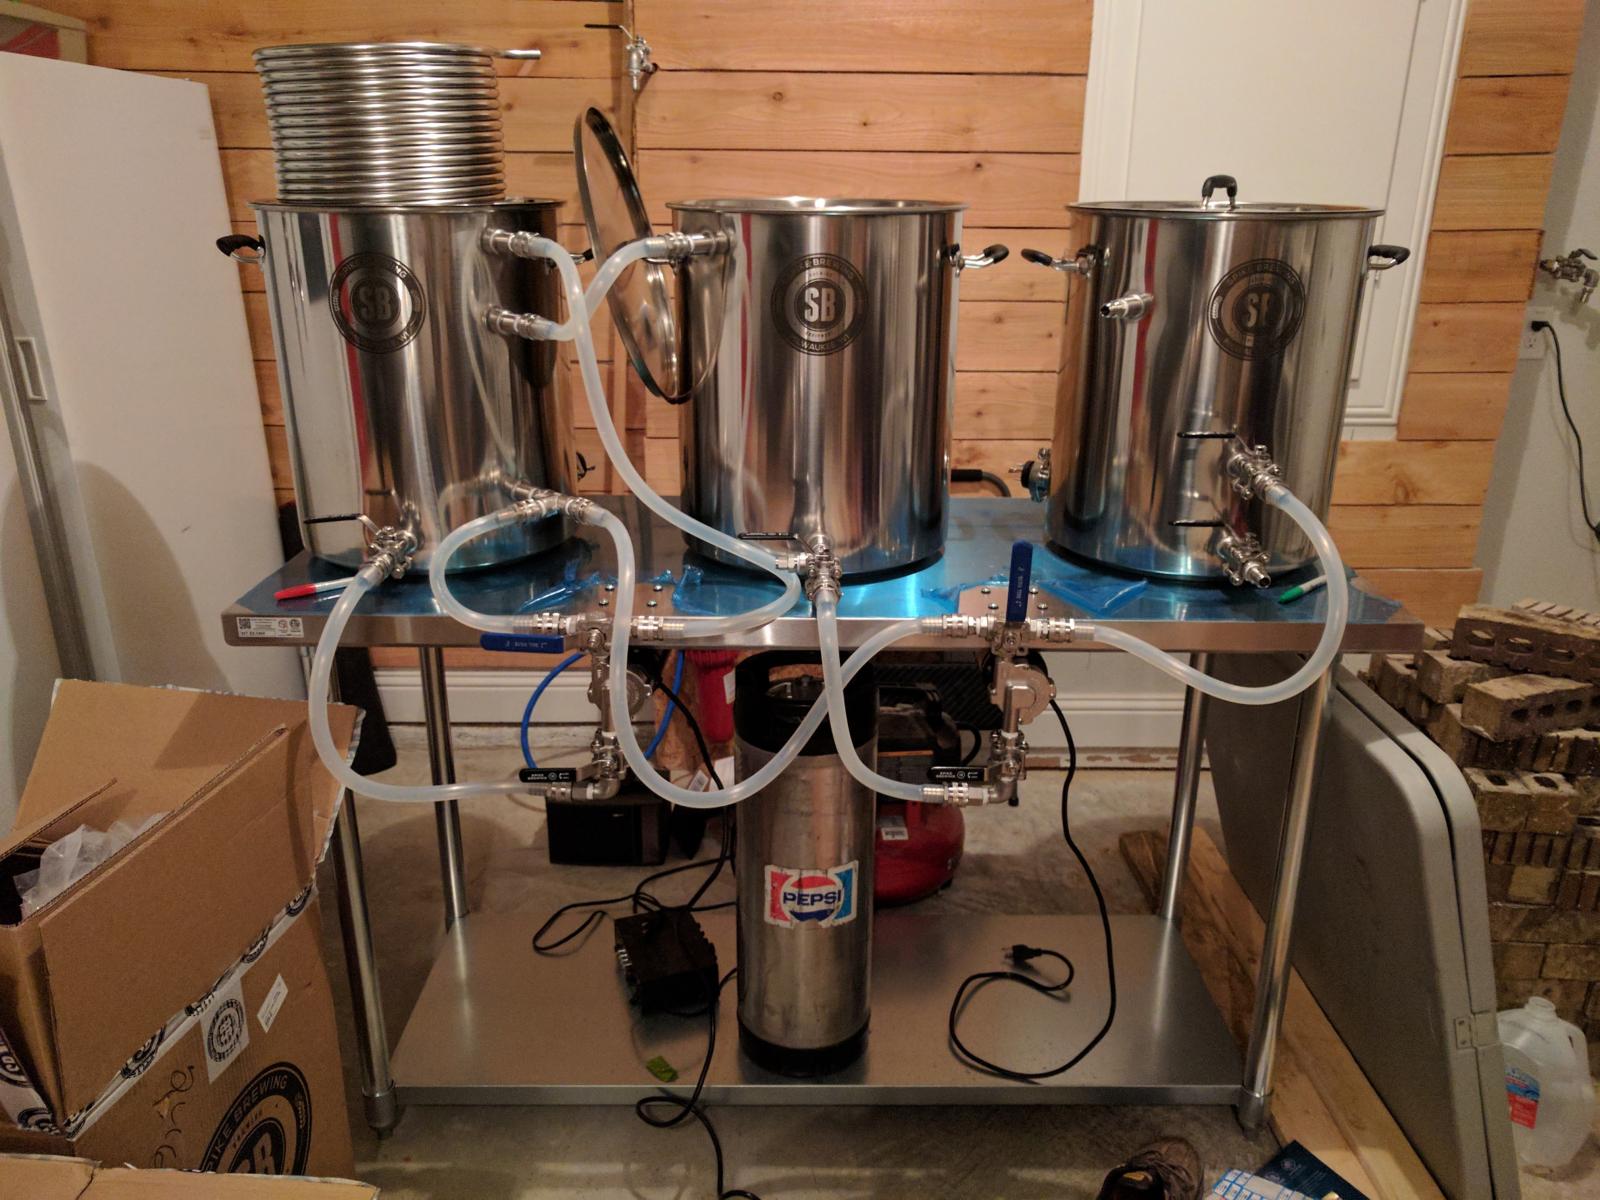
Got more progress today, really hoping to get this thing wrapped up soon. Got the pumps installed and got the brewery hosed up.

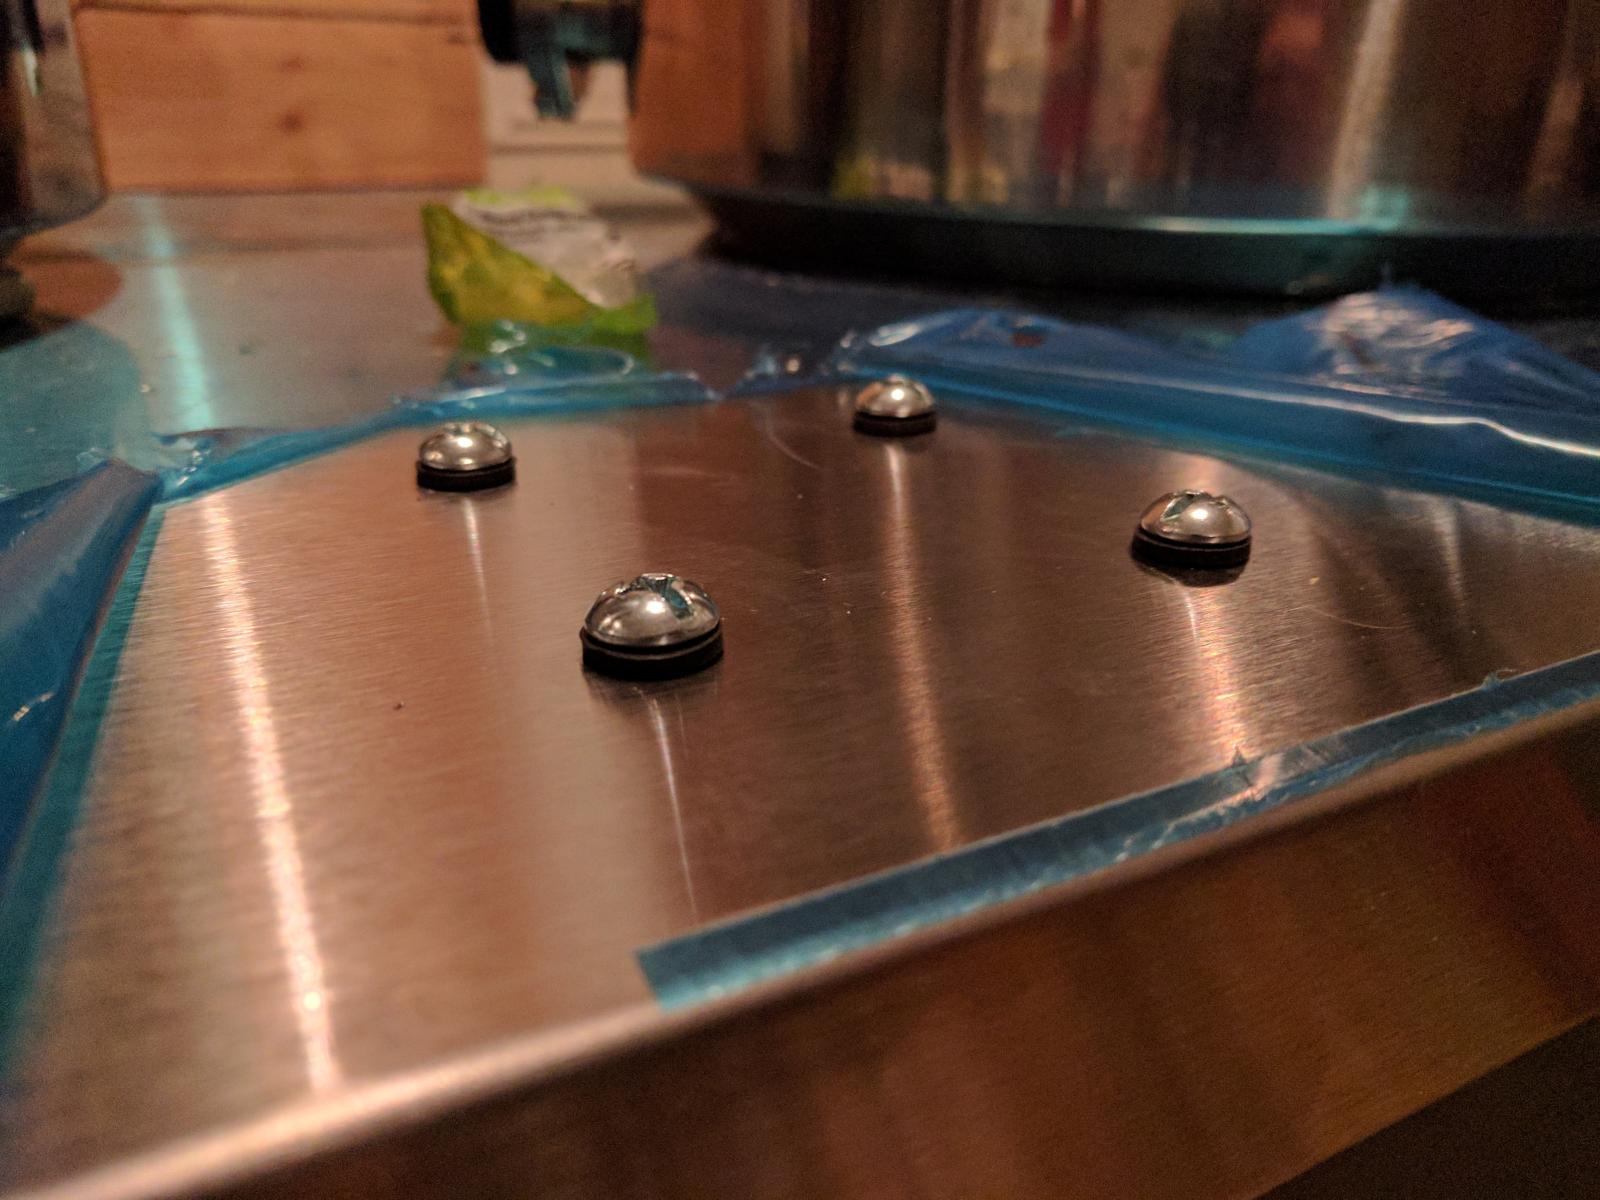
Wanted to show off how I mounted the pumps. I bought 8 1/4"x20x2.5" screws with nuts for the mounting hardware. Also bought some rubber washers and 9/16" OD x 1/4" rubber grommets. Essentially the mounting hardware and pumps are sitting on rubber, which I think is beneficial to keep things snug without risking damage to the table, but also serves to absorb any vibration from the pump.

Without further ado, pictures!

IMG_20170204_144750.jpg


IMG_20170204_144805.jpg


IMG_20170204_161154.jpg


IMG_20170204_230105.jpg
 
This is pretty much the exact setup I'm hoping to build this spring. I really appreciate the pictures and info, it will definitely come in handy when I start my build. Keep it coming!
 
In your post you say you got 15 gallon kettles, but in the pictures the boxes say 20 gallons. Which did you get?

I'm trying to figure out what size table to get, your 5 foot one looks like a good size but not if those aren't 20 gallon kettles.
 
They are 15 gallon each, they were shipped in 20 gallon boxes but were stuffed with shipping material. Must have run out of 15 gallon boxes.
 
I'm trying to make a push to finish everything up but it's slow going at the end. Tonight I got the diptubes and herms coil installed in the kettles, also ran some water through my chiller to leak test, and good news, no leaks. However, I'm having a really hard time getting the fill valves that are installed on my water supply to seal. If I can't get them to seal I may just say the heck with it and let them leak, they won't have water turned onto them all the time anyway and they aren't used for a very long period of time.

Also, word to the wise, I had a 30A 220 outlet installed in my house and the plug on the hosehead is a 50A plug, long story short I ended up replacing my 30A receptacle with a 50A to allow me to plug in the hosehead, it's still a 30A breaker with wire only capable of 30A so it will still trip all the same if I overcurrent the circuit, however, the receptacle allows me to actually plug in the hosehead.

Tomorrow I hope to get the hosehead booted up, connected to the network and controlling my elements and pumps. Once that's working I can finally properly leak test everything and get it ready to brew. I was hoping to brew Saturday on it, but doesn't look like that's going to happen.
 
Finished, all that's left now is figuring out how to brew on it:confused:

I was able to mount the hosehead computer to the underside of the table with some industrial strength velcro which seems to do the trick, hasn't fallen off yet. I also mounted a power strip to the underside of the table with double sided tape. All the wires and cords for the pumps, computers, and temp probes are tucked into some channels on the underside of the table on the front and back.

I'm still putzing with a few things here and there and still need to calibrate the temp probes, but those are so small they wouldn't even warrant another post. If anyone has specific questions or things they want to know I'd be more than happy to share any learnings I had along the way.

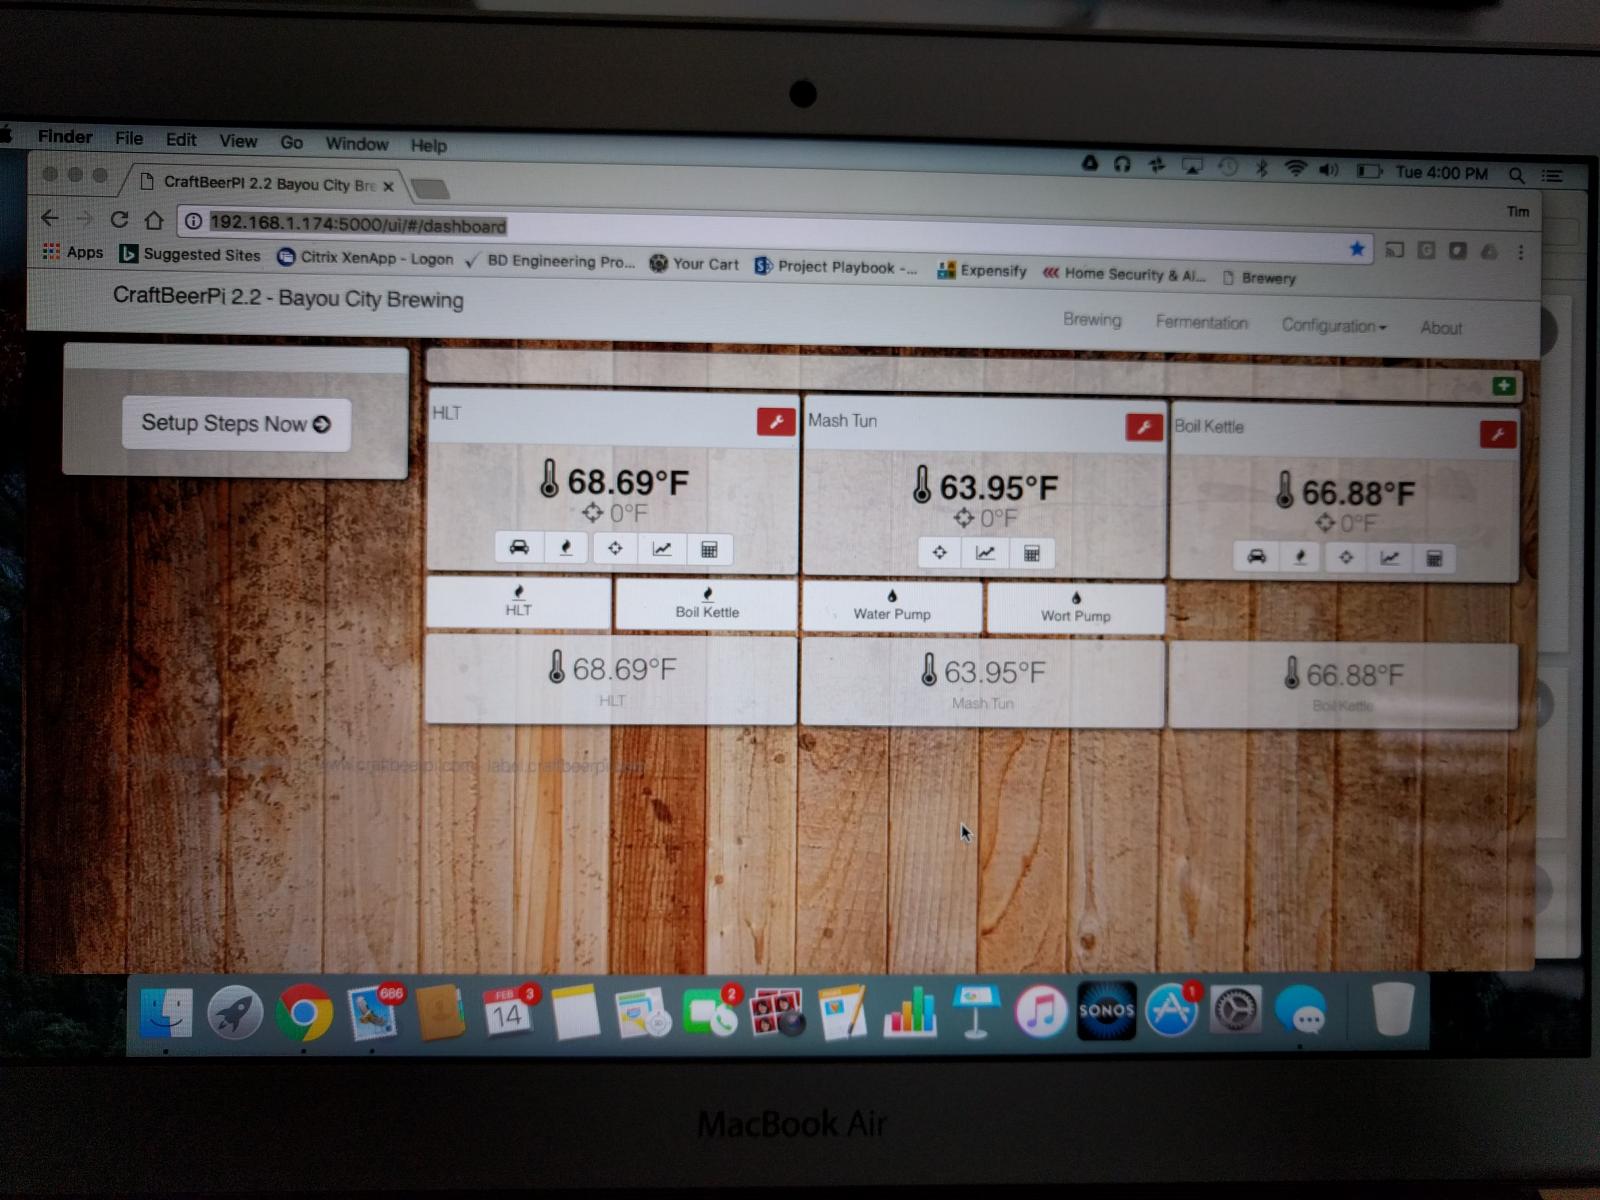
FYI, the program running on my computer is craftbeerpi. I removed elsinore as craftbeerpi seems to be a bit more polished and better supported.

IMG_20170215_213911.jpg


IMG_20170214_160021.jpg
 
I'm trying to make a push to finish everything up but it's slow going at the end. Tonight I got the diptubes and herms coil installed in the kettles, also ran some water through my chiller to leak test, and good news, no leaks. However, I'm having a really hard time getting the fill valves that are installed on my water supply to seal. If I can't get them to seal I may just say the heck with it and let them leak, they won't have water turned onto them all the time anyway and they aren't used for a very long period of time.

Also, word to the wise, I had a 30A 220 outlet installed in my house and the plug on the hosehead is a 50A plug, long story short I ended up replacing my 30A receptacle with a 50A to allow me to plug in the hosehead, it's still a 30A breaker with wire only capable of 30A so it will still trip all the same if I overcurrent the circuit, however, the receptacle allows me to actually plug in the hosehead.

Tomorrow I hope to get the hosehead booted up, connected to the network and controlling my elements and pumps. Once that's working I can finally properly leak test everything and get it ready to brew. I was hoping to brew Saturday on it, but doesn't look like that's going to happen.

I had to do the same thing with my Hosehead -- when I ordered it, they didn't have the 50A option, and it came with 10' of 10/3 cable, supply your own plug. So I ordered it and got an L6-30 plug and receptacle for it and installed the receptacle -- then when it came it had a much shorter 8/4 cord with a 14-50 plug on it -- well, OK, I guess. I'm a little annoyed, too, because I've got a single element system (EBIAB) and I definitely don't need the 50A capability. If they had the Uno option at the time, I could have saved some money.
 
Nice looking set up @tmurph6. You've come a long way in a short amount of time.

I'm almost done with my all electric rig and haven't brewed since August. It will be interesting to see if brewing again on a new rig will be as fun and captivating as building it has been.

Looks like you'll be well set up for years to come...Of course you know you'll want to go bigger...We always do!
 
Looks really good! I started ordering smaller parts for my setup, as I see things go on sale. Hope to order the kettles in the next month or so. I'll be doing my setup in my basement though, not the garage. Your setup is pretty much exactly what I'm planning to do so your process has been a huge help! Let us know how the first brew day goes!
 
First brew was rough. I couldn't quite get the mash recirculation going, finally got it after about 25 minutes fooling with it. I had the pump recirculating full bore until I realized it kept compacting the grain bed and causing cavitation. After throttling the pump discharge and slowing the recirculation everything went better.

On the positives, no boil over, hit my preboil gravity and original gravity on the nose, predicted my boil off perfectly and ended up with 11 gallons of clear wort. Efficiency was 80% and I only sparged 30 minutes!

Cleaning was a pain as I don't have my regiment down, also forgot to sanitize my fermenter as I was doing so many other things. Oh well I've made worse mistakes.

Looking forward to tasting the first beer thru the system.

I've been watching your thread and finally signed up to say great job. Good to see as I'm currently waiting for my order of parts for a HERMS build running craftbrewpi too.

Quick question, you mention throttling the recirculation. Just to clarify, you left the inlet to the pump wide open and only throttled the output, yes?

Yes throttled output.
 
Back
Top