First Keezer Build!

Homebrew Talk - Beer, Wine, Mead, & Cider Brewing Discussion Forum

Help Support Homebrew Talk - Beer, Wine, Mead, & Cider Brewing Discussion Forum:

This site may earn a commission from merchant affiliate links, including eBay, Amazon, and others.

kgirthofer

Member
Joined
Feb 1, 2018
Messages
6
Reaction score
9
Morning all - Just finished (mostly) building out my keezer and wanted to share my pictures!
I still have to throw in some insulation around the collar up top and actually get some beer in there - but I'm mostly just super excited to get some beer on tap at home!!
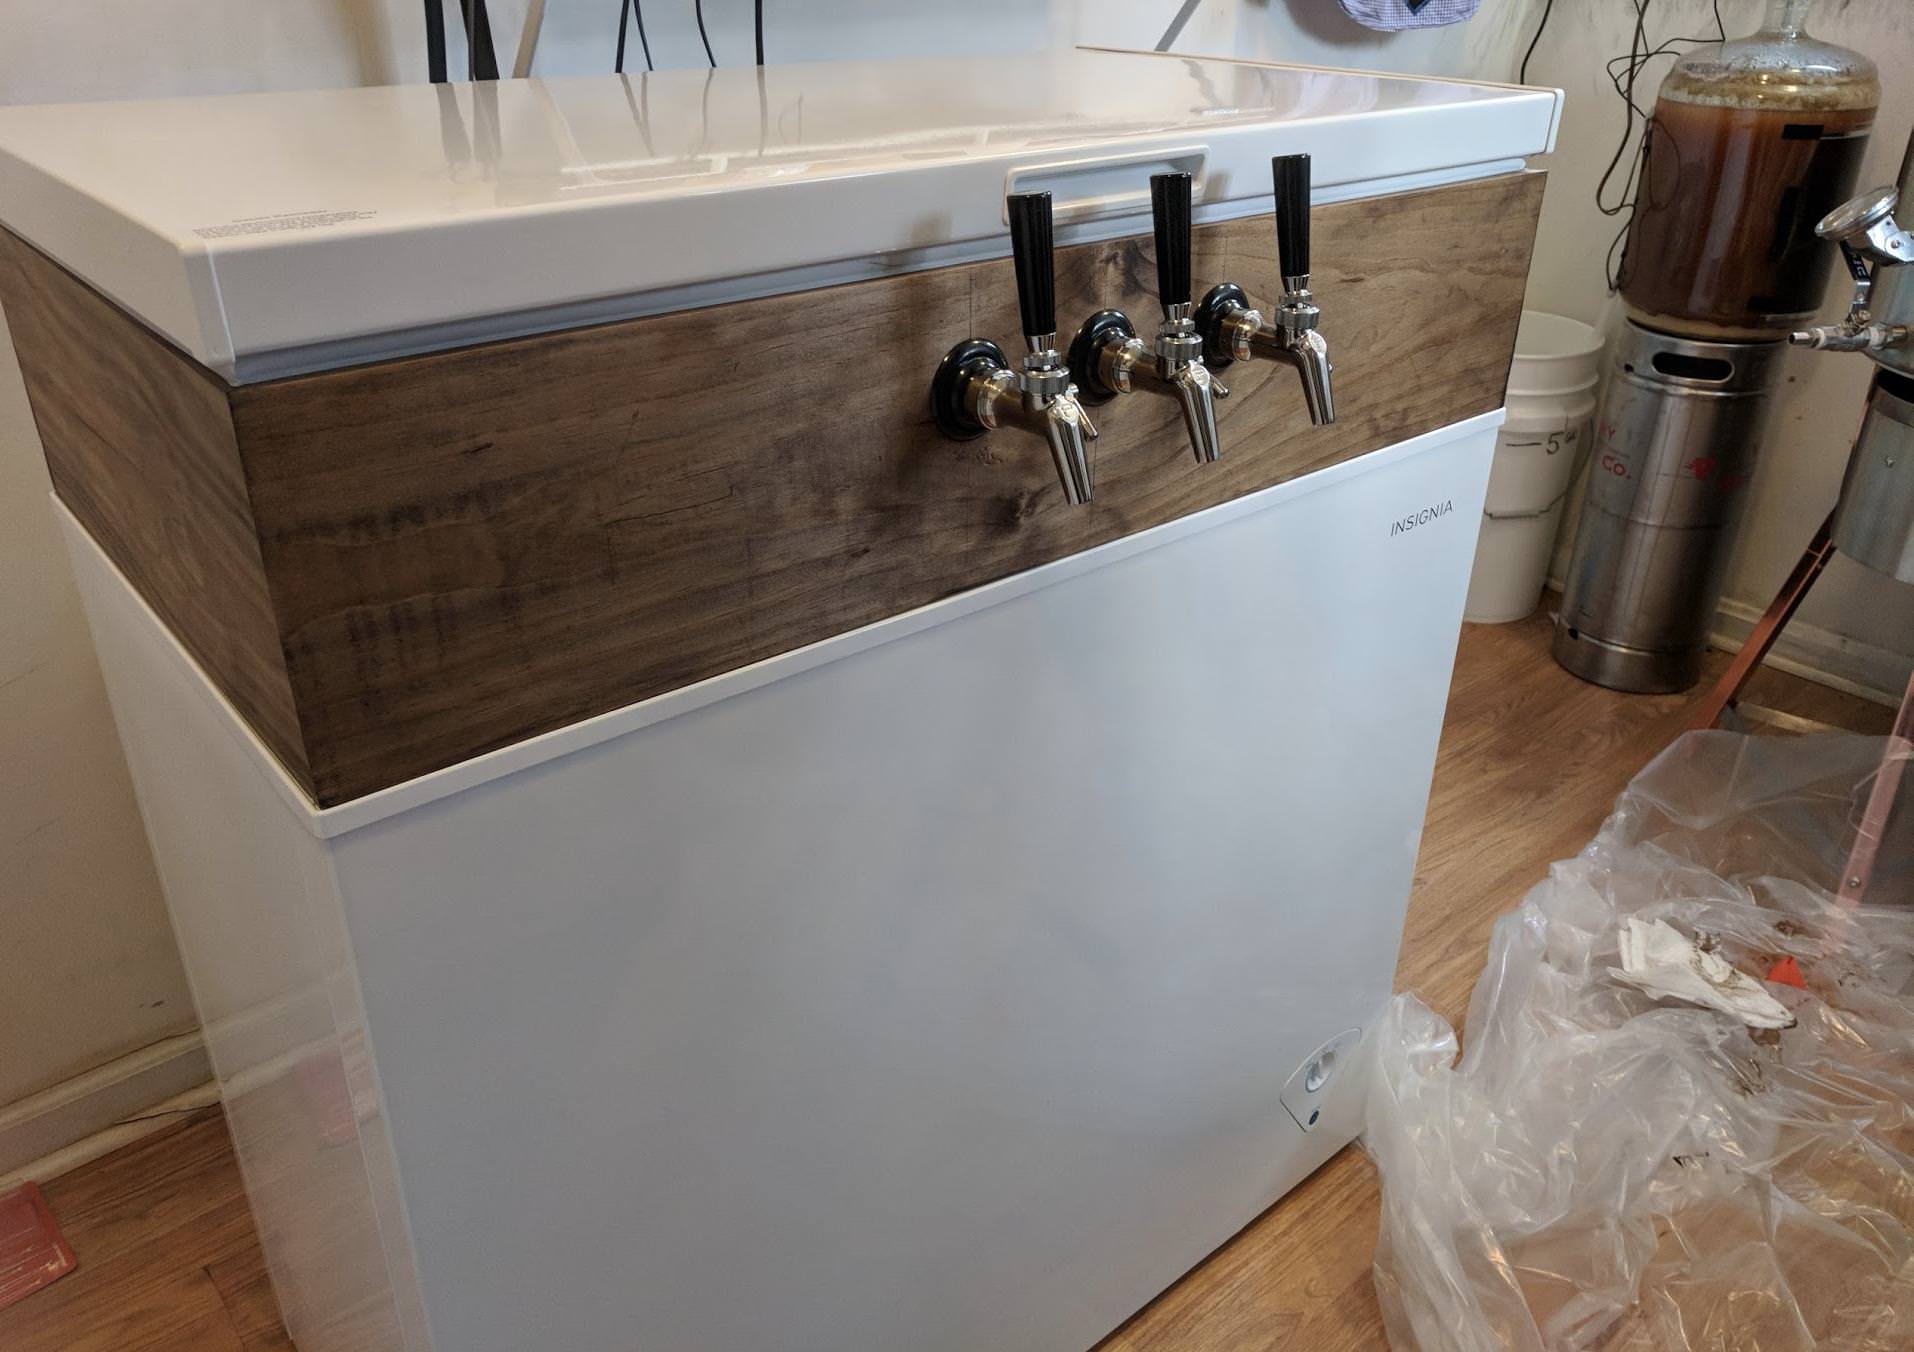
I don't have any shots before this - I picked up an insignia 7cu/ft freezer and about 30' of 1x8" pine. Hit it with 45 degree cuts and assembled right on the inner lip of the seam. I think I paid about 230 for the wood and the freezer.
KlnDn19.jpg

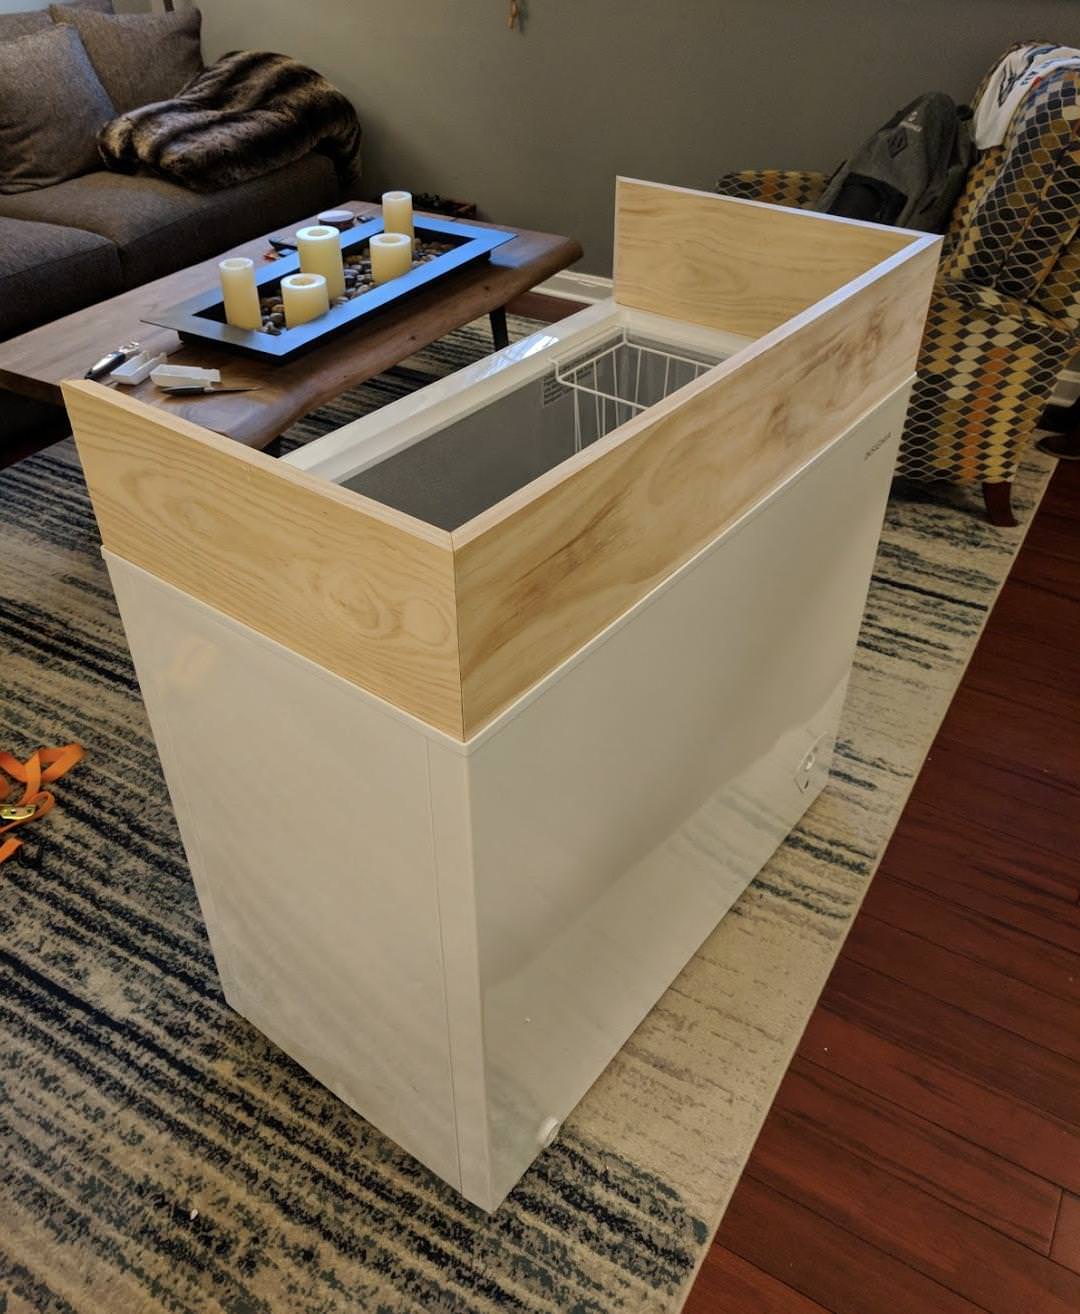
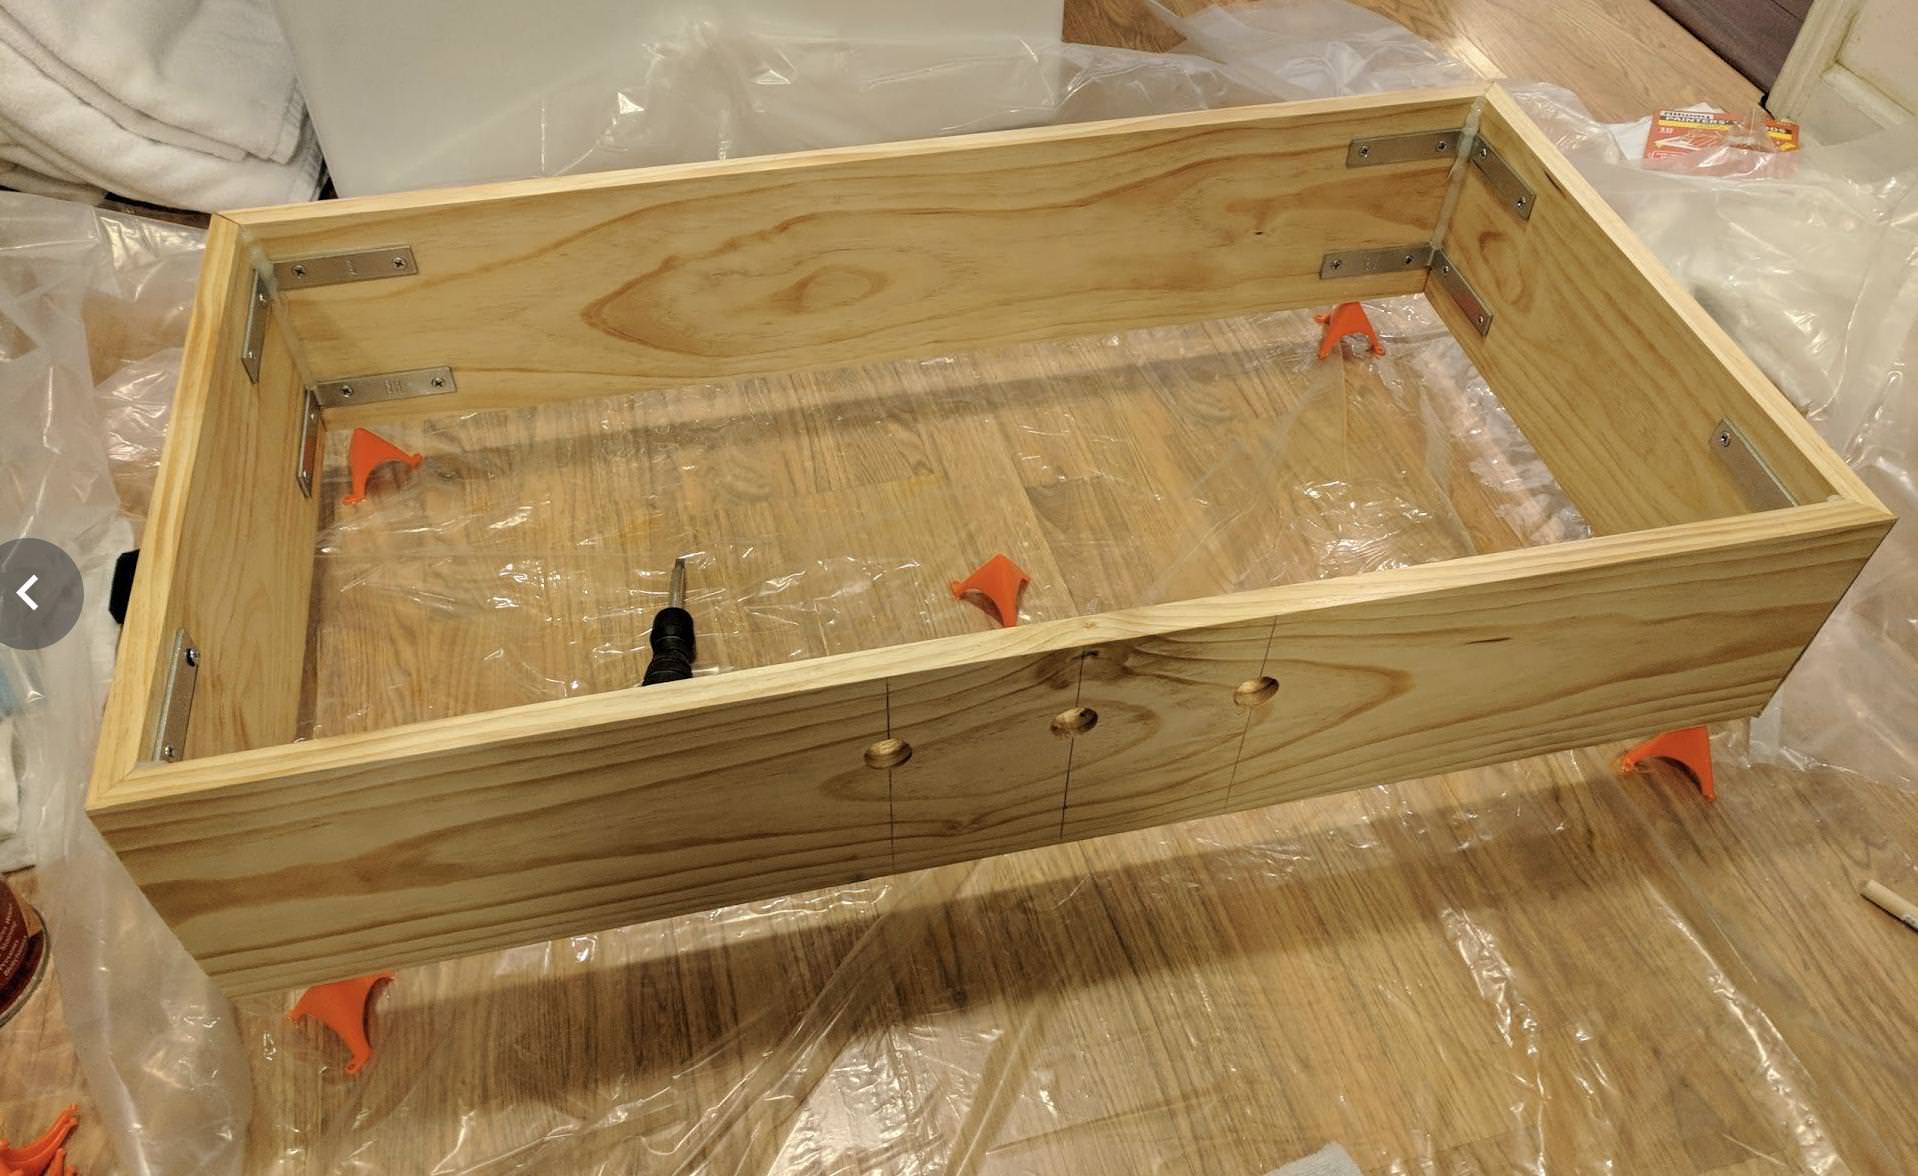
Got all the boards cut and I installed corner brackets - I found that if I ran the screws on the outside edge of the countersink hole on the brackets it did an excellent job of pulling the boards tightly closed. I used ratchet straps to hold everything square while I assembled. Put the lid on for testing - looks like I get a solid seal all the way around - with exception for the back. If I put a flash light in there I can see some light escaping from the back board from the way the lid settles on it. I'll be installing a small 1x1 square board back there to get an extra inch of lip for the lid seal.
CCLK3qP.jpg

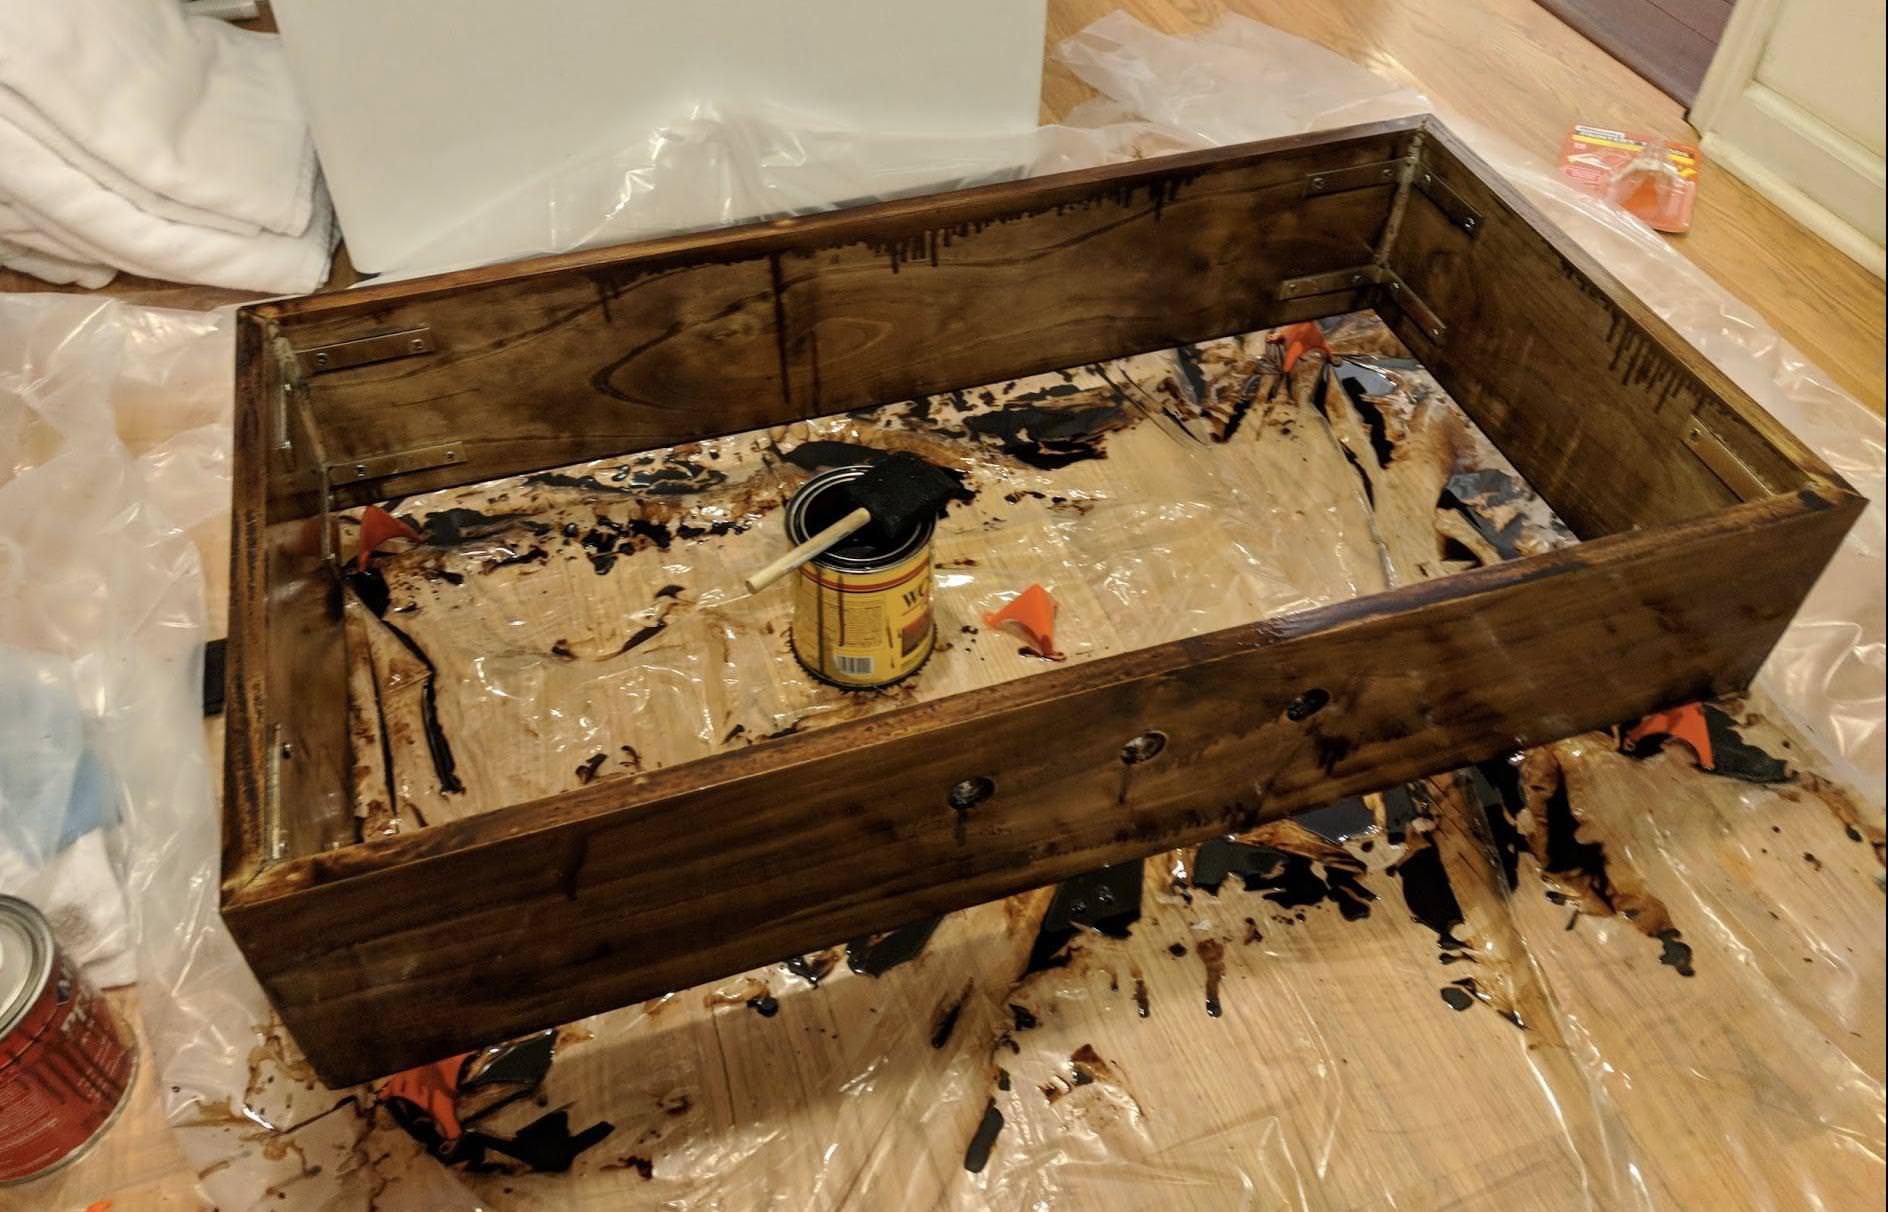
Drilled 3 tap holes 4" off center 1" dia. and got to staining. I got excited and put the sealant on the corners before I stained which was dumb - looks poor on the inside now - but i'm covering it up with insulation anyway. /shrug
WtYqkyz.jpg

I've never stained something before - I probably wasn't supposed to do it all vertically but what ever. Doesn't need to be a work of art. Here's during the staining process - I used "English Chestnut" to stain.
76A7kCD.jpg

And after the wipe - terrible picture
UElemY9.jpg

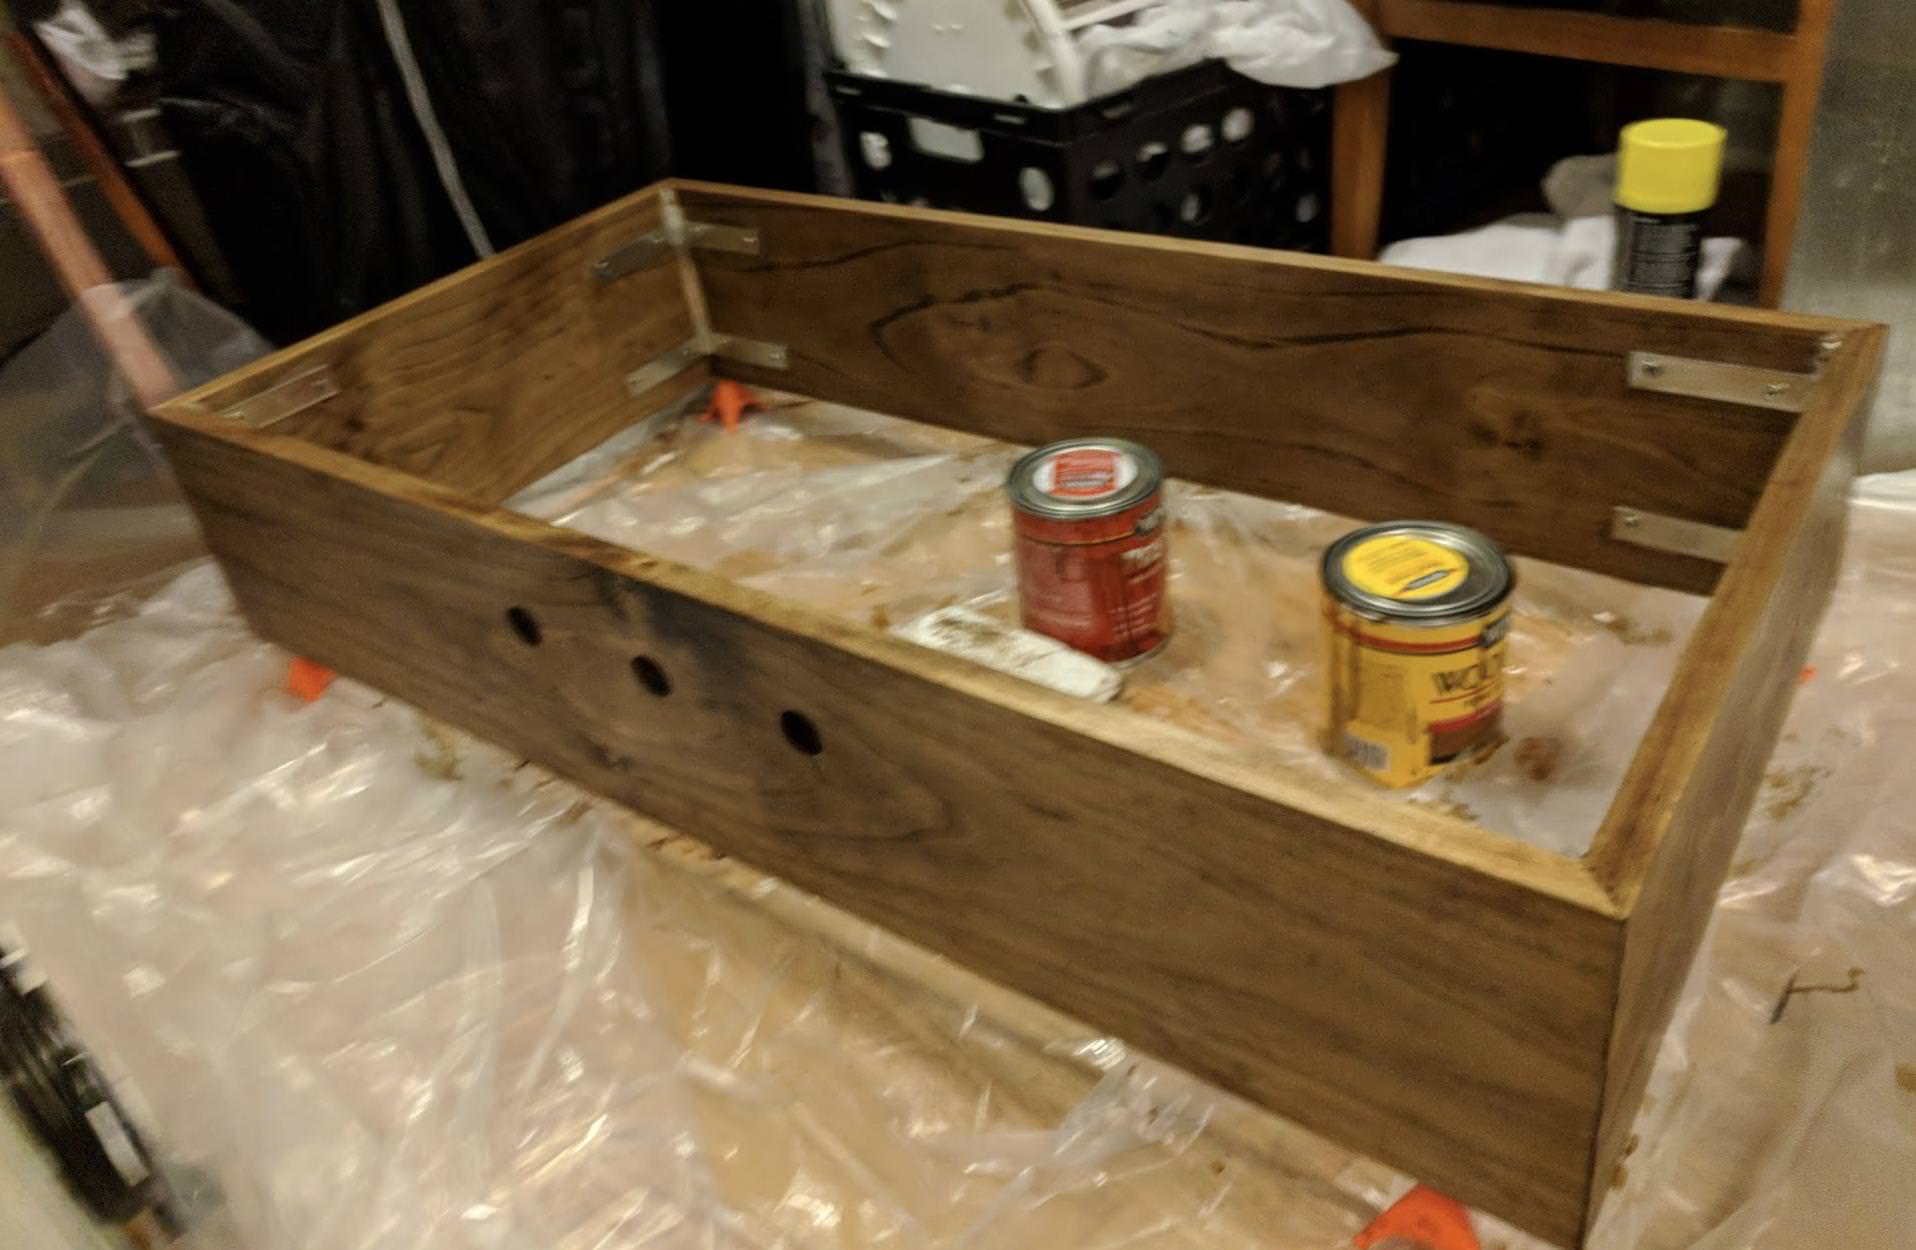
I let that dry and sealed it and got to running the lines.
I glued the collar to the freezer with liquid nails and sealed it from the inside with some window sealant or something.
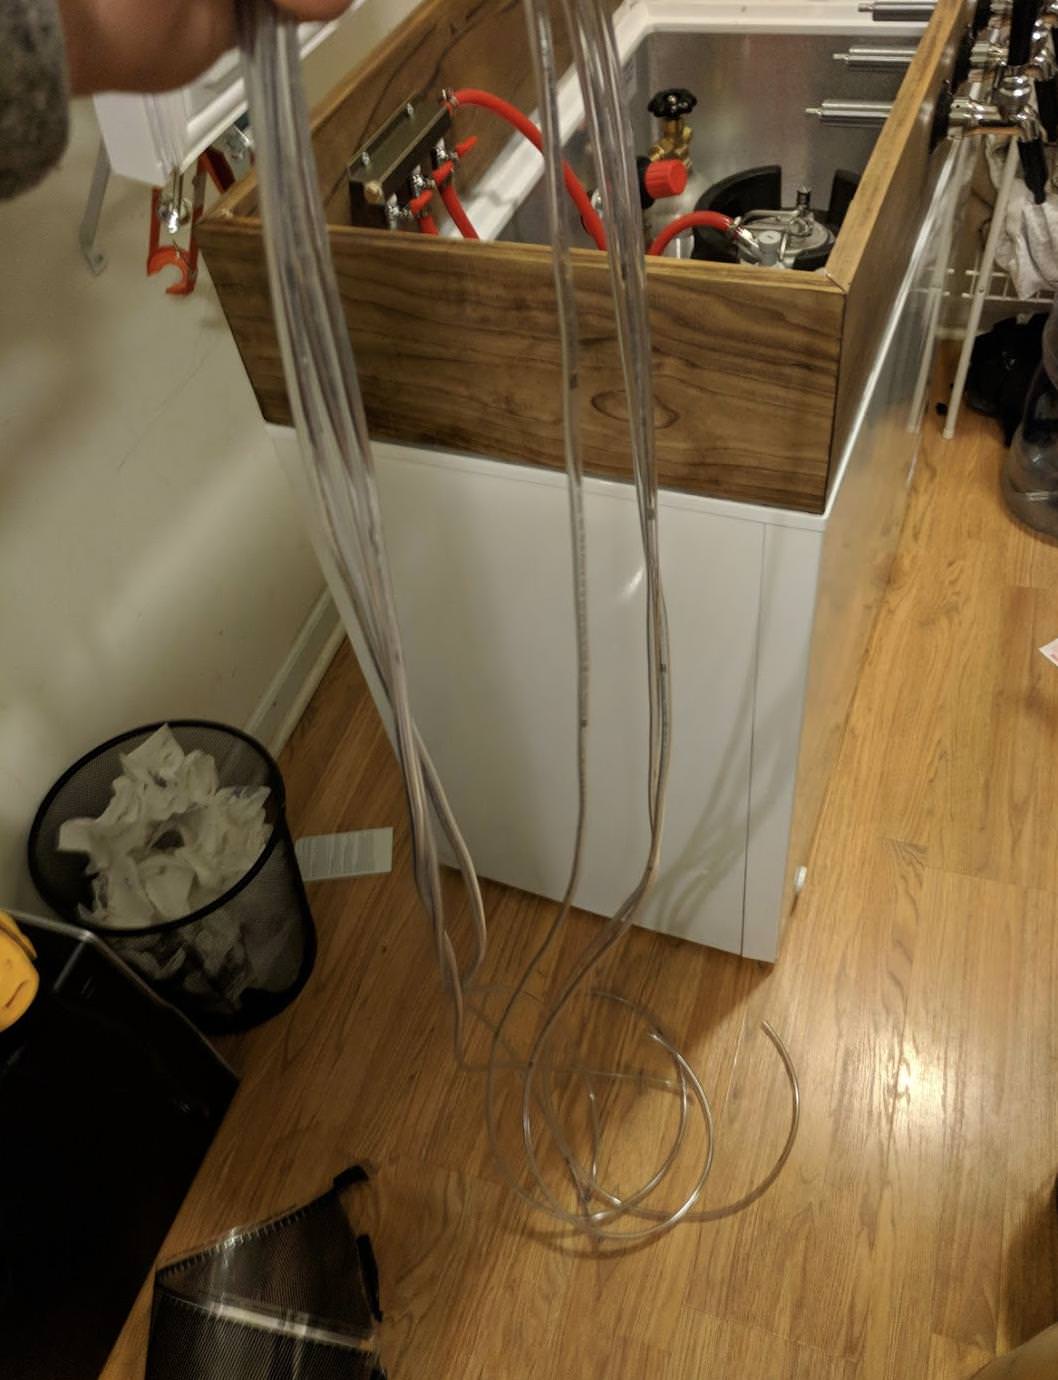
I ran 11' of liquid line 3/16th for each tap... so long!
S6kEi73.jpg

Installed the taps and the lid - I think it came out really great. Perlick 650ss taps
jAT3aJ7.jpg

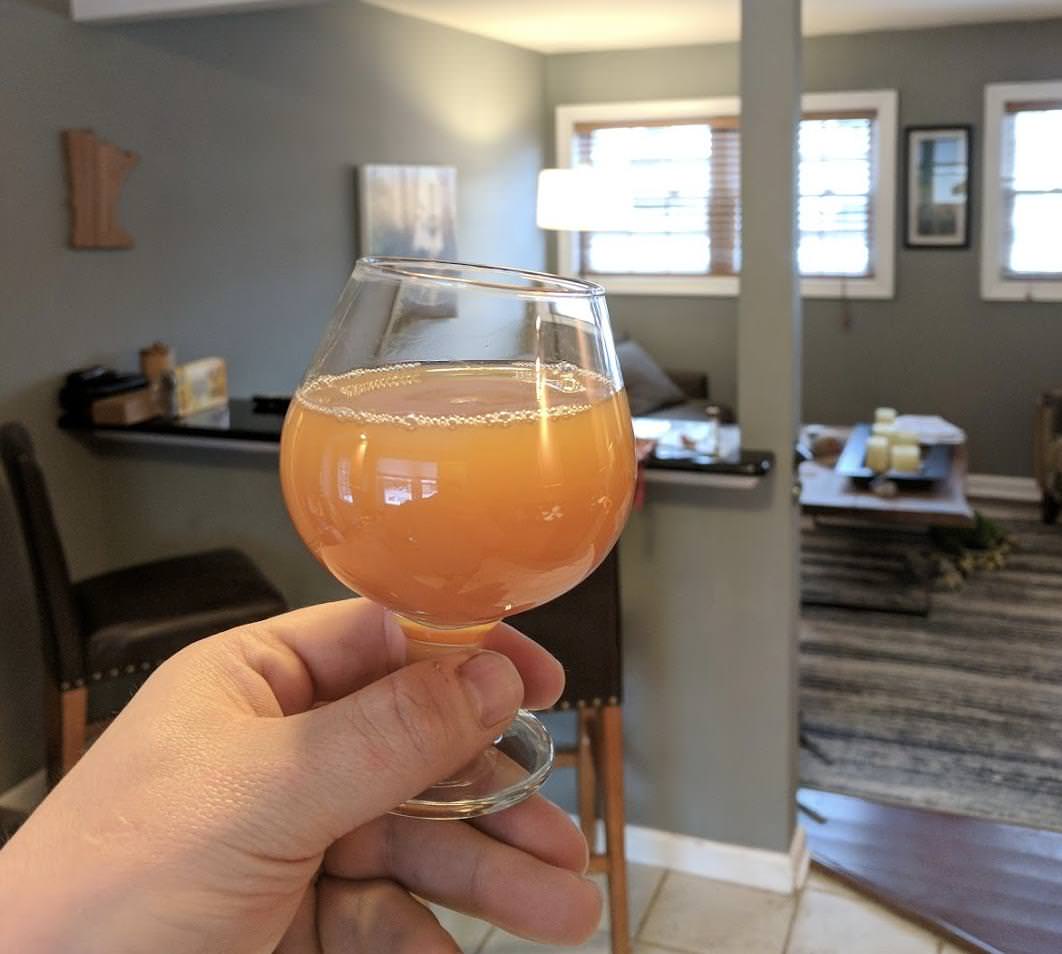
First beers going on tap - Dark Kolsh - Dark Saison - and a NEIPA.
(Pre-carbbed IPA)
v81cW5s.jpg


Cheers!
 
Looks very nice. Just watch those shanks and tail pieces when your loading full kegs in there.
 
Looks very nice. Just watch those shanks and tail pieces when your loading full kegs in there.
Funny you should say that - I just got done loading kegs in and completely spilled about 3-4 pints worth of kolsh on the floor from hitting the tap handle :smh:

Good learning experience!
 
Looks good! I'm currently building mine as well. I started with a mitered collar of 2x8 pine but I was to lazy to get out my planer and was in a rush so it wobbles a bit. I then realized (measuring AFTER construction is not the smartest thing :rolleyes:) that I can get 4 kegs on the floor so I'm going to rebuild it the right way with only a 4 inch collar. I love the idea of those angle brackets inside so I will likely borrow that and the english chestnut is beautiful! Kudos on the build! :mug:
 
Looks good! I'm currently building mine as well. I started with a mitered collar of 2x8 pine but I was to lazy to get out my planer and was in a rush so it wobbles a bit. I then realized (measuring AFTER construction is not the smartest thing :rolleyes:) that I can get 4 kegs on the floor so I'm going to rebuild it the right way with only a 4 inch collar. I love the idea of those angle brackets inside so I will likely borrow that and the english chestnut is beautiful! Kudos on the build! :mug:
I figured they can't hurt - keep everything square. Made it easier to conceal the screws holding it together with the 45 joins. Where did you get your pine from that the sides had wobbles? I didn't need to plane out mine they were good to go.
 
awesome work. That full carboy on the keg scares the crap out of me.
for a much cleaner staining process... use rags. Much easier to control the consistency/color and way less mess.
 
awesome work. That full carboy on the keg scares the crap out of me.
for a much cleaner staining process... use rags. Much easier to control the consistency/color and way less mess.
yea I read about doing it with rags but then last minute at home depot bought the foam brushes. Good to know for next time - I'd like to start building a bunch of other things for the house so I'll give the rags an attempt this coming spring!
There's a shelf I had the carboy on before that I had to move to make space for the keezer - the carboy has been repositioned. I just don't feel like bending down to the ground to pick them up - they're heavy!

I find the foam brushes work just fine, always go with the grain... I leave them for a couple minutes and then wipe the excess with a rag, sand with 220, restain, wipe... let cure over night then whatever sealant. Looks like an awesome kegerator... I think i'd definitely copy a build like this.
 
Funny, when I first saw the pictures of were you drilled your tap holes, I thought to myself "that's going to be tough to load and unload" and the first post after said what I thought. In the future, remove your tap handles before you load or unload a keg, you'll decrease your chance of loosing beer.
 
yea I read about doing it with rags but then last minute at home depot bought the foam brushes. Good to know for next time - I'd like to start building a bunch of other things for the house so I'll give the rags an attempt this coming spring!
There's a shelf I had the carboy on before that I had to move to make space for the keezer - the carboy has been repositioned. I just don't feel like bending down to the ground to pick them up - they're heavy!

I did my oak staircase and everyone says it looks very good. The best part about rags is no sanding required after. I bought commercial stain to match https://www.homedepot.ca/en/home/p....ood-flooring-1296-sq-ft--case.1000744756.html and it only required 1 wipe. No reapplication needed. I was very careful not to over apply and apply evenly. I had to basically plan my route. 2 coats of polyurethane (sanding between those) and its showing no signs of wear 5 years later.
The poly is overkill for a keezer but it might help with the common moisture issue. I've seen door seals on keezer that have good success against moisture.
 
Where did you get your pine from that the sides had wobbles? I didn't need to plane out mine they were good to go.

I just picked up some 2x8 pieces from the culled lumber section at Menards figuring a planer would take take of it. I also started drinking a bit before construction so theres a chance my cuts weren't as clean as they should have been. So, long story short, between the 'scrap' wood used and being a few beers deep I 100% blame the wood and am in no way responsible for the wobble lol.
 
Funny, when I first saw the pictures of were you drilled your tap holes, I thought to myself "that's going to be tough to load and unload" and the first post after said what I thought. In the future, remove your tap handles before you load or unload a keg, you'll decrease your chance of loosing beer.
yea that would be helpful too - I have the perlick 650ss's so I have just been shutting the flow off before that way if I hit the handle it's no big deal.
 
Collar looks great. How's this setup working out for you OP?

I picked up the same freezer in the 10.2 cu. ft. size and I'm preparing to build a collar. After seeing your build, I think it's pretty much the way to go.

Did your 1"x1" backboard go well for getting more room for the lid seal? Did you put anything down to help the seal, like a plastic strip of some sort?

thanks! Yea it's working really well - minimal temp losses, keeps the beer extra cold. There is a strong temp variation between the bottom of the freezer and the top but I think that's just how it works.

I did insulate the wood around all 4 sides, but I have no issues with sealing. Using a thicker board would be good - but isn't needed. a 2" board would be almost perfect IMO - but then insulation would stick out.
 
Back
Top