You are using an out of date browser. It may not display this or other websites correctly.
You should upgrade or use an alternative browser.
You should upgrade or use an alternative browser.
Doubling Down: SS Brewtech Conical + FTSS + Glycol Power Pack
- Thread starter mfabe
- Start date

Help Support Homebrew Talk:
This site may earn a commission from merchant affiliate
links, including eBay, Amazon, and others.
- Joined
- Feb 29, 2016
- Messages
- 502
- Reaction score
- 316
How are people doing transfers? Are you connecting CO2 line to the carb stone to pressurize tank for transfer?
That is how I did it.
MaltManMike
Member
- Joined
- May 11, 2016
- Messages
- 11
- Reaction score
- 0
Did the price of the 14 gal version go up by $100 recently? I could have sworn they were $999.
Did the price of the 14 gal version go up by $100 recently? I could have sworn they were $999.
I just posted that question to their Facebook page. I don't see any changes so it's likely just they wanted to make more money and figured people would pay, especially with the holidays almost here. I was considering a second down the road, not a chance at that price though.
MaltManMike
Member
- Joined
- May 11, 2016
- Messages
- 11
- Reaction score
- 0
I don't see any changes so it's likely just they wanted to make more money and figured people would pay, especially with the holidays almost here. I was considering a second down the road, not a chance at that price though.
I didn't buy a first one yet and was looking at two. Now I have to find yet another $200 or just change my plans entirely.


$76.92 ($2,179.04 / Ounce)
Brewing accessories 1.5" Tri Clamp to Ball Lock Post Liquid Gas Homebrew Kegging Fermentation Parts Brewer Hardware SUS304 Brewing accessories(Gas Hose Barb)
chuhanhandianzishangwu


$7.79 ($7.79 / Count)
Craft A Brew - LalBrew Voss™ - Kveik Ale Yeast - For Craft Lagers - Ingredients for Home Brewing - Beer Making Supplies - (1 Pack)
Craft a Brew


$44.99
$49.95
Craft A Brew - Mead Making Kit – Reusable Make Your Own Mead Kit – Yields 1 Gallon of Mead
Craft a Brew

$33.99 ($17.00 / Count)
$41.99 ($21.00 / Count)
2 Pack 1 Gallon Large Fermentation Jars with 3 Airlocks and 2 SCREW Lids(100% Airtight Heavy Duty Lid w Silicone) - Wide Mouth Glass Jars w Scale Mark - Pickle Jars for Sauerkraut, Sourdough Starter
Qianfenie Direct


$22.00 ($623.23 / Ounce)
AMZLMPKNTW Ball Lock Sample Faucet 30cm Reinforced Silicone Hose Secondary Fermentation Homebrew Kegging joyful
无为中南商贸有限公司


$49.95 ($0.08 / Fl Oz)
$52.99 ($0.08 / Fl Oz)
Brewer's Best - 1073 - Home Brew Beer Ingredient Kit (5 gallon), (Blueberry Honey Ale) Golden
Amazon.com


![Craft A Brew - Safale S-04 Dry Yeast - Fermentis - English Ale Dry Yeast - For English and American Ales and Hard Apple Ciders - Ingredients for Home Brewing - Beer Making Supplies - [1 Pack]](https://m.media-amazon.com/images/I/41fVGNh6JfL._SL500_.jpg)
$6.95 ($17.38 / Ounce)
$7.47 ($18.68 / Ounce)
Craft A Brew - Safale S-04 Dry Yeast - Fermentis - English Ale Dry Yeast - For English and American Ales and Hard Apple Ciders - Ingredients for Home Brewing - Beer Making Supplies - [1 Pack]
Hobby Homebrew


$53.24
1pc Hose Barb/MFL 1.5" Tri Clamp to Ball Lock Post Liquid Gas Homebrew Kegging Fermentation Parts Brewer Hardware SUS304(Gas MFL)
Guangshui Weilu You Trading Co., Ltd


$53.24
1pc Hose Barb/MFL 1.5" Tri Clamp to Ball Lock Post Liquid Gas Homebrew Kegging Fermentation Parts Brewer Hardware SUS304(Liquid Hose Barb)
yunchengshiyanhuqucuichendianzishangwuyouxiangongsi


$479.00
$559.00
EdgeStar KC1000SS Craft Brew Kegerator for 1/6 Barrel and Cornelius Kegs
Amazon.com

$20.94
$29.99
The Brew Your Own Big Book of Clone Recipes: Featuring 300 Homebrew Recipes from Your Favorite Breweries
Amazon.com


$176.97
1pc Commercial Keg Manifold 2" Tri Clamp,Ball Lock Tapping Head,Pressure Gauge/Adjustable PRV for Kegging,Fermentation Control
hanhanbaihuoxiaoshoudian


$58.16
HUIZHUGS Brewing Equipment Keg Ball Lock Faucet 30cm Reinforced Silicone Hose Secondary Fermentation Homebrew Kegging Brewing Equipment
xiangshuizhenzhanglingfengshop


$719.00
$799.00
EdgeStar KC2000TWIN Full Size Dual Tap Kegerator & Draft Beer Dispenser - Black
Amazon.com


Morrey
Well-Known Member
Did the price of the 14 gal version go up by $100 recently? I could have sworn they were $999.
I did a pre-order of my 14G tank in July (received in Oct) and it was $999...then I added the FTSs Cool and heat option which drove the price up, but the base price was $999. I looked today and it has moved to $1099 for the base tank, of course that includes all the fittings, clamps and gaskets you need.
They recently released the 7G version at $899, so I think the scant $100 difference between the 7G and 14G at $999 was simply too close so they shifted the price point apart a bit.
Selling point is that this is a dream come true system.

Morrey
Well-Known Member
They should have made the 7 gallon 799 and the 14 left at 999. If got mine for 999 and while it's nice, it is not worth 1100 without accessories
Agreed the 7G should be $799.
Did the price of the 14 gal version go up by $100 recently? I could have sworn they were $999.
You are correct. I noticed SS jacked the price of the glycol chiller up a few hundred $$ since it debuted as well. That's the reason I ended up with the Penguin Chiller. I can't stand it when prices go UP (with no extra value).
I almost didn't buy the Penguin Chiller when the price moved from $799 to $859 - however, it turns out that they decided to include the shipping and call it 'Ships Free' now. It's the same price, as shipping was always $60. I would not have ordered it had they just jacked the price up like SS does.
Morrey
Well-Known Member
You are correct. I noticed SS jacked the price of the glycol chiller up a few hundred $$ since it debuted as well. That's the reason I ended up with the Penguin Chiller. I can't stand it when prices go UP (with no extra value).
I almost didn't buy the Penguin Chiller when the price moved from $799 to $859 - however, it turns out that they decided to include the shipping and call it 'Ships Free' now. It's the same price, as shipping was always $60. I would not have ordered it had they just jacked the price up like SS does.
That's a good point about "marketing" that Penguin chose: Taking up the price $60 then offering FREE SHIPPING that would have been $60 anyway makes sense. Some folks get turned off when they see shipping rates and don't order. But the word FREE is bigger than life and it makes sense to market the product as Penguin chose to do. BTW I have a Penguin Glycol Chiller and think it is perfect for my 3 fermenter needs.
iijakii
Well-Known Member
Does anyone have quick disconnects (sealing ones) on the glycol lines to the coil they could link? I need to get something so I can move it around easier.
Does anyone have quick disconnects (sealing ones) on the glycol lines to the coil they could link? I need to get something so I can move it around easier.
I am using regular vinyl tubing off the coil barbs with ball lock disconnects on the ends. If am going to snap those onto ball lock connection posts on a washing machine valve box on the wall with the chiller behind the wall feeding the box. Easily removed to wheel to my kettles then.
Ride123ca
Well-Known Member
I just ordered the morebeer quick disconnects for my new penguin with a bme and cf10......they are 1/4 flow instead of 5/16 or 3/8 which is my only concern....but they were the only ones i could find that had shut offs so i didnt leak glycol everytime i cleaned my conical
https://www.morebeer.com/products/beer-gas-quick-connect-inline-set-shutoff.html
https://www.morebeer.com/products/beer-gas-quick-connect-inline-set-shutoff.html
- Joined
- Feb 29, 2016
- Messages
- 502
- Reaction score
- 316
I just ordered the morebeer quick disconnects for my new penguin with a bme and cf10......they are 1/4 flow instead of 5/16 or 3/8 which is my only concern....but they were the only ones i could find that had shut offs so i didnt leak glycol everytime i cleaned my conical
https://www.morebeer.com/products/beer-gas-quick-connect-inline-set-shutoff.html
So, you will just connect a small piece of tubing to the barb in your tank then the QD? Unlike the BME fermenters it is a pain to remove the tubing on the unitank its like it vacuum seals. Very interested to know how this works out.
Ride123ca
Well-Known Member
Yup.....ill shoot u a pic when i get them installed tomorrow jready
helibrewer
Well-Known Member
Does anyone have quick disconnects (sealing ones) on the glycol lines to the coil they could link? I need to get something so I can move it around easier.
Got mine here: Fresh Water Systems

Gustatorian
Well-Known Member
- Joined
- Apr 1, 2015
- Messages
- 638
- Reaction score
- 23
+1 on these QDs. I don't use insulation on my line though. I bought thicker tubing which has minimized condensation but hasn't totally eliminated it.
Morrey
Well-Known Member
I haven't quite figured out my connections yet for the new 14G uni tank or the 2 - 7G Brewbuckets. Once done fermenting and I am ready to clean, I am clamping off the glycol supply line into the cooling coil at the fermenter. Once removed, I take a short piece of 3/8 tubing and blow gently to force the glycol in the coils back into the chiller's reserve tank. I use occluding, smooth jaw hemostats and keep both the supply and return lines clamped off until ready to use again. I prefer to use a valve instead of the hemostats if I can find a 3/8" shut off.
I know there are probably better ways to clamp the lines off and evacuate the glycol from the coils as not to waste it. Any help/suggestions/advice/pictures are very much appreciated.
helibrewer, I just looked at the link of the connector barb you posted. Obviously this coupler has a barb that the glycol supply/return line will fit on. How about the other side as in the barb coming from the uni tank? A short piece of tubing coming the coil barb with a coupler attached to mate with the coupler body you linked? If this is correct, can you show me a link for that piece please?
helibrewer
Well-Known Member
+1 on these QDs. I don't use insulation on my line though. I bought thicker tubing which has minimized condensation but hasn't totally eliminated it.
That blue tubing you see on the wall is silicone insulated heater hose...that is what I used....it does still present some condensation. I am having trouble getting my fermenter below 40F so I tried the insulation....didn't make any difference.
Gustatorian
Well-Known Member
- Joined
- Apr 1, 2015
- Messages
- 638
- Reaction score
- 23
That blue tubing you see on the wall is silicone insulated heater hose...that is what I used....it does still present some condensation. I am having trouble getting my fermenter below 40F so I tried the insulation....didn't make any difference.
The lowest I can get is 40ºF, but that is with my glycol at 33ºF. I fear taking it lower than that...
iijakii
Well-Known Member
I can run my janky window AC unit down to the 20s easily and have no trouble freezing my fermenter if I wanted to. I bet your purpose built glycol chillers can handle lower temps fine?
I did a pre-order of my 14G tank in July (received in Oct) and it was $999...then I added the FTSs Cool and heat option which drove the price up, but the base price was $999. I looked today and it has moved to $1099 for the base tank, of course that includes all the fittings, clamps and gaskets you need.
They recently released the 7G version at $899, so I think the scant $100 difference between the 7G and 14G at $999 was simply too close so they shifted the price point apart a bit.
Selling point is that this is a dream come true system.
Where can i find the connection you have their for kegging?
tempestman
Member
I used these dual QDs from USPlastic they are 3/8" barb and 1/4" flow but they seem to work well. They are also kinda spendy but you only need half as many.
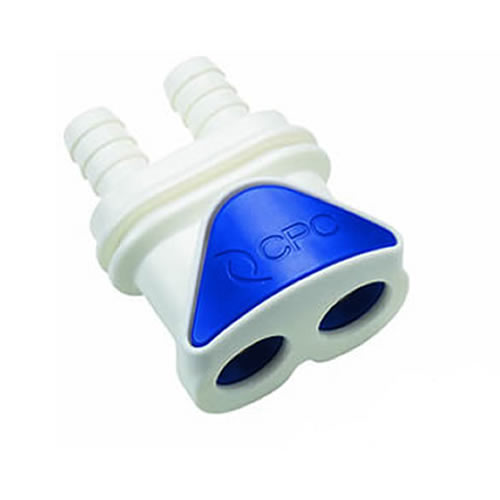
https://www.usplastic.com/catalog/item.aspx?itemid=118169
https://www.usplastic.com/catalog/item.aspx?itemid=118169
Morrey
Well-Known Member
Where can i find the connection you have their for kegging?
I think this may answer your question....I bought a 1.5" TriClamp fitting that has a liquid post built into it which I clamp on the uni tanks' racking arm valve along with a small sight glass to watch for trub pickup. I made a transfer line with 5/16" clear tubing and two ball lock liquid QDs. Pressurize the tank and push beer into keg.
I bought the 1.5" TC to liquid post from Bobby_M at brewhardware.
Morrey
Well-Known Member
I used these dual QDs from USPlastic they are 3/8" barb and 1/4" flow but they seem to work well. They are also kinda spendy but you only need half as many.
https://www.usplastic.com/catalog/item.aspx?itemid=118169
Nice. Did you rig up a shut-off valve as well?
Gustatorian
Well-Known Member
- Joined
- Apr 1, 2015
- Messages
- 638
- Reaction score
- 23
I think this may answer your question....I bought a 1.5" TriClamp fitting that has a liquid post built into it which I clamp on the uni tanks' racking arm valve along with a small sight glass to watch for trub pickup. I made a transfer line with 5/16" clear tubing and two ball lock liquid QDs. Pressurize the tank and push beer into keg.
I bought the 1.5" TC to liquid post from Bobby_M at brewhardware.
Can you post a photo of this set up? How are you pushing CO2 through the line to purge it of air before you transfer beer into the keg?
Morrey
Well-Known Member
Can you post a photo of this set up? How are you pushing CO2 through the line to purge it of air before you transfer beer into the keg?
I'll be glad to take a few pics and post. I'm doing an Oyster Stout tomorrow, so when I am mashing and boiling, I'll take a cell phone pic.
The transfer line I made is 4' long with liquid QD's on both ends. I'll have my keg sanitized and purged ready to receive beer from the tank. I will have my transfer line sanitized by pushing star san thru it from the keg being sanitized while I hold the spring loaded QD center post depressed with a pencil size SS rod I picked up somewhere. When I get ready to pump beer thru this transfer line, my uni tank is pressurized and I push some beer thru while holding down that center post until beer runs into a cup and this is clearing out all O2. Then I push the QD on the receiving keg liquid post and transfer begins.
Link for the liquid out 1.5" TC fitting: https://www.brewhardware.com/product_p/tc15bll.htm
Look at the attached pic and note the TC liquid out post on the racking arm.

Link for the liquid out 1.5" TC fitting: https://www.brewhardware.com/product_p/tc15bll.htm
Look at the attached pic and note the TC liquid out post on the racking arm.
I personally think it's a bit easier to use an MFL triclamp connector. That way you only have to connect one of the ball lock liquid connectors. It's also cheaper.
https://www.brewhardware.com/product_p/tc15flare.htm
Morrey
Well-Known Member
I personally think it's a bit easier to use an MFL triclamp connector. That way you only have to connect one of the ball lock liquid connectors. It's also cheaper.
https://www.brewhardware.com/product_p/tc15flare.htm
Yep, several ways to roll here.
Gustatorian
Well-Known Member
- Joined
- Apr 1, 2015
- Messages
- 638
- Reaction score
- 23
I'll be glad to take a few pics and post. I'm doing an Oyster Stout tomorrow, so when I am mashing and boiling, I'll take a cell phone pic.
The transfer line I made is 4' long with liquid QD's on both ends. I'll have my keg sanitized and purged ready to receive beer from the tank. I will have my transfer line sanitized by pushing star san thru it from the keg being sanitized while I hold the spring loaded QD center post depressed with a pencil size SS rod I picked up somewhere. When I get ready to pump beer thru this transfer line, my uni tank is pressurized and I push some beer thru while holding down that center post until beer runs into a cup and this is clearing out all O2. Then I push the QD on the receiving keg liquid post and transfer begins.
Link for the liquid out 1.5" TC fitting: https://www.brewhardware.com/product_p/tc15bll.htm
Look at the attached pic and note the TC liquid out post on the racking arm.
Trying to get my bearings around that Uni. That racking port looks intense! So you only utilize that racking port on the Uni when transferring beer into a keg, correct? I assume you just take samples from the sample port and leave the racking port alone? Do you have to turn the liquid-out post on the Uni prior to transfer so that the racking arm rotates within the vessel?
iijakii
Well-Known Member
Yeah, samples from the sample valve. Easy and no risk of making a giant mess.
You can pretty easily rotate the valve assembly to spin the racking arm up or down. I thought at first it might be difficult or that you'd have to loosen it up and risk spilling beer everywhere but nope... it simply turns.
You can pretty easily rotate the valve assembly to spin the racking arm up or down. I thought at first it might be difficult or that you'd have to loosen it up and risk spilling beer everywhere but nope... it simply turns.
Gustatorian
Well-Known Member
- Joined
- Apr 1, 2015
- Messages
- 638
- Reaction score
- 23
Yeah, samples from the sample valve. Easy and no risk of making a giant mess.
You can pretty easily rotate the valve assembly to spin the racking arm up or down. I thought at first it might be difficult or that you'd have to loosen it up and risk spilling beer everywhere but nope... it simply turns.
Good to know. I definitely have to loosen the TC quite a bit to rotate the racking arm on my 7G chronical
tempestman
Member
Nice. Did you rig up a shut-off valve as well?
They are valved connectors that do not leak when disconnected.
Carlscan26
Well-Known Member
I'll be glad to take a few pics and post. I'm doing an Oyster Stout tomorrow, so when I am mashing and boiling, I'll take a cell phone pic.
The transfer line I made is 4' long with liquid QD's on both ends. I'll have my keg sanitized and purged ready to receive beer from the tank. I will have my transfer line sanitized by pushing star san thru it from the keg being sanitized while I hold the spring loaded QD center post depressed with a pencil size SS rod I picked up somewhere. When I get ready to pump beer thru this transfer line, my uni tank is pressurized and I push some beer thru while holding down that center post until beer runs into a cup and this is clearing out all O2. Then I push the QD on the receiving keg liquid post and transfer begins.
Link for the liquid out 1.5" TC fitting: https://www.brewhardware.com/product_p/tc15bll.htm
Look at the attached pic and note the TC liquid out post on the racking arm.
So youre not keeping the receiving keg under pressure/trying to do a counter pressure transfer? Doesnt your beer foam up as it goes into the keg? Or is the PRV closed creating back pressure?
Morrey
Well-Known Member
So youre not keeping the receiving keg under pressure/trying to do a counter pressure transfer? Doesnt your beer foam up as it goes into the keg? Or is the PRV closed creating back pressure?
Receiving keg is under pressure. Haven't tried pushing beer into a non-pressurized keg, but I suspect carbed beer would make a mess. I use a spunding valve (on the gas post/receiving keg) I got from Williams Brewing, and set the relief pressure at around...3psi. Then the uni-tank or donor tank needs to be slightly above that pressure...say 6psi. Transfer is pretty slow, but I don't get foaming with the counter pressure. I sit my keg on a scale, zero out the tare weight, then push beer until the keg hits 42.5 lbs. Since I am filling more than one keg, I need to know when to stop the flow.
Carlscan26
Well-Known Member
Receiving keg is under pressure. Haven't tried pushing beer into a non-pressurized keg, but I suspect carbed beer would make a mess. I use a spunding valve (on the gas post/receiving keg) I got from Williams Brewing, and set the relief pressure at around...3psi. Then the uni-tank or donor tank needs to be slightly above that pressure...say 6psi. Transfer is pretty slow, but I don't get foaming with the counter pressure. I sit my keg on a scale, zero out the tare weight, then push beer until the keg hits 42.5 lbs. Since I am filling more than one keg, I need to know when to stop the flow.
Thanks for explaining that. What do you carb the beer to before transferring? If its higher than the 6psi youre pushing with them do you release pressure first?
Gustatorian
Well-Known Member
- Joined
- Apr 1, 2015
- Messages
- 638
- Reaction score
- 23
Receiving keg is under pressure. Haven't tried pushing beer into a non-pressurized keg, but I suspect carbed beer would make a mess. I use a spunding valve (on the gas post/receiving keg) I got from Williams Brewing, and set the relief pressure at around...3psi. Then the uni-tank or donor tank needs to be slightly above that pressure...say 6psi. Transfer is pretty slow, but I don't get foaming with the counter pressure. I sit my keg on a scale, zero out the tare weight, then push beer until the keg hits 42.5 lbs. Since I am filling more than one keg, I need to know when to stop the flow.
I'm trying to wrap my brain around this too. So the beer in the Uni-tank is not-carbed, partially-carbed, or fully carbed when it goes into the keg? And when you put approximately 6psi on the donor vessel, the beer should flow into the pressurized keg (assuming that the spunding valve is set to something lower than 6 psi, hence the keg will be at a lower pressure than the donor vessel, and flow will move forward accordingly...Am I understanding this correctly?
Morrey
Well-Known Member
I'm trying to wrap my brain around this too. So the beer in the Uni-tank is not-carbed, partially-carbed, or fully carbed when it goes into the keg? And when you put approximately 6psi on the donor vessel, the beer should flow into the pressurized keg (assuming that the spunding valve is set to something lower than 6 psi, hence the keg will be at a lower pressure than the donor vessel, and flow will move forward accordingly...Am I understanding this correctly?
This was my first go at the uni tank, so I lightly carbed the beer and the pressure gauge was reading somewhere around 10 psi. I bled off the head pressure, then set the CO2 regulator and spunding valve as mentioned.
In hindsight, I wasted CO2 since I should have not bled head pressure and set the spunding valve accordingly lower than the donor tank. Still getting my process down.
And yes, Gustatorian, beer from the uni-tank can be transferred non-carbed, partially carbed or fully carbed. Any of the above will work to be pushed to keg, and O2 exposure can be minimized with proper techniques. Moving carbed beer can create foaming issues, so having a counter-pressure process will help plus I figured moving the beer very slowly will help too. This was my first foray carbing in a tank, so this was a learning experience. I considered carbing in keg, but since the tank offers carb capabilities, I wanted to try this function. To me, it seems almost preferable to simply carb in the keg.
Similar threads
- Replies
- 13
- Views
- 623
- Replies
- 11
- Views
- 580
- Replies
- 5
- Views
- 641
- Replies
- 3
- Views
- 586
