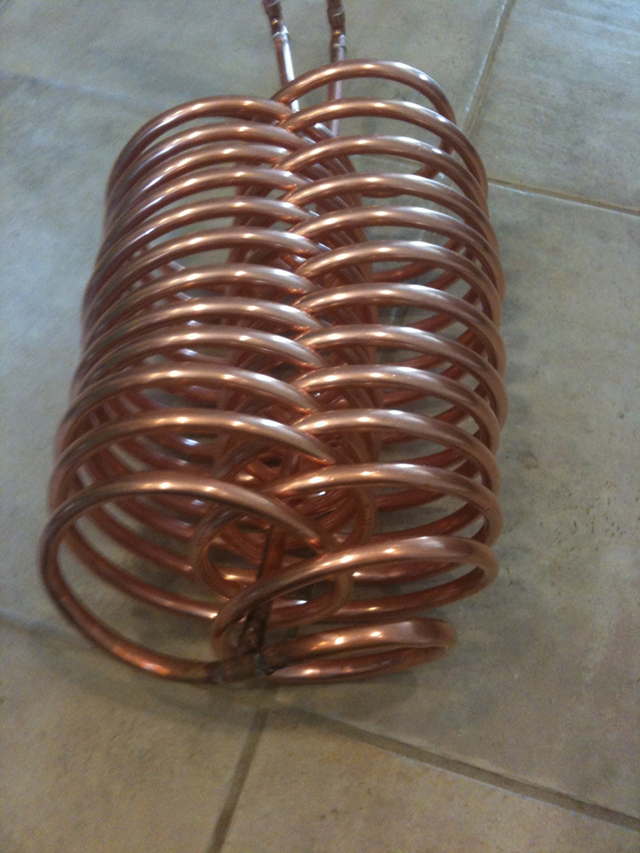
I have to drop in and give my ($2/100). I love thermodynamics. Ive gone to bed with a phsyc chart, steam table, and a calculator just for a last minute calculation to help me become sleepy. Anyway, I have to say, I love the Rib Cage Immersion Chiller design. Its design is a huge advantage to a tightly wound coil (TWC). Most of the time, the TWCs have no spaces between each coil. The RCIC is super ingenious and really looks like it gets the job done.
The biggest problem (BP) to overcome when chilling wort is when the wort approaches the cooling water temperature. (wort=90 and tap water = 70) When you are chilling near pitching temperature (NPT), the chiller with the largest surface area will prevail. If you think about what is going on when the wort is at 212, you will be confused. The average house-hold doesn't have enough water pressure to keep the temp of the waste water leaving the chiller (WWLTC) below the temperature of the wort. The WWLTC will be very close to the temperature of the wort, if the flow is low and the surface area of the chiller is also low. There may be quite a few stove-top-in-the-kitchen brewers reading this as well. If possible, try to increase your flow rate of chill water by running a hose from the water supply in the house, or from a garden faucet outside. This may give you much higher water flow than the kitchen sink.
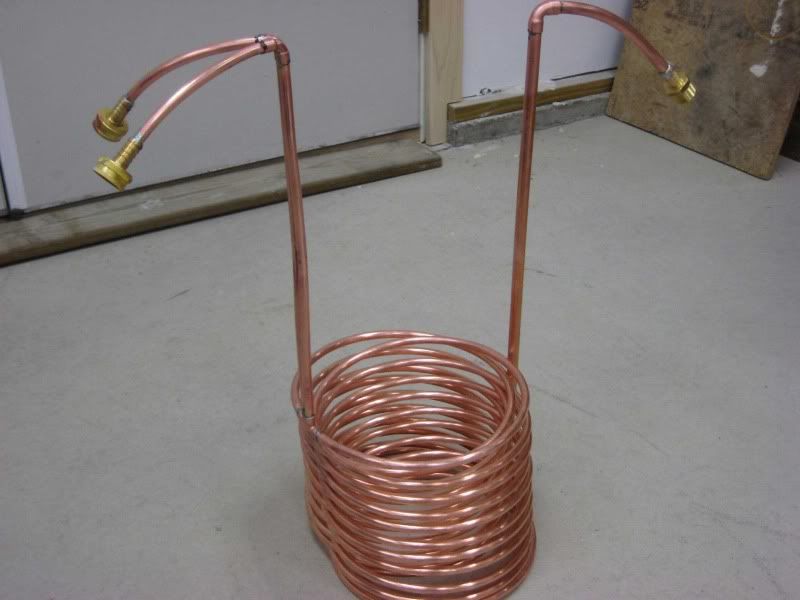
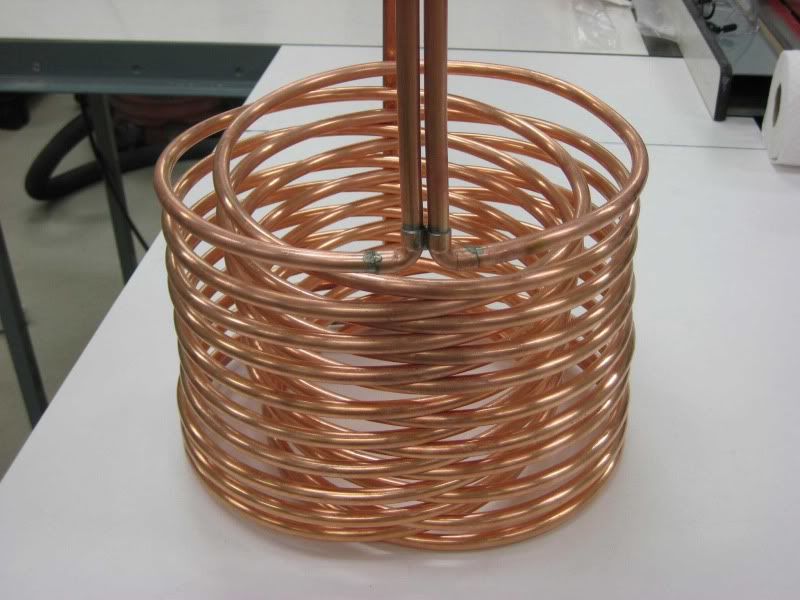
So back to the problem of chilling the wort down to the chilling water temperature. The best way to accomplish this without using ice, is with larger surface area and agitation. Lets say you had a coil that was made from 50' copper tube (5/8") OD and about 3 feet were useless because they are the feed and waste water portions of the RCIC. Also, the water flow rate is 1.3 gpm at 50 degrees Fahrenheit.
Area of coil= 50' - 3' = 47 ft
A= 47*(.625pi/12) = 7.7ft^2
T_2=50
mdot=(1.3gpm)*(231in/gal)/(1728in^3/ft^3)*(62.4lbs/ft^3) = 10.8 lbs/minute
(mdot is mass flow rate of water this time)
Lets also assume that you are down to 76 degrees Fahrenheit.
T_1= 76
Internal energy at @ T_2 is:
u_2 = 18 btu/lbm
T_1 (wort)
u_1= 44 btu/lbm
If we assume the RCIC is 100% efficient, it wil be removing this much heat per minute(Q_out is usually heat removed):
Q_out = m_dot(u_1-u_2)
Q_out = 10.8lbm/min (44btu/lbm-18btu/lbm)
Q_out = 280.8 Btu/min
Have you ever heard the term tons of cooling when hearing about AC units? A ton of cooling is 200 btu/min. Its pretty wild that a RCIC can chill at the rate of one ton with a mere differential temperature of 26 degrees.
This isnt fast enough though for 5 gallons of wort. (m=42lbm)
One degree in temperature change requires:
u @ 76 degrees: 42lbm*44btu/lbm = 1848 btu
u @ 75 degrees: 42lbm*43btu/lbm = 1806 btu
(its really one btu/lbm per degree at these temperatures)
So the energy needed to chill 5 gallons on degree is 1848 - 1806 = 42 btu/degree change of wort. If we are only able to exchange 280 Btu/minute with our 1.3 gpm flow rate, then we can find the temperature rate with those numbers:
Degrees/min = 280 Btu/min / 42 Btu/degree (Btu's cancel out and leave us with degrees/min)
=6.7 degrees / minute.
Not true, no? This is for a 100% efficiency assumption. You would have to stir your arss off, have 50ft^2 of area to achieve near perfect efficiency. This is food for thought. I figure I should jump on here take some numbers from real world, and talk about my lust for thrermodynamics.
Hail Purdue.


")


![Craft A Brew - Safale BE-256 Yeast - Fermentis - Belgian Ale Dry Yeast - For Belgian & Strong Ales - Ingredients for Home Brewing - Beer Making Supplies - [3 Pack]](https://m.media-amazon.com/images/I/51bcKEwQmWL._SL500_.jpg)