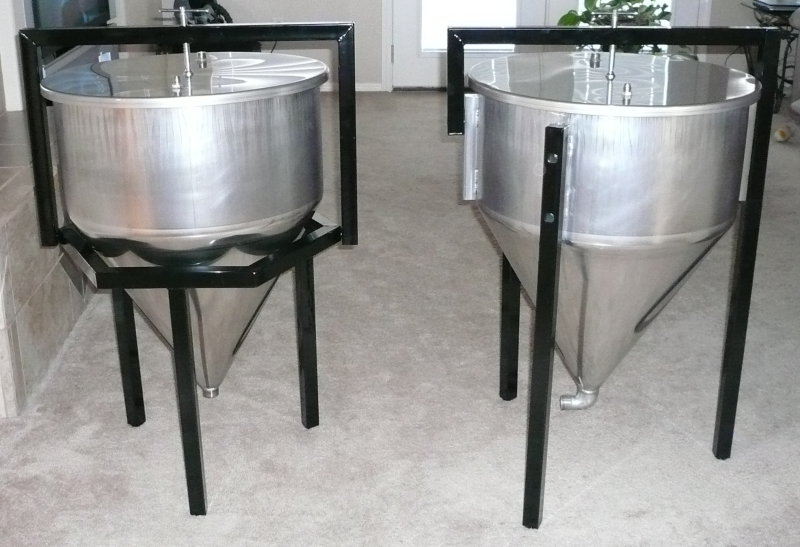
I may have missed this, but why the hexagonal stand for one, and the legs directly bolted onto the conical for the other?
You are using an out of date browser. It may not display this or other websites correctly.
You should upgrade or use an alternative browser.
You should upgrade or use an alternative browser.
DIY Conical Fermenter
- Thread starter Yuri_Rage
- Start date

Help Support Homebrew Talk:
This site may earn a commission from merchant affiliate
links, including eBay, Amazon, and others.
old_townie
Well-Known Member
IT looks like YURI found a hardware-free way of cradling the cone in the stand!!! my guess is this is how he can set the cone into the stand allowing him to remove the cone easily.
I'm STOKED!! Clean in place is NO fun... and i've been hemming and hawing about an easy way to allow me to remove a cone from the stand, but still have a stable base for fermenting
this is super cool
I'm STOKED!! Clean in place is NO fun... and i've been hemming and hawing about an easy way to allow me to remove a cone from the stand, but still have a stable base for fermenting
this is super cool
BeerCanuck
Well-Known Member
Those fermenters look sweet...Yuri
Cheers
BeerCanuck
Cheers
BeerCanuck
OP
OP
The primary reason for the hexagonal stand was to minimize the amount of welding on the fermenter body. The one with legs on the sides has four brackets welded to the outside, resulting in 16 welds, all requiring cleanup on the inside. My attempts at minimizing the heat still resulted in full penetration welds - quite structurally sound, but weld marks become evident opposite the side that had the heat applied (flux and/or back-gassing prevented any major mishaps). Through eliminating those welds, the fermenter on the hexagonal stand has a much more uniform interior. I'm still working on getting all the grind marks out of the other one. I don't think I sacrificed anything with the new design, and I'm much happier with the results. If there are additional benefits, like the ones townie mentioned, so much the better!
Well crap, I was hoping it would hold more pressure than that. Nice setup though, I love your stuff. So professional looking and clean.
Yuri_Rage said:Here they are! I just need to clean them up a bit more, drill a single hole in each one for the racking port, and install the rubber lid seals. Thanks to a late night last night, the legs/hardware are powder coated. Almost there!
wow. the powder coating makes those look sick! beer porn indeed!


$159.50 ($26.58 / Count)
3M High Flow Series System BREW120-MS, 5616001, For Brewed Coffee and Hot Tea, Valve-in-Head Design
Amazon.com

$53.24
1pc Hose Barb/MFL 1.5" Tri Clamp to Ball Lock Post Liquid Gas Homebrew Kegging Fermentation Parts Brewer Hardware SUS304(Liquid Hose Barb)
yunchengshiyanhuqucuichendianzishangwuyouxiangongsi

$76.92 ($2,179.04 / Ounce)
Brewing accessories 1.5" Tri Clamp to Ball Lock Post Liquid Gas Homebrew Kegging Fermentation Parts Brewer Hardware SUS304 Brewing accessories(Gas Hose Barb)
chuhanhandianzishangwu


$10.99 ($31.16 / Ounce)
Hornindal Kveik Yeast for Homebrewing - Mead, Cider, Wine, Beer - 10g Packet - Saccharomyces Cerevisiae - Sold by Shadowhive.com
Shadowhive


$479.00
$559.00
EdgeStar KC1000SS Craft Brew Kegerator for 1/6 Barrel and Cornelius Kegs
Amazon.com


$719.00
$799.00
EdgeStar KC2000TWIN Full Size Dual Tap Kegerator & Draft Beer Dispenser - Black
Amazon.com


$20.94
$29.99
The Brew Your Own Big Book of Clone Recipes: Featuring 300 Homebrew Recipes from Your Favorite Breweries
Amazon.com

$53.24
1pc Hose Barb/MFL 1.5" Tri Clamp to Ball Lock Post Liquid Gas Homebrew Kegging Fermentation Parts Brewer Hardware SUS304(Liquid Hose Barb)
Guangshui Weilu You Trading Co., Ltd


$58.16
HUIZHUGS Brewing Equipment Keg Ball Lock Faucet 30cm Reinforced Silicone Hose Secondary Fermentation Homebrew Kegging Brewing Equipment
xiangshuizhenzhanglingfengshop


$176.97
1pc Commercial Keg Manifold 2" Tri Clamp,Ball Lock Tapping Head,Pressure Gauge/Adjustable PRV for Kegging,Fermentation Control
hanhanbaihuoxiaoshoudian

$22.00 ($623.23 / Ounce)
AMZLMPKNTW Ball Lock Sample Faucet 30cm Reinforced Silicone Hose Secondary Fermentation Homebrew Kegging joyful
无为中南商贸有限公司


$7.79 ($7.79 / Count)
Craft A Brew - LalBrew Voss™ - Kveik Ale Yeast - For Craft Lagers - Ingredients for Home Brewing - Beer Making Supplies - (1 Pack)
Craft a Brew

![Craft A Brew - Safale S-04 Dry Yeast - Fermentis - English Ale Dry Yeast - For English and American Ales and Hard Apple Ciders - Ingredients for Home Brewing - Beer Making Supplies - [1 Pack]](https://m.media-amazon.com/images/I/41fVGNh6JfL._SL500_.jpg)
$6.95 ($17.38 / Ounce)
$7.47 ($18.68 / Ounce)
Craft A Brew - Safale S-04 Dry Yeast - Fermentis - English Ale Dry Yeast - For English and American Ales and Hard Apple Ciders - Ingredients for Home Brewing - Beer Making Supplies - [1 Pack]
Hobby Homebrew


$33.99 ($17.00 / Count)
$41.99 ($21.00 / Count)
2 Pack 1 Gallon Large Fermentation Jars with 3 Airlocks and 2 SCREW Lids(100% Airtight Heavy Duty Lid w Silicone) - Wide Mouth Glass Jars w Scale Mark - Pickle Jars for Sauerkraut, Sourdough Starter
Qianfenie Direct


$44.99
$49.95
Craft A Brew - Mead Making Kit – Reusable Make Your Own Mead Kit – Yields 1 Gallon of Mead
Craft a Brew

brewitall
Well-Known Member
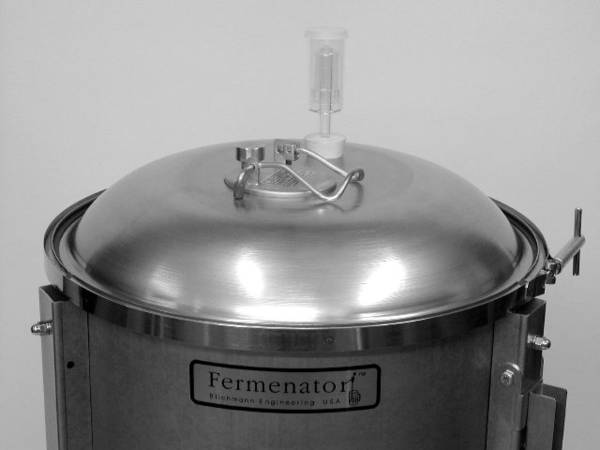
The problem with the design (although very minor), is the single screw in the middle of the crossmember to seal the top.
Because the thin stainless lid doesn't flex evenly all around under pressure, you get leaks caused by the uneven fit.
The solution to this is to tranfer the clamping force from the center of the lid to the outside edges. I have been using a set of aluminum channel fastened at right angles where the center of the cross sets under the clamping screw and the four ends extend to the edge of my lid.
While this has been fairly effective in sealing my conical, I'm thinking of constructing a "convex wagon wheel" that has a solid ring the same size as the top of my fermentor with 6 curving supports that meet at the center above wheel so that pressure from the hold down screw will be distributed through the fixture to put downward pressure on the edge of the lid rather than lifting the egde of the lid by placing the down force in the center.
OP
OP
The four clamps didn't work at all. My first fermenter barely seals at all and will hold absolutely no pressure whatsoever.
I just got done pressure testing the new design with the screw down system. It'll hold 1-2 psi; not quite what I expected, but the lid definitely seals uniformly as long as the pressure is low. It's enough for a pressure transfer, but there's no way you're going to force carb in these fermenters.
If you think about it, you're asking a lot of the system if you're trying to force carb/serve. The lids are about 21" in diameter, or 346 square inches. 2 psi puts over 1/4 ton of force on the lid. 10 psi is over a ton and a half of pressure against the bottom side of that lid!
OP
OP
Interior, just inside where the leg mount is welded:
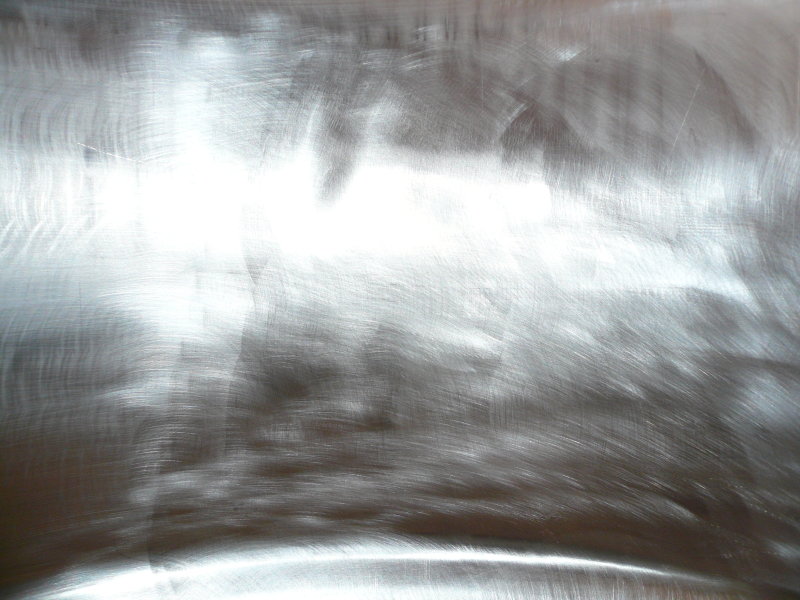
The lid:

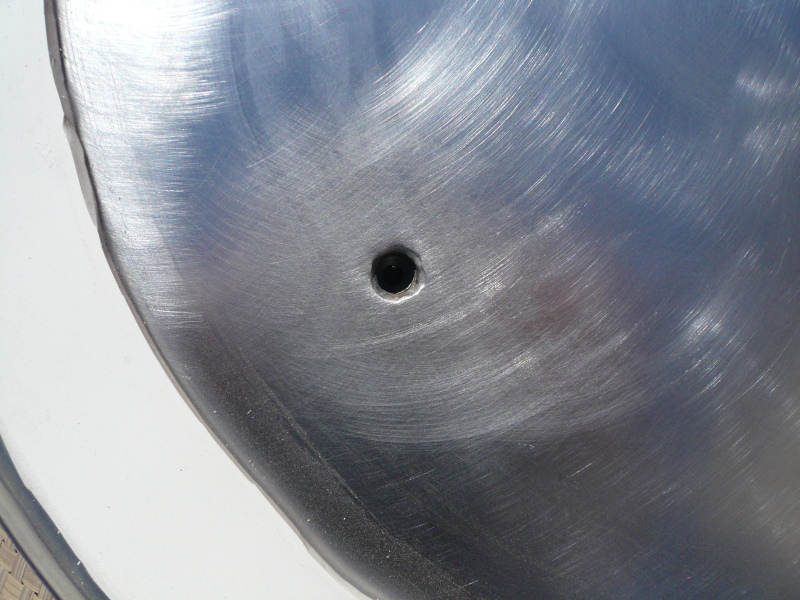
The underside of the lid:

Closeup (there's a caulk bead to keep nasties from getting under the seal):
The lid:
The underside of the lid:
Closeup (there's a caulk bead to keep nasties from getting under the seal):
OP
OP
The bottom weld (interior):

explosivebeer
Well-Known Member
That's beautiful system Yuri. Nicely done. Is it still working well for you? When I scale up in the next year I may have to do a similar thing. Do you have any concern about bacteria hiding in the seal that you used for the lid? Do you just sanitize that with an iodine solution or do you use something else? Thanks for the info and again, nicely done.
i've got one sitting in my friends basement at the moment. it works wonderfully. we currently have it filled with a rye mash for "experiments"
i just sanitize with iodine by turning the lid upside down and letting it drain into the conical, then rubbing the rest of the conical with iodine. seems to have worked so far.
once it gets cooler, i can start brewing some 15 gallon batches in there. it's just too warm right now and it won't fit in my fermentation cabinet.
can't wait...just another month or two.
Sheeeet, that was 17 pages worth of reading. Good read.
if you change your posts-per-page to 40 (in your profile) it's only 5 pages!
I just read the whole thread as well!
B
Mirage
Well-Known Member
") Makes me smile. Great job Yuri! Took a little bit to determine what those pink squiggly things were in post 162. Carpet FTW!!
Makes me smile. Great job Yuri! Took a little bit to determine what those pink squiggly things were in post 162. Carpet FTW!! BrewBeemer
Well-Known Member
yuri; i've been watching your frementer project from the start, great I must add. Question; on that 21 gallon conical fermenter what is the liquid level distance down from the top of flange or rim when the conical is filled with 21 gallons? I'm looking at all options for a conical fermenter for my needs be it a manufactured unit (yuck way to exspensive) besides not in the volume capacity range i'm looking for vs building my own.
Thanks. Carl..........
Thanks. Carl..........
BrewBeemer
Well-Known Member
No those are bug larva just before they hatch due to poor sanitation practices before putting away your equipment the last time used.
Rug fiber filtration system your onto something.
ChshreCat
Well-Known Member
my first thought was "mmmm.... pork sausage..."
BrewBeemer
Well-Known Member
my first thought was "mmmm.... pork sausage..."
This would require many mini toothpicks while serving if using proper eating manners.
Remember the one about a big overweight person in the buff who took a photo of a antique steam kettle then posted it on ebay. The photo showed clearly a reflection of him. What a moron.
Sorry got off the OP thread here a little but it was fun.
Phantoms4evermore
New Member
- Joined
- Aug 27, 2007
- Messages
- 2
- Reaction score
- 0
Sanitary is not a marketng ploy-there are welders that are qualified to do such- similar to the same experts that weld submarine hulls-these are the creme of the crop in the sea of welders- imagine welding a 8-10" thick hull sub perfectly- skill- mad skills!!!
Looks very good Yuri-
Looks very good Yuri-
BrewBeemer
Well-Known Member
I have to agree with the reply a couple pages back about using a large diameter plate same diameter as the lid say 1/4" or even 5/16" to distribute even flat pressure on the lid hence a seal even under any elevated pressures above the fermentation process. I must add that center cover bolt I would use a rod coupling for long thread life under load.
As for what Yuri stated about low pressures creating high forces due to the lids large surface area this is true and adds up rather quickly. My question is with a cover plate and any pressures applied above normal fermentation like Co2 transferring what would prevent the contact spots at the flat octagon frame against that tapered conical from being forced down denting into the conical? Small contact on eight locations with those high pressures and that conical is only .037" thick at that contact point. Don't take this wrong but I would of used 1" standard angle iron that has been rolled into a hoop for full contact support around the tapered conicals bottom and one for the top. JMO.
As for what Yuri stated about low pressures creating high forces due to the lids large surface area this is true and adds up rather quickly. My question is with a cover plate and any pressures applied above normal fermentation like Co2 transferring what would prevent the contact spots at the flat octagon frame against that tapered conical from being forced down denting into the conical? Small contact on eight locations with those high pressures and that conical is only .037" thick at that contact point. Don't take this wrong but I would of used 1" standard angle iron that has been rolled into a hoop for full contact support around the tapered conicals bottom and one for the top. JMO.
BrewBeemer
Well-Known Member
I have to agree with the reply a couple pages back about using a large diameter plate same diameter as the lid say 1/4" or even 5/16" to distribute even flat pressure on the lid hence a flat 100% seal even under any forced Co2 elevated pressures during fermentation or the transfer process. I must add also that center cover bolt I would use a rod coupling for long thread life under constant use and loads it will have if used a lot. I don't know what size or thread on the clamp bolt but I would go to 1/2" all thread.
As for what Yuri stated about low pressures creating high forces due to the lids large surface area this is quite true and adds up rather quickly. My question is with the cover plate screw pressure, Co2 pressure if above normal fermentation pressures plus the weight of the full fermenter all resting on eight small contact spots on that sharp box octagon frame edge against that tapered conical. What prevents that tapered conical from being forced down under all that pressure denting into the conical under those eight small contact spots vs a full conical contact area? Those eight contact locations transfer all this weight and pressure against the full conical that is only .037" thick at those contact spots. That conical at the taper is rather thin, .037" less than one mm for those metric members and made of soft 304 stainless easy to draw and spin. Don't take this wrong Yuri but I would of used 1 1/4" square tube that has been rolled into a hoop for a full contact support around the tapered conicals section. On the top cross bar I would of used rectangle stock mounted vertical for added strength vs square stock to prevent any possible bowing if elevated Co2 fermenting or Co2 transferring pressures were applied plus a low pressure safety relief pop off valve to protect the system. JMO's
As for what Yuri stated about low pressures creating high forces due to the lids large surface area this is quite true and adds up rather quickly. My question is with the cover plate screw pressure, Co2 pressure if above normal fermentation pressures plus the weight of the full fermenter all resting on eight small contact spots on that sharp box octagon frame edge against that tapered conical. What prevents that tapered conical from being forced down under all that pressure denting into the conical under those eight small contact spots vs a full conical contact area? Those eight contact locations transfer all this weight and pressure against the full conical that is only .037" thick at those contact spots. That conical at the taper is rather thin, .037" less than one mm for those metric members and made of soft 304 stainless easy to draw and spin. Don't take this wrong Yuri but I would of used 1 1/4" square tube that has been rolled into a hoop for a full contact support around the tapered conicals section. On the top cross bar I would of used rectangle stock mounted vertical for added strength vs square stock to prevent any possible bowing if elevated Co2 fermenting or Co2 transferring pressures were applied plus a low pressure safety relief pop off valve to protect the system. JMO's
OP
OP
A plate would be awesome, but stainless plate of that thickness nearly doubles the price of the project.
As for thread life, I scavenged parts from a heavy duty clamp. Those threads were designed for repeated stress.
Buy me a tubing roller or slip roll capable of handling thick stock, and I'll gladly use a hoop. Until then, a hexagon is the best I can do. There isn't THAT much stress on the conical portion - the clamping force is fairly minimal (it's designed for low pressure transfers, not force carb pressures).
During fermentation, there should be ZERO pressure buildup, so a relief valve is pointless there. During transfers, one end of the system should always be open, acting as a pressure relief. Rectangular stock makes some sense, but, again, the system is designed for minimal pressure.
In any event, I don't think I'll be selling any more fermenters anytime soon. It is a cost/time prohibitive venture. I had a great time with the project, and I learned a ton. Hopefully others can learn from my successes and failures.
BrewBeemer
Well-Known Member
I was thinking of using aluminum it's cheap as a disk to transfer the pressure to the outer lids sealing area.
I always liked that three powered roller hoop machine that American Chopper has besides the manual flat stock hoop or radius bender. I believe that manual bender is $700 base price before you add any dies, that would triple the value of the bender.
Like a Bridgeport the accessories cost more than the machines base price if you loaded one up.
I have a spot in the shop for any of their bend or hoop machines, all donations accepted 24/7.
That would be a quick and simple way to make square stock hoops, weld, dress and move on a fast operation.
trip2hard
Well-Known Member
are you still making these???
brauhausjoe
Well-Known Member
Hey Yuri, Would the clamp like the one shown in the picture work for your lid? Maybe the domed lid?
Just a thought....
Just a thought....
Similar threads
- Replies
- 0
- Views
- 275
- Replies
- 9
- Views
- 1K
- Replies
- 0
- Views
- 576
- Replies
- 0
- Views
- 815
- Replies
- 63
- Views
- 3K
