
aeviaanah
Well-Known Member
- Joined
- Jul 1, 2012
- Messages
- 1,686
- Reaction score
- 217
Looking to perform an initial charge on a used split unit we bought for our cold storage. This is a split unit and we have installed about 40' of service line in which we need to vacuum. I spoke with an AC technician and this is about as much information I could gather. I have gauges, refrigerant and vacuum pump. If anyone has any time can you review my notes and see if there is anything I am missing? I am unsure if the previous owner knew about shutting off the valves to preserve refrigerant in the unit.
- Hook up gauges- red line to hot side (high pressure, small line), blue line to cold side (low pressure, big line). Yellow to vacuum.
- Shut of knobs at gauges, this controls flow to the yellow line. Dont allow a surge of refrigerant into the vacuum it may make it leak oil. Relieve the lines before vacuuming on future steps!
- Check if there is pressure in the AC, use the needle valve at the units, check the low side pressure. If the needle valve is fully tightened it probably has pressure. Check for pressure and close immediately.
- If no pressure, open up both needle valves and proceed to vacuum the system.
- If pressure, there is no need to vacuum the AC, preserve the refrigerant.
- Vacuum for 1 hr. Let sit for 15m with pump off. Observe for a change in pressure.
- If you have a change in pressure fix the leak.
- Close valves to hold vacuum, disconnect yellow line at vacuum.
- Hook up refrigerant and turn cylinder upside down. Hook up yellow line to cylinder.
- Purge the yellow line with refrigerant, hook back up to gauges.
- Install a quality thermometer on high pressure side at unit. Insulate.
- If system is empty, add refrigerant until high pressure side and low pressure side read same pressure??? This will be about 110psi starting.
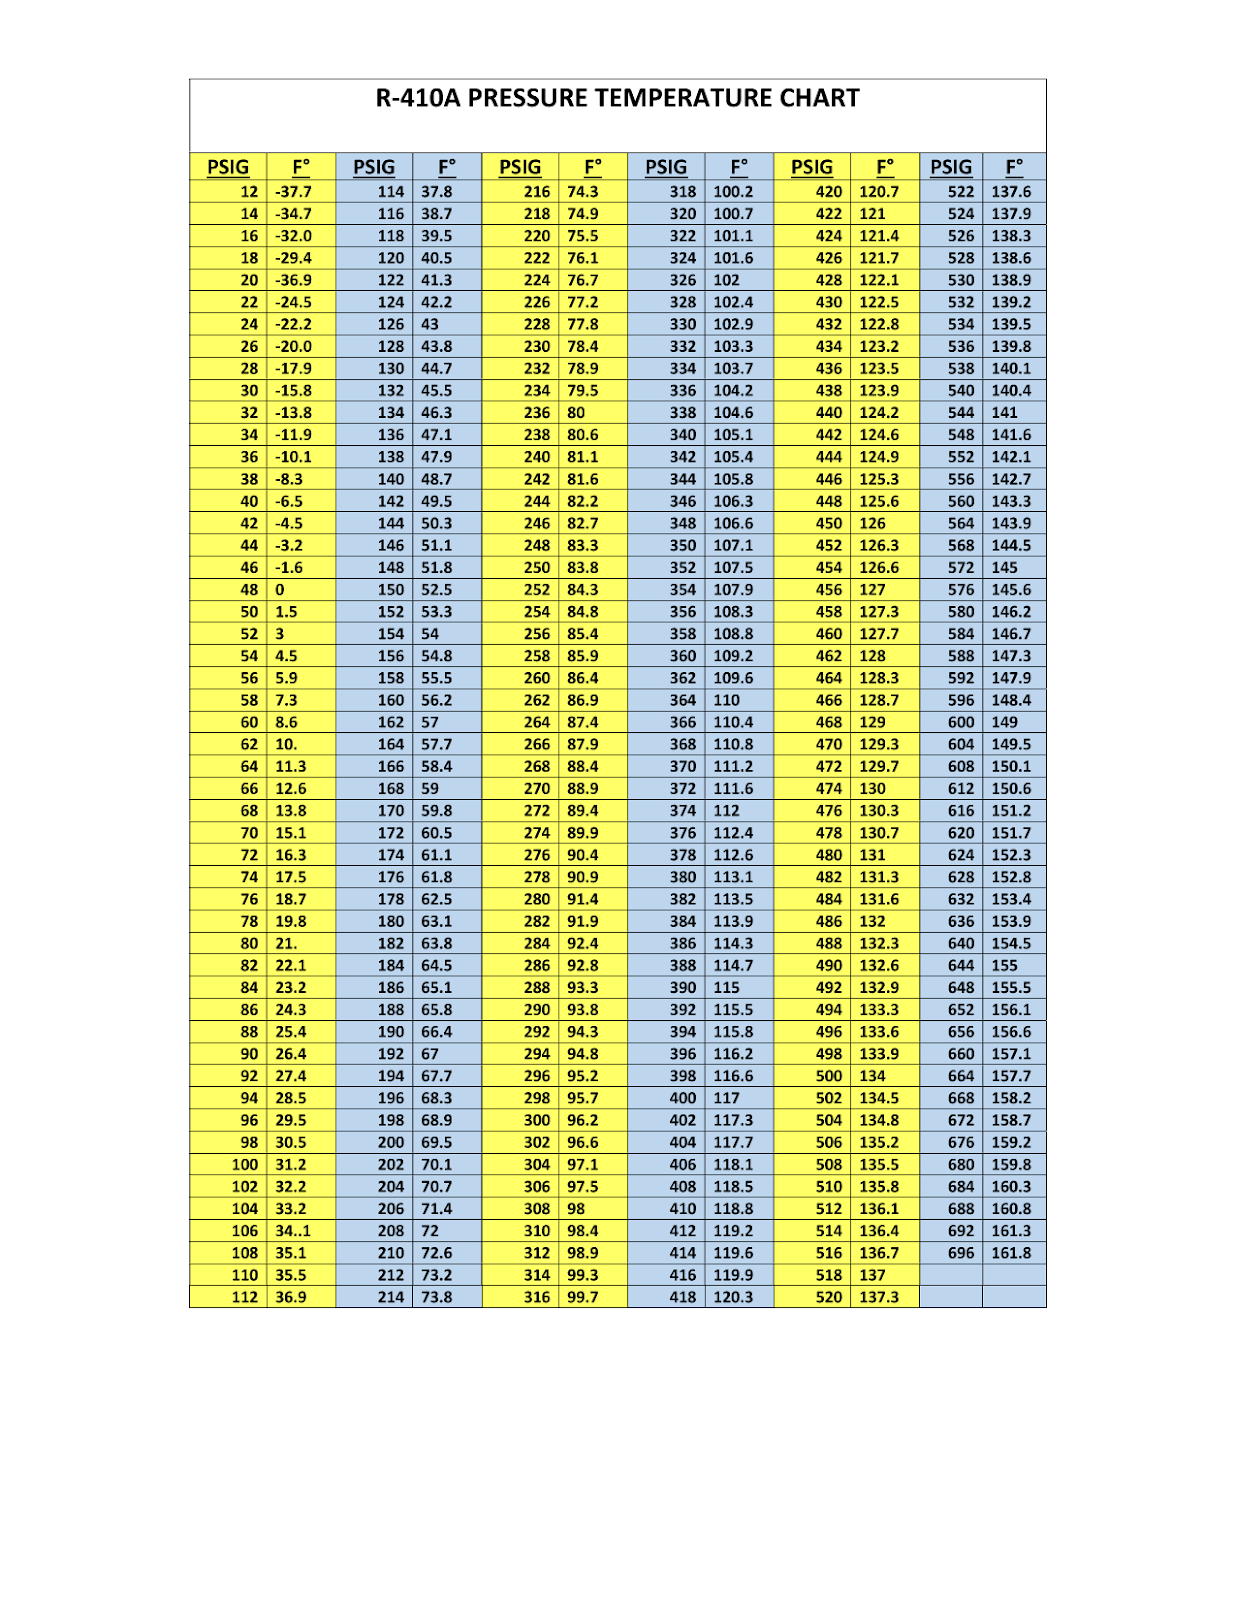
- To ensure the proper pressure on the high side... Run unit for 20m. When reading thermometer on high side, we are targeting 10deg less than the pressure converted to temp chart. 7-13deg is acceptable.
- If larger differential remove gas, if smaller differential add gas. Ie -14deg remove gas, -6 deg add gas.
- Where do we remove gas from? Shut off valves, disconnect from the refrigerant tank and depressurize there
