• Please visit and share your knowledge at our sister communities:
  • If you have not, please join our official Homebrewing Facebook Group!

    Homebrewing Facebook Group

Custom Spike TC eBIAB Build- stovetop plus 120v element

Homebrew Talk

Help Support Homebrew Talk:

This site may earn a commission from merchant affiliate links, including eBay, Amazon, and others.
I really like your setup. Had a few questions about your dip tube and whirlpool arm from Jaybird.

Do you recall what the dimensions were of this dip tube before you cut it?http://www.norcalbrewingsolutions.com/store/Tri-Clover-Dip-Tube-1.5-Inch-x-1.5-Inch-x-.5-Inch.html

Standard length is 3 inches and standard height is 3 5/8

What did you use to cut the dip tube and at what angle did you cut it?

Also for the Whirlpool arm you stated the height was 10 inches, but do you recall the length? ... 2 1/8 is the default.

I am looking to design something similar so any help on the dimensions would be huge.

What I am using as the diptube is actually the NorCal whirlpool return so it is 2 and 1/8" long not the 3" that comes standard with the TC "diptube". I ordered it 5" tall then cut back and inch or so, then cut the angle to match the kettle bottom.

I cut this with a little hand hacksaw and a dremel tool. Worked well enough.

The whirlpool arm is 10" tall and the standard 2 1/8" long. This length hugs the kettle wall nicely.

Hope it helps!
 
Much appreciated. I am doing a 15 gallon version. I order the same two items only did the whirlpool arm 13 inches instead of 10.

I was planning a similar design, but your post inspired me to move the whirlpool port up higher, so it could potentially be used for a recirc arm. Also, added the heater port based on your post.

Thanks for getting back to me.

Glad to hear it helped. Be sure to share your setup pics here or in the custom Spike thread when you are done!

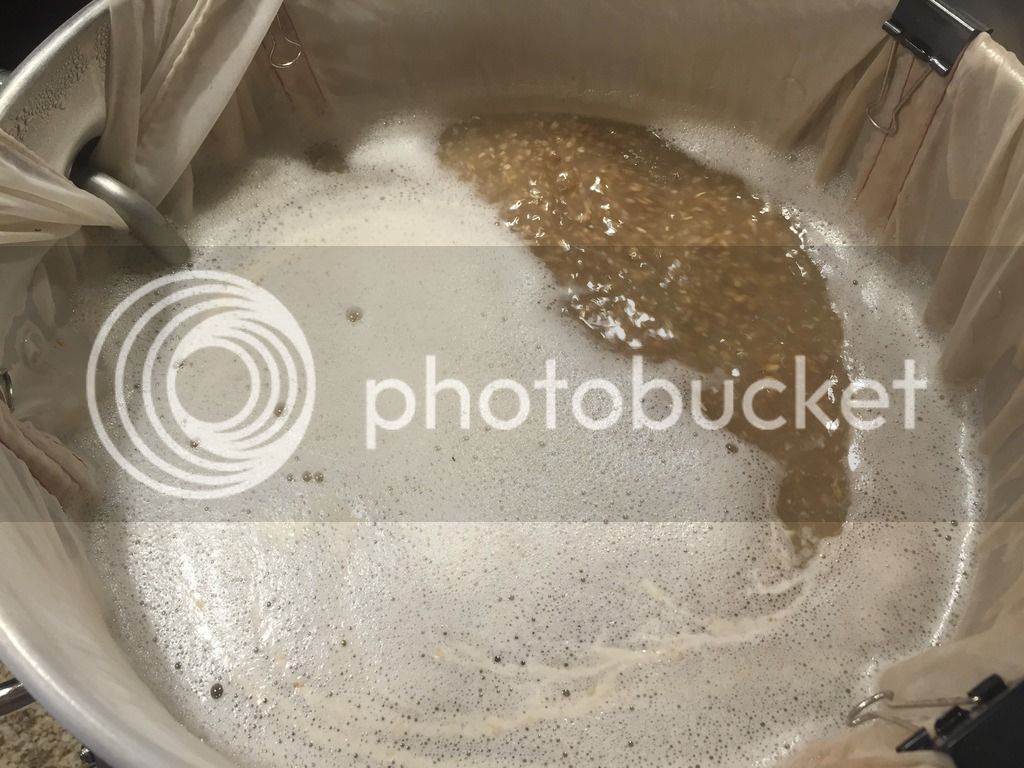
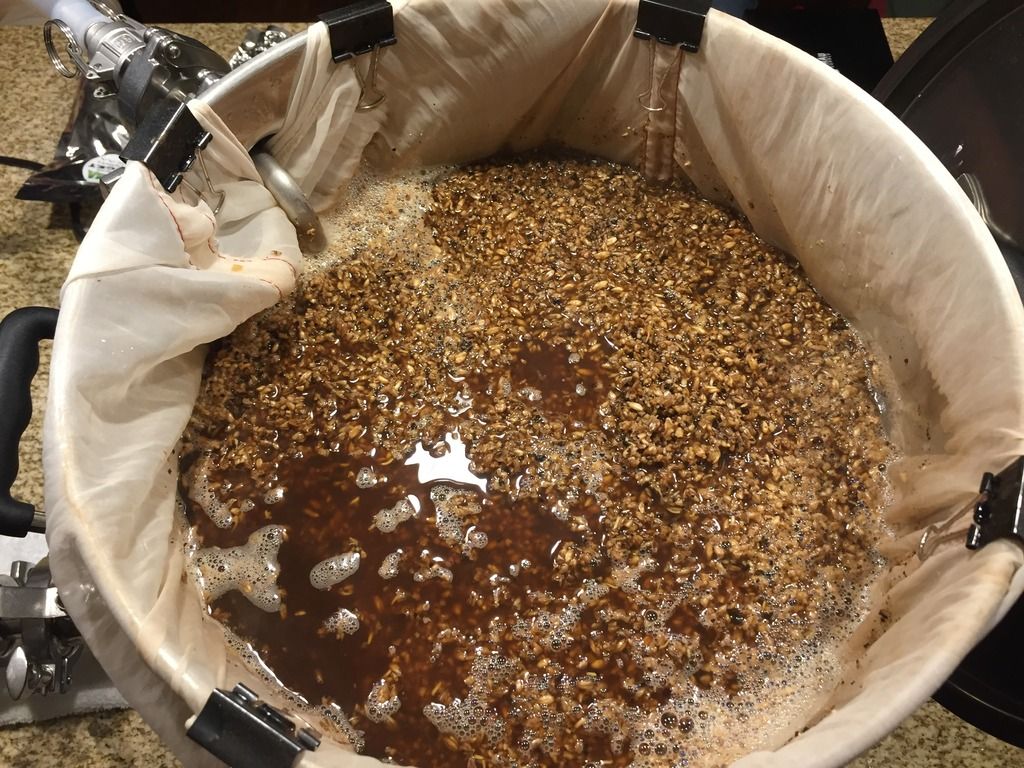
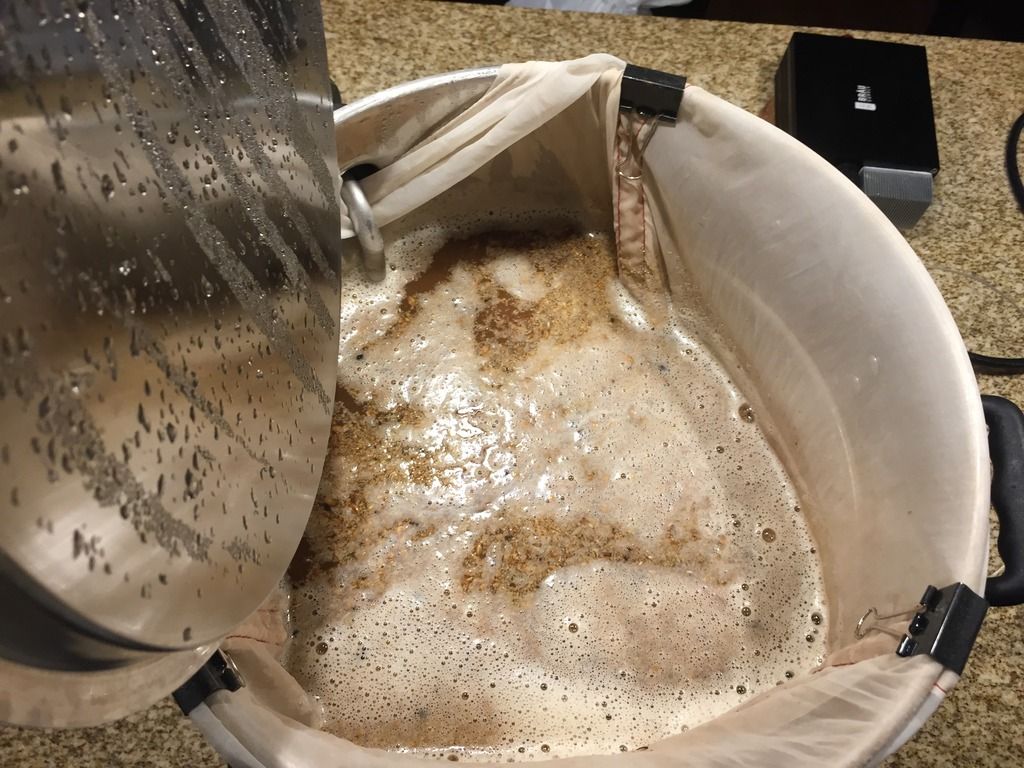
As a bonus, on my last brewday I used my whirlpool arm to recirculate during the mash, and it was awesome. No cavitation issues, held mash temp perfectly with my EZBoil controller. You just need to put your BIAB- bag in, then pull a small part of it down to install the whirlpool arm into the bag. I just use video clips to hold the bad in place and off of the element. Pictured below:

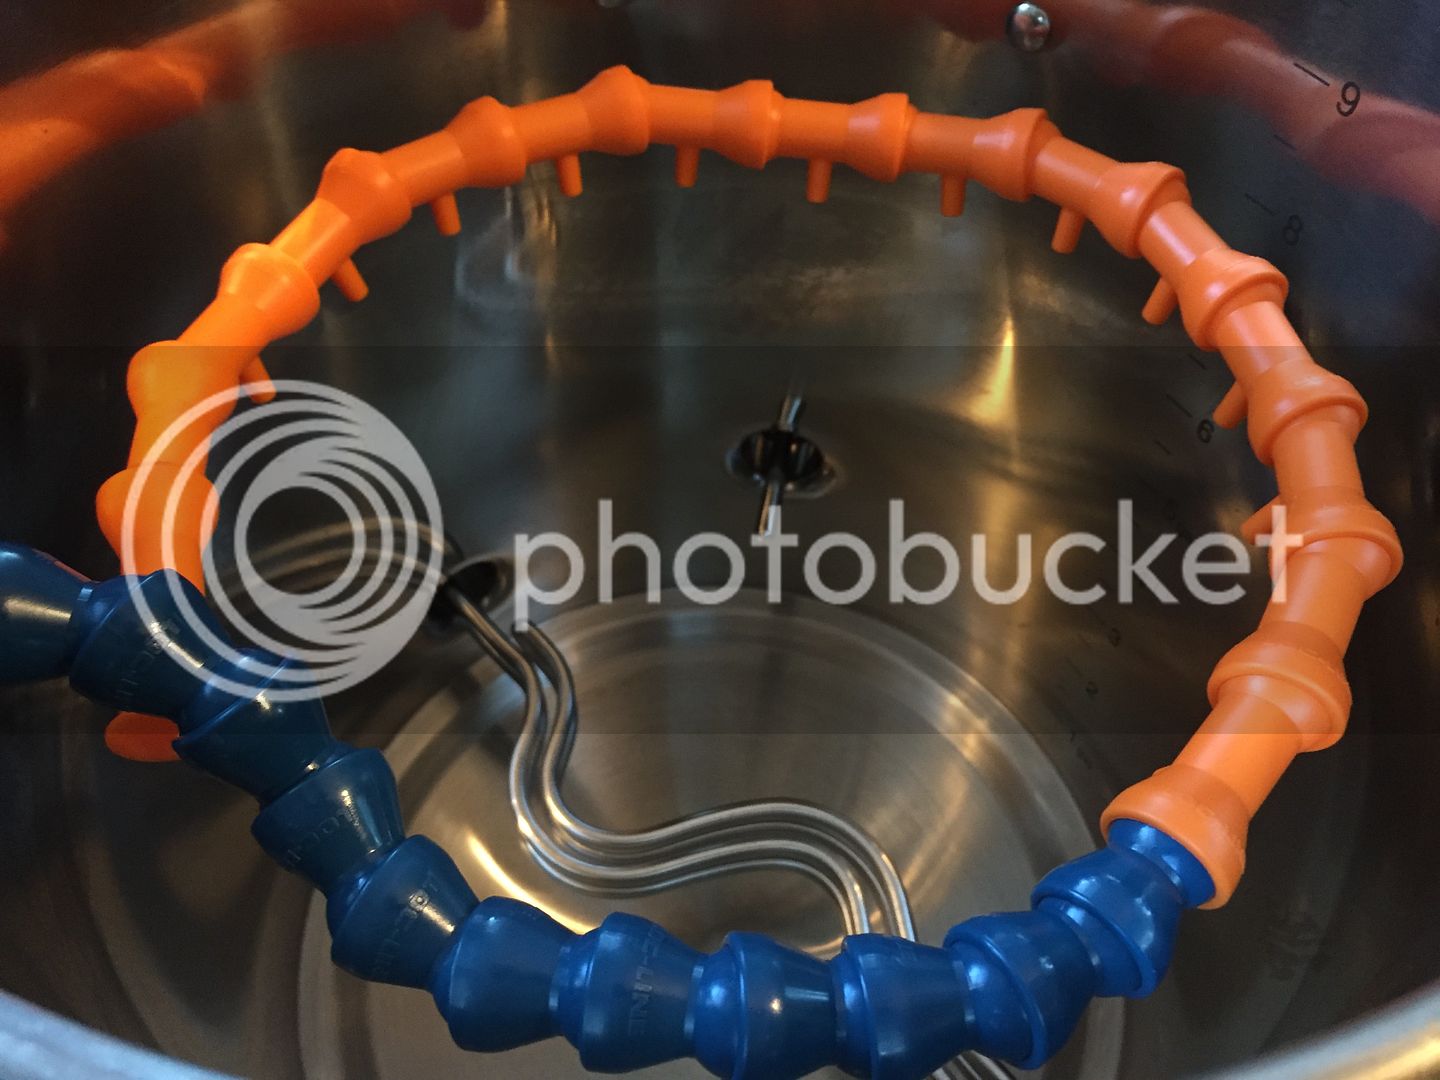
I have also been using the locline return for a CIP sprayer at the end of the brew day.


Which of these two setups (whirlpool arm vs locline) do you prefer your mash recirculation setup? Looking at building a very similar setup and had been debating whether the whirlpool arm would be sufficient for recirculating.
 
Which of these two setups (whirlpool arm vs locline) do you prefer your mash recirculation setup? Looking at building a very similar setup and had been debating whether the whirlpool arm would be sufficient for recirculating.

I have only brewed two batches with this set up so far. One batch with each recirculation setup. Both were lower gravity (1.04- 1.05) and done as full volume BIAB. I have no screen or false bottom. The bag was simply held above the element with binder clips as pictured.

In these two batches, the whirlpool arm worked flawlessly. I added the grains let soak at temp for 10 minutes, then started the recirc. The pump was very happy at about 1/2 way open on outflow. I did not need to stir or stop the pump once. I did check the grain "bed" with my mash spoon and it appeared as though everything was more or less in a uniform suspension.

In the loc line batch, things went okay, but not quite as flawless. In this batch I did not let the grains soak for 10 minutes though, so not totally the same. I also tried a couple pump outflow settings and slower was definitely better. Stirring every 10min or so did seem to be required though as a bed of grain would form at the bottom and the flow through the bag could not keep up with the pump (cavitation). Stirring occasionally did fix this.

Next batch will definitely be the whirlpool arm recirc though. This time in a slightly larger porter.
 
Curious, did you notice any efficiency differences in the two recirculation approaches (Locline vs whirlpool)?

I have really only done 2 brews, one of each so far, with this system. So strictly anecdotal evidence. But, IIRC, the whirlpool arm method gave me just under 80% mash efficiency (wound up 72% brewhouse efficiency). I got slightly less from the locline setup (I don't recall the exact number but not less than 65% brewhouse).

But, I am very much still learning my new system so not really a fair comparison.
 
Just thought I'd post a quick update for anyone interested. I have now brewed 4 batches with the new set up and could not be happier. Brews have included a grissete, pale ale, porter, and scottish 70 schilling. All have been a breeze.

Current mashing process includes adding grain to full 7g of strike water, mixing to wet, then letting stand for 10 min or so before beginning recirculation through the whirlpool arm. I have yet to have any problems with cavitation or restricted flow. The BrauSupply EZBoil keeps me dead on my mash temp the whole time. I then mash out by simply adjusting the setting on the controller. Then I remove the bag, squeeze, rinse lightly with an additional 0.25g or so (brings total pre boil volume to just over 7g), then place my kettle on the stove burner and set to boil mode on the controller. Once at a boil, 85% on the 120v element plus my stove coil on full gets me an excellent rolling boil with a final volume transferred to the fermenter of 6g. I use a hop sack only off using a larger amount of hops, and whirlpool chill (takes less than 15min to reach 75 or so with 70ish tap water).

For all batches I have had a measured mash efficiency of 72-75%. So right about what I want to use BCS and CYBI recipes without modifications.

Highly recommend pretty much all the components for a relatively hassle free all grain, 120v electric, brew day in a single vessel. Which in my 750sqft downtown apartment is just what I needed.

A couple more mashing photos:


The system looks great! I think I may have gone with all TC connections if I had seen this thread before I ordered my Spike kettles. I'm not sure if I would have, but I should have given all TC clamps due thought.

beer looks great!
 
Hey jmrybak, what a sweet rig! I bought a similar custom kettle from spike recently. I'm looking in to doing the same thing you are, but with a 15gal kettle and 10 gallon batches when desired.

My kettle:

15 Gal
  • 1.5 tc at 180 2" from bottom
  • 2 full npt at 2" from bottom
  • half npt at 2" from bottom
  • full npt at 2" from top

I originally planned to do 240v due to the volumes, and maybe I will end up doing this still because the laundry room with the dryer outlet is where all my brew equipment/keezer resides(beer>laundry). But getting gfci installed or doing it myself seems like a very bad idea for someone who's renting, unless I can convince the landlord to pay for it. I'll ask once I've researched all options but its unlikely.

In the event that I cant make that happen, my options are to either wait it out and brew with propane/cooler until I live in a place with 240v gfci, or go the 120v route. If I can use a stovetop or induction burner paired with a 120 to the same effect as I would get with 240v on 10gal batches, this could the most flexible option for me.

I'm really glad I found this thread, everything about your rig seems tuned in and on point. Love the locline CIP even though that wasn't its intended use. Its not easy to clean my 15 gal kettle indoors and I live upstairs with the only outdoor hose 50+ yards away. Great way to save water too.

Do you use the stove to heat your strike water or just for boiling? I'd imagine the 120 element alone would have a pretty rough time with 10gal batch preboil volumes.
 
Here's the mash recirculation arm I'm planning on trying out.


How did the LocLine sparge ring work out for you when recirculating during the mash? Any issues with errant bits of grain/husk clogging it? Or does your bag do a good enough job of filtering that this is not an issue?

It looks in your update like you went back to a SS tube for recirc...
 
Hi, I have a very similar set up and I wanted to know what you were doing to keep the bag off of the element, if you have started heating during mash. Are you depending on binder clips or do you have a false bottom sitting above the element?
 
Hi, I have a very similar set up and I wanted to know what you were doing to keep the bag off of the element, if you have started heating during mash. Are you depending on binder clips or do you have a false bottom sitting above the element?
So I am using the binder clips to hold the bag up. This minimizes the bag from pressing down on the element, but I'm certain it doesn't totally prevent it. Especially with the grain pressing down. I don't have a false bottom. I do preheat to the initial strike temp (with near full volume ~7g), add grain, let it sit and soak for 5- 10 min after initial mixing, then recirculate with my whirlpool arm which returns about 2" above the element running on 120v for ULWD. Additionally, while the element is holding my mash temp (extremely well), it's only intermittently on at partial power with my EZBoil. I have done a few step mashes and will help stir during this time, but not constantly. To date I have about 10 batches through with up to about 18 lbs of grain including a batch of 100% wheat malt with 3 steps (Grodziskie). Not the slightest sign of an issue.

Add some pictures of your setup if you can! Love to see it.
 
The Brewery

Thanks! I have a whirlpool fitting bottom and top but wasn't sure if I was going for a mesh bag or basket from Arbor Fab or what. I still need to get a 3rd elbow and I may just get the normal one and throw a silicone hose on it instead of the length of pipe you have on yours.
 
I personally use an in the kettle probe position. I like this set up because it gives you a usable temp even when you aren't recirculating.
 
for a system like this, would you guys suggest in line temp probe or in kettle?

Probe in Kettle. The In-line option is good for retrofit setups where you already have a kettle, don't want to add another NPT or TC fitting, and are ok with running the pump the entire time. If you're building or updating I would put it in the kettle.
 
Going to bring back a semi old thread. This is basically the same exact set up I have been starting to build. Right now I have a Brew Boss using a kettle I made. Everything is weldless with threads. I just ordered a 1.5" TC element. I will be ordering a TC dip tube and whirlpool arm from NorCal. I also use Loc Line right now. I'll be using my current kettle for a little while until I figure out exactly what fittings I want Spike to install for me.

Have you been using the whirlpool arm as the mash recirculating arm? Wouldn't the wort on top not be part of the circulation and start to cool down a little? I'm sure some moves down but if the in and out are low, I'd think most of the recirculating is happening in the bottom half of the kettle.
 
Have you been using the whirlpool arm as the mash recirculating arm? Wouldn't the wort on top not be part of the circulation and start to cool down a little? I'm sure some moves down but if the in and out are low, I'd think most of the recirculating is happening in the bottom half of the kettle.

Most of these systems recirculate back into the top of the mash somehow. Some have a recirculation port placed high on the kettle, others recirc through the lid.

My system uses a weldless fitting in the lid that connects to a locline recirc ring. Works great. The thread is below if it helps. N.B. I've recently switched from the SS mesh basket to a wilser bag. No issues with flow and getting much better efficiency.

https://www.homebrewtalk.com/showthread.php?t=596834

My current system recirculates from the lid using a locline too. I was curious what OP is using now after a few months with the kettle. I'm going to get one very similar. I want the whirlpool arm TC near the top rim. I don't want anything on the lid so I'll be using the whirlpool port for my locline...I think
 
My current system recirculates from the lid using a locline too. I was curious what OP is using now after a few months with the kettle. I'm going to get one very similar. I want the whirlpool arm TC near the top rim. I don't want anything on the lid so I'll be using the whirlpool port for my locline...I think

Hey all, I now have more than a dozen brews through the system and couldn't be happier.

I have abandoned use of the locline for mashing, and use this only in CIP applications now. For mash recirc, I am much happier using the whirlpool arm as I have pictured before. This has led to good movement/ recirc, stable temps with my brausupply controller running on 120v, and no problems with flow or air getting trapped under the brew bag (which I had with the locline). Plus the whirlpool arm is much easier to clean and sanitize. Worth noting, I use near full volume mash water (~7g) so I have a thin mash. Even with this I get good turbulence at the surface of the mash, and just occasionally stir when I feel like doing something haha. No temperature regulation/ stratification problems have been noted, and I do keep a Thermapen handy.

My efficiency has been better than before, ranging between 72 and 80% depending on OG/ grain bill. I have also had not even the slightest sign of scorching on the bag (no guard here), and this includes when I have made multi- step mashes and high gravity brews.
 
Hey all, just thought I'd share an update on the system. Several more brews completed and no problems with scorching. In fact, I have recently brewed my Piwo Grodziskie which utilizes multiple prolonged steps (30min at 100F, up to 125F over 20min then hold 30min, up to 158F over 20min then hold for 45min, up to 170F over 10min then hold 10min). Not only did this brew not scorch, it turned out well enough to place against all wood aged and smoked beers in the regional round of NHC.

Overall the mash efficiency seems to hang between 70 and 75% dependent on the grainbill/ target OG.

Still strongly recommend the set-up.
 
hey jmrybak,

I've been following this thread for almost a year now, but can't see the pics anymore. I was highly interested in getting a spike kettle built in the same manner since I don't have much space. The pics would help me describe to them what i would want. Much appreciated if you can get them back up. Or if you have your custom order sheet, that would most def help.

- BIsForBrew
 
Here is the design sheet for exact port placement as well, in case it helps.
 

Attachments

  • Custom_Jeff.png
    Custom_Jeff.png
    168.5 KB
Hey I really like the setup and am considering doing something similar. I was originally looking at the Unibrau system but it seems like this setup would be great quality and more economical. Would you mind sharing how much you invested in this? Also, have you tried heating/boiling with only the element and no help from the stove? I have 20A going to my kitchen and am wondering if I go with the 5500w element if that would suffice without the need for the stove. I have been told by several people that it won’t be enough, but it seems like nobody has any complaints using the grainfather or unibrau which only use 120V elements? Is there something I am missing that these pre-fab units do that is different than a system like yours? Thanks for any advice you might have!
 
Hey I really like the setup and am considering doing something similar. I was originally looking at the Unibrau system but it seems like this setup would be great quality and more economical. Would you mind sharing how much you invested in this? Also, have you tried heating/boiling with only the element and no help from the stove? I have 20A going to my kitchen and am wondering if I go with the 5500w element if that would suffice without the need for the stove. I have been told by several people that it won’t be enough, but it seems like nobody has any complaints using the grainfather or unibrau which only use 120V elements? Is there something I am missing that these pre-fab units do that is different than a system like yours? Thanks for any advice you might have!

Apologies if this is a bit brief/ direct:

I would never buy the Unibrau system. I have one of their controllers, and the build quality is low. Their kettles look cheap to me, and that pump appears to be a $30ish dollar knock off from eBay.

Dozens of brews in, I love my system and if I was doing it again I'd build something like this:

Spike custom kettle with 4 TC ports- $320ish

Auberins EZBoil controller $370

Blichmann Riptide pump $200

TC 5500w element $75

Brewbag $25

Then connect everything with SS fittings as needed

In the end you'd have a much higher quality kettle with TC port that would allow your system to evolve in the future, a control box with a very user friendly controller, a fantastic pump with strong output, a TC head, and much easier cleaning, a solid element, and a simple BIAB solution.

You cannot operate a system like this with full volume boils on just 120v and expect a strong boil. You could always add a 120v induction burner under the kettle if you have a second 120v circuit and don't want to use your stove.
 
Back
Top