Counterflow Wort Chiller Build (and use)

Homebrew Talk - Beer, Wine, Mead, & Cider Brewing Discussion Forum

Help Support Homebrew Talk - Beer, Wine, Mead, & Cider Brewing Discussion Forum:

This site may earn a commission from merchant affiliate links, including eBay, Amazon, and others.
Cooling coil is a pre-chiller. Hot run trough the chiller packed in ice water and then out the temp probe to the ferm bucket.
 
Essentially, it's sounds like using a herms coil type setup. A member of our club uses his coil to serve dual roles, he fills his HLT up with ice water and regulates the flow through the coil for his system.
 
So you're ditching the idea of a CFC altogether?


Yes but it's an idea I had.

The water temps in SoCal just don't get low enough for a CFC in the summer months. It would take hours and possibly a pump to get the wort to a pitchable temp.

So I drew up this plan and thought I'd see what you all thought.
 
Yes but it's an idea I had.

The water temps in SoCal just don't get low enough for a CFC in the summer months. It would take hours and possibly a pump to get the wort to a pitchable temp.

So I drew up this plan and thought I'd see what you all thought.


I live in southern Louisiana. Personally I use plate chillers in my system. But some of my buddies use immersion and counter flow chillers. In the summer months we don't use straight tap water. Instead we opt for a bucket to bucket gravity feed of our chill water. Basically a bucket of ice water is raised up above the CFC and is siphoned out and run through the CFC to another bucket down low. When the water level of the higher bucket gets too low, we add more ice water and continue. If the chill water coming out isn't too hot we will reuse it until colder water is needed.
 
Yes but it's an idea I had.

The water temps in SoCal just don't get low enough for a CFC in the summer months. It would take hours and possibly a pump to get the wort to a pitchable temp.

So I drew up this plan and thought I'd see what you all thought.

No. If you used ice water in a CFC, it would take you about 10-15 minutes to chill 5.5 gallons. If you don't want to introduce a pump to your setup, try the method wbarber69 mentioned above. I think you'll find that using the CFC is worth the trouble.
 
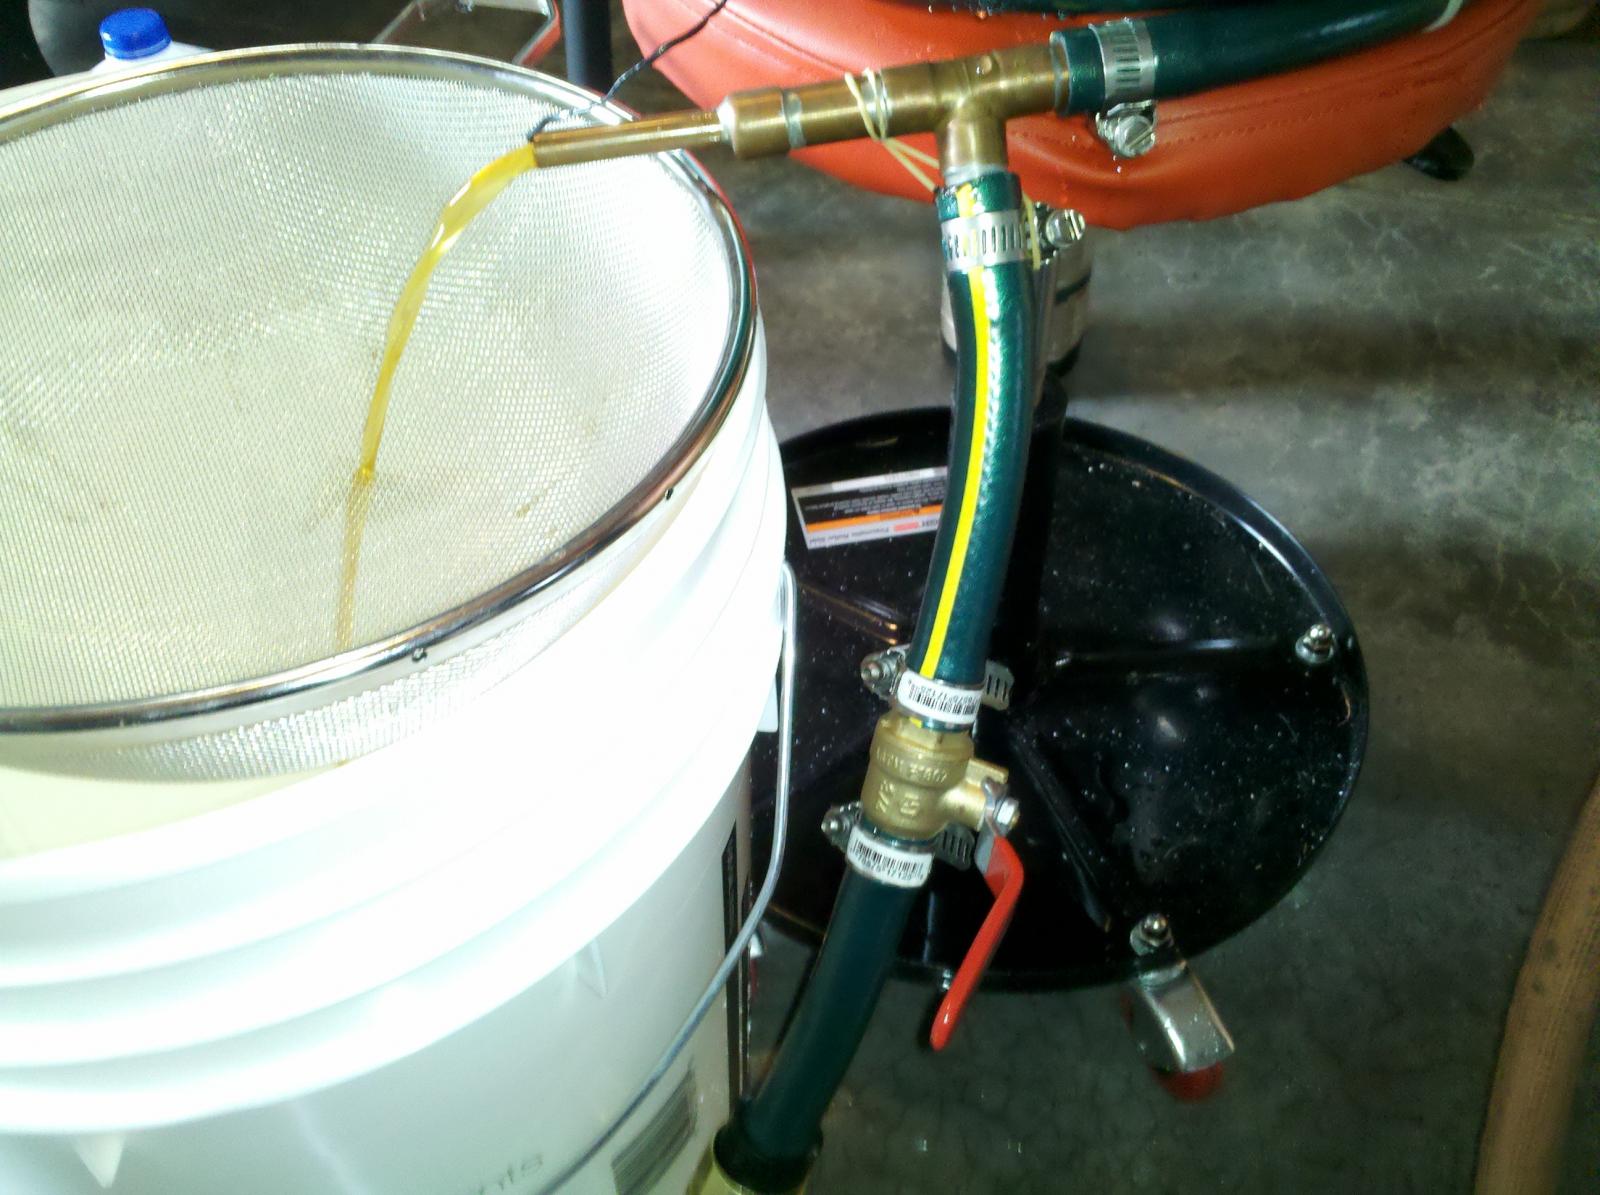
OK so I've had a few brews since constructing my CFC which I posted back in #258. I can say that it works really well. Too good actually, I have to throttle back on my garden hose spigot quite a bit because my ground water is pretty cold. So I got to thinking... and made a trip down to the hardware store to cruise through the plumbing section. What I finally settled on was a 3/4" ball valve for about $11 and change. I cut the inlet hose and added the ball valve and I now have FLOW control without walking back outside! Yes... I am still using the temp probe in the flow of wort but I gave the old rubber band trick a serious effort on the advice of others and just couldn't get the probe to stay put. So, I sanitize my temp probe before inserting it in the outlet ( ;

IMG_20150214_150703.jpg
 
I just finished mine:rockin: what a PIA! Of course I had to use a SS coil :cross: it took forever sliding the hose on. I have it cleaned, all I need to do is brew and see how well it works. Thanks for the inspiration:mug:

imag0668-65114.jpg
 
So I was able to draw my plan out. Was wondering if anyone can add input to this so I can see it with fresh eyes. A perspective that isn't my own. The coil is 1/2" and 25' and will be in a bucket of ice and water. Thx in advance. Eager brewer lol

View attachment 250793

Also if you'd like to see a parts list I can provide links


Essentially it sounds like a jockey box? Just gravity fed and used to cool boiling wort instead of a warm keg. Unless I'm mistaken?

Sounds like it might work, maybe if it was in a cooler that you could drain when the water got too hot to sufficiently chill, similar to wbarber69's friend. It's not a "counterflow chiller" by any means. But I wonder why you would build something like that instead of making a counterflow chiller? You could set up a CFC with a bucket of ice as some have mentioned, or you could simply use an immersion chiller with or without a bucket of ice. In the system you describe above, I think it would work, I just think you would have to stop wort flow once you determined the water was becoming too warm. It just sounds like unnecessary work in your future is all.

If you do go that route, let me know if/how well it works!


Sent from my iPhone using Home Brew
 
Actually it worked really well. Chill time was the same-ish. I do think I'll add a spigot to drain off the warmer water. The main problem I run into is that the water temps in SoCal for 7 months out of the year are just too high. The CFC just won't work for me. I didn't want to buy more pumps and coolers and all the other gear to recirculate ice water.

(Maybe I'll look into a soup chiller.)

This way I created a way to slow the hot wort to a point where ice water contact is at its highest. On my test run the wort came out at 100* so that's a huge drop but with adjustments it came down to below 60*. The problem with this is that the cooler wort was at such a slower rate that it was having a harder time affecting the 100* wort in the ferm bucket. In the end I hit just below 80* and pitched. I have temp control for ferm so it's not a big deal.

I believe that if I had 50' coil it would have been perfect. The wort could have flowed faster and still be chilled to a perfect pitching temp. On another note I can couple in another 10'-15' and get better results that way also. It is definitely a work in process but I am happy with the results for my first run.
 
Just finished mine today, currently mashing the first batch that's going to go through it
 
I am on the hunt for a different hose. f My copper binds every time in the same spot in the hose, no matter what I try.
 
I still haven't brewed with mine but I tested it today with boiling water. With the cold ground water it was immediately coming out at about 55. I definitely want to add a ball valve or some other control right at the cold water inlet but other than that it's ready to go.
 
I just brewed another batch with mine today after adding a ball valve. I also added a pickup tube to my brew kettle prior to this brew day and it worked awesome! I could sit there and tweak the flow through the CFC and once I started picking up trub from the bottom of the kettle I stopped. No more tipping the kettle, wort is at a nice yeast pitching temp, I couldn't be happier!
 
With all the issues I had and all the copper coil I removed due to mistakes, I was very surprised at how well this chiller functioned. I sent 195* beer in one side and it came out the other at 76*

Very happy with this, it even cooled down the water that bowed my autosiphon in the time it took to flow through the chiller
 
Where is everyone getting it? I want to get my own, but it looks like you can get 20 ft or 50 ft, and 50 ft is already $60. NY Brew Supply sells one all premade for less than $100 on ebay, free shipping. I just don't think I'll save much(if any) unless I can get 25 - 30 ft of copper tubing pretty cheap.
 
Check out stainlessbrewing.com I got some stuff for my HERMS from there they sell coils for pretty cheap and will bend for a few dollars more. But anywhere you go stainless by the foot is pretty pricy. But the real cost usually comes down to shipping. Cause 50' of 1/2" stainless coil is pretty heavy
 
Last edited by a moderator:
I'll price it all out with this. DIY is much more fun. Will let this thread know what I decide and how much it all costs.

For the fittings, I'm seeing $41.22+tax, store pick up at HomeDepot and $46.25+tax shipped at Amazon.

The Amazon total includes a 10 pack of hose clamps while the HD is only 4 single hose clamps

Sears often puts their 50ft craftsman rubber hose on sale for $19.99, w/ free in store pick up

So if you only count half the hose, or buy enough fittings to make 2 chillers, you're looking at $82+tax each from amazon/sears or $77+tax each HomeDepot/Sears. Shipping from HD adds $5.99.

NY Brew supply has one very close at $86+$12 shipping:
http://www.amazon.com/dp/B004D50LO8/?tag=skimlinks_replacement-20
 
Last edited by a moderator:
When I built mine about 7 years ago, I bought enough material to build three, and the cost each came out to about $46. Although, ours were only 15' each, instead of the more common 25'.
 
For the fittings, I'm seeing $41.22+tax, store pick up at HomeDepot and $46.25+tax shipped at Amazon.

The Amazon total includes a 10 pack of hose clamps while the HD is only 4 single hose clamps

Sears often puts their 50ft craftsman rubber hose on sale for $19.99, w/ free in store pick up

So if you only count half the hose, or buy enough fittings to make 2 chillers, you're looking at $82+tax each from amazon/sears or $77+tax each HomeDepot/Sears. Shipping from HD adds $5.99.

NY Brew supply has one very close at $86+$12 shipping:
http://www.amazon.com/dp/B004D50LO8/?tag=skimlinks_replacement-20

I was gonna build another, but at that price, I am just buying it!
 
Last edited by a moderator:
I just ended up building one, but I used Polypropylene fittings instead of brass...

Amazon:
10 pack of hose barbs $3.36
10 pack of hose clamps $3.85
25' copper tubing $23.61
2 pack of 1/2" tee $1.90

Sears
50' Craftsman hose $19.99 (gotta wait for the sale)

Local Hardware store
2 brass compression fiittings ~$7 (couldn't find poly versions online*)

The prices fluctuate, but those were mine. So, that's almost $60... BUT with the multipacks & the other half of the 50' hose, I could build a 2nd one for about $33 more if I could get the same prices (2 more tee's, 1 more copper coil, 2 more compression)

bringing the costs to about $47-ish each for 2...


EDIT to Add
* while making the links, I actually found one... better price
 
Last edited by a moderator:
I built a counterflow heat exchanger this week that I'm going to use for chilling and as a HERMS coil. 25' of 3/8" ID copper inside 3/4" PEX tubing. I went with PEX because the water being circulated will be at 160ish for mashing, and may be used as sparge water so I don't want leaching from a garden hose. Total cost was $60 if that, but I had most of the copper fittings on hand so that saved a few bucks.

https://www.homebrewtalk.com/showpost.php?p=7039558
 
Just asking for a quick update:
I searched the thread to see how you guys go around keeping the inside of the pipe aseptic. Learned some of you use iodophor and this sounds nice enough to me to follow, except I don't normally use iodophor in my setup. No big deal to start doing it, but I'd rather prefer to stick to the minimal number of chemicals.
I use peracetic acid (it is much cheaper in my location than Star San) and nearly boiling hot NaOH-based dishwasher liquid solution. (I also have and use Star San on rare occasions). Most of my sterilization is done by hot steam though. Well, NaOH doesn't go on well with copper, so it is the acids that I'd be most happy to use.
How safe is it and how well it does the job?

And btw, do you store the chillers with open ends? Or filled with sanitizer and sealed up? I'm a bit afraid something may start growing in a cozy damp and warm pipe between brews.

Thank you!
 
Here's what I do. During brew day I boil some water and drain it through my CFC to sterilize it. When I am finished brewing for the day I will boil water again to drain through the CFC. Sometimes it will take a couple rounds of boiling water to clean out the old wort, it just depends on whether I did a double batch that day or a single batch. I make sure to get all of the water used for cleaning out of the coils and store it on the shelf (both ends open). The next time I brew I will do the same process over again. I am of the opinion this method will sanitize well, it's easy and efficient.
 
With the exception of air sucking in as it cools in the coil, it seems that storing it open should be fine based on Louis Pasteur's open broth flask experiment. Obviously you have to start with a clean coil, but still.
 
Just built one of these, how do you get the inside of the pipe dry? Put soapy water in to help prevent kinks while rolling and hours later every time I move it more water comes out
 
Here is what I do to get the water out after a brew day. I boil about 4gal of water in my clean brew kettle. Then I let it drain through the CFC. The first 2 gallons I dump and the second 2 gallons I use to mop the floor (I am a messy cook LOL). Once it has finished draining it is actually pretty easy to get the remaining water out by gently... oscillating the CFC to help the water drain out? If that makes sense? Basically I hold the CFC in my hands while tipping it in a circular fashion, which helps the remaining water in the coils roll down hill... and eventually spills out the open end. It takes several revolutions but in a few minutes it will all empty out.
HTH

I did try that but maybe I spun it too fast. I'll have to experiment some more tomorrow. Thanks
 
Just thought I would update my build:

Installed on my brewing cart with a fabricated mount. Thermometer angled up for better viewing.
img_20130111_134509_222-57959.jpg


Rear view showing water inlet (bottom left) and outlet (upper right). Extended them to reduce the risk of dripping on the pump mounted on the lower shelf.
img_20130111_134617_282-57960.jpg


Final copper configuration.
counter-flow-chiller-57957.jpg

Where did you get that thermometer from and how much was it?
Thanks:mug:
 
A while back I read this post and it inspired me. Instead of running out to buy new copper tubing I just uncoiled my immersion chiller, lubed it up and ran it through an old garden hose. That was the easy part. The hard part was all of those fittings. You have to know how to solder or you'll have leaks and whatnot. Took me some tries but now I have a counterflow chiller and I also know how to solder copper pipes. Win win! Chills from 180 to like 80 at a rate of 1 gallon every 2-3 minutes. The smaller diameter tubing I think is what's holding me back from chilling colder & faster, but I spent literally $10 on the thing so I don't care.

Thanks for this post OP!!

zc
 
Back
Top