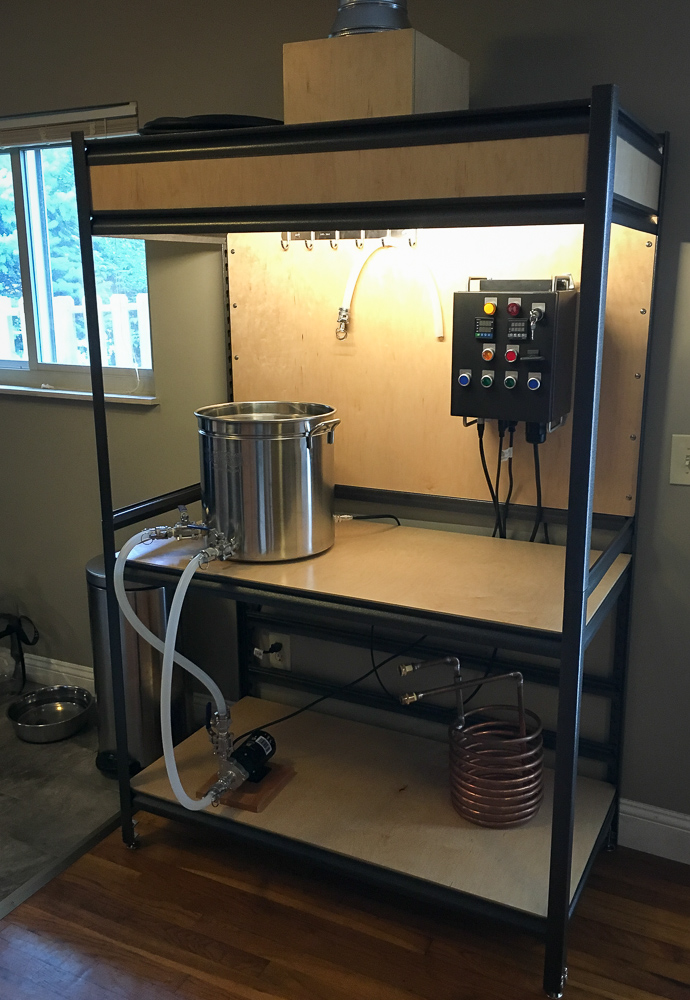
I just completed an electric BIAB setup for my son. (He brews, I build stuff.) It's based on a $70 steel shelving unit from Costco. It's 24"x48" by 6-feet tall, not counting the exhaust fan on top.
I replaced the black composition board shelves with 2-sided pre-finished maple 1/2" plywood. I used the same plywood for the back and to make the "hood".
The plywood is nice stuff with no voids, but the edges are unfinished and not likely to stand up to much water. I wasn't sure what to do with the edges so I saturated them with 95-degree Johnson's Paste Wax. It was hot in my garage and the paste wax was the consistency of warm butter. It soaked in nicely. We'll see how well it withstands the occasional splash of water.
The top is one of the original black composition board shelves with a hole cut for an 8" 170 CFM exhaust fan, which is built into the box on top. The exhaust fan vents to a nearby window by a temporary duct when he is brewing. A temporary board with a 6" hole and elbow duct fits into the window to complete the exhaust solution. Additional shelf rails and about 6" wide finished plywood form the exhaust hood that does a remarkably good job of capturing and venting the generated steam.
The hood also houses a 23" LED strip light to illuminate what you're doing.
It's installed in his large kitchen, so it had to look decent if somewhat utilitarian. He apartment is older and the floor is unlevel near the walls, so I added leg-levelers at all four corners. It's solid and level now.
A 25-foot 10-4 extension cord (coiled on top in the photo) connects the control panel to a spa panel with a GFCI breaker near his dryer outlet.
It's sized for some growing room if he ever wants to invest in a more complex setup.


![Craft A Brew - Safale BE-256 Yeast - Fermentis - Belgian Ale Dry Yeast - For Belgian & Strong Ales - Ingredients for Home Brewing - Beer Making Supplies - [3 Pack]](https://m.media-amazon.com/images/I/51bcKEwQmWL._SL500_.jpg)


