compact peltier cooled carboy setup

Homebrew Talk - Beer, Wine, Mead, & Cider Brewing Discussion Forum

Help Support Homebrew Talk - Beer, Wine, Mead, & Cider Brewing Discussion Forum:

This site may earn a commission from merchant affiliate links, including eBay, Amazon, and others.

Gruel

Well-Known Member
Joined
Feb 16, 2020
Messages
276
Reaction score
141
Location
Chicago
Hi, I'm new here. I did a bit of a search for peltier cooled brewing setups, and it sounds like people are not having much luck with them, so I thought I'd post my compact setup that seems to be working ok.

I just started brewing again after a ten year break. For various reasons (smaller fridge; also, marriage) I can't use half the fridge anymore for brewing lagers/pilsners, so I came up with a compact peltier cooled carboy setup. As it turns out, with direct liquid to liquid (to liquid to air, if you include the hot side of the peltiers) heat exchange you can get away with minimal insulation for a glass carboy. (Glass is already somewhat of an insulator.)

Essentially, I'm running three 50W (nominal; at 11V they are probably pulling closer to 40W electrical each) TEC1-12706 peltiers powered by a cheap computer power supply and sandwiched between two water loops driven by small 12V pumps. The cold loop runs through copper piping inside a 5 (or 6, not sure anymore, need to measure) gallon carboy, and has no trouble cooling it to 11C (52F) while fermenting a Pilsner. (The yeast package said 12-15C would be ideal. I seem to remember somewhat lower temps for Pilsner, but decided to follow the instructions for once.)
Ambient temperature is about 22C (72F).

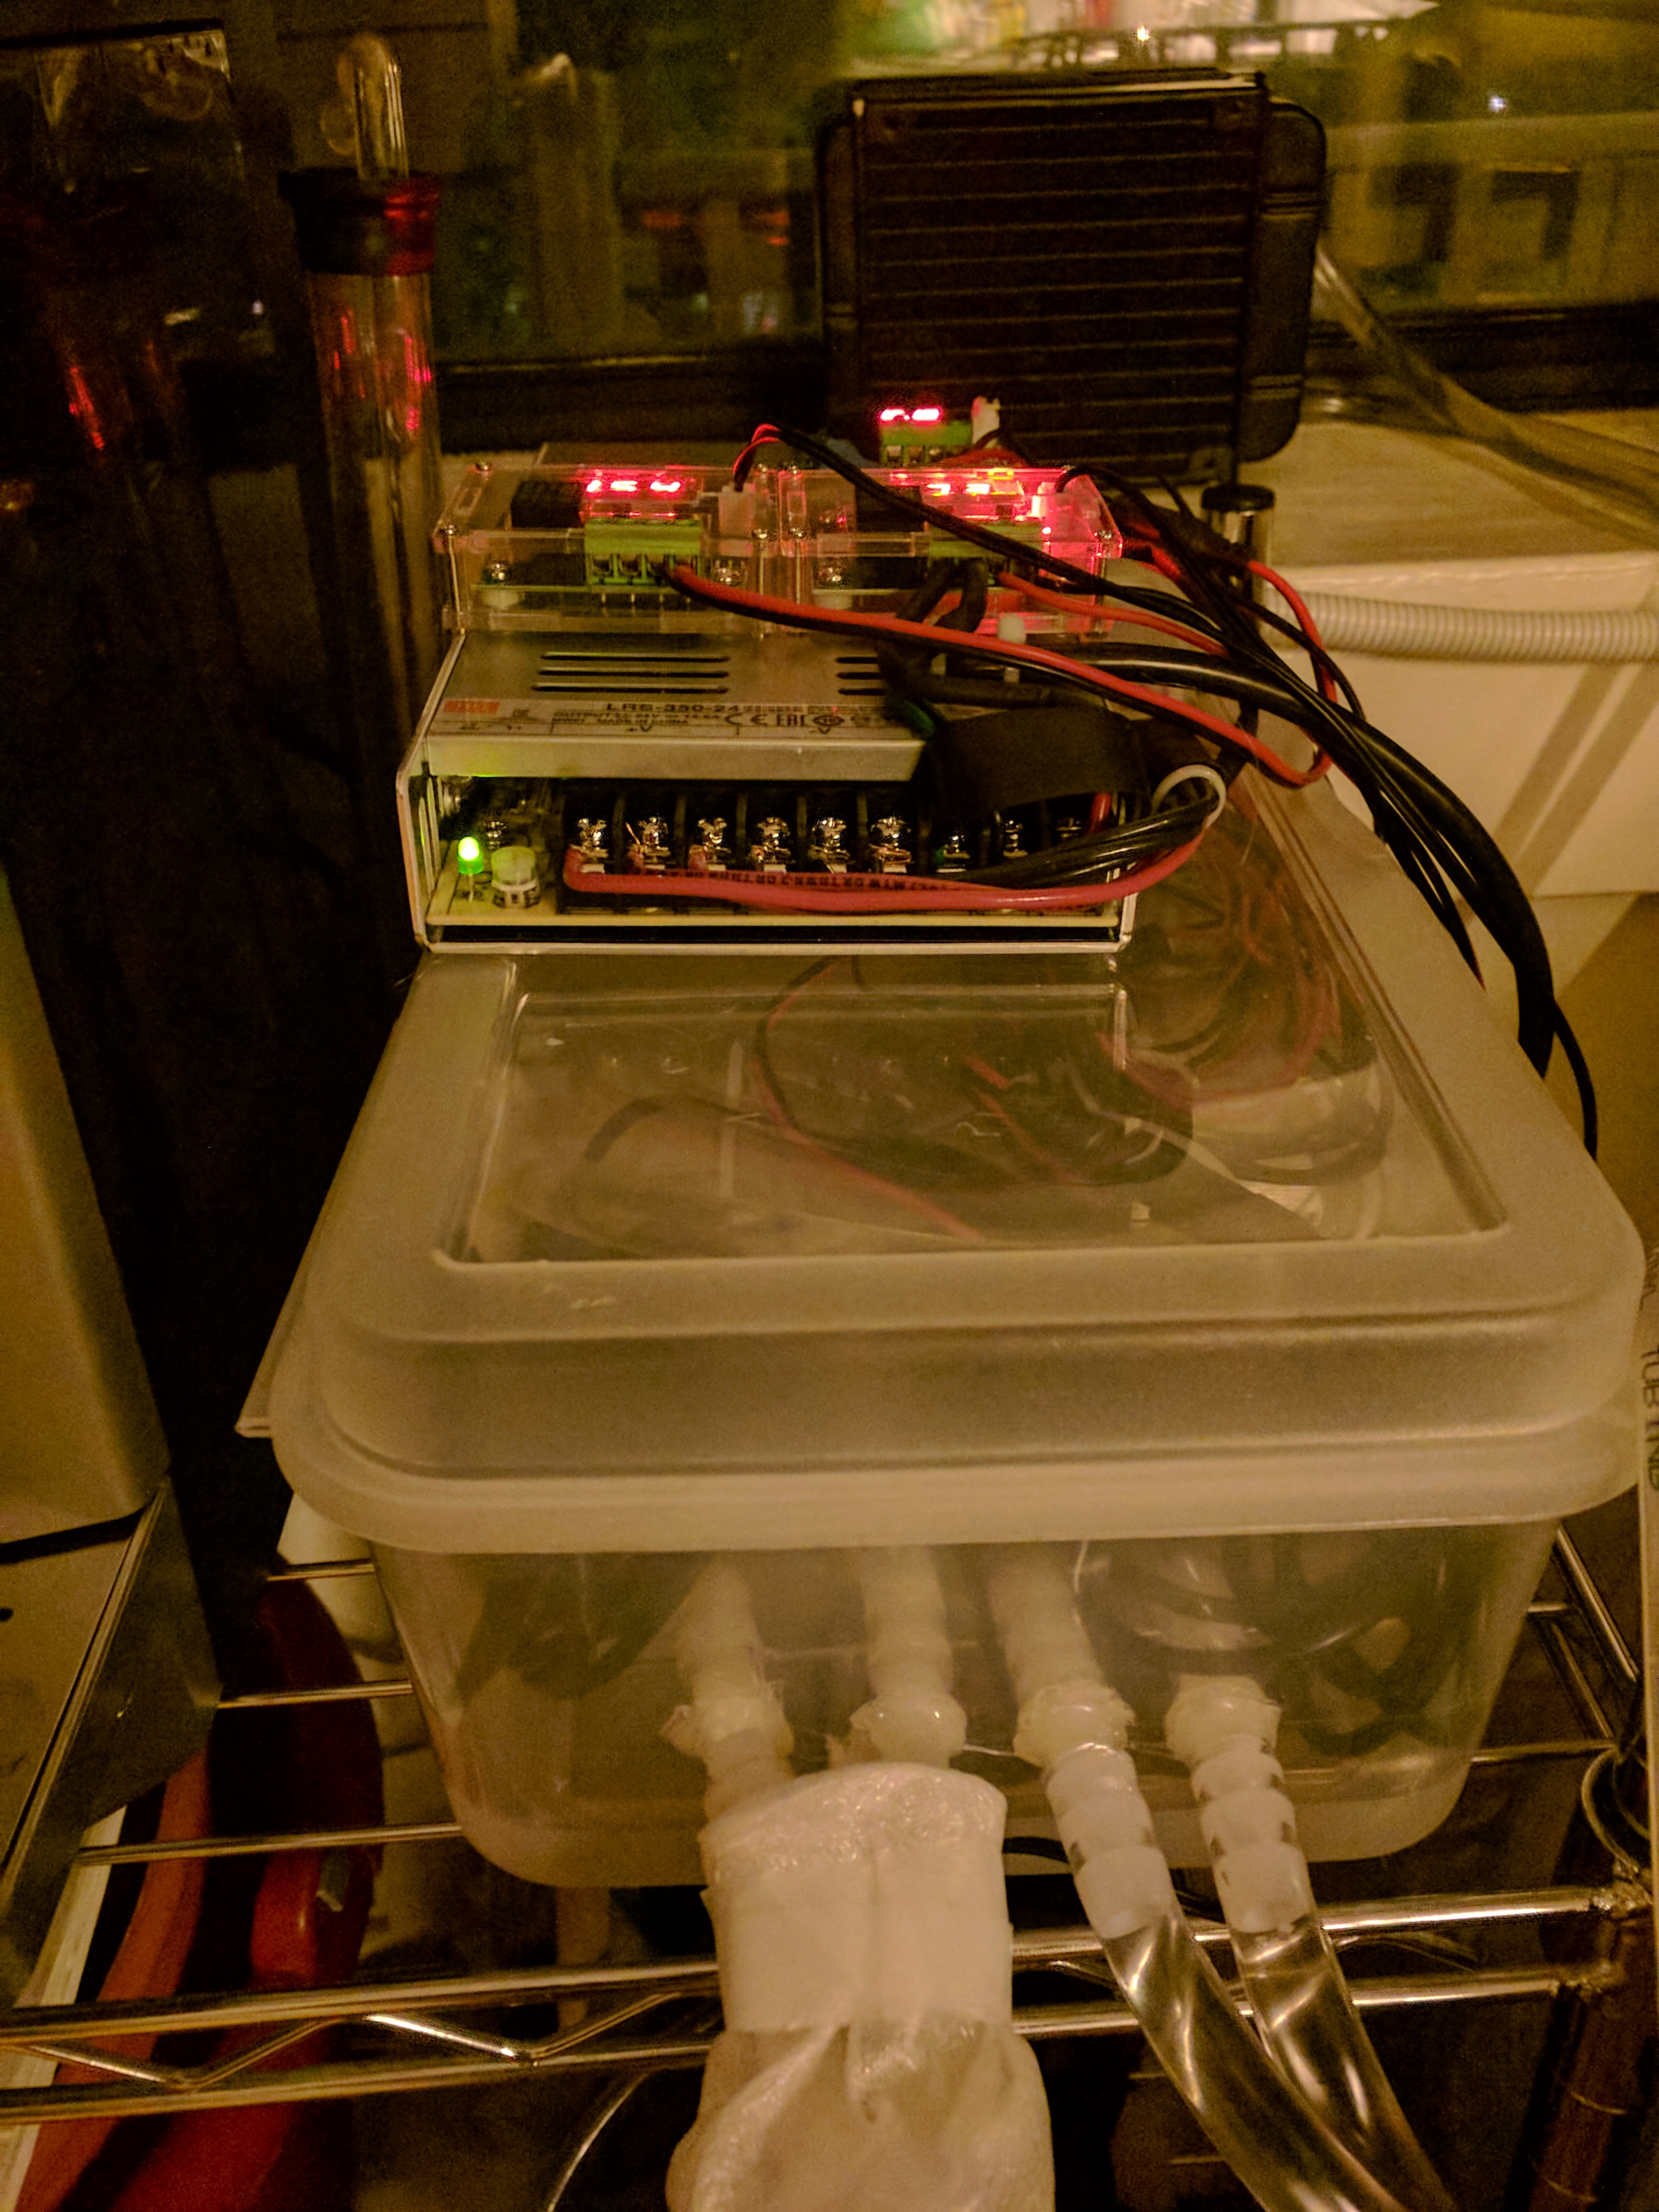
I managed to cram everything but the fermenting vessel inside a small plastic box with cutouts to pull room air in and dump hot air from the hot side radiator and the PC power supply.
The carboy insulation is an old bathrobe, which was temporary until it worked (to quote the Red Green show).
Total budget was about $250, with extra peltiers and power supplies and connectors and such left over.
(I already had the peltiers, radiator, PC power supply and small parts from a previous project, but included them in the bill - see next post.)
The nice thing about using a PC power supply is that the temperature controller only needs to switch the small remote control current to turn the power supply on, not the whole 15A.

Pictures: IMG_20200214_124638 - Copy.jpg IMG_20200214_124700 - Copy.jpg IMG_20200214_124737 - Copy.jpg IMG_20200216_172652 - Copy.jpg IMG_20200216_172751 - Copy.jpg IMG_20200216_172713 - Copy.jpg IMG_20200216_172614 - Copy.jpg
 
Last edited:
Bill of materials:


Peltiers (5 for $16.99)

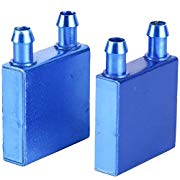
Heat sinks (used 6 40mm by 40mm, better use 2 120mm by 40mm for 2x$11.99)

Thermal glue ($6.62)

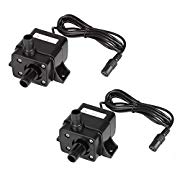
Pumps (2 for $13.99)

Radiator ($17.99)

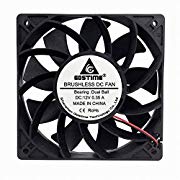
Fan (120mm, $15.99)

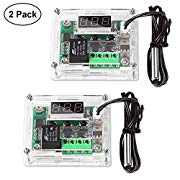
Thermostats (2 w/ cases for $7.99)

PC power supply 12V/24A (Frey's, ~$30)

1 Small 12V power supply for temperature controller (5 for $13.99)

Connectors (10+10 for $12.80)

Box (Home Depot, set for $11)

Hose (25 feet for $13.45)

Zip ties (Home Depot, ~$6)

Quick disconnects (Kegworks, 3 pairs for $51.87)

Copper tubing (Home Depot, $x)

Total: ~$250

all below from amazon, except as noted (quick disconnects):
-----------------------------------
GDSTIME 120mm Case Fan, Increase Air Pressure Fan, 120mm x 25mm 12V Dc Brushless Cooling Fan Dual Ball Bearings Long lifespan
Sold by: GDSTIME $15.99

upload_2020-2-17_0-9-15.jpeg
---------------------------
HDVD 10 Pack DC Power Male Pigtail Connectors 2.1 x 5.5mm Copper 10 inch Length
Sold by: HDVD $6.50

upload_2020-2-17_0-9-15.jpeg

----------------------------
MOUNTAIN_ARK 2 Pack 63 GPH (240L/H) Submersible Water Pump DC 12V 3.6W 9.8ft Lift for Fish Tank Pumping, Rockery Water, Bonsai Fountain
Sold by: Mountain-ark $13.99

upload_2020-2-17_0-9-15.jpeg
-------------------------
2 of 2 Pack Aluminum Water Cooling Block for CPU Graphics Radiator Heat Sink 40 x 40mm
Sold by: Yae First Trading $9.99

upload_2020-2-17_0-9-15.jpeg
--------------------------
(better alternative: BXQINLENX Aluminum Water Cooling Block for CPU Graphics Radiator Heatsink 40x 120(White) $11.99each

upload_2020-2-17_0-9-15.jpeg)
-------------------------
upload_2020-2-17_0-9-15.jpeg
HDVD 10 pack DC Power Female Pigtail Connectors 2.1 x 5.5mm Solid Copper 10 inch length
Sold by: HDVD $6.30
------------------------
upload_2020-2-17_0-9-15.jpeg
R-Tech DC12V 1A UL-Listed Switching Power Supply Adapter for CCTV - 5 Pack - Black
Sold by: JC Tech $13.99
---------------------------
upload_2020-2-17_0-9-15.jpeg
Temperature Controller Module with Case, 2PCS XH W1209 Display Digital Thermostat Module with Waterproof NTC Probe
Sold by: Umlife US $7.99
-----------------------------
upload_2020-2-17_0-9-15.jpeg

GENNEL 10gram Thermal Conductive Glue Silicone Plaster Viscous Adhesive Cooling Compound For LED GPU Chipset Heatsink
Sold by: GENNEL Direct $6.62
------------------------------
upload_2020-2-17_0-9-15.jpeg

25 Feet Vinyl Tubing- Food Grade- 5/16" ID 7/16" OD 10 Ft, 25 Ft, or 50 Ft FDA Approved
Sold by: Nolk Co $13.45
-------------------------------
AGPtek® 12 Pipe Aluminum Heat Exchanger Radiator for PC CPU CO2 Laser Water Cool System Computer
Sold by: BrainyDeal $17.99
-------------------------------
Aideepen 5pcs TEC1-12706 12V 6A Heatsink Thermoelectric Cooler Cooling Peltier Plate Module 40x40MM
Sold by: Aideepen $16.99
-------------------------------
Kegworks: Quick Disconnects for 5/16" ID Vinyl Hose - Set of 1 Male & 1 Female
QD516-KIT 3 for $51.87
 
Last edited:
Interesting solution!
Thanks for the detailed parts list.

The copper chilling/heat exchanger pipe inside your carboy, how should we envision that? I see 2 tubes going into the bung, we all know how narrow that carboy neck is.

50-55F is a common temp range for Lagers, depending on the yeast and character one wants to achieve. You're right in the middle of that range. Good for now.

Now using copper in (acidic) beer is a different story... That will need a revision, definitely use stainless tubing wherever there's exposure to beer.
 
IslandLizard, thanks for the info regarding Pilsner fermenting temperatures! This batch certainly fermented better (started much sooner) compared to my previous fridge fermentations. Maybe the fridge didn't allow higher temps, that's why I ran below 10C/50F.

Copper in fermentation vessel: I had assumed copper was ok, and a quick search found that the FDA thinks so too. Apparently copper ions will kill the yeast at much lower concentrations then they will kill us, so the yeast acts as a kind of canary. Copper supposedly fell out of favor for cost reasons, not because of health concerns.
https://libationlawblog.com/2017/08...ewing-equipment-but-not-for-your-moscow-mule/
http://tinyurl.com/z2owgdc (from https://homedistiller.org/forum/viewtopic.php?t=59861)

Getting the cooling tube into the carboy: prebending into a U-shape did not work, but simply pushing the leading end in will make the tubing turn around inside the vessel, following the wall. Then it's simply a matter of directing the leading end back towards the top and through the neck while pushing the tube in, cutting the tubing to the desired length, and feeding it through the stopper. It's easier than I thought. The 1/4"copper tubing needs a bit of flaring to seal inside the 5/16" ID vinyl tubing. I also used PTFE tape behind the flare to make the seal.

A pic showing a bit of the tubing:
IMG_20191231_203830 - Copy.jpg
and another picture showing the single loop (sorry, crappy pic):
IMG_20191231_203739 - Copy.jpg

Small heat sinks on the hot side do NOT work:
IMG_20191231_203803 - Copy.jpg
 
Last edited:
I tried to add this below the first pic of my second post (which at this time still needs moderator approval), but apparently the website software thinks this sounds like spam - go figure.
"You can see the tube on the left side of the stopper going down, turning right, circling around, and then coming back up, which needed just a little bit of coaxing, and leaving through the right side of the stopper. I had to drill two extra holes. The temperature sensor wires descend through the airlock hole, and the sensor sits just below the beer (or soon to be beer, hopefully...) surface."
 
Thanks for the detailed information. I don't remember seeing a ferm cooling system like yours before, especially the (copper) tubing inside the carboy. Many of us use a (spare) fridge or freezer with a temp controller.

Somewhat better insulation around your carboy fermenter should make it even more temp efficient/consistent.

Just be very careful handling glass carboys, they are fragile; When they break, the large glass shards can cause serious injuries.
Small heat sinks on the hot side do NOT work:
"The hot side" when chilling your boiling wort down to ferm temps? No, you'd need much more chilling capacity. There's a lot of energy in those 5 gallons of boiling wort that needs to be exchanged. Peltiers have severe limitations, they barely work on the fermentation side even with insulation assistance. You're definitely beating the odds here, the internal tubing coil is key.
I tried to add this below the first pic of my second post (which at this time still needs moderator approval)
You should be in the clear after your 5th post here. ;)
 
Pretty sure this is "a whole new paradigm" wrt HBT. Folks have tried sticking Peltiers directly to the side of vessels (never works well) but driving a cooling loop inside a carboy is definitely unique.
I've love to see a better picture of the copper tubing stuffed inside that carboy. Is it considered single-use?

Anyway....this is all actually kind of brilliant, and I'd be pleased to give it thumbs up...but the copper tubing in fermenting wort would be a non-starter for most. It's one thing to use a copper IC for 20 minutes to cool the wort (still, sub-optimal) but leaving copper in direct contact with fermenting beer (pH = quite acidic) for perhaps weeks has to have some deleterious staling effect better avoided in the first place...

Cheers!
 
Good to know that things will get easier after the five post threshold. Having a lot of links in the first post probably didn't help.

Cooling wort: no, for that I have another (multi-turn) copper coil that I hook up to the kitchen sink faucet. Works pretty well and fast. The hot side air cooled heat sinks are not even sufficient to remove the heat generated by the Peltier itself. I guess just putting a few numbers together could have told me that, but since this is not work, I'm trying to avoid numbers...

I added another picture of the loop above. I'll try to take a better picture of the cooling loop inside the carboy once the fermentation is done. Right now it's too cloudy. Yes, one could definitely improve the insulation, and I had plans to do so, until the current ad-hoc solution worked (the 'Red Green trap': 'this is temporary - unless it works').
now-this-is-only-temporary-unless-it-works-imgflip-com-36150117.png


'One time use' question: It should be possible to sanitize the carboy with the loop inside. The copper is also supposed to help remove sulphur. I guess the proof will be in how the beer turns out. I could try replacing the copper with a (multi-turn?) food-grade PVC or silicone line; the thermal conductivity of that stuff is of course a lot worse than copper (like, literally a thousand times worse), but maybe the copper is overkill, compared to the other limitations of the system. I'm pretty sure (again, no numbers; they could take all the fun out of this...) that the limitation is with the radiator on the hot side of the peltiers. If it weren't such a waste, one could simply run faucet water through the hot side heat exchangers. Right now the air coming out of the radiator is at ~35C/96F, so the water has to be hotter than that. Switching to 10C/50F faucet water (I just measured the temperature) means I wouldn't need the peltiers at all for fermenting, and could even drive a small camping cooler for lagering (hoping that's a word). But then I'd be stuck to running the system near the sink, whereas right now it's really portable (my wife has already asked whether it could run in the office...).
 
Last edited:
Jayjay, by all means, if you have the space, get an extra fridge or freezer. Or build a cold room/custom fridge from foil-backed polyisocyanurate panels.

Power usage: the compact cooler above uses about 2.6 kWhr/day. When it's on, it draws about 170 Watt.
 
I'm not saying it ain't impressive and cool AF, just pointing out that its still kinda expensive, IMHO.

Now if it could be built for under a hundred smackers, I'd build one myself.
 
Ballandkeg sells a single stainless loop for $39.Works well for me holding 50 degrees with 34 degree water. It comes with either a #9 or #10 stopper. I can't measure the bend at the moment because it's submerged but the 2 ends of the loop measure 1 1/4" apart(outside to outside) where it exits the stopper.
 
I tried running a peltier cooler for a couple years. I made quite a few successful batches. My solution was to take 25' of 1/4" copper tubing around the outside of the carboy and then wrap it up in blankets. It worked to keeping things at ale temps. I wasn't able to cold crash. It would certainly solve your problem with copper in the fermenting beer. It's not going to help with sulfur, it is going to oxidize your beer and probably leech more copper than you should be ingesting!

I eventually moved away from the peltier solution to a chest freezer. My setup was not exactly trouble free. I ended up having to troubleshoot more than I cared to. (That was because of poor engineering on my part.)
 
Regarding the copper: thanks for your concerns. I will check the beer; my understanding is that the yeast stops working (and/or dies) at a concentration ten times lower than the one that is dangerous for humans. So, if it's drinkable, it should be safe.

Copper and oxidization/staling: I'll have to learn more about that. So far I've read a) that copper helps removing unwanted sulfur compounds, and b) that copper can catalyze production of stale flavors (unfortunately I can only read the abstract of https://www.asbcnet.org/publications/journal/vol/Abstracts/49-26.htm ).

Replacing the copper: I think keeping the liquid-to-liquid heat transfer on the cold (beer) side is important, since the heat exchange is a factor 100 more efficient than from gas. Using copper for the tubing is overkill, stainless would definitely work, but plastic tubing might require several feet of submerged length to achieve reasonably low temperature differences.
Maybe I'll run a trial (once the beer is finished) with a short piece of submerged plastic tubing, or I'll see whether I can find fully annealed stainless tubing that's bendable to the required radius. Notwithstanding the comments about this setup being not exactly cheap ;-), the commercial stainless loops seem a bit expensive. But maybe that's the way to go.

[Numbers for the above: The liquid-to-liquid heat exchange coefficient for water is supposedly about 1 kW/m^2/K for forced flow on one side to just convection on the other side, whereas for still air to a solid surface it's only about 5 W/m^2/K, and a few 10 W/m^2/K for moving air. (This also explains why it is important to have a radiator on the hot side, since you need a good fraction of a square meter to get rid of a few 10W into room temperature air without leading to excessive hot side peltier temperatures.) A 1/4" copper pipe with 1/32" wall thickness should lead to a heat exchange coefficient of almost 10 kW/K per meter of pipe, so the temperature drop due to the pipe material is completely negligible. Stainless steel is about a factor 25 worse, so also still negligible. Plastic is another factor 75 worse - I'm assuming 0.2W/m/K thermal conductivity for the plastic -, and together with the thicker walls leads to about 3 W/K per meter of 5/16" ID plastic tubing with 1/16" wall thickness. So to remove 20 W with 2K temperature drop requires about 10 feet of this plastic tubing.]
 
Update: I added a fourth 50W (nominal) peltier element, and cleaned up the plumbing. The cold level tubing including circulation pump at the bottom of the housing is now separated by a thin layer of foam insulation from the rest of the container. The whole setup now draws 210W (was 170W with three peltiers). The exhaust air from the radiator is marginally warmer now, at 39C, with an ambient temperature of 25C. The cooling power at 18C beer temperature is about 35W to the beer, plus 15-25W of ambient heat gain into the carboy, for a total cooling power of 50-60W.
 
The lowest temperature my setup can get to is 5.7°C; this is after wrapping aluminized mylar insulation around the lines to the carboy. It uses 210W, 5kWh/day running full out.
 
I added an insulated five gallon keg with external cooling loop to my setup. It hooks up to the same 210W (electric)/50W (thermal) liquid-to-liquid peltier system described above. Filling the keg with hot water allowed me to measure the heat leak to/from ambient, and the actual cooling power of my peltier setup.
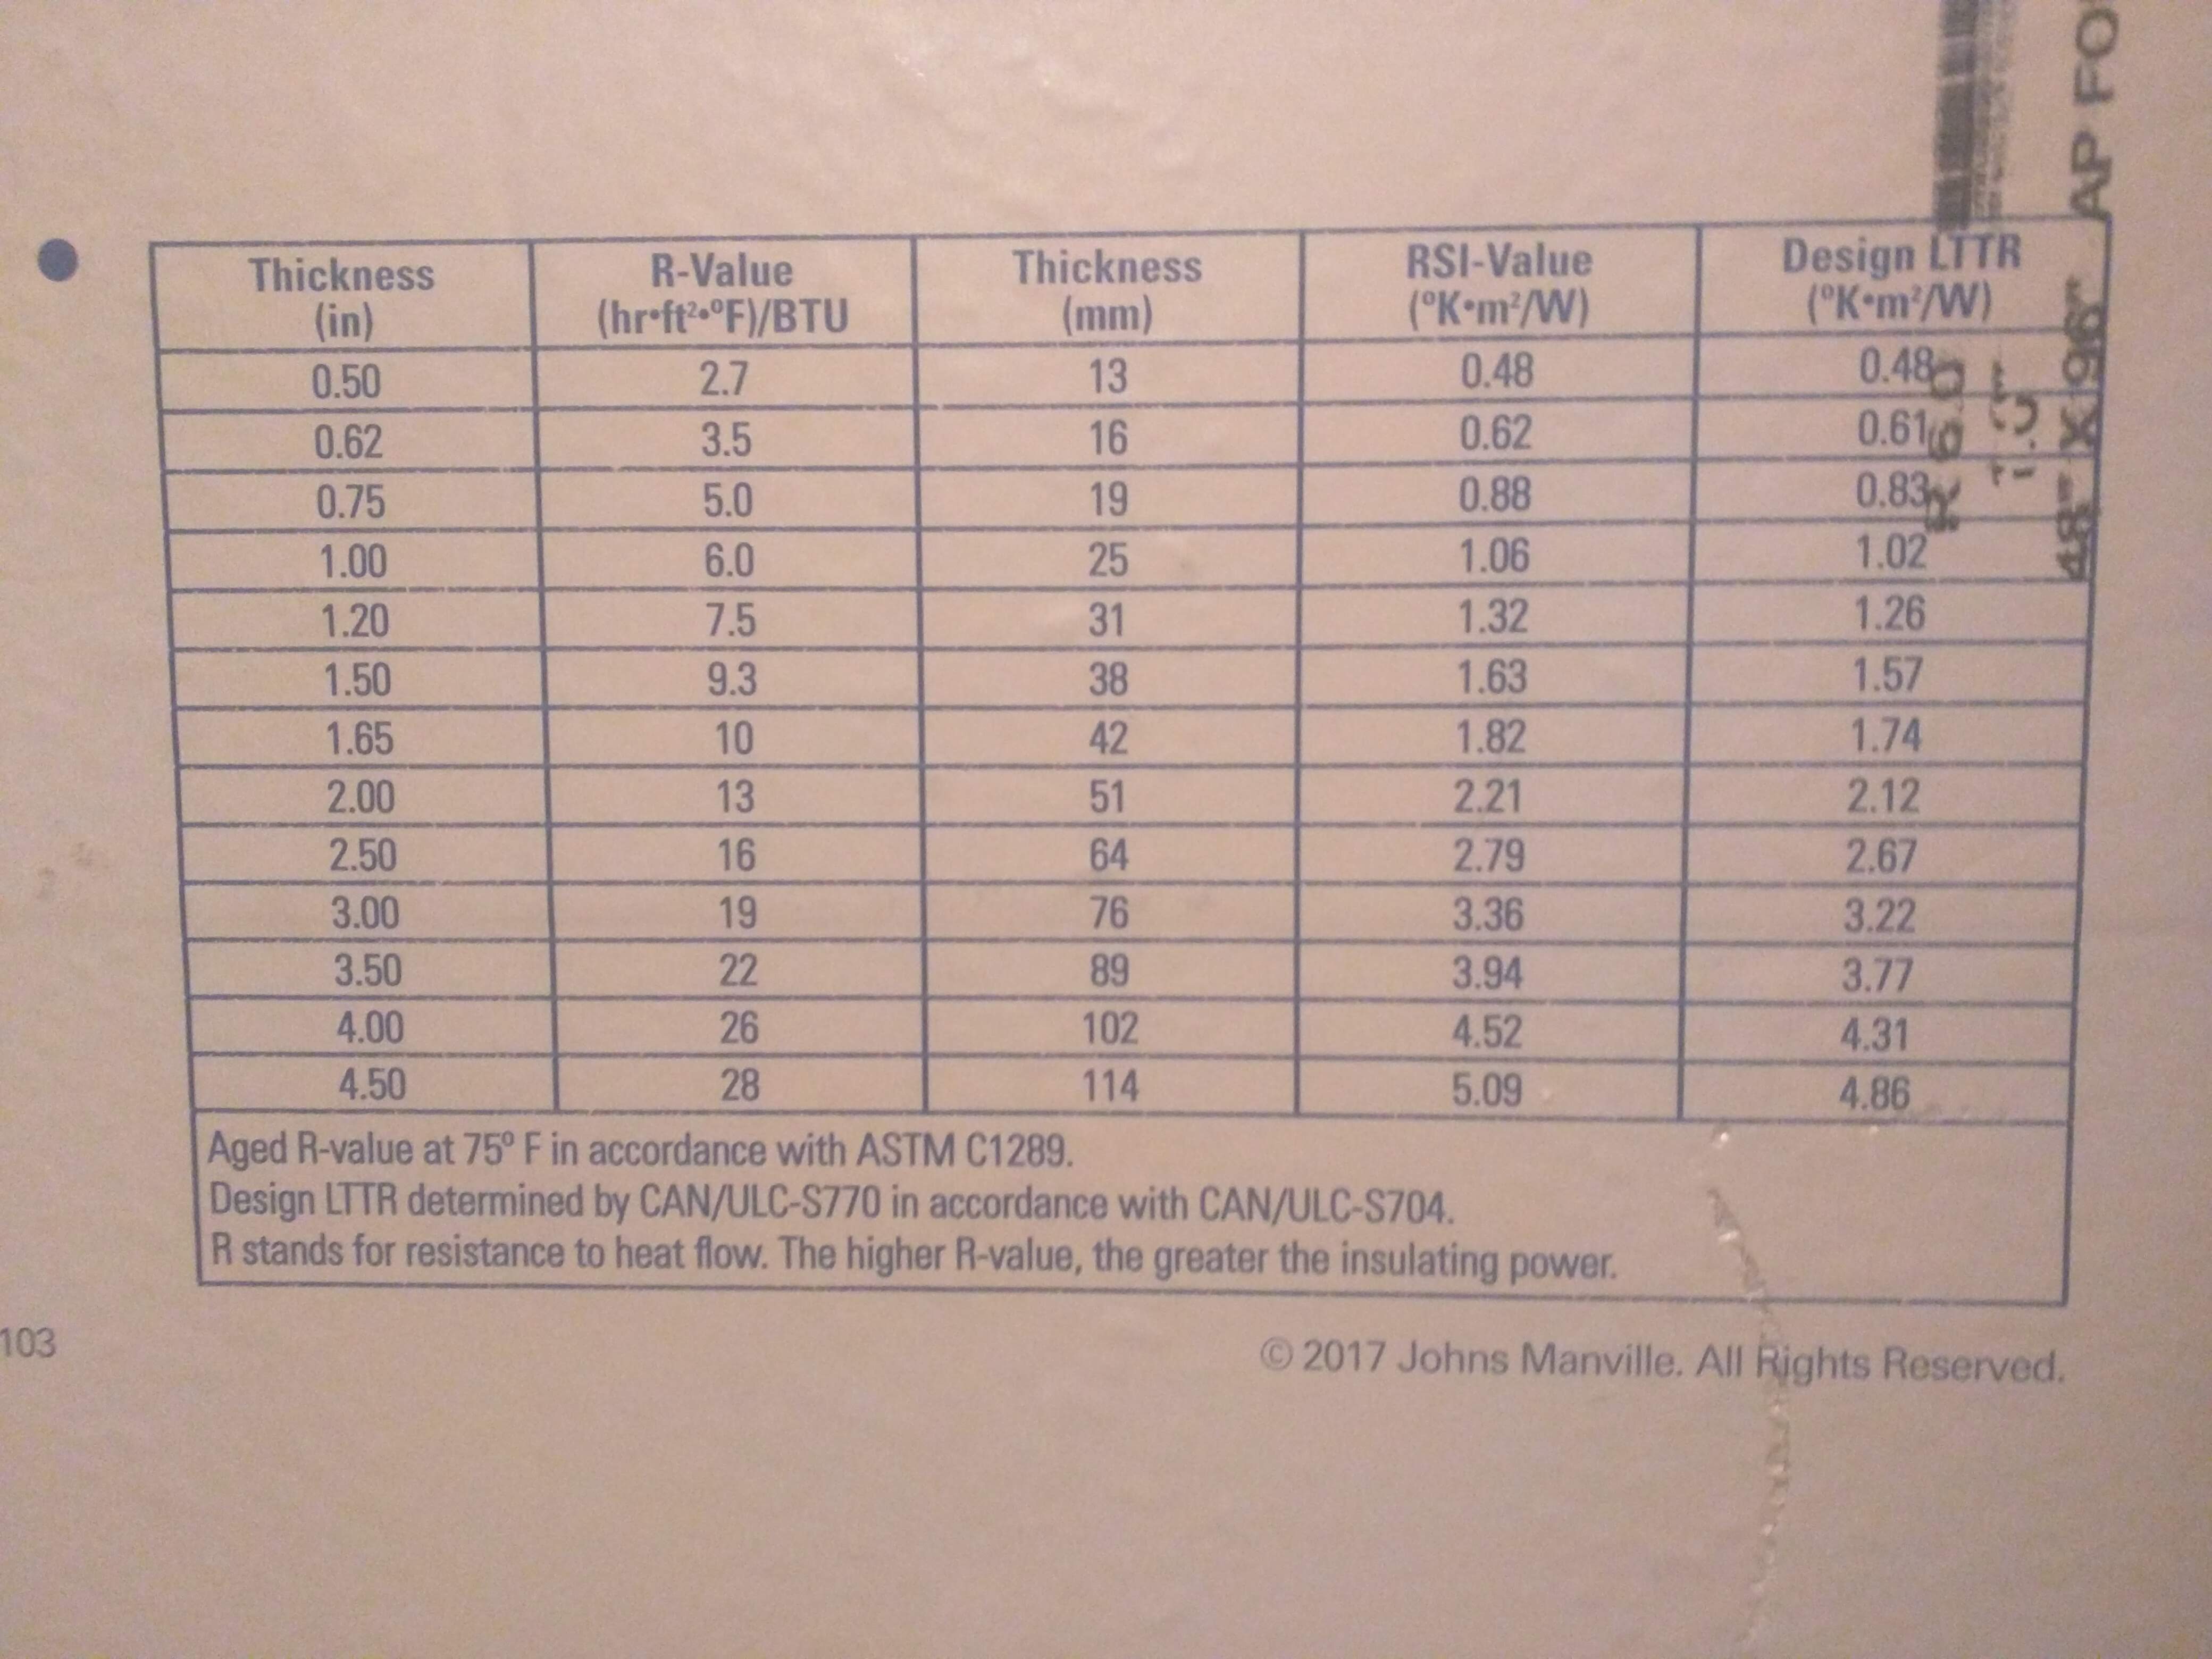
The 1.5" packing foam + mylar insulation has an R value of about 3.9 (imperial units), to be compared to about 6 for an inch of polyisocyanurate ; the insulated keg leaks or gains 1.1 W per K (or 0.6 W per ℉) temperature difference, so 22W for 20K difference, which the cooler can handle.

The peltier system can remove 50W while cooling down the full keg. I'm still measuring the minimum temperature it can reach, but I assume it should be similar to the ~6 ℃ (43℉) it can reach for the carboy. Update: the minimum temperature is 8.5 C (47 F).

The pictures show the 1/4" copper cooling loop taped to the outside of the keg, the foam insulation held in place with packing tape, and the final appearance after wrapping in aluminized mylar.
I think it looks tolerable for a kitchen, and takes up less space than an extra fridge. The keg is 8.5" diameter, with insulation 11.5".
IMG_20200308_171846 - Copy.jpg IMG_20200308_181722 - Copy.jpg IMG_20200308_182846 - Copy.jpg IMG_20200308_183341 - Copy.jpg IMG_20200308_181646 - Copy.jpg
 
Last edited:
After transferring to the keg, I took a few more pics of the cooling loop inside the carboy:
IMG_20200311_143314 - Copy.jpg IMG_20200311_143327 - Copy.jpg IMG_20200311_143353 - Copy.jpg IMG_20200311_143410 - Copy.jpg
 
Update: I have been running the keg and the fermenter in series. During the peak of the weissbier activity the keg stayed cold, but it seemed the copper loop inside the fermenter could not keep up with the energy output from fermentation. I'm actually a bit baffled by that, because converting 2.8 kg sugar into alcohol and CO2 over two to three days shouldn't put out more than about 10W (550MJ per kg sugar, so 2.8 kg sugar converted during one day corresponds to 17 W, over two days to 8.5W, etc.). The more likely explanation is that the temperature sensors I'm using are failing and giving erratic and drifting measurements over time when immersed in liquid. The last measurement with the old sensor inside the carboy was 24C, but a different sensor taped to the outside of the keg that I transferred the beer to showed the starting temperature just above 16C after the transfer, which makes more sense.

I had only very little 1/4 inch copper tubing left, so this keg has only one turn of the external cooling loop, attached with stretched aluminum tape, like the first keg, and just some left over bubble wrap for insulation.

I'm now running the two kegs in series, and the peltier system seems to be doing ok.
IMG_20200412_182706 - Copy.jpg
 
@Gruel
This is a really interesting setup. I'm actually looking to do something somewhat similar where I cool a tank that is then used to chill a coil in my conical. Are the dual controls simply for two tanks? If so, I might look into a 1/2 setup of this.
 
only one of the two (four, actually, in the mean time) thermometers is used to control the PC power supply. The others are just used as cheap thermometers (currently 10 bucks for two on amazon). With two, I'm reading the kegs (or keg + fermenter), and two more read the cooler output and return line temperatures. The kegs,or keg and fermenter, are hooked up in series, but only one controls the cooler.

Just be aware that Peltier coolers are really inefficient. If you need more than few times ten Watt, this is not the way to go. Most of the 200W electrical power going into the setup is just wasted.
 
Just a note that the Peltier setup is easily overwhelmed when the surrounding air gets more humid and condensation occurs. The limit seems to be about two degrees C or four degrees F below the ambient dewpoint (which might be the actual dewpoint in the peltier enclosure).
I had the system set to 10 C for my latest keg of wheat beer (brewed in a bag, but with traditional sparging, which cut the amount of sediment in the fermenter from four inch down to the usual one inch). That was one degree C warmer than the limit the system could reach, so it wouldn't have to run non-stop. With the weather getting warmer, I noticed that the keg was now at 12C, the system running non-stop, and condensation was accumulating below the peltiers in the enclosure, and dripping from the exposed parts of the coolant lines. Hopefully running the air conditioning will help. The indoors dew point is currently 13 C, outdoors 19 C.
 
I added a poor man's vapor barrier (a layer of clear packing tape) to the peltier enclosure, separating the peltier stacks at the bottom from the air flow of the radiator and power supply. I also needed to vent and refill the hot side plumbing; quite a bit of air in there.
The system is now able to keep the 5 gallon (less by now...) keg of Weissbier at 11 ±1 ⁰C without running all the time.

I'm glad that the peltiers seem to survive the limited cycling quite well so far. At work, colleagues had to exchange their units regularly, but they were constantly cycling between room temperature and -30⁰C. The stress on the peltiers probably also depends on the exact kind of mounting used.

I ordered a few more 12706 peltiers (*) and two of the 120mm x 40mm heat exchangers (the ones I mentioned already in the parts list in the second post), with the plan to run three serial pairs (six total) of peltiers in parallel. Theoretically that should give the same cooling power as three units at full blast, but at half the dissipated power. The triple width heat exchangers should also clean up the plumbing a bit.

(*) Unfortunately, having glued them with the silicone adhesive, the peltiers are not easily separable from the heat exchangers. I should also note that the peltiers I bought are running at 10.8V and 2.9A, dissipating about 31W power each. At 12V they draw between 3.2 to 3.6A, definitely not 6A as the spec says. With 3 x 2 pairs, I'm hoping to draw (and dissipate) half the electrical power (12V *1.7A*3 pairs =61W, compared to 10.8V*2.88A*4 single units= 124W) at hopefully only a ten percent loss in nominal cooling power (which is proportional to the current times the number of units).
 
Last edited:
So, I hooked up my new batch of cheap peltiers (also running at 3A, not 6A, at 12V, but I already expected that) sandwiched two in series between the 3-wide aluminum water blocks, and the cooling power was really not better than what I got with the old four-in-parallel setup.
I also replaced the enclosure, installing four 5/16" barbed feedthroughs (actually, I ordered 5/16", but the label said 3/8"; in any case, perfect fit for the 5/16" ID soft tubing) in order to move the hot side radiator out of the box, and clean up the interface.

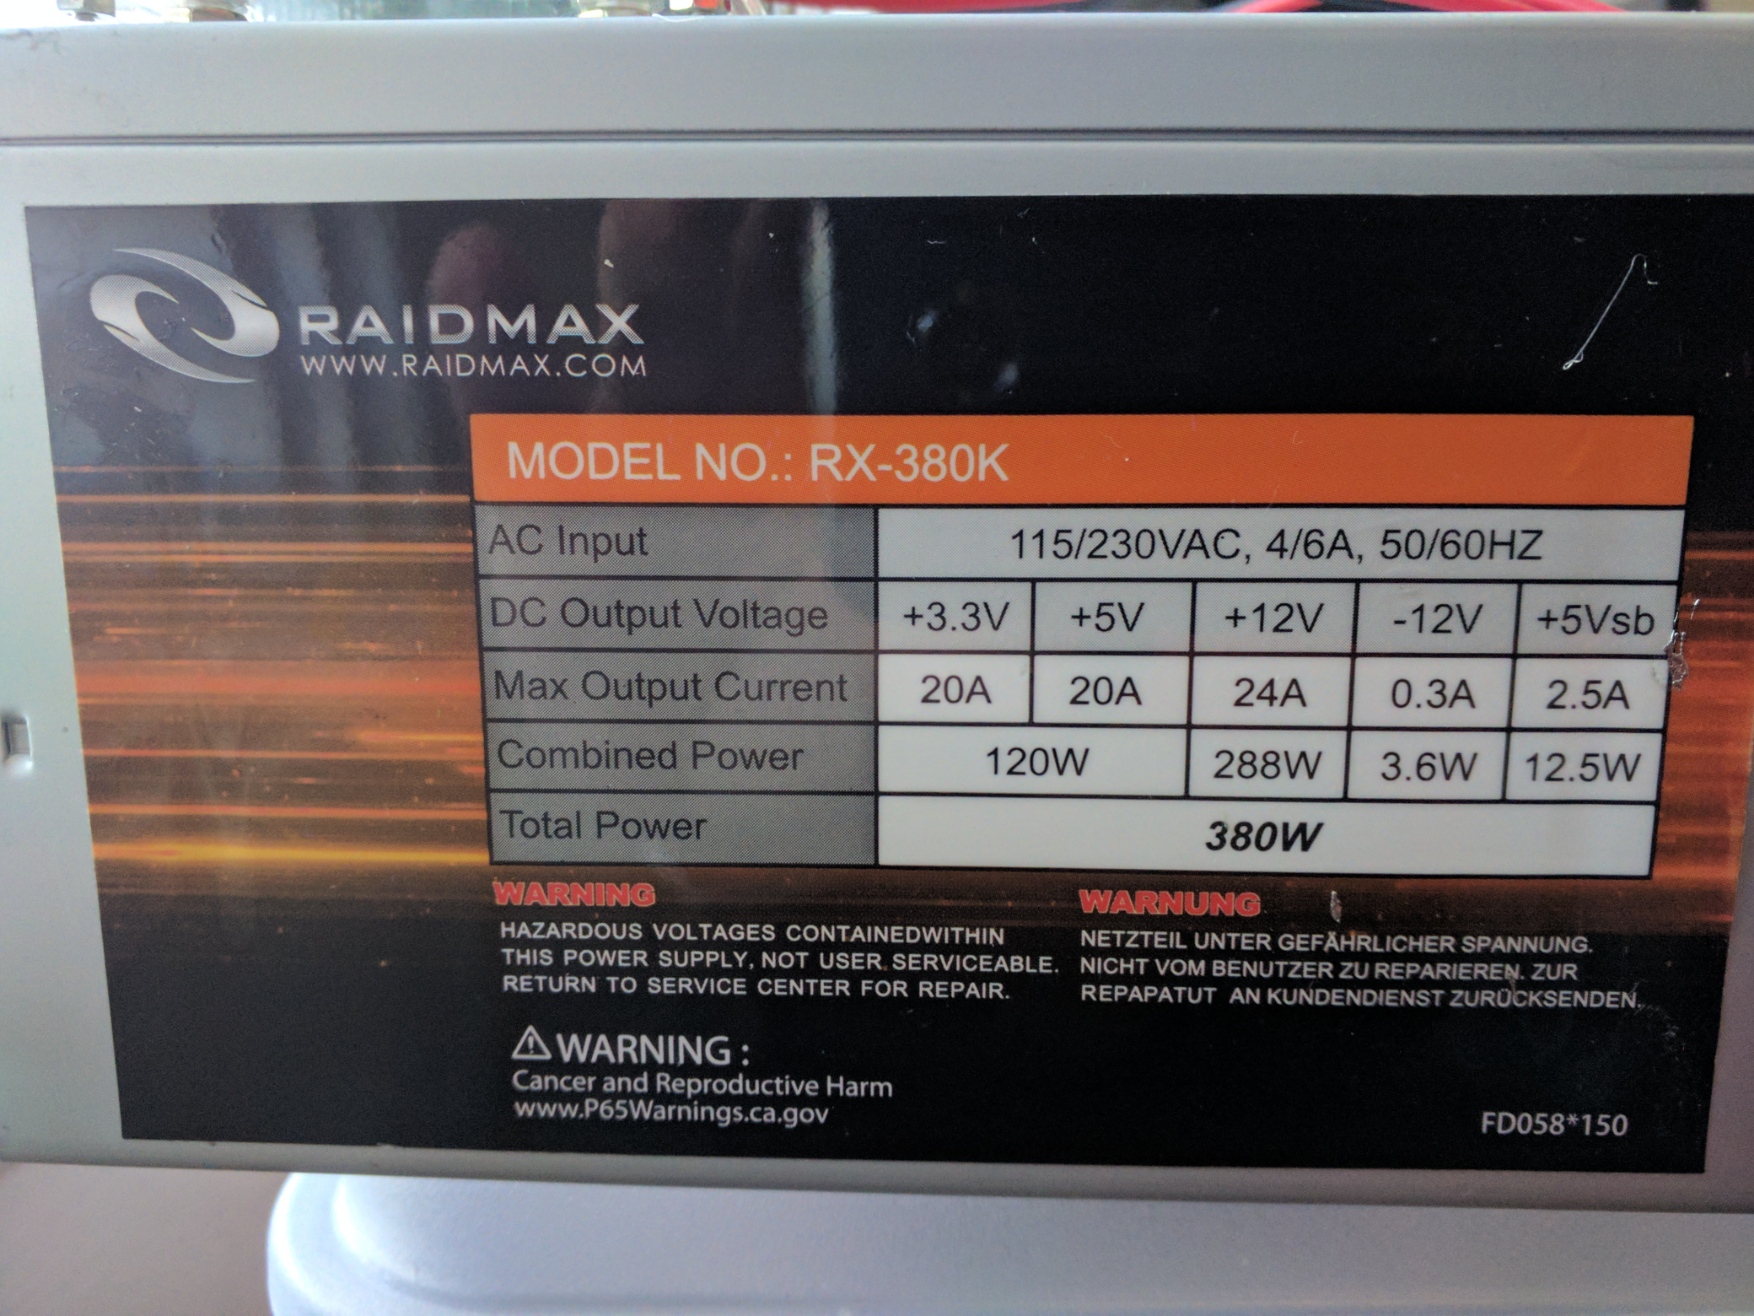
Since I was nowhere near maxing out my power supply (or so I thought...), I hooked up both the old and the new setup, coolant flow in series, electrically in parallel. One of six new peltiers I had sandwiched between the cooling blocks unfortunately already had died (I should have done a burn-in test before gluing them in place...), so I hooked up five single peltiers, at 2.9A each, and two series of two peltiers, for a total of less than 18A. Next thing I know, my Raidmax RX-380K PC power supply, rated for 24A on the 12V output, gives up, first temporarily, and then for good. I had reduced the load to five times 2.9A, but apparently the 12A I was drawing earlier with the four peltier setup was all it could supply. Disappointing. I guess there was a reason why Fry's was selling this supply for 25 bucks...

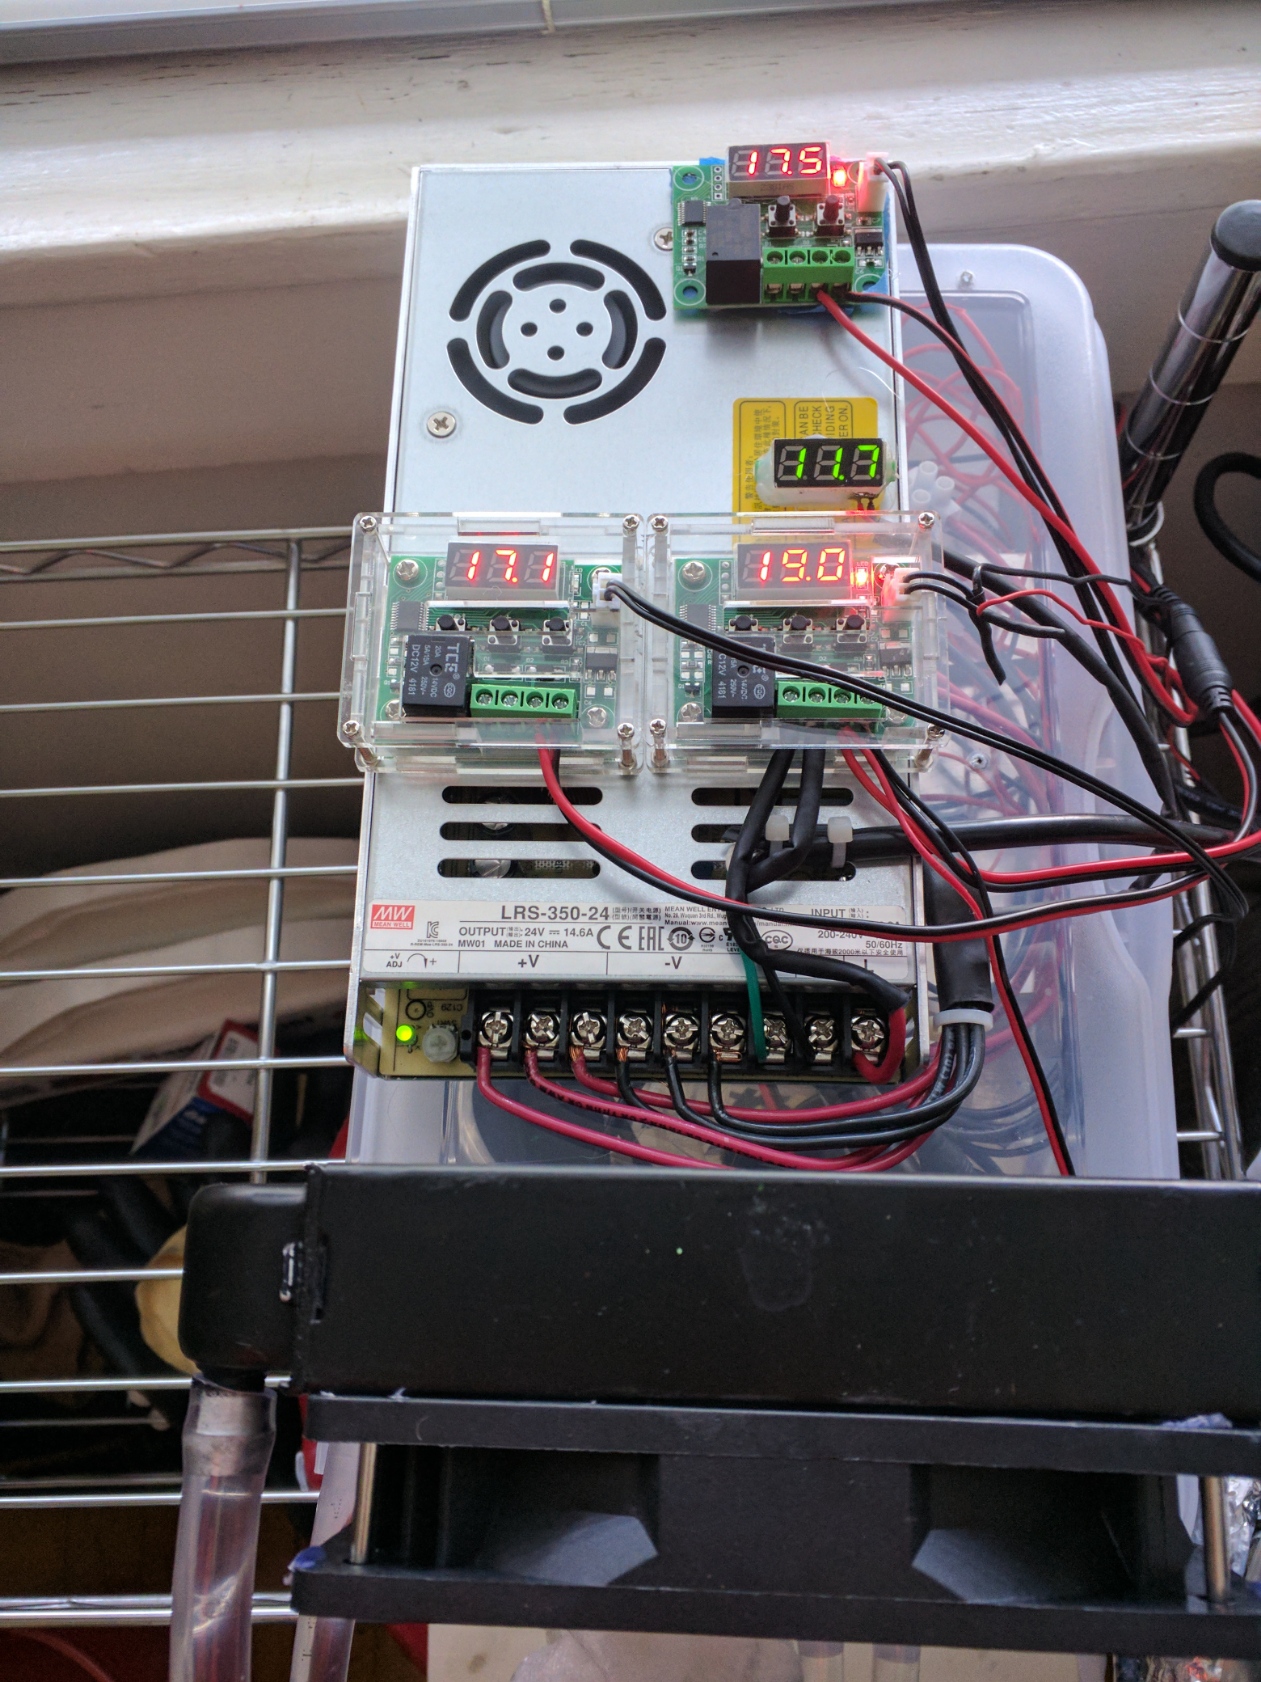
So, I splurged on a Meanwell LRS-350-24 ($30 on Amazon), hooked up the peltiers in appropriate groups for 24V (two times two in series, and a single peltier in series with two parallel groups of two in series, for three groups of 24V/3A), and now this thing is running like gang busters. I had already moved the hot side radiator and the power supply out of the enclosure.

The power supply is not getting hot at all, supplying the full 24V, and so far no condensation inside the enclosure. Total power usage is a bit less than 300W (which, incidentally is what the old Raidmax was using, but I think at a much worse power factor, so it was drawing more current and having higher ohmic losses in the AC cable), and I think I'm getting about 240W into the peltiers.

Attaching some pics:
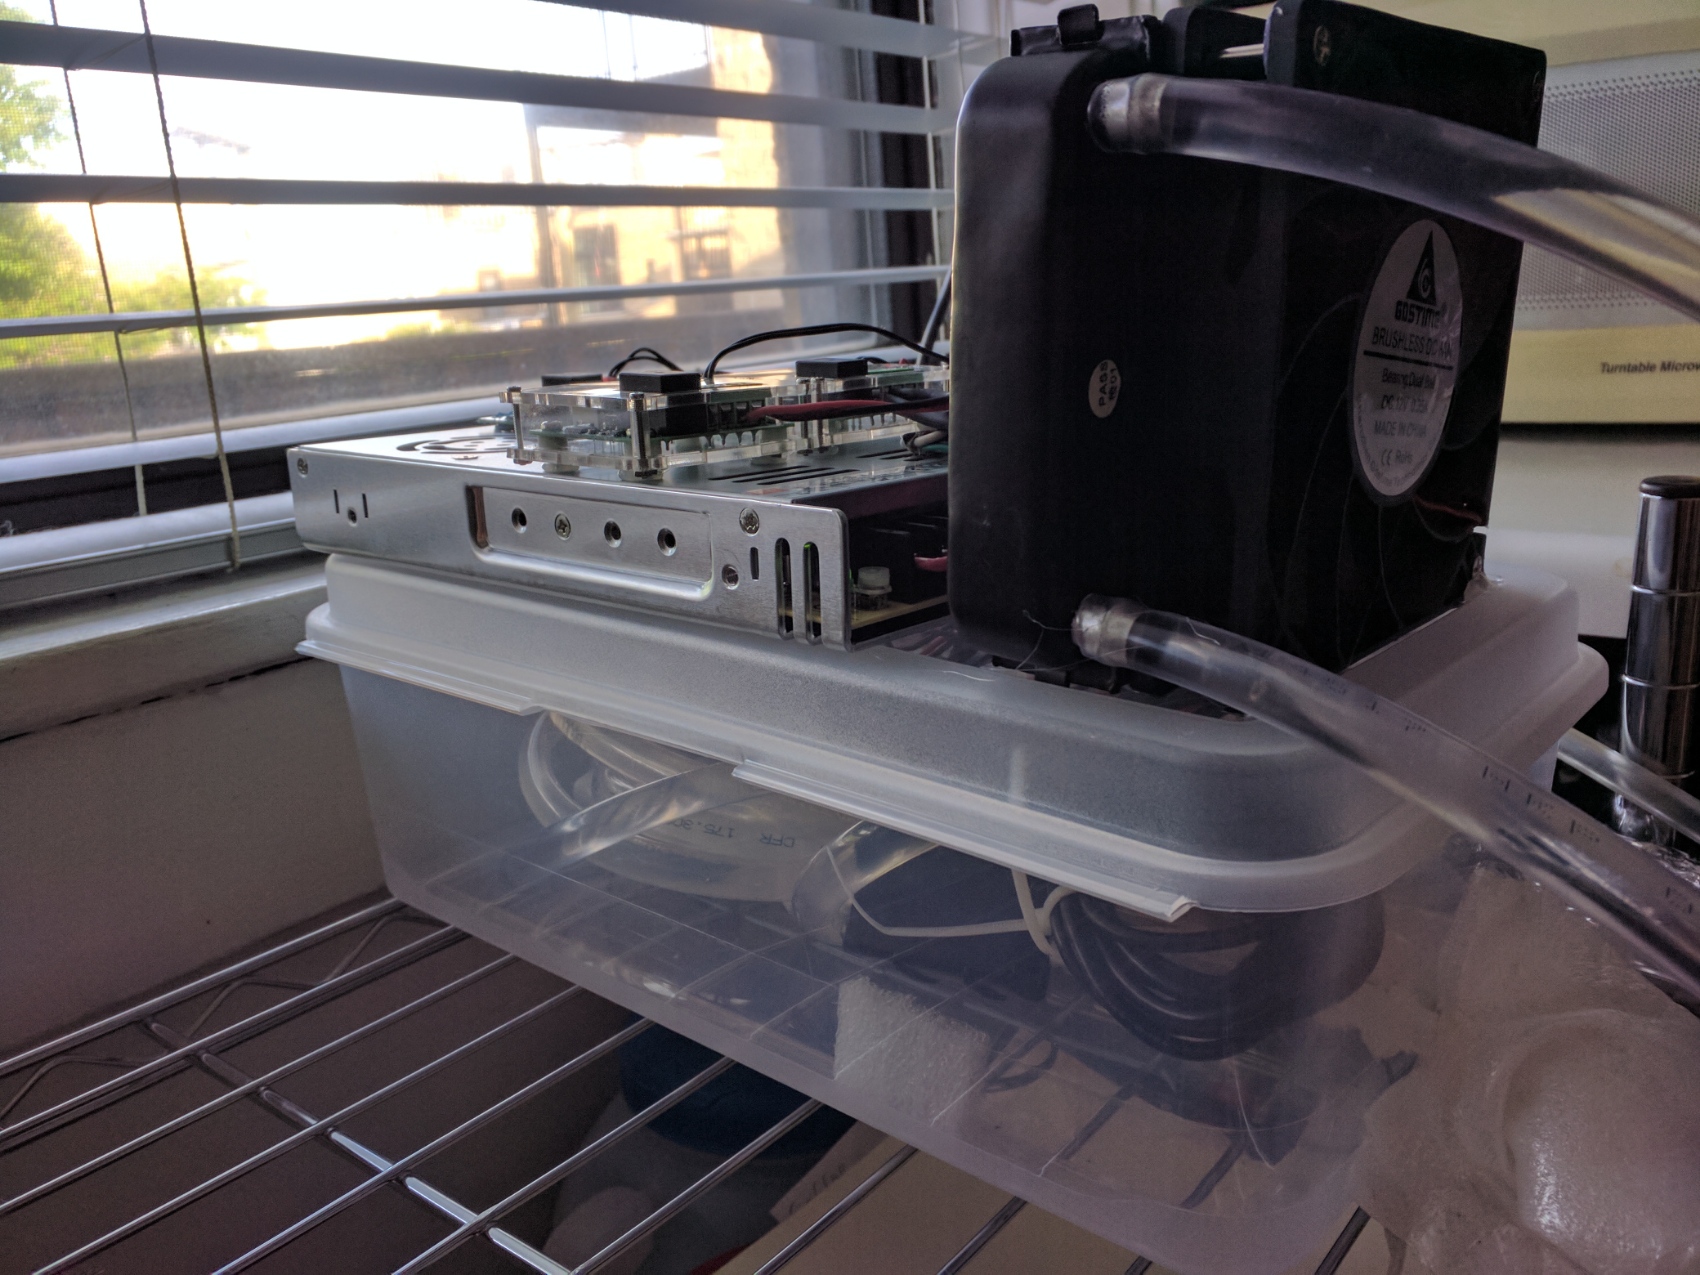
Side view of new setup; it's still very kitchen-friendly:

beer_cooler_side_view - Copy.jpg


Top view, while cooling down the Weissbier keg that had warmed up a bit while I was fixing the beer chiller:
beer_cooler_top_view - Copy.jpg


Side view of the double peltier stack; somebody here had suggested to sandwich the cold sides of two stacks towards each other, to minimize environmental losses; thanks for that!
double_peltier_stack_side_view - Copy.jpg


The label of the original no-good PC power supply; it couldn't deliver more than about half the nominal power, at a voltage drop of 10%; at less than 15A it overheated and permanently disabled itself. Looking inside, it has two thermal sensors that one might have been able to replace, but a coil looked already pretty burned, so I felt trying to fix it might not only be time wasted, but risky as well. I do not recommend this one.
no_good_RX-380K_PS - Copy.jpg


Update: blowing 300W of heat into your kitchen is not optimal, so I installed longer radiator tubing and wiring, and relocated the radiator to a window sill. Power usage is 6 kWhr per day when keeping the beer at 11+/- 1 degree C, at 28 degree C ambient temperature, which means the cooler is running 85% of the time. Therefore it should be able to achieve 17/0.85 =20 degree C delta T when running full out, 8 degree C keg temperature when the ambient is 28 C.
With just the internal heat load and the short-circuited cold loop (no keg) it can achieve 6 degree C.
 
Last edited:
With the radiator connected with longer hoses & wires and relocated to the window sill, and the Meanwell LRS-350-24 power supply, I think this is now a setup I can recommend for 5 gallon brewers with space constraints. I really like the quick disconnects for switching in kegs and fermenters, and the compact peltier and pump enclosure with the lid-mounted power supply. The one thing that could be fine tuned is maybe finding a quieter fan, but the one I listed (in the second post) does a good job, and 50 decibel is tolerable.
IMG_20200618_221533.jpg
 
Last edited:
Well it's no surprise, but I still have to say that wattage is crazy compared to using a fridge. That's a buck a day in many power districts in the USA.
Meanwhile my 17cf top-freezer E-star fridges burn under $30 per year (@12 cents/KWH), and a mini-fridge is bound to use even less.
One would have to be totally hard up for space to go this route...

Cheers!
 
day_trippr, that's the point. I can fit the keg (with insulation), I can fit the 7.5 gallon carboy, but I can't fit a fridge that would hold the keg. It's more a thing for city folks, I guess.
 
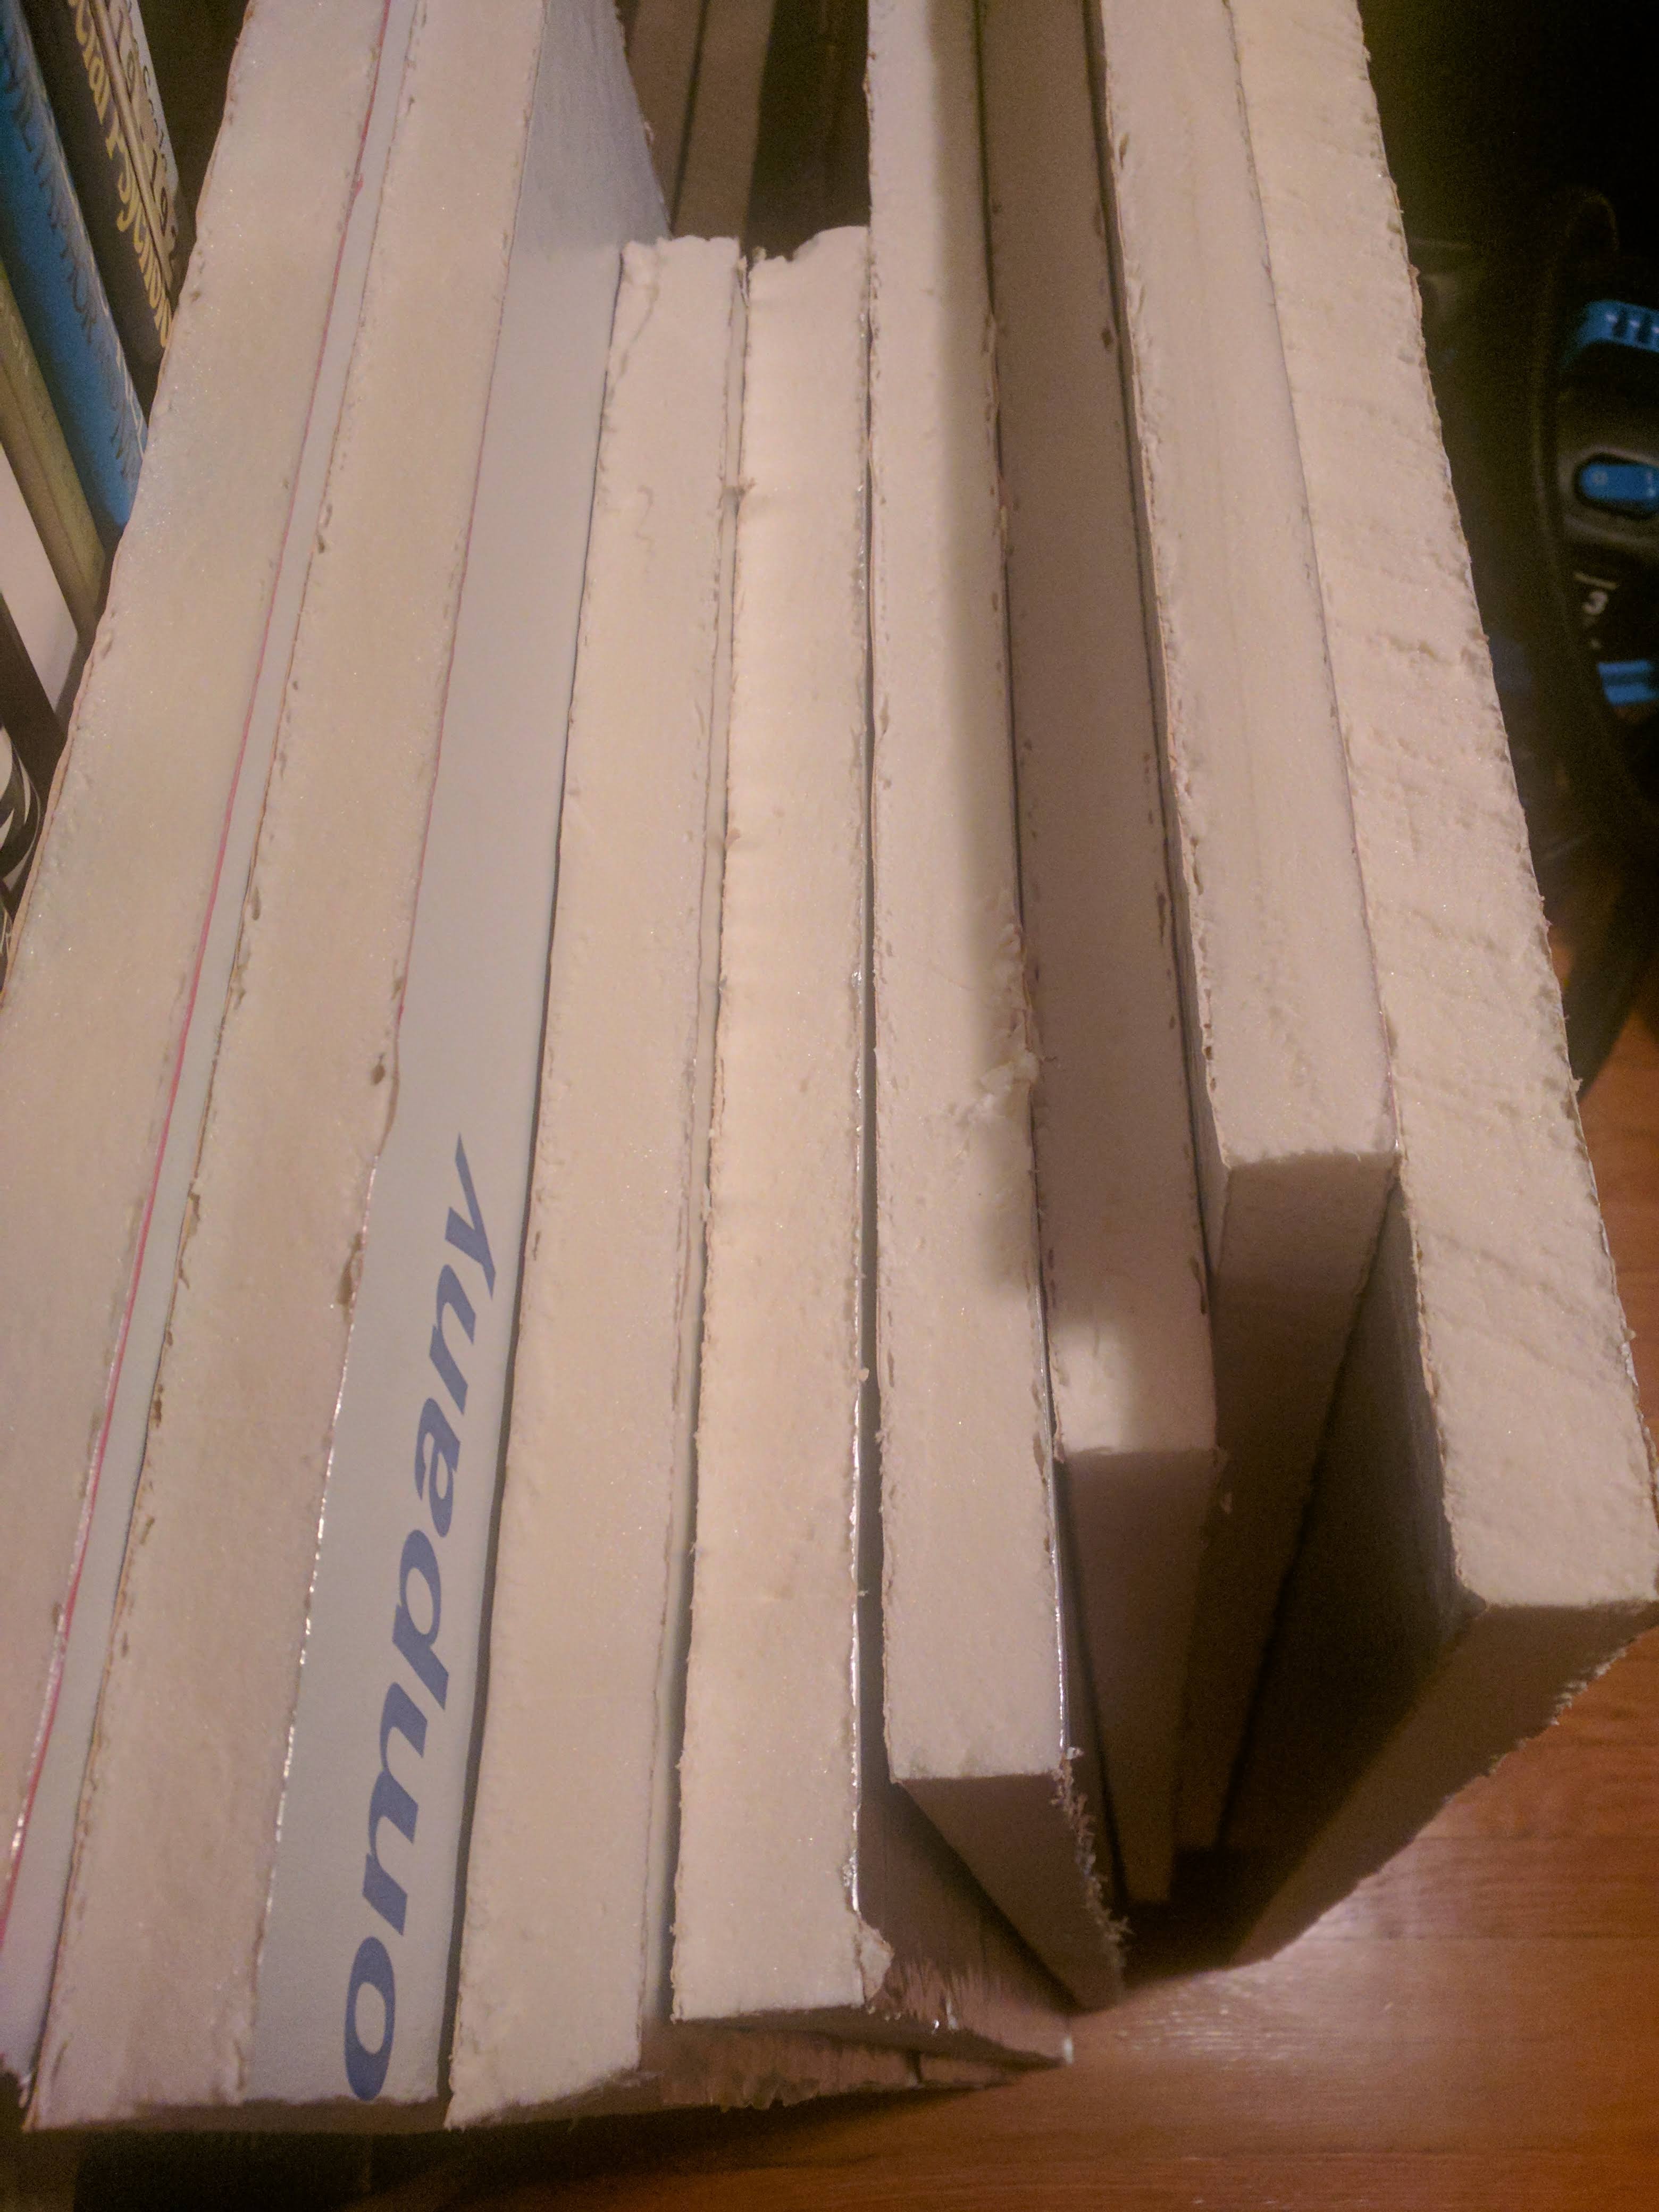
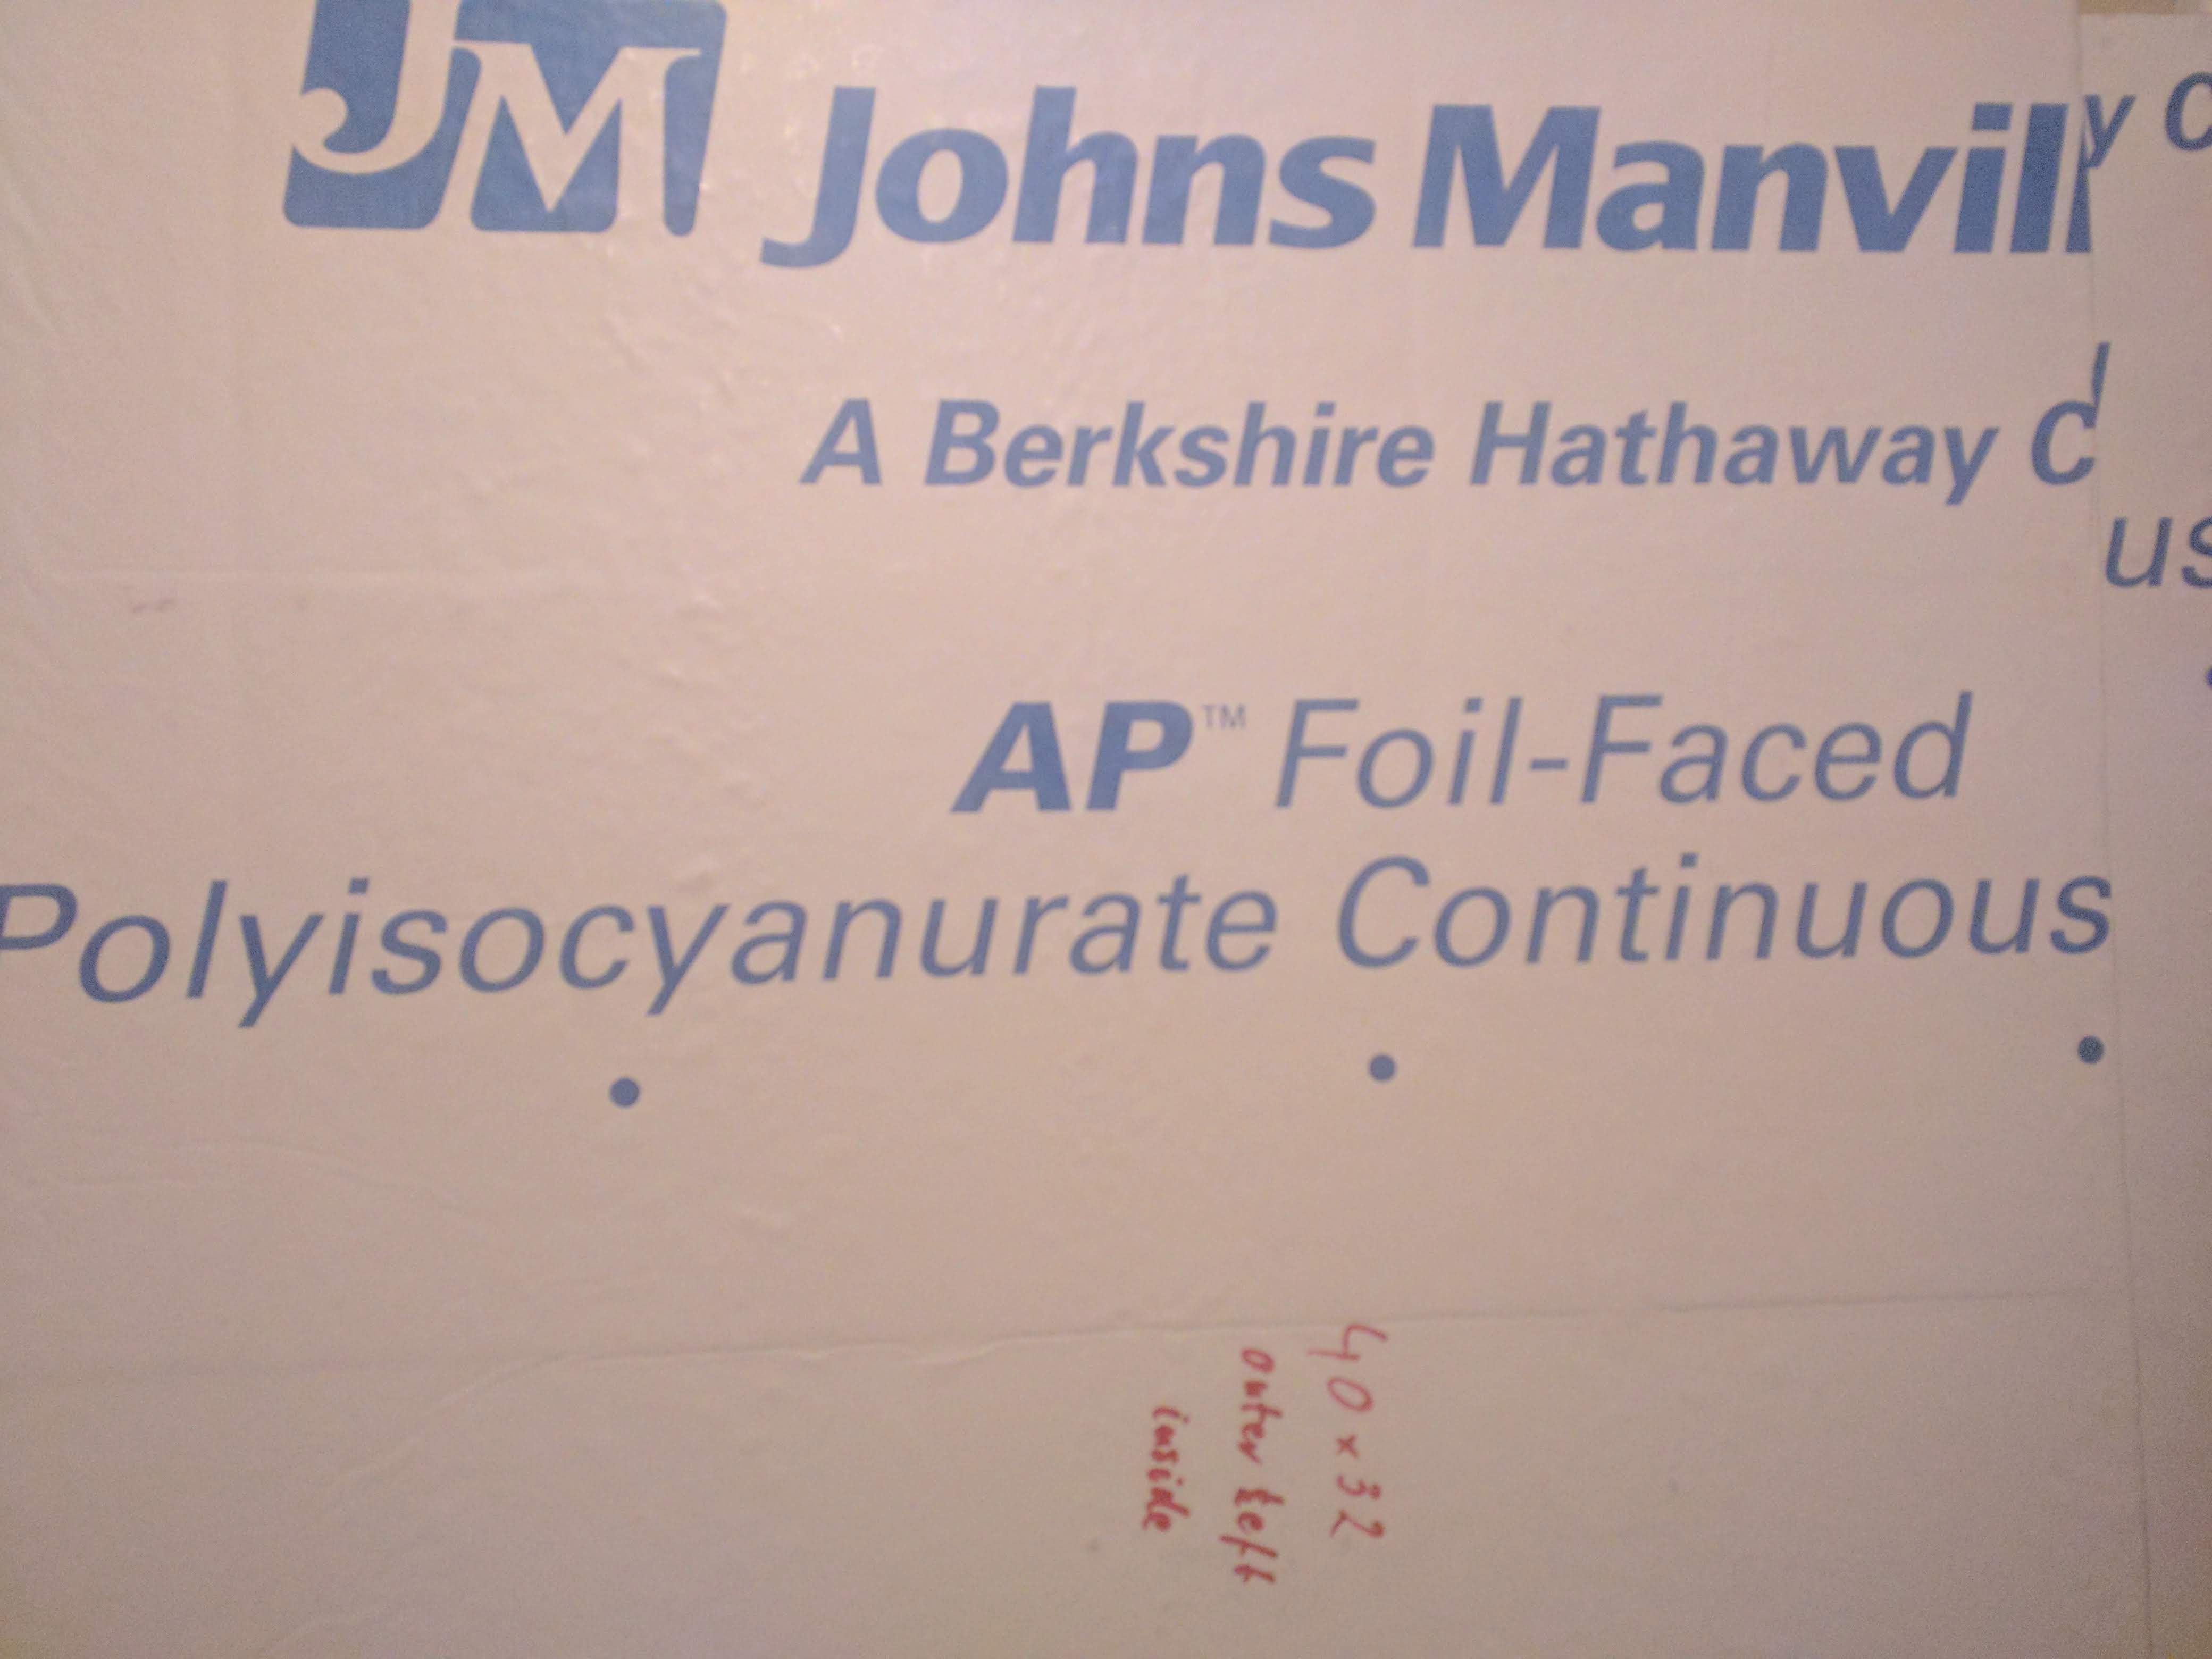
Another two (or more) of the thermoelectric elements died, and the cooler is performing quite poorly. It is currently dealing with a Pils and a Weissbier, each in a 5 gallon keg with very moderate insulation. Today I bought two 4 by 8 sheets of one inch polyisocyanurate (or poly iso) insulation, and I'm going to put the carboy and the two kegs into a 36" by 12" by 30" enclosure. This should also deal with the condensation issue, since the foam has aluminum backing on both side.
We'll see how this works out.
 
This is a wicked cool build - I’ve heard that TEC lifespan can be improved by mounting with a compressive preload. Also, I wonder if the “bang bang” control is too hard on the TECs? I don’t have direct experience, so can’t say for certain
 
I think this is a downside of buying cheap TECs from Amazon. You are right that thermal cycling is not good for them, but lately they have been running full out, not quite reaching the set point temperature, so it's not the cycling that kills them. I think they are just crap TECs, not quite meeting their specs, and having a short lifetime. They are under a bit of compression preload.

As I had mentioned earlier, colleagues at work just kept replacing the TECs when they died.
(For the latest iteration of a similar system (module testing for a silicon tracking detector) the engineer in charge moved away from peltiers altogether, and just went for a more powerful glycol unit.)
Unfortunately my TECs are glued to the water cooling bodies. For now I will try to simply bypass dead ones, but eventually I should either get a small compressor (mechanical refrigerator) unit, or switch to a setup where the peltiers are clamped and replaceable.
Actually, eventually the plan is to move into a bigger place with a garage and a basement...; still, it would be nice to build a robust apartment/condo system.
 
Last edited:
One idea I was thinking about for fermenter insulation was to put your carboy or bucket into a 10 gallon igloo water cooler. It looks like a 6 gallon bucket would fit inside and even allow the lid to be put on—but you’d likely need to cut a hole in the lid for your airlock. However, you gotta do that anyway to get the water hoses out. Bonus insulation if you wrap the fermenter in aluminum foil to reflect radiative heat transfer...
 
Yeah, but build a few of those enclosures, and soon you'll be at the size of a small chest freezer. Actually, today I thought about getting one, but space wise I'm telling myself I'm a bit better off building a custom enclosure that just fits my three vessels. Plus, I get to build something!
On the other hand, keeping it modular and only hooking up what you need to the cooling system is what I like about my current setup. So, that's an argument in favor of your igloo water cooler approach. But I still need to store the rest of the vessels even when I'm not using them. Hence the idea of building an enclosure just for the three vessels; they would keep their individual insulation, since I want to run them at different temperatures.

I think aluminized mylar works better than aluminum foil. That's what they make cryogenic super insulation (radiative multilayer insulation) from. I think it also works ok if not in a vacuum, due to the many separate trapped air layers. You can buy it pre-crinkled.
 
Last edited:
Nice to know about the super insulation - how long before my fermenter gets mistaken for a lunar lander? Just need a dish now...
 
I knew them as TEDs -thermo electric diodes and played around and used them in a tester in the 1980s. We used a number of them and the cheaper ones would have the substrate crack from thermal cycling. Best long term was using springs to clamp them between the heatsink and the plate to be cooled.
 
a great article, helps me a lot as I had ideas of using Peltiers to chill a fermentation box but after reading your article I realise it will be too inefficient for our 30 plus summer temperatures (South Africa) if it is of interest to you I made something of a similar size to chill my keg beer for serving using a 1/4 hp compressor, works out a lot cheaper power wise cost a lot less to build and can get my ales down to 5 degrees
IMG_20190916_145608.jpg
 
That looks pretty compact! Where did you get the chiller from? The Peltiers are about a factor 10 less efficient than a mechanical refrigerator.
 
I finally decided to build a small enclosure for the carboy and the two kegs. I bought two sheets of 1" polyisocyanurate foam with aluminum facing on both sides at Menards (thickest they had in stock), and was able to cut all the parts for a box with internal dimensions 36" long by 28" tall by 14" wide, with very little left over. Outer surface area is about 33 sq.ft, the R value (US units, not metric!) of 2" polyiso is 13 (see table in picture), so 30W or 100 BTU/hr should get me 40F below ambient (40F*33sq.ft/(13 hr sq.ft. F/BTU) is about 100 BTU/hr); 40W should get me close to freezing, except the Peltiers become less and less efficient. We'll see. Hopefully it will help with condensation.

Apropos condensation: what killed one of the peltiers was corrosion; foam pieces I had put between the old independent 40mm heat exchanger and peltier stacks had become wet, and one of the wires touching the foam corroded right off the peltier. I did a shoddy job at soldering (due to too good a job at heat-sinking the peltier ...), but for now it seems to work, and the short circuited cooling loop went right down to 6C/43F, which is pretty much the minimum temperature the peltiers can reach given the current ambient of close to 80F.

Some pics:
IMG_20200805_220421 - Copy.jpg

IMG_20200805_220330 - Copy.jpg

IMG_20200805_220354 - Copy.jpg
 
That looks pretty compact! Where did you get the chiller from? The Peltiers are about a factor 10 less efficient than a mechanical refrigerator.
totally home made, purchased the components from my local Reco outlet except the steel for the box and 18mm ply for the base, and the gassing up via a friend in the business. at current exchange it totaled up around $150. uses the same controller you have used, 1/4 hp compressor, 6 pack cooler box for the glycol bath, 1/2 in copper pipe, 1/4in copper pipe 0.7mm capillary tube (calculated the length with app from Dancap), 2 lt glycol (for safe from a vape company), best condenser I could pick up for my buck, 1/2 of a 1200 x 2400mm x 1.5mm galvanised steel sheet for the box, for flow and silver solder rods, plus a few odds and sods to complete the job.
used far too much 1/4 in tube for the beer chilling, works but rather a slow flow, I plan to change that part. the 1/2 in copper coiled tube works as the evaporator in the glycol mixture with a 1/4 in copper coiled tube inside that for chilling my ale. this could be an option for you if you have the tools to construct it.
 
That's amazing! I never thought about that, but that is a good solution. I guess the only tricky part is the dimensioning of the capillary? How do you determine how much refrigerant to put in? Do you have to calculate the volume of your plumbing, or is it just filling to some pressure at a given temperature?
 
Back
Top