Brewer's Edge Mash and Boil

Homebrew Talk - Beer, Wine, Mead, & Cider Brewing Discussion Forum

Help Support Homebrew Talk - Beer, Wine, Mead, & Cider Brewing Discussion Forum:

This site may earn a commission from merchant affiliate links, including eBay, Amazon, and others.

The_General

Well-Known Member
Joined
Jul 10, 2010
Messages
129
Reaction score
9
Location
Rockville, MD
I've been playing around with my Brewer's Edge Mash and Boil and am looking for thoughts and advice for people more experienced with E-BIAB systems. I've just moved over from a cooler mash tun.

As others have seen, I'm getting a huge swing in temperature as measured by the Brewer's Edge. You get swings of plus or minus about five degrees from what you set it to. What I did notice is that the grain bed itself holds fairly steady temperature with those swings (although its about 11 degrees lower than what the display reads). So, how would you deal with this? Here are my thoughts:

-Set the temp 11 degrees higher and live with it. My concern is that there is some liquid outside of the basket that's getting heated that much higher. Is that a concern or is that negligible?

-Recirculate....I've tried this but not extensively. I lost a lot of heat when I did this. I'm not sure if that's simply due to pumping it through the system or if the grain bed is pulling that down.

I've also wrapped the whole thing in a blanket and that didn't seem to help. As it's holding a pretty steady temperature, my inclination is to just adjust the temperature up to account for the difference but I'm open to other thoughts.
 
i periodically lift the grain basket about an inch or two off the bottom and it seems to help spread the heat out..As you said the wort around the grain basket is hotter then the grain bed so by doing this the hot wort bubbles up the grain bed a little ,when i do this the temp on the M&B matches my thermometer pretty close..i do this about 2-3 times during the 60 min mash and my temps are pretty steady not perfect but pretty steady..im about to add insulation to mine as well as a pump with insulated hoses..Also if you use a pump try not to let it splash cause you will lose heat..i am new to E brewing its all a learning curve..cheers
 
Thanks! I'll try the "lifting the basket" trick. Even with stirring, I found that the temperature stays well below what's on the display. I'm actually happier with that than I was with the large swings. If it's precise but not accurate, I can adjust for that.

Overall, though, I'm pretty happy with the M&B. I used the timer, used a supplemental heat stick to quickly change temps, and did no chill on my last batch. I was able to finish in under three hours.
 
yeah im happy with the M&B also..if i can get a mash within 150-155 im happy with that..i dont need a perfect mash temp as long as i get conversion and tasty beer im golden..cheers good luck with the set up
 
I just did a detailed write-up review on the Mash & Boil. The system works great. In my write-up I talk about the temperature discrepancy I saw. I did some experimentation with heating strike water to different target temperatures. Basically I found that if you stir/circulate, it comes within ~1 degree most of the time.

http://www.homebrewfinds.com/2017/09/hands-on-review-brewers-edge-mash-boil-electric-brewery.html

I hooked up a wort pump with some hose and made my own re-circ (Keg King sells a great pump at a more affordable price than Marsh/etc) and that worked great.

The other thing to consider is that it is a true dual wall unit so insulation is quite good. Prior to using this unit, I'd see mash hold temperature within 1-2 degrees over a 1 hour rest with just single steel wall pot. So my thought is to use the pump to recirc when heating to a new mash rest temperature, then shut it off and switch off the heating elements when I get to a rest temp. Even if the LED says my temperature is changing, my temperature probe says not so.
 
I wonder if the temperature probe is in a good place at the bottom next to the heating element. The plus, minus five degrees is how it maintains temperature and will not hurt anything.
 
I've brewed two batches of beer on my Mash and Boil so far, and I've noticed too that while the temperature on the display fluctuates quite a bit, temperature readings taken with a separate thermometer at the center of the grain bed in the top of the grain basket typically stay between 150 to 152 for the duration of the mash. All in all, the Mash and Boil is a great all grain set up for those of us brewers who don't have the space or budget for a dedicated 220 or 240 volt electric brewing circuit, or a propane jet burner powered 3 tier brew sculpture.
 
I have used the MnB for about 10 batches now and I agree the temperature fluctuations drive me a little nuts. I was going to try and use the blanket like I used to do with my BIAB set up but I just moved back to extract for now. Sweet little piece of equipment thought
 
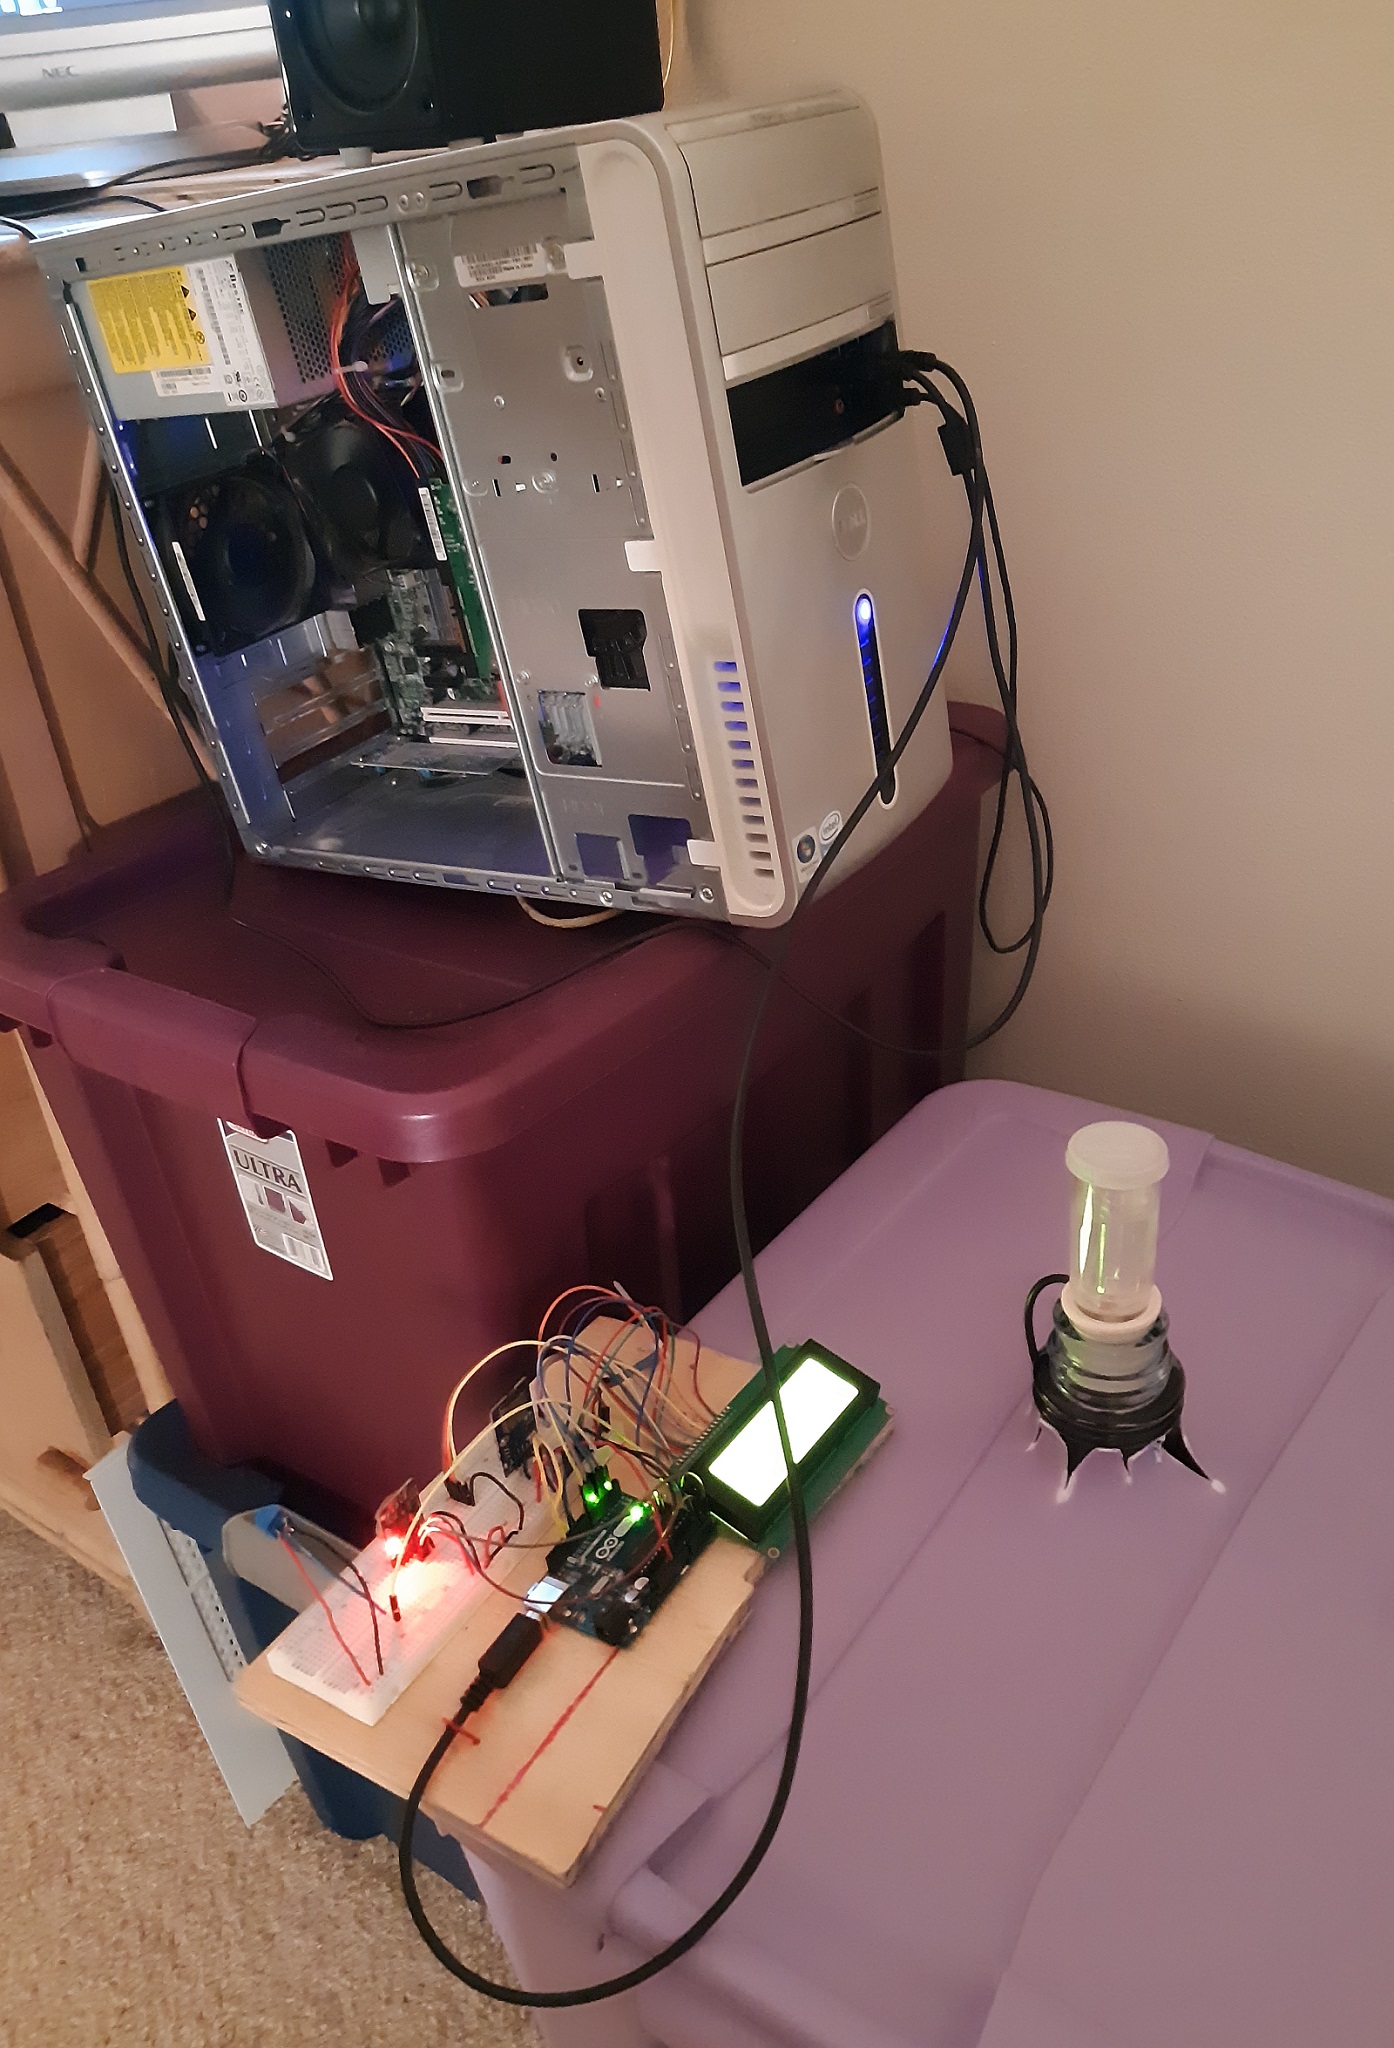
I just did my first all grain. I used my new Mash and Brew with pump.. The temp changes drove me nuts too. The dial thermometer with the long probe I clipped to the pot was reporting 147 F to 152 F . during the mash. It was sticking a few inches in the grain. I made a nice grain bed and adjusted the pump flow to get that one inch of water on top and observed the beer getting clearer. The pump is fun. Use the pump and some extra hose for cleaning up afterwards. The Sierra Madre Pale ale is in the primary, lets see what happens. I like the pump. This is a good piece of equipment,. With the lid clamped down, you get a good rolling boil with the temp set at 218, keep an eye on it though with the lid clamped down. Also be careful, i got a steam burn on my finger when un- clamping the lid. In the attached pictures I am tracking the fermentation temperatures in my plastic tub swamp cooler :) . I get a temperature reading logged ever 30 seconds. There is water in the tub and a wet t-shirt around the carboy. I hope i can keep the temp at or around 70 degrees F .
 
Last edited:
beermonitor2.jpg
beerdisplay.jpg
 
How long does it takes you guys to drain and sparge mine drains extremely slow I’m wondering if something is wrong.
 
I assume you mean sparging by adding water at the top of the bazooka tube and it draining from the bottom of it. Correct? For my normal brews it drains super quick. Because of that I do not dump the water. I slowly sprinkle it on top of grain. Sometimes if I use oats or wheat I could get kind of a stuck sparge and will drain super slow requiring assistance.
 
Really, every brew I do it’s insanely slow. How fine do you kill your grains?
 
I get on average 91% conversion efficiency with 0.048 crush with my process.
 
Okay I think that must be my problem. Have you ever found the need to use a grain bag due to some of the grain getting through?
 
I never use a bag. I know some do to use finer crush. But I'm happy with my efficiency using the tub. I have used up to 0.043 but didn't make a difference and was iffy. Once I did 0.038 and got bad stuck sparge. I do squeeze the grains at the end and use recirculation pump among other things to get to my efficiency.
 
I’m thinking my issues might just come down to milling way to fine. I considered the system to basically be the same as BIAB and took the advice to mill around .30. Next brew day I’m going to set it around .4 and hope I get better results. Thanks
 
I have not used a bag with the M&B yet but I have heard from a fellow here that does that it can keep smaller stuff from clogging the holes in the bottom of the mash pipe and improve flow with finer ground stuff.

The M&B makes you work to keep mash temp even. Regular stirring and Vorlauf at intervals during mash is what it takes with the basic unit. And knocking the power back to 1000 watts once you reach temp. Still shows fluctuation onscreen but not as bad as the 1600 setting. I played around with higher mash temp settings a few times but usually just set it at your target and work it like gruel. You gotta keep pulling heat from the bottom to the top.

never used a pump with the M&B, but using one with the Grainfather sure beats all the stirring. You still got stirring to do at mash-in, but you can forget it after that. Final wort clarity and efficiency is pretty amazing.

M&B is now my extract system and sparge water heater.
 
It's a decent rig for the price but you need to accept the limitations or not have false expectations. I kinda regret buying this or not really understanding the +/- 6F temperature variation until after i brought it home. And I didn't understand the timer is only about setting for when it turns on. And it is not a set and forget system.

That said, I use mine a couple of times a month. I also bought a 400 micro BIAB from these guys that fits right in the grain bucket. Brew Bag - All In One - 400 MICRON - Anvil, Grainfather, Robo, Brewers, UniBrau – The Brew Bag (brewinabag.com)

My experience is that
1. I like to mash high usually, so mash in temp is the preset around 162 so after the grains are added I'm in the 158-160 range
2. Then I set it at one 154F, remember it has a +/-6F range.
3. Need to stir the mash every 5-10 minutes
4. use a separate thermometer probe for accuracy
5. can lift the grain filter to also "stir" a couple of times thru the boil
6. play with the temp if you're monitoring it to keep from dropping too low or going too high
7. efficiency isn't great. 60-70%. This goes up if I soak the BIAB in a separate pot and stir it to "sparg". If I just lift the grain filter up and pour in a gallon of water it's not so good.
8. I don't cool it. Just kinda guesstimate the IBU will increase 5-10% while letting it cool overnight. Depending on how cool ambient temp is, you may need to swirl it once at dawn so everything has settled and at pitching temperature in the morning.

Make sure you have a voltage surge attached. My unit literally melted one. Second one is holding up. local HBST reported the same issue.

Again, I would say it's a decent system for the price as long as you understand what it does and does not do.
 
I use a BIAB with my mash tun and a continuous spare with great results. I lift the bag to help speed the process.
 
I have been using a bag and do the same thing. But it really just doesn’t drain and I can’t seem to get my efficiency above 68%. So I’m thinking it must be the crush size at least hoping that will fix the problem.
 
I recommend talking with Rex at BIAB, when I told him i was recirculating he set me up with a different micron bag. I also suggest checking your mash temp and water to grist ratio. Rex had told me, although I haven't tested it yet, that with his bag, you can mill very fine grains and reduce the grain bill. Of course this takes practice.
 
I have found that even if the display temp swing 6°F my actual mash doesn't swing more than 2°F. This is what I do to achieve my average of 91% conversion and 77% brew house efficiencies.

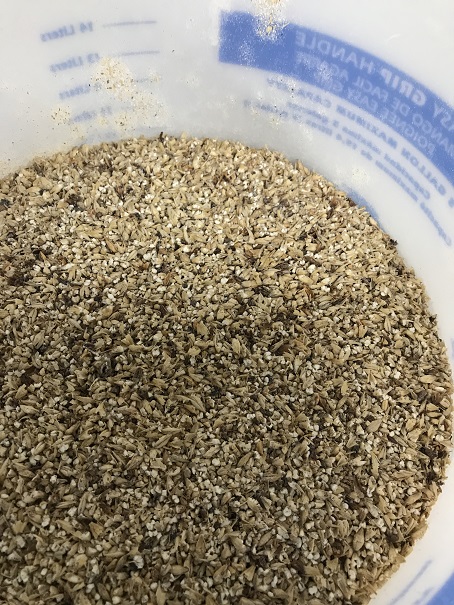
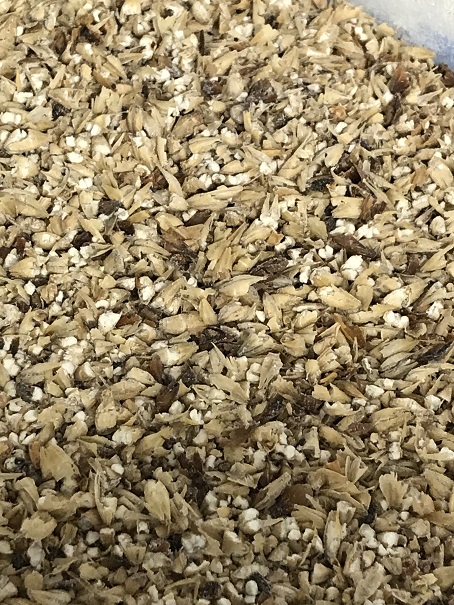
- I crush between 0.043 to 0.048 (latest). You can see pictures below. I mostly use 2-row, Munich, Maris Otter and Pilsner as base malts. I also use 1.5 to 1.6 mash thickness.

- I set the controller to 160°F to heat strike water. Consistently water ends up around 166°F and after adding grains the grain bed ends up at 151.5° to 152.1° F.

- At this point I set the controller to 150°F (turn off 1000W switch) and hook up this little Amazon pump below and recalculate the whole mash. I mash between 70min to 80min. I turn the mash normally 2 times during that period. Taking temp measurements after turning the mash the grains usually are around 151°F but mostly at or close to 152°F. Pump:(Amazon.com)

- At the end I disconnect pump and lift the basket and let it drain some. Then I start sprinkling 190°F sparge water over the grains until I collect 6.8 to 7gal (actual, not at kettle mark) of wort. During this process I also move the grains twice. At the end I have a flat wood thingy that I use to squeeze down all the wort I can from the grains. I got that tip from another M&B forum. I get no off flavors from that. After I get my volume I take a pre-boil OG and start the boil.

- I then boil until I get the volume to a pre-set line in the kettle which is the point I add the 60min hops and boil for 60 minutes to get to the final volume I need to get 5gal at the keg all the way at the end. This kettle point was found by trial and error in first 10 brews.

- At end of boil I use a plate chiller and MKII pump to transfer to carboy. Transfer takes about 2.5min in winter and about 8+min in summer chilling to 65°-66°F in winter (lower if I need to) and 68° in summer (Michigan).

I have done 65 brews up to date in last two years so my process is very stable now. I prep my water and the mash PH is always between 5.2 and 5.6. I buy my grains and crush them. That alone got me a 20+ point increase in efficiency (my LHBS crush was horrible). For the price of this system (paid $239 on black Friday sale) I think it can't be beat. Just add the pump and crush your grains and the rest should be easy.
Grain1.jpg
Grain2.jpg
 
I have the one with the recirculating pump. I can tell my grain is milled way finer than yours through the picture. Thanks for your help. One last question what do you find your boil off rate to be? Mine seems to be about 1/2 gallon per hour.
 
I have the one with the recirculating pump. I can tell my grain is milled way finer than yours through the picture. Thanks for your help. One last question what do you find your boil off rate to be? Mine seems to be about 1/2 gallon per hour.

Looking at my brew pictures I would say it is close to that. Maybe a little more. In my water volume calculations I use 0.9g but I know it is less. Again, after doing so many brews I have a set of numbers that I put in the water volume calculator based on my process losses. It is very predictable so I never run low on water. Normally there is some sparge water remaining at the end which is ok for me. As you use your system you will get your set of process specs for it to give you consistent results. This is good because if some day something is off then you can see in your notes and try to detect what changed to troubleshoot whatever odd result. One day early on I ran out of sparge water. After looking in detail I found that I put 6min boil instead of 60min boil in the calculator. Now days I can tell just by the number if the volume are odd as I have expectations or grain bill size. Experience helps a lot. You'll get there ;-)
 
I have the one with the recirculating pump. I can tell my grain is milled way finer than yours through the picture. Thanks for your help. One last question what do you find your boil off rate to be? Mine seems to be about 1/2 gallon per hour.
I’ve used my new M&B with a pump once and I’m doing a 2nd brew this weekend so obviously my direct experience is very limited. I decided to use a BIAB that drapes over the kettle edge, not just the malt pipe edge because I found just 2-3 pieces (literally!) of grain around the pump inlet at the bottom renders the pump useless. I’d turn it off then back on and it’d work for a bit until a piece of grain was sucked up to that inlet. I wanted the recirc pump because I‘ve read it helps with maintaining a more stable temp through the grain bed. I double crush so that’s another reason I wanted the BIAB (made by Wilser). I’m very optimistic about this unit. Good luck with yours!
 
I’ve used my new M&B with a pump once and I’m doing a 2nd brew this weekend so obviously my direct experience is very limited. I decided to use a BIAB that drapes over the kettle edge, not just the malt pipe edge because I found just 2-3 pieces (literally!) of grain around the pump inlet at the bottom renders the pump useless. I’d turn it off then back on and it’d work for a bit until a piece of grain was sucked up to that inlet. I wanted the recirc pump because I‘ve read it helps with maintaining a more stable temp through the grain bed. I double crush so that’s another reason I wanted the BIAB (made by Wilser). I’m very optimistic about this unit. Good luck with yours!
I’ve do like the unit I’ve done about 10 brews. I have had the issue with the pipe getting clogged. I’m pretty convinced my issue is crush size at this point.
 
I have had the issue with the pipe getting clogged. I’m pretty convinced my issue is crush size at this point.
My sparge was quite slow as well so I am trying 8 oz of rice hulls in the next batch.
 
@Beenym88 I have started using 5 gallon paint strainer bags in the mash tube. I use alligator clips to help hold it on. Drains really pretty fast, and then I just do a warm water dump sparge once most 1st runnings have drained off. I finish squeezing the grain out using a stockpot lid to push the grain down while the mash tube is raised. I also don't get grain bit and I double mill my grains. Hope this helps
 
I have a Brewer's Edge Mash and Boil, non-circulating version. My biggest issue with it is it keeps temperature in a +/- 6F temperature range. I typically mash high around 158F to get more mouthfeel for session beers. I'm also trying to clone a few recipes, and that requires getting the mash temp right among a host of other things. Just can't do that with the Brewer's Edge.

BTW, I use a 400 micron BIAB bag made for the Mash and Boil.

For my half batches I've been using a sous vide wand to heat the mash and to dial in the temperature really accurately.

Well, silly me, it was only today that I thought. Hmmm, I could heat up 6 gallons in the Mash and Boil, dump in all the grains, and the sous vide wand can immerse far enough into the mash to keep a steady temperature. And it did. Kept it right at 149 for 90 minutes. There might be some stratification with the temperature cooler at the base than on the top, but should be much improved over the 6F range. Efficiency went up to around 70 (previously was closer to 60). This fixes for me the biggest drawback of the Mash and Boil, and now I can keep a steady mash temp
 
Because I use a plate chiller, I can't afford hops or other stuff getting into it as they would never come out. So this is how I have dealt with the challenge:
  • Mash using a 400m Brewbag (inside the mash tube)
  • Hop additions using a 200m hop bag (which in turn is inside a stainless hop spider).
  • Ultra thin grain/water ratio (4 liters per Kg) similar to what German brewers do (rather than the UK or US) for better efficiency
  • Circulation great due to the thin mash and nothing escapes the bag to stick in the recirculation pump or plate chiller
  • Chilling wort from boiling to 64F takes just 5 minutes with a plate chiller (Dudadiesel)
  • Because I'm paranoid about keeping my plate chiller clean, I still first run the wort through a filter (BrewersHardware) on its way to the plate chiller
  • All the bags make clean-up with BrewersEdge almost non-existent (however, I do still have to clean the filter & plate chiller)
Note: there is some great literature discussing the 4L/Kg ratio for mashing
 
Just takes a little ingenuity and help from others who have figured things out the hard way. I have done 3 batches now with my Mash and Boil and this thread has been most helpful. I am going to buy a brew in bag now.
On my last batch i put a temperature probe in the mash to record and log the temp every 1 minute and also writing down the temp shown on the M&B display every so often to chart in Excel and compare. The problem is I forgot to put the SD card in my data logger and temperatures did not get recorded o_O , Doh! Next batch.
 
On my last batch i put a temperature probe in the mash to record and log the temp every 1 minute and also writing down the temp shown on the M&B display every so often to chart in Excel and compare. The problem is I forgot to put the SD card in my data logger and temperatures did not get recorded o_O , Doh!

Funny you should say that... I did a hands-on review a couple years back, and did some experiments with the temperature accuracy. I was curious how it would work with the sensor in the base of the unit, near the heating coil. Attached are my plots I did with different volumes of water, gradually heating it and taking measurements with just still water, and then after stirring it to mix the temperature well. Attached are my temperature plots, and a link to my review if anyone's interested.

https://www.homebrewfinds.com/2017/09/hands-on-review-brewers-edge-mash-boil-electric-brewery.html
 

Attachments

  • 3.8 Gallon Strike Water Trial.jpg
    3.8 Gallon Strike Water Trial.jpg
    80.3 KB · Views: 16
  • 3.85 Gallon Strike Water Trial.jpg
    3.85 Gallon Strike Water Trial.jpg
    73.7 KB · Views: 16
  • 6 Gallon Strike Water Trial.jpg
    6 Gallon Strike Water Trial.jpg
    78.8 KB · Views: 15
Funny you should say that... I did a hands-on review a couple years back, and did some experiments with the temperature accuracy. I was curious how it would work with the sensor in the base of the unit, near the heating coil. Attached are my plots I did with different volumes of water, gradually heating it and taking measurements with just still water, and then after stirring it to mix the temperature well. Attached are my temperature plots, and a link to my review if anyone's interested.

https://www.homebrewfinds.com/2017/09/hands-on-review-brewers-edge-mash-boil-electric-brewery.html

Yes, you inspired me to make my own graphs. Will do another batch soon and make more measurements. Logging data and making charts is good fun :p Gives you something to ponder as well.
 
Back
Top