
kombat
Well-Known Member
Today I brewed what will eventually be a Bacon Smoked Porter. For now, it's just a Smoked Porter. I brewed it as a 1-gallon recipe using BIAB to try it out before committing to a full 5 gallon batch. The recipe is actually the Bee Cave Brewery Robust Porter recipe, with 17% smoked malt added.
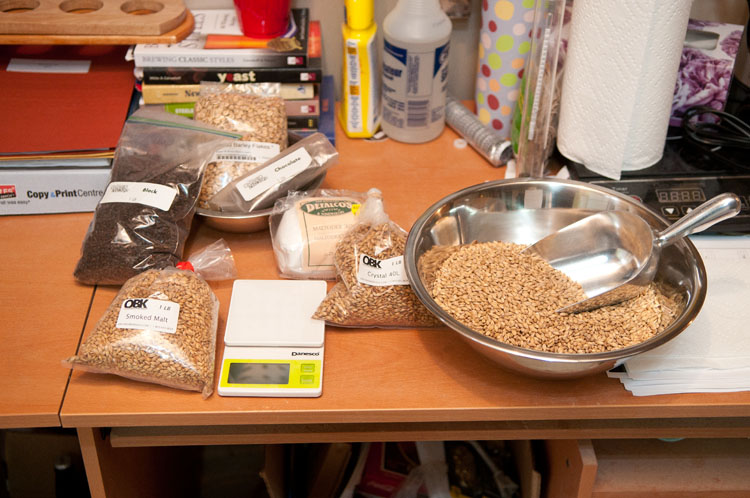
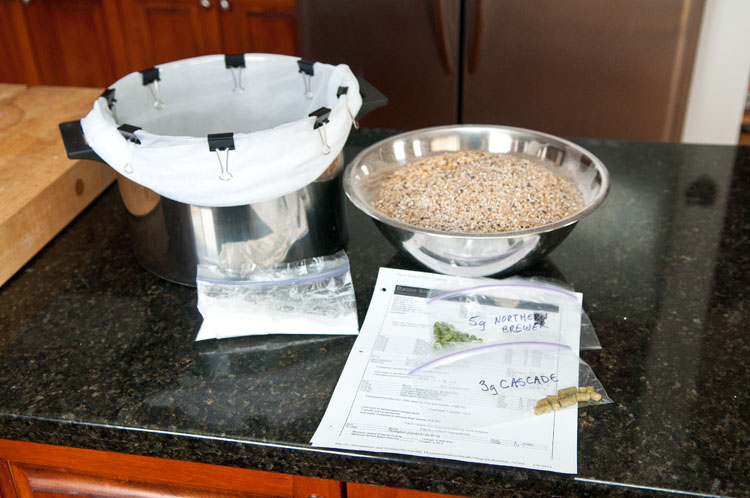
Prepping my ingredients and weighing out the grains:
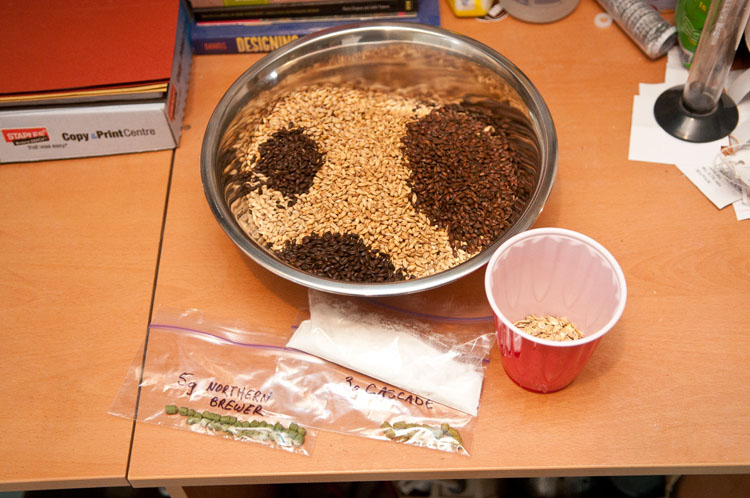
Everything all portioned out:
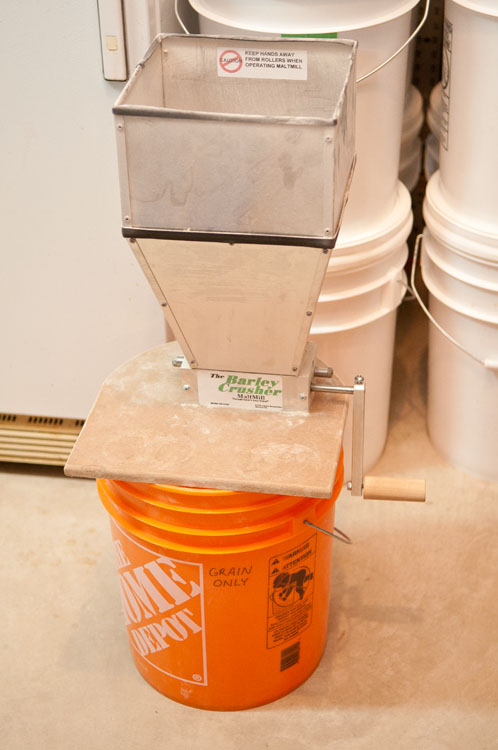
Getting ready to mill. I usually attach my drill to the mill, but for small batches like this, I don't bother, I just do it by hand. It makes me feel a little more connected to the beer.")
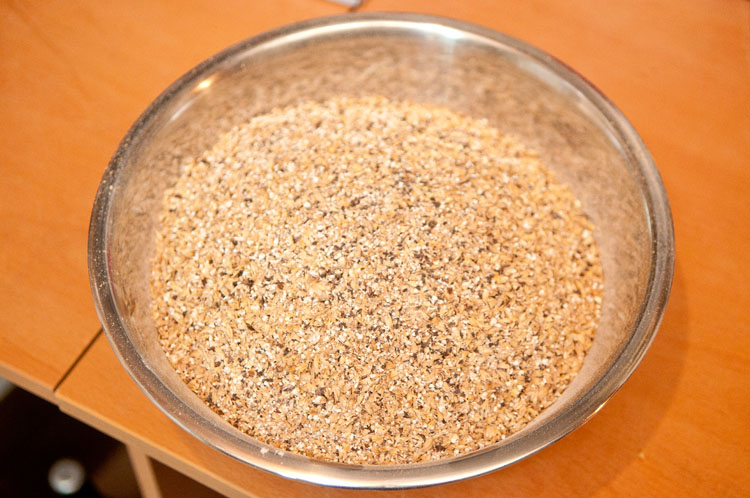
The grains, all milled:
I attached my mesh bag to the pot and gathered everything in the kitchen.
Heating the strike water and enjoying a glass of my award-winning Citra Pale Ale. Yes, that's a candy thermometer in the pot, don't worry, I was just using it to tell when I was getting close to the strike temperature. I used a much more accurate digital thermometer to ensure I hit the proper mash temperature.

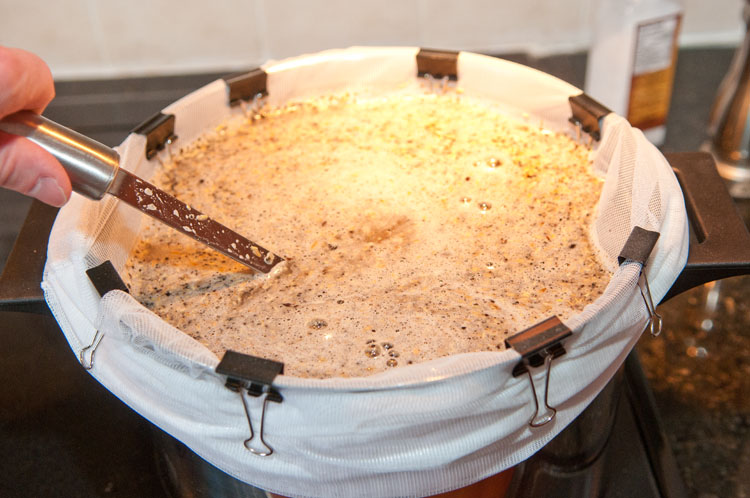
Doughing in.
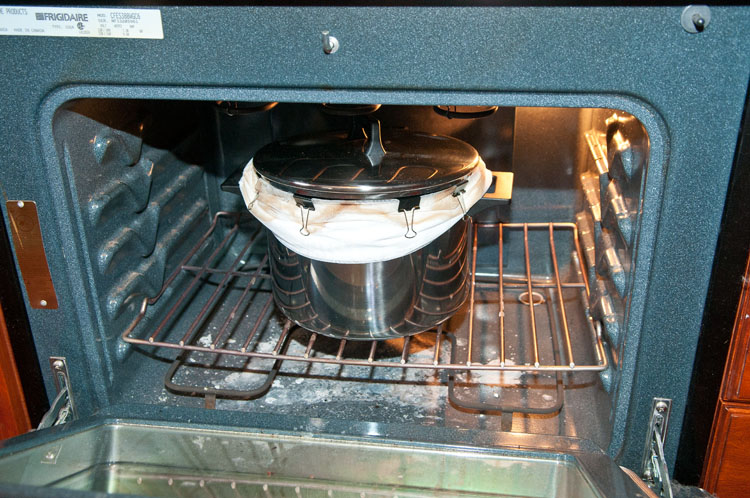
After I hit temperature, I covered the pot and put it in the oven (pre-heated to 170° F and then turned off) to help hold temperature with such a small batch.
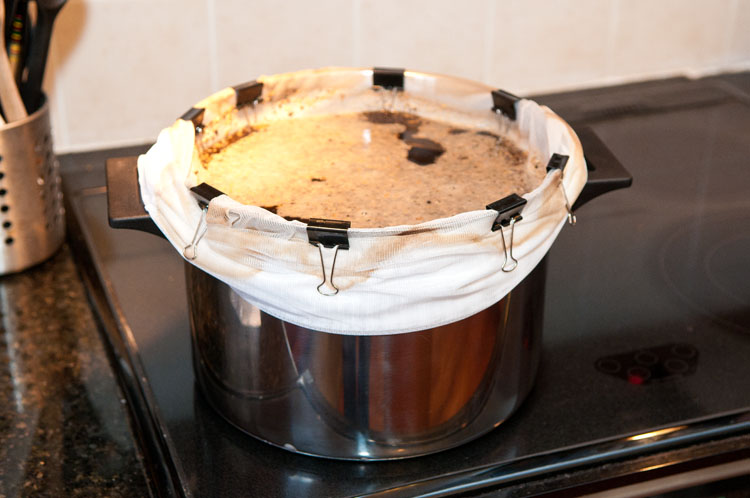
After 60 minutes, I brought the pot out of the oven and back onto the stove, and began heating to mash out.
I then removed the bag and continued heating to a boil.

While I waited for the boil, I poured a glass of my Vanilla Porter (same recipe, actually, but without the smoked malt and with vanilla beans in secondary).

Success! The boil. I used Fermcap to stave off any boilovers.

I prepped the hops in a hob sock with a couple granite Whiskey Stones to keep them submerged during the boil.

I clipped the hop sock to the rim of the pot and boiled for 60 minutes.

While it was boiling, I prepped the yeast. 3 grams of S-04, rehydrated in 80° F tap water. After 20 minutes, I swirled it for a while to get all the cells wet. By the time I pitched, I had a nice creamy head on top.

Boil complete, I set it in an icewater bath in my kitchen sink to cool. It took about 25 minutes.

I poured the wort into a 1-gallon fermenter, shook the heck out of it, and pitched the yeast. I ended up with more wort than I expected, so I added a couple more drops of Fermcap to try and prevent a blowout.
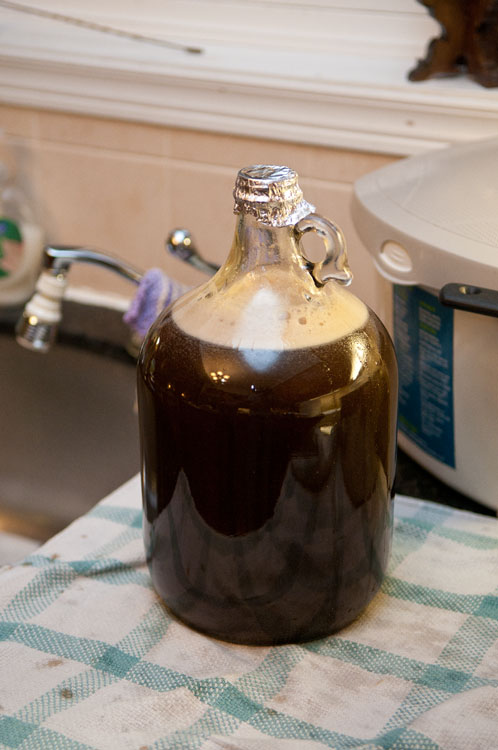
I then moved it downstairs and set it in a bucket of room-temperature water to help sink the heat and keep fermentation temperatures in the low 60's. And I replaced the foil cap with a proper airlock.

Ta-da! That was my day.
Prepping my ingredients and weighing out the grains:
Everything all portioned out:
Getting ready to mill. I usually attach my drill to the mill, but for small batches like this, I don't bother, I just do it by hand. It makes me feel a little more connected to the beer.
The grains, all milled:
I attached my mesh bag to the pot and gathered everything in the kitchen.
Heating the strike water and enjoying a glass of my award-winning Citra Pale Ale. Yes, that's a candy thermometer in the pot, don't worry, I was just using it to tell when I was getting close to the strike temperature. I used a much more accurate digital thermometer to ensure I hit the proper mash temperature.
Doughing in.
After I hit temperature, I covered the pot and put it in the oven (pre-heated to 170° F and then turned off) to help hold temperature with such a small batch.
After 60 minutes, I brought the pot out of the oven and back onto the stove, and began heating to mash out.
I then removed the bag and continued heating to a boil.
While I waited for the boil, I poured a glass of my Vanilla Porter (same recipe, actually, but without the smoked malt and with vanilla beans in secondary).
Success! The boil. I used Fermcap to stave off any boilovers.
I prepped the hops in a hob sock with a couple granite Whiskey Stones to keep them submerged during the boil.
I clipped the hop sock to the rim of the pot and boiled for 60 minutes.
While it was boiling, I prepped the yeast. 3 grams of S-04, rehydrated in 80° F tap water. After 20 minutes, I swirled it for a while to get all the cells wet. By the time I pitched, I had a nice creamy head on top.
Boil complete, I set it in an icewater bath in my kitchen sink to cool. It took about 25 minutes.
I poured the wort into a 1-gallon fermenter, shook the heck out of it, and pitched the yeast. I ended up with more wort than I expected, so I added a couple more drops of Fermcap to try and prevent a blowout.
I then moved it downstairs and set it in a bucket of room-temperature water to help sink the heat and keep fermentation temperatures in the low 60's. And I replaced the foil cap with a proper airlock.
Ta-da! That was my day.


![Craft A Brew - Safale S-04 Dry Yeast - Fermentis - English Ale Dry Yeast - For English and American Ales and Hard Apple Ciders - Ingredients for Home Brewing - Beer Making Supplies - [1 Pack]](https://m.media-amazon.com/images/I/41fVGNh6JfL._SL500_.jpg)


