OP
OP
Went ahead and ordered the Amazon Fire 10.1 tablet to go along with it.

Mike, I've got the same setup with the Fire tablet. I find that I can plug the USB end into my laptop and see the Fire files in the BrewBoss folder. I use Beersmith for my recipes and I export the recipe as a BeerXML file type. I can then put this file onto the Fire tablet, go to the BrewBoss app and convert the BeerXML file to a BrewBoss stp file. If I need to edit the step file, I find it a hassle on the tablet so I copy it up to my laptop and edit it as a CSV file in Excel. I can save the edited file and replace the step file on the tablet. Easy peasy.Went ahead and ordered the Amazon Fire 10.1 tablet to go along with it.


Congrats cnash. throw some pictures up where you get it up and running.
Will do. Also used the Kegconnection deals to get some kegs and two tap kegerator kit (upgraded all to stainless and V3S faucets) so I'll have some work to do. Have to move first (hopefully this weekend) then as stuff comes in it gets put together. To my suprise the Kegconnection stuff already showed up.
Sounds awesome Conodor! I am having a buddy of mine build a stand like the one Darin has for the 1 BBL system. I ordered the Harbor Freight 440lbs electric hoist to mount to that as well. My system needs to be on wheels so we can move it around. Going to wait until the system actually gets here, because like you, I want to make sure the geometries are right.
TennBrewer, what would be the reason you might need to edit the brewboss.stp file after you import from BeerXML? Just wondering if I should think about writing a small app to edit .stp files or not?
EDIT:Note: If you got the 240volt system, you will need to use a 240-to-120 volt converter to plug the tablet into. That side is only 1 amp so you cannot plug the winch into it, use a separate plug for that. I bought the BB stand and use the HFT winch, too. I asked Darin about putting the stand on wheels and he did not recommend it. But, I don't have a dedicated area in the garage for this setup so I need to move it around from time to time, limited by the length of the power cable. I bought this adjustable dolly and it can be made to fit perfectly:
https://www.amazon.com/gp/product/B07C2MDXLB/?tag=skimlinks_replacement-20
The added height (about 3 inches) will not clear an overhead beam so I may need to cut the post. It's a limitation I can live with for now but someday I just might have to cut it.
Editing the step file: The conversion is not perfect, I need to make corrections if it messes up when the recipe has any post-boil additions, ie. whirlpool hop additions, fruit, dry hopping, etc. Also, I like to add in some steps to remind me to do things, like pre-boil strike water, connect CF chiller, et.al. Now that the weather has turned colder, I am using a steam condenser so I can't use the Hops-Boss. I make a copy of the original step file and replace the Hops-Boss positions with audible prompts, reminder to connect the condenser before starting the boil. No need to write an app for editing, I just import the .stp file as a delimited file (CSV) with comma for the delimiter. I move the steps to another worksheet where I have a header row that's frozen in place. The header matches the columns for the step data. When I'm done, I move the new step data back to another worksheet and save that worksheet. I can then close the header sheet without saving. One thing that is nice is that Excel will wrap some lines in quotes if you have embedded quotes or commas. I use a text editor to correct these lines. When the file looks good, I change the file type to .stp and move it to the internal storage for the Fire tablet. There is a Brew Boss folder and inside it has a Stepfiles folder.
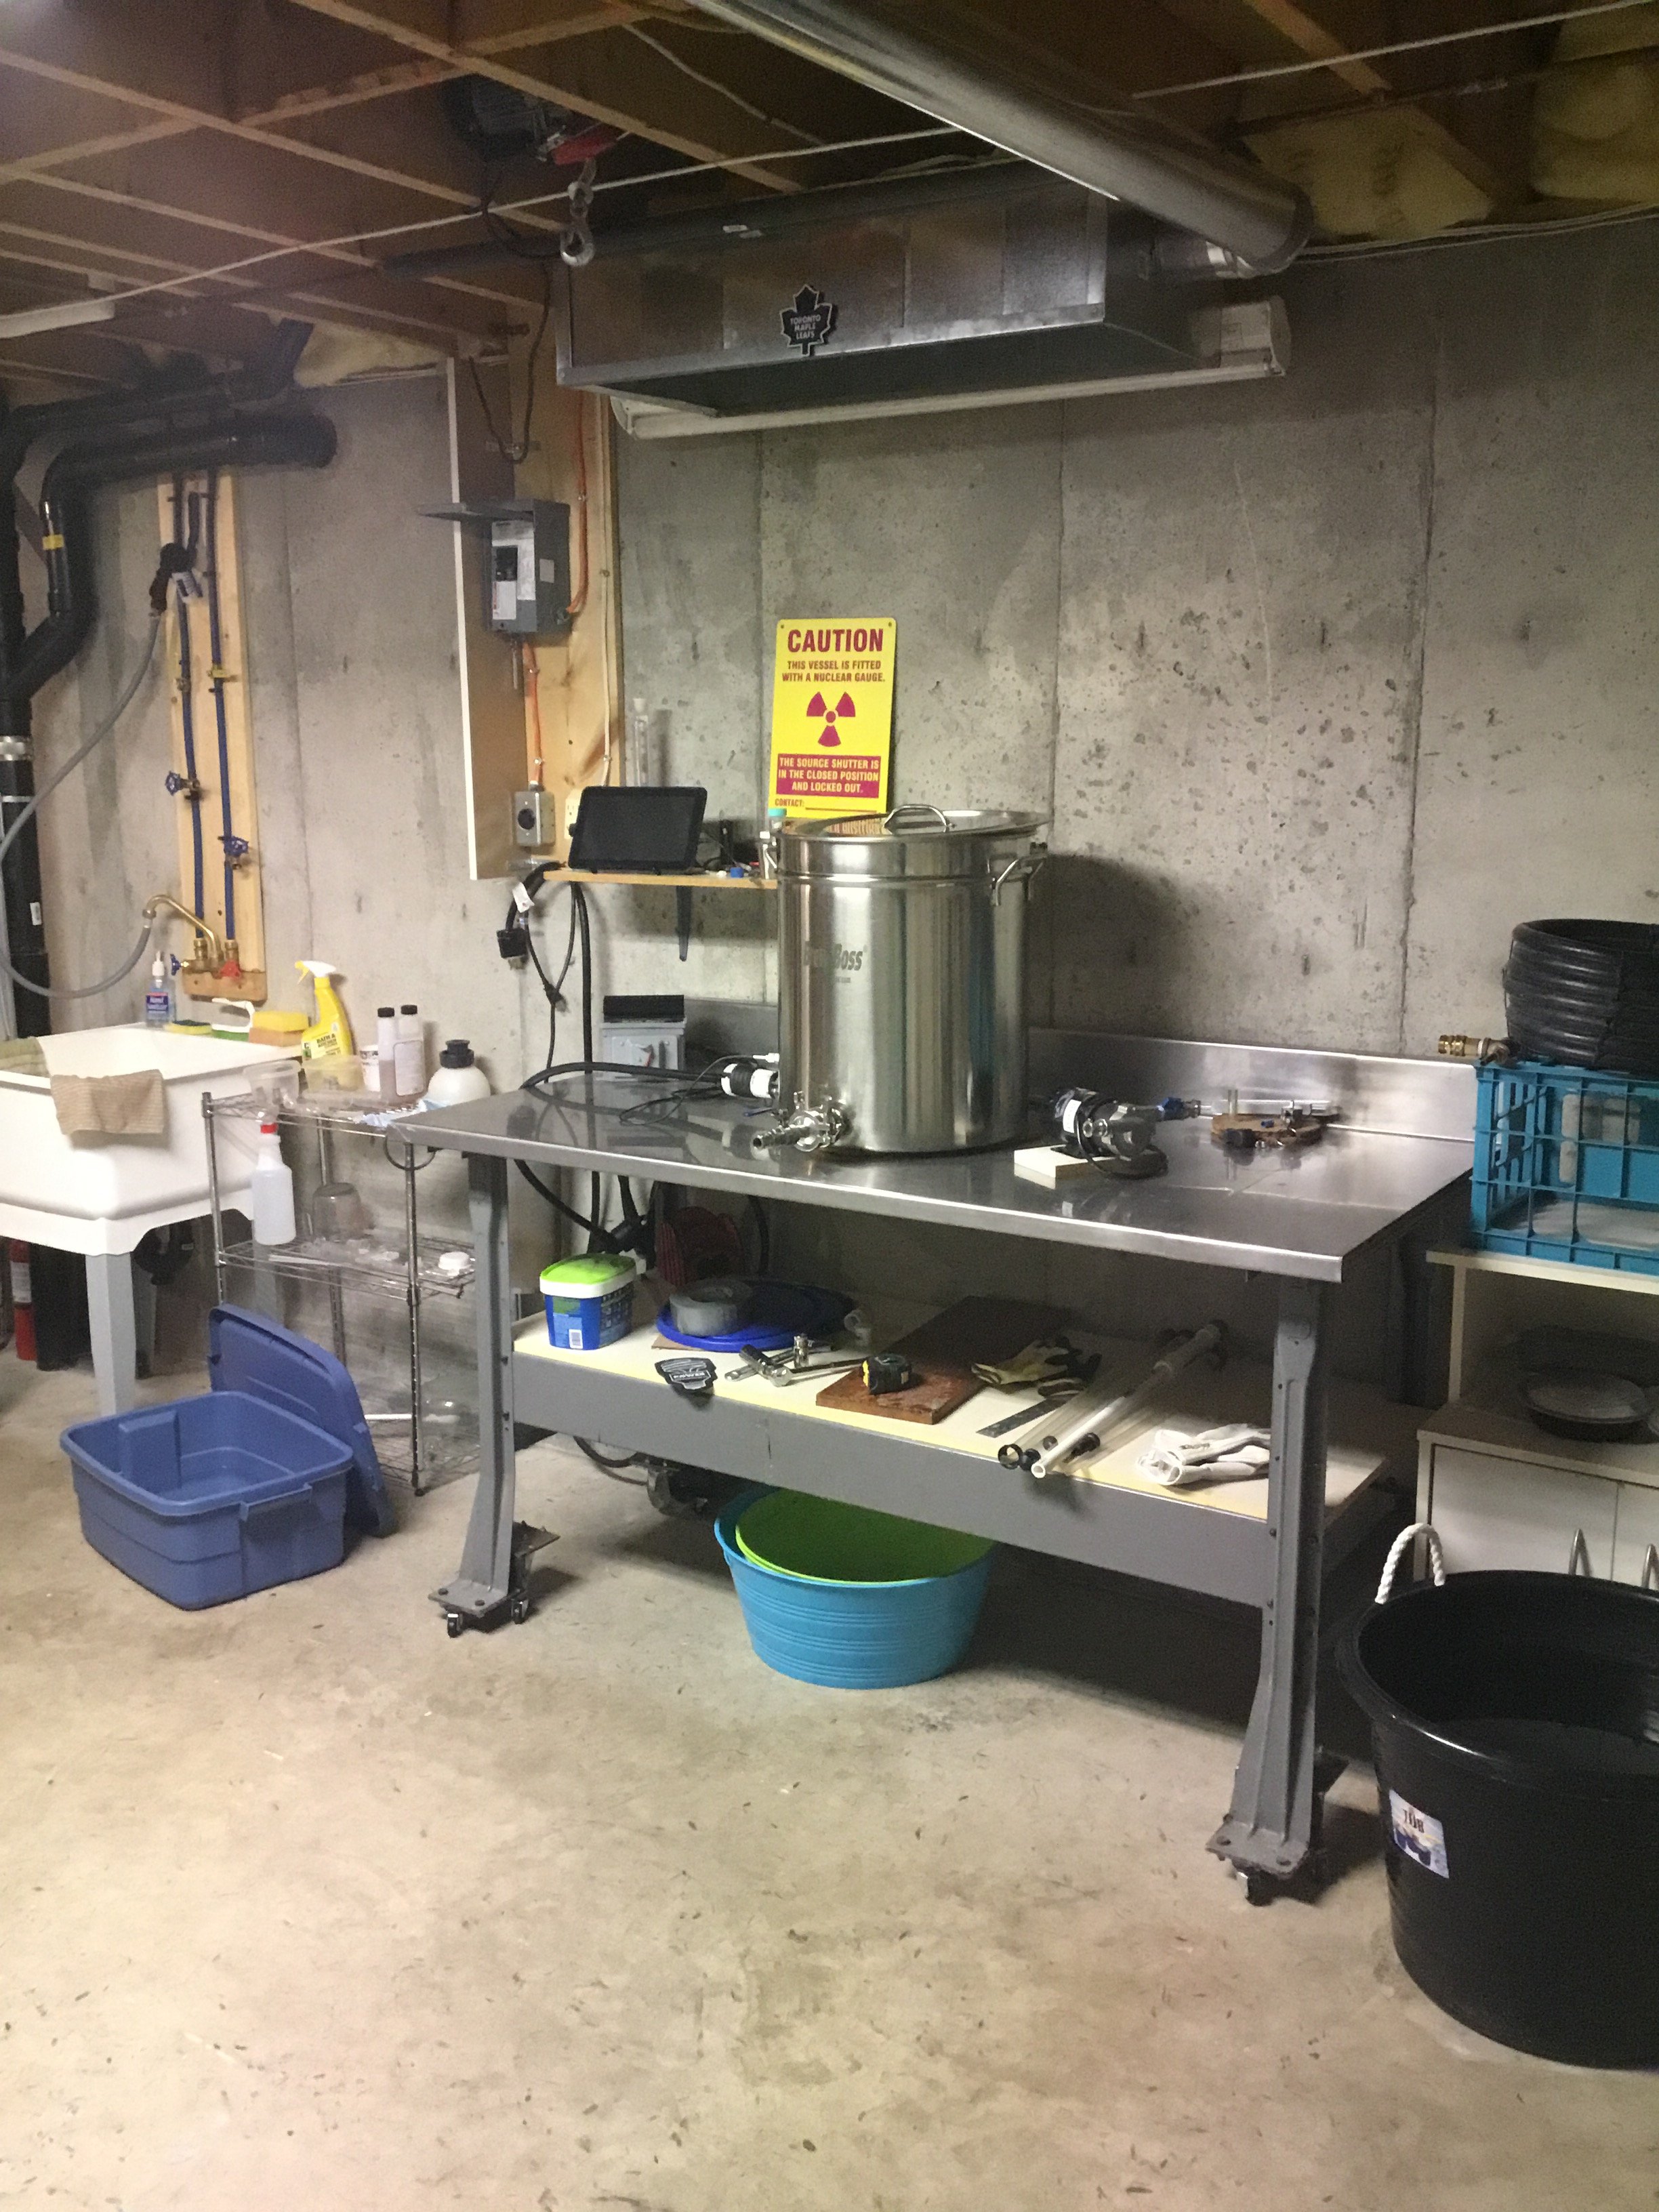
Here’s a pic of my 15gal setup that I purchased on Black Friday 2016. I’ve got 3 wheel moving dollies under the legs of the table and they are very smooth when moving the table. Where the winch is positioned, I only need to pivot the table away from the wall approx 2’. When the wort is done draining into the kettle, I go up on the winch enough to get the blue plastic tub under the basket and then push the table back against the wall. I then lower the basket to the ground, all the while holding the tub under it, and low and behold, no mess! The height from top of table to hook is approx. 4’4”. Hope this gives you some ideas and if you need any more info or pics, I’d be glad to help. I’ll also be looking for you guys to post pics that may help me tweak my setup. I know you’ll love the BrewBoss!My main concern isn't so much the power to the winch, but the rotating. I really don't want to move my kettle back and forth. I'd like some form of a moving system. That leaves back and forth or rotating. The stand rotates.
I like that option, due to limited height since it's going in my basement. Since pictures of the stand are limited, It seems on the stand is a circle tube going up, and a square tube over top of it. This will allow the winch mount turn. I'm searching to see what kind of options are available off the shelf for that. So i don't 'have to have something custom made.
Since pictures of the stand are limited, It seems on the stand is a circle tube going up, and a square tube over top of it. This will allow the winch mount turn. I'm searching to see what kind of options are available off the shelf for that. So i don't 'have to have something custom made.
Just got an email saying my order has shipped....woohoo
What's everyone's first brew going to be? This will be my first "real" all-grain setup, having previously only used a PicoPro, which while all-grain, is very much a predefined, walled-garden type of brewing. So this will be my first time buying ingredients and actually making the wort myself.
I'm thinking about either doing Biermuncher's Centennial Blonde, or Sierra Nevada Resilience IPA, the recipe for which they published and Chop and Brew translated into a 5-gallon batch size.
YoU are correct, the square tube slides over the shorter round tube and sits on two washers that fit on the inner round tube. This lets the outer square tube rotate on the washers. Everything is powder coated so the washers slide easily over each other.There's an exploded diagram on page 9 of the stand assembly manual. You're very close. It's actually square tubing on the top and bottom, with round tube sandwiched inside and a sort of built-in flange to allow the top part to rotate freely.
If you have the 20 gallon system like I have, you must be very aware of the size of the grain bill. I made a Brickwarmer Holiday ale today with a grain bill over 13 pounds. When I lowered the grain filled basket into 10 gallons of strike water, it did not cover the grain bed. I had to add several gallons of water just to cover the grain bed. It seems that my limit for grains is 12 pounds so any recipes I have that call for more will have to be partial mashes as I would need to replace some of the base grains with a suitable LME. Anyway, as it turns out, my specified efficiency (Beersmith 3) was too low but the OG was ok even though there is more wort that expected. When I was ready to chill the wort, I first poured off 1.5 gallons into a sanitized bucket. Good thing I did, when I filled my fermenter (settling tank, actually), I topped it up with the wort I poured off to exactly 6 gallons. Transfer to fermenter leaving behind a half gallon of trub. This should work out to a good 5 gallons into the keg.What's everyone's first brew going to be? This will be my first "real" all-grain setup, having previously only used a PicoPro, which while all-grain, is very much a predefined, walled-garden type of brewing. So this will be my first time buying ingredients and actually making the wort myself.
I'm thinking about either doing Biermuncher's Centennial Blonde, or Sierra Nevada Resilience IPA, the recipe for which they published and Chop and Brew translated into a 5-gallon batch size.


![Craft A Brew - Safale S-04 Dry Yeast - Fermentis - English Ale Dry Yeast - For English and American Ales and Hard Apple Ciders - Ingredients for Home Brewing - Beer Making Supplies - [1 Pack]](https://m.media-amazon.com/images/I/41fVGNh6JfL._SL500_.jpg)