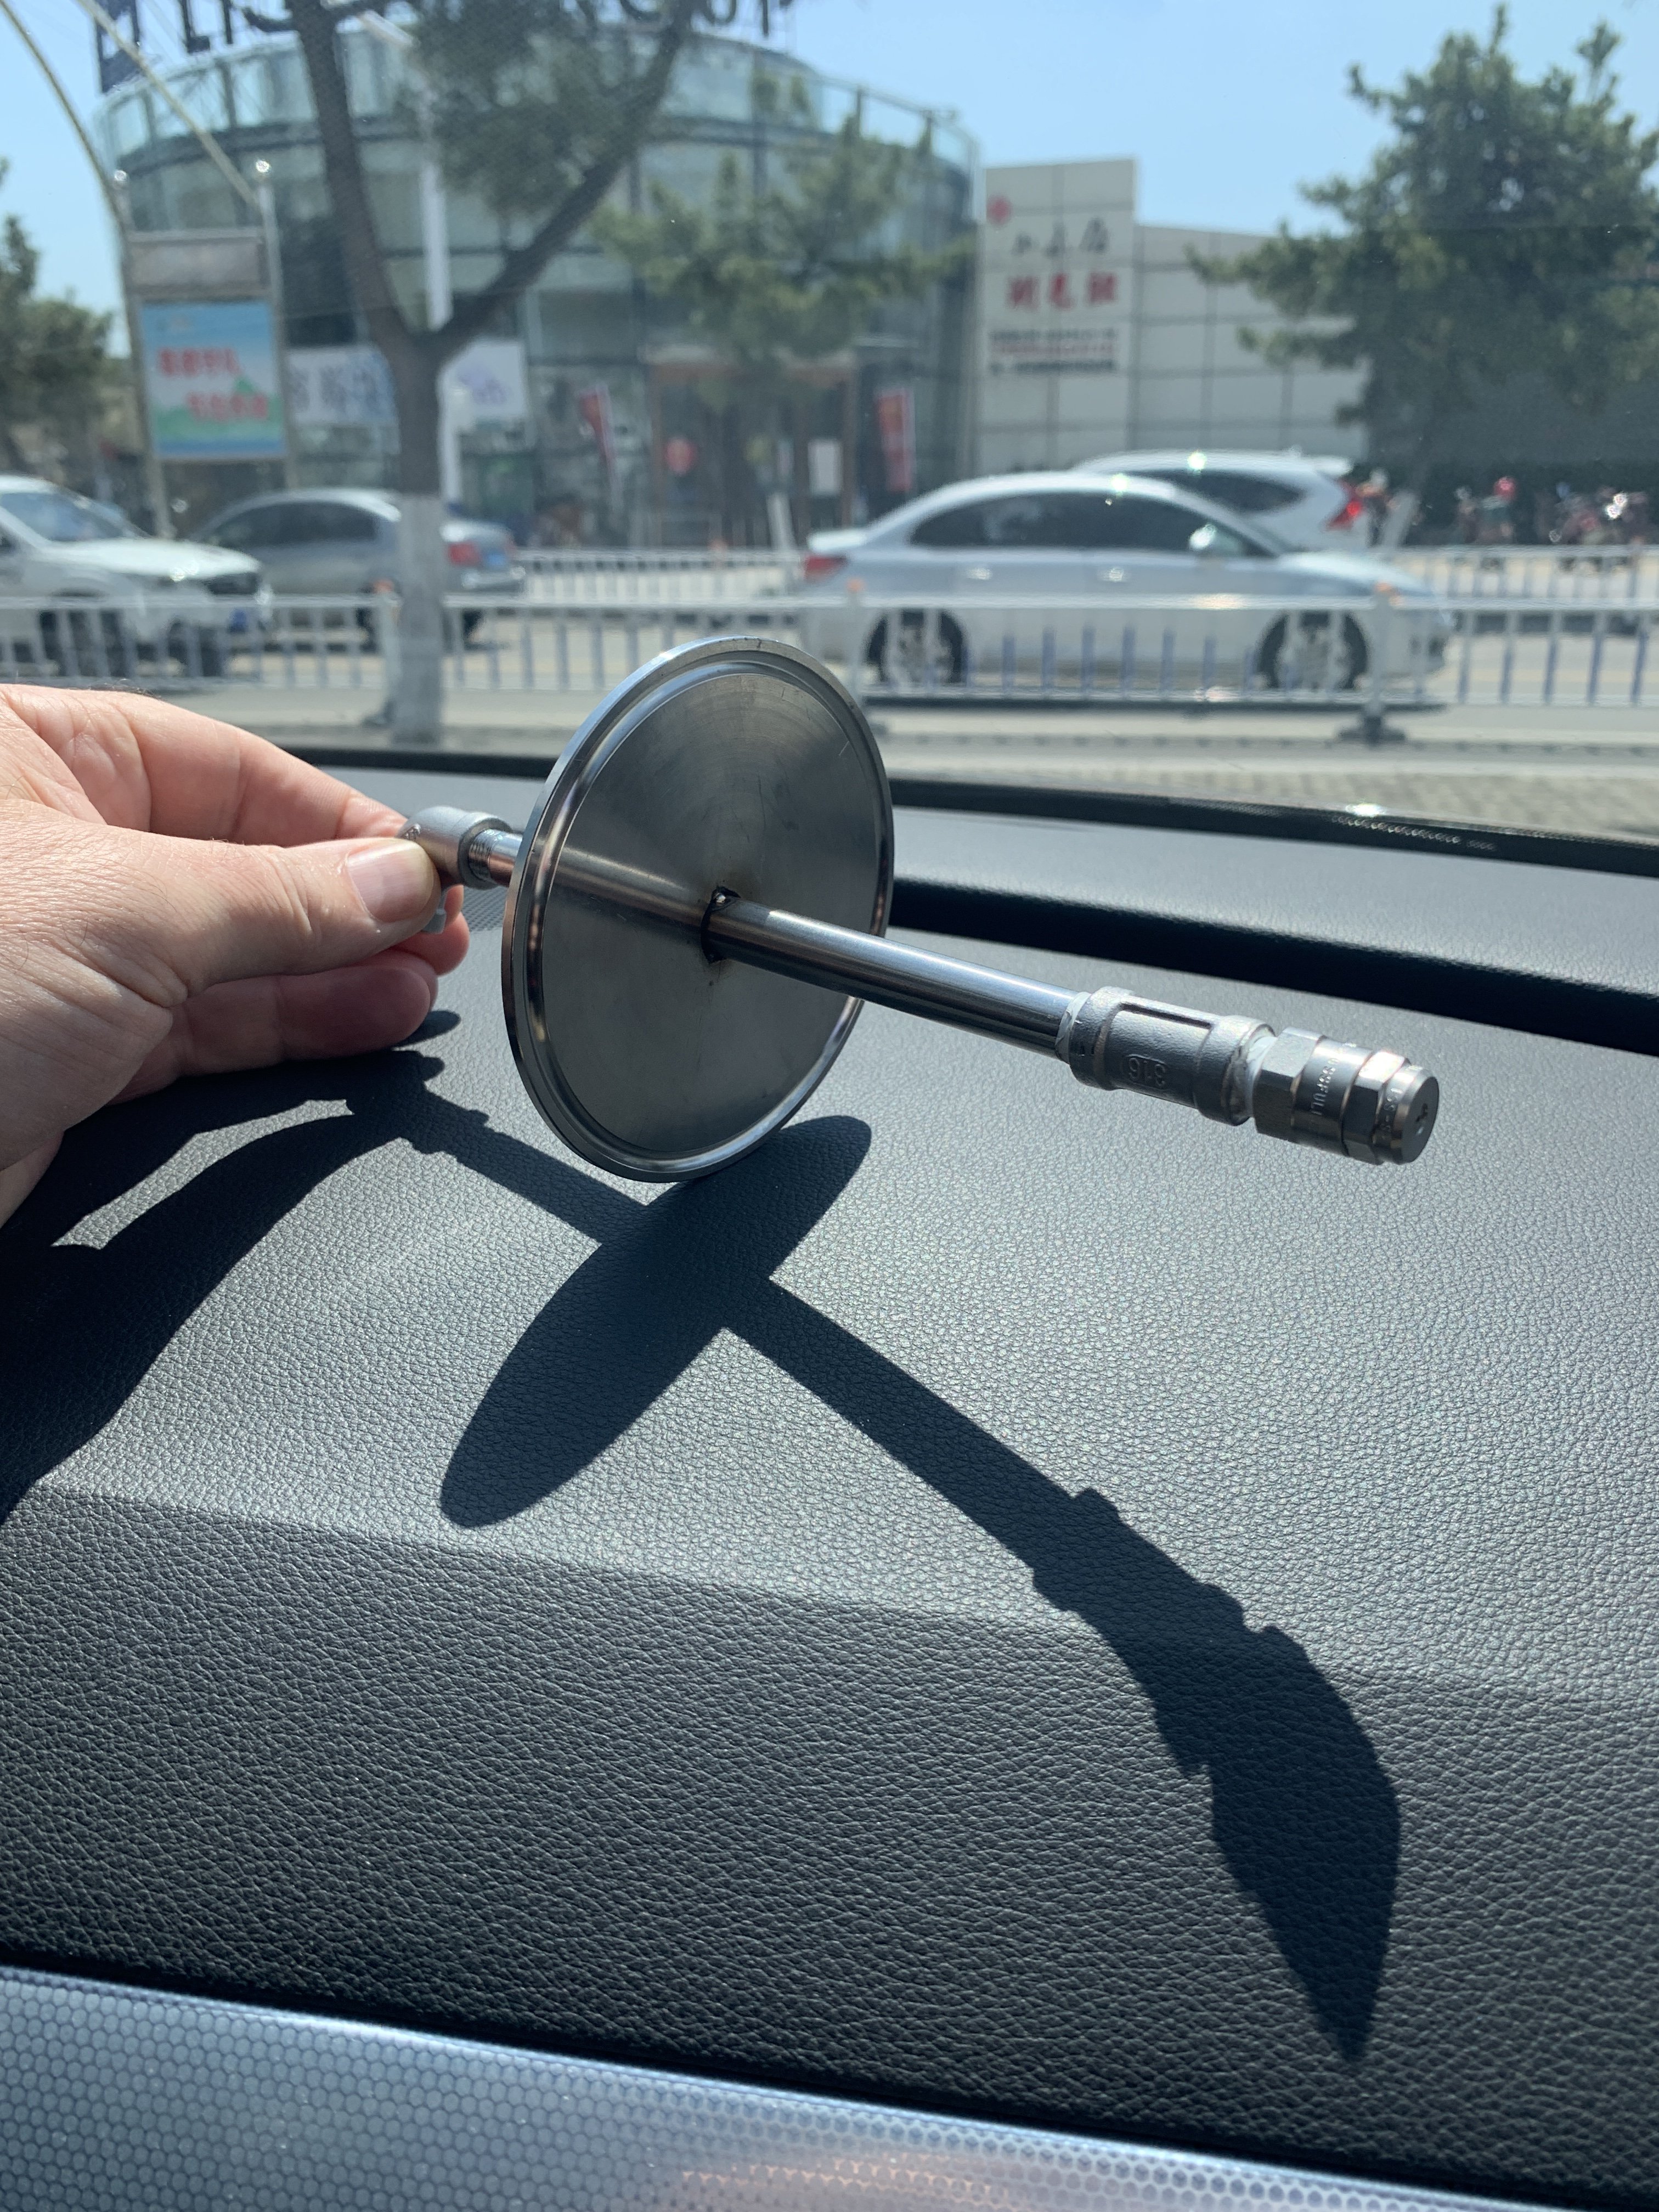
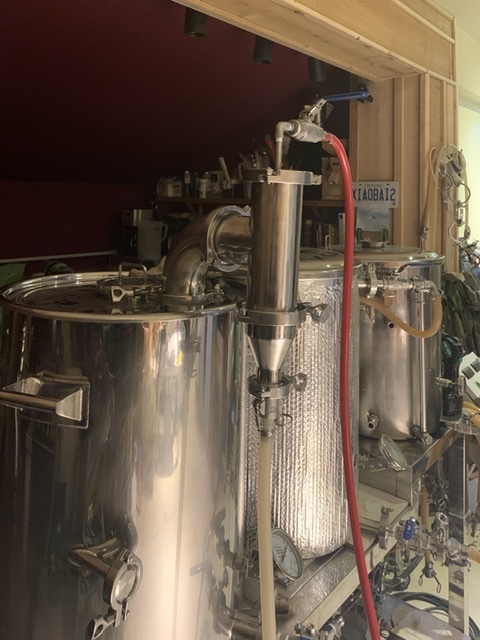
Boil kettle condenser - no overhead ventilation needed

Homebrew Talk - Beer, Wine, Mead, & Cider Brewing Discussion Forum

Help Support Homebrew Talk - Beer, Wine, Mead, & Cider Brewing Discussion Forum:

This site may earn a commission from merchant affiliate links, including eBay, Amazon, and others.
I’m curious what solutions people have come up with for supplying water to both a steam condenser and a wort chiller. I recently did my first indoor brew last weekend and ended up pulling our dirty garden hose in through the back door to supply water to my counterflow chiller. Has anyone made some kind of water manifold? I have a sink nearby, is it better to put a garden hose attachment or is there a better, under counter hook up option? Any help appreciated. The condenser I made based on the discussion in this thread worked awesome btw so thanks to all who have contributed.
 
Guys, need your advice/help.

I brought my widebody steam slayer to my buddies brewery today. He has a 2" TC fitting in the center of the Blichmann 30 gallon gen 1 kettle. We installed a reducer, 1.5" elbow, 6" spool and the steam slayer. We had 1 5500 watt 240v element running on 208v going at full bore on 20 gallons of water.

With the 9 gph nozzle, we were on track to consume 22 gallons per hour, but his water pressure is 90 PSI.

The other issue was we had steam coming out the end of the hose which means to me we overwhelmed it's capacity?

We also had issues with steam leaking around the edges of the lid, but we remedied that with a split silicone hose and some clamps.

My first test was pretty negative, what did we do wrong?

It is pretty clear I am going to install it in the kettle side wall since adding hops is going to be a major PITA if the slayer is lid mounted.
Does the boil off get that much higher due to the vacuum than I need to run the element at a much lower power rating to keep the amount of steam down?
What do I do about the water consumption? 22 gallons for an hour long boil is not acceptable. My house pressure is much lower probably around 50 PSI. I assume this will drive water consumption down.

Thanks,
Chris
 
I’m curious what solutions people have come up with for supplying water to both a steam condenser and a wort chiller. I recently did my first indoor brew last weekend and ended up pulling our dirty garden hose in through the back door to supply water to my counterflow chiller. Has anyone made some kind of water manifold? I have a sink nearby, is it better to put a garden hose attachment or is there a better, under counter hook up option? Any help appreciated. The condenser I made based on the discussion in this thread worked awesome btw so thanks to all who have contributed.
I use brass quick disconnects. When I'm done with the condenser I swap the hose over to the chiller. I also have a brass valve on the hose before the quick disconnect, so I can shut off the flow to swap and throttle flow when I need to the chiller. For the condenser I keep it full open. I brew in the garage where I setup a garden hose. You could use a hose attachment to your faucet or maybe install a hose bibb under your sink.

I mention brass quick disconnects and valve because you will see plastic ones, but they won't last.

I like the idea of using a quick disconnect. I use camlocks on my brewing vessels, maybe it makes sense to use another camlock? As a follow up question, if I make a hose to run from my sink to chiller or condenser what is a good flexible material to use? I find garden hoses to be too stiff to manage indoors (insert joke here) but on the flip side when I tried connecting a 1/2” vinyl tube to my counterflow chiller I found it got really soft from the radiant heat (insert other joke here) thoughts?
 
I like the idea of using a quick disconnect. I use camlocks on my brewing vessels, maybe it makes sense to use another camlock? As a follow up question, if I make a hose to run from my sink to chiller or condenser what is a good flexible material to use? I find garden hoses to be too stiff to manage indoors (insert joke here) but on the flip side when I tried connecting a 1/2” vinyl tube to my counterflow chiller I found it got really soft from the radiant heat (insert other joke here) thoughts?
I'm sure camlocks could work as well.

For hose, you could use radiator hose. I use it on the outlet side of my chiller.
 
We had 1 5500 watt 240v element running on 208v going at full bore on 20 gallons of water.

My first test was pretty negative, what did we do wrong?
My guess is that you've got way too much power to maintain the boil on 20G in a 30G "sealed" kettle. Did you ever open the lid to look at your boil vigor? It takes only ~2300W to keep 12G at a rolling boil in my 20G Spike kettle with a 1.5" TC condenser. I have the 6.5 gph nozzle and get ~5-6G of water of discharge.
 
My guess is that you've got way too much power to maintain the boil on 20G in a 30G "sealed" kettle. Did you ever open the lid to look at your boil vigor? It takes only ~2300W to keep 12G at a rolling boil in my 20G Spike kettle with a 1.5" TC condenser. I have the 6.5 gph nozzle and get ~5-6G of water of discharge.

Are you running your nozzle wide open? Do you know your water pressure?

Chris
 
That 22 gallons per hour was not boil off, it was mostly cooling water. At 100psi the 9gph sprayer delivers 15gph. In other words, those stated ratings are at 40psi. You're getting steam leakage and high temp effluent because you're putting too much power into the kettle. For a 7 gallon boil, I run my 5500 watt at 28-30% so that's about 1600 watts effective. That's not going to be enough for 20 gallons but the power required to boil doesn't go up linearly with volume. The instructions advise starting with HALF the power you would normally use in an open top boil.

Another common mistake is having water collect in the effluent hose due to bends like a P-trap or submerging the end in the collection bucket water. That will kill the whole process.

We used your 5 foot hose and drained it straight into the floor drain, that is why we saw the steam.

Bobby, yes that was cooling water, thanks for looking up the GPH curve for the nozzle. Do you run your nozzle with the valve on the top wide open?

We were boiling in his 30 gallon HLT since his boil kettle is 90 gallons LOL.

I thought we were putting too much power in, but he did not want to put his Auber PID into manual mode and I am not familiar with the operation of the Auber so we had to run at 100%.

I'll try to install it on my kettle today and see how it goes with a much lower power setting.

What do you guys think about scaling this up to a 90 gallon kettle with a 15kw element? Is it possible?

Thanks for the advice!

Chris

The valve on the top of the sprayer cap is a ball valve so it's either on or off. You can't really throttle the flow, nor should you try. The regulation of flow is done by the selection of the spray tip. This concept can scale to any boil size but you'll need a bigger port off the kettle, a bigger chamber and more than one spray tip. I think the unit that Stout sells for 2-4 barrels uses three of the 9GPH tips.
 
:off:The normal flu virus will live on a hard, non-porous surface longer than anywhere else, but it is still no more than 24 hours. The Corona virus can be viable up to 9 days later at normal temps and up to 28 days later under 39F. Break out your iodopher.
https://www.medicalnewstoday.com/ar...n-surfaces#How-long-do-coronaviruses-persist?

Some research has suggested longer than this....and much depends on ambient conditions. One article (now published in NEJoM) showed evidence of the virus living up to 72 hours on plastic surfaces, and 48 hours on Stainless.

However, that's the longest they observed, and it's important to note that it doesn't mean other trials wouldn't have shown viability for a longer time period.

https://www.medrxiv.org/content/10.1101/2020.03.09.20033217v2

This is a preprint service, but it's now published. You can download a.PDF of that article.
 
Hey everybody. I was having a hard time deciding between this option and overhead ventilation. I stumbled on a scratch and dent range hood and went that way... cut through wall and ceiling and out through a roof vent. Long story short.... total disaster. Tons of steam condensing and dripping back into the kettle. Sigh. Now I am looking at this solution. Looks cool My question is, how much steam escapes when you open the lid to add hops and when you need to start cooling?

Thanks all. Love this stuff.

I brew in my garage. Doors closed. I can't have a gallon or more of steam being produced there without saturating the insulation in the walls, so I have to use something like the steam slayer.

So what happens when I lift the lid? A little steam escapes. During the course of a 1-hour boil, I probably have that lid open for....maybe 60 seconds total? Maybe only 30 seconds? It's nothing compared to the steam that would escape from the kettle if I wasn't using the steam slayer. If I'm tossing in hops, I open up one side, pour them in, then close the lid. Five seconds, maybe. Then maybe a little time to rinse hop residue on the kettle sides above the boil line, but that's only about 10 seconds.

Further, I've gone toward a gentler boil. On my system (5500-watt element), I turn down the power to maybe 30 percent or so. That reduces the amount of steam being produced--it's not so much of a rolling boil--and thus less escapes when I open the lid.

You're going to produce more steam, far more steam, taking a shower than would escape from the kettle.
 
I am thinking of adding a1.5" weldless TC fitting to just opposite of the existing 1.5" port on the mash colander of my medium Brewha BIAC and installing a large Steam Slayer. The lid for the colander is not heavy enough to support the Steam Slayer using a top mount and 90 degree bend, besides it seems that it would be a bit cumbersome to deal with in that configuration,

Looking for comment on how well this might work and what to lookout for.

PS> I have a 1.625" Greenlee punch so I am not concerned about getting a clean hole for the fitting.

https://www.brewhardware.com/product_p/tc15wlf.htm

I'm not familiar w/ the Brewha BIAC but I do use the Steam Slayer, and you have to have essentially a closed system with the only outlet that of the Steam Slayer.

The lid and such do not have to seal, as the Steam Layer will create a partial vacuum that will pull steam out, but if you have an opening elsewhere in the system, I doubt the SS would work well.

So--does that condition obtain with your setup?

Below is a pic of the BIAC mash colander. I would install the Slayer port just opposite the re-circulation port and run with the lid in place. So no issue with the Slayer vacuum not working.

Mash_Colander_2_473458e5-779e-4a40-8f19-6abbd7f91d94_110x110@2x.jpg

https://brewhaequipment.com/products/mash-colander
 
I have a manifold on my personal rig to provide water to the CFC, the condenser, the automated cleaning/CIP system, and a hand sprayer. simple set of copper tees I soldered up.

Cool! I’d love to see a picture of that if possible
 
Below is a pic of the BIAC mash colander. I would install the Slayer port just opposite the re-circulation port and run with the lid in place. So no issue with the Slayer vacuum not working.

When I had a BIAC system I never worried about steam from the mash and never really noticed any... are you boiling with the basket in place?
 
The valve on the top of the sprayer cap is a ball valve so it's either on or off. You can't really throttle the flow, nor should you try. The regulation of flow is done by the selection of the spray tip. This concept can scale to any boil size but you'll need a bigger port off the kettle, a bigger chamber and more than one spray tip. I think the unit that Stout sells for 2-4 barrels uses three of the 9GPH tips.
For some of my customers here in the EU who want a steam condenser on larger systems I also recommend they can use multiple smaller units per kettle. In some cases that is more economical than moving up to a very large chamber with multiple nozzles. However once you have to add say 3 separate units the economics and practicality start to look a little different. No idea what the boiloff rate will look like on that 90 gallon system... just an idea.
 
The valve on the top of the sprayer cap is a ball valve so it's either on or off. You can't really throttle the flow, nor should you try. The regulation of flow is done by the selection of the spray tip. This concept can scale to any boil size but you'll need a bigger port off the kettle, a bigger chamber and more than one spray tip. I think the unit that Stout sells for 2-4 barrels uses three of the 9GPH tips.

Hey. I just got my new widebody steamslayer and want to install it today. I bought the weldless bulkhead to add as well. The site says use a 40mm bit but all I have is a 42mm. Do you think that will work or should I wait and order a 40mm?
 
Hey. I just got my new widebody steamslayer and want to install it today. I bought the weldless bulkhead to add as well. The site says use a 40mm bit but all I have is a 42mm. Do you think that will work or should I wait and order a 40mm?

I used a 40mm and a file to clean off the burrs. The weldless bulkhead went through it but it was pretty tight. One extra millimeter would probably be ok, but be careful not to widen the hole too much when cleaning off the burrs.
 
The valve on the top of the sprayer cap is a ball valve so it's either on or off. You can't really throttle the flow, nor should you try. The regulation of flow is done by the selection of the spray tip. This concept can scale to any boil size but you'll need a bigger port off the kettle, a bigger chamber and more than one spray tip. I think the unit that Stout sells for 2-4 barrels uses three of the 9GPH tips.
Hello Bobby. I have purchased one of your steam condensers for my 20 Gal Spike BK. I used the largest nozzle (M15-9GPH, 40 PSI) and setup the same power level for the 5500 W element for boiling 15 Gal of wort as I used with open lid. I noticed that some foam went out the drain tube (open end all the time) and I didn't hit end of boil gravity. I ended up with more liquid than expected. I fear that a lot of steam was condensated on the inner wall of the lid and it came back to the wort, together with the undesired DMS...any thoughts ?
 
Hello Bobby. I have purchased one of your steam condensers for my 20 Gal Spike BK. I used the largest nozzle (M15-9GPH, 40 PSI) and setup the same power level for the 5500 W element for boiling 15 Gal of wort as I used with open lid. I noticed that some foam went out the drain tube (open end all the time) and I didn't hit end of boil gravity. I ended up with more liquid than expected. I fear that a lot of steam was condensated on the inner wall of the lid and it came back to the wort, together with the undesired DMS...any thoughts ?
I'll certainly let Bobby respond, but can give you an independent response. Some foam went out the drain tube because it takes less energy/power to maintain the same boil level under pressure. You simply need to reduce the power. The gravity was also high because you didn't experience your "expected" level of boil-off and volume reduction. There's a possibility that you got some condensation, but this is much less likely with that high level of discharge with that nozzle. I think you just need to reduce your boil power and reduce your estimated boil-off. Turn down the boil power and RDWHAHB.
 
Gentlemen,
My apologies, maybe I was not clear enough in my initial comment.
Actually, I obtained a lower end of boil gravity than expected (more liquid at the end of the boil). I understand that I have to reduce the power with the lid on because the wort has the tendency to produce more foam in this condition, and yes, the power was around 45%.
My main concern is that the DMS that was supposed to be eliminated ended up in the wort again due to the condensation inside the kettle.
Maybe I would need a larger chamber or a longer steam condensator to produce enough draft to carry out all the steam while condensing it outside the kettle..?
 
We haven’t been able to detect any SMS/DMS.

Keep in mind a couple of important principles: the effluent from the condenser should be HOT and the lid should have a slight negative pressure on it and minimal steam escaping - this tells you that the condenser is doing it’s job. Also the end of the effluent tube should be open to breathe - you will often see some steam escaping, but that’s minimal.
 
Gentlemen,
My apologies, maybe I was not clear enough in my initial comment.
Actually, I obtained a lower end of boil gravity than expected (more liquid at the end of the boil). I understand that I have to reduce the power with the lid on because the wort has the tendency to produce more foam in this condition, and yes, the power was around 45%.
My main concern is that the DMS that was supposed to be eliminated ended up in the wort again due to the condensation inside the kettle.
Maybe I would need a larger chamber or a longer steam condensator to produce enough draft to carry out all the steam while condensing it outside the kettle..?
Have you actually detected DMS in your wort? DMS boils at about 100°F, so as long as the kettle walls and lid are hotter than that, no DMS will condense, even if water condenses.

Brew on :mug:
 
You have to account for the nearly halved boil off rate of the lower heat input and that will fix the low gravity and high post boil volume issue. This is just a learning curve issue. If you're getting foam in the discharge, you're probably still boiling just a bit too hard. Try 42%.

Definitely make sure the waste tube is not bent into a p-trap, gathering a pool of water or submerged in water.

I have done at least 15 batches with the slayer installed and have no DMS issues even with 100% pilsner malt.
 
Has any one ordered parts for a condenser off of Aliexpress? I'm in New Zealand so shipping makes things very cost prohibitive! Specifically looking for recommendations on a good spray nozzle and double sided TC fitting (not too concerned with what is on the top, as I can get whatever sized fitting for the incoming water line).
 
11B22E04-AD54-40CB-AE1B-E9E1656453C3.jpeg
I got everything up and running today. I’ll try and calibrate the flow rate tomorrow. Should be able to brew something by the weekend. Thanks again for the idea.
 
Last edited:
You have to account for the nearly halved boil off rate of the lower heat input and that will fix the low gravity and high post boil volume issue. This is just a learning curve issue. If you're getting foam in the discharge, you're probably still boiling just a bit too hard. Try 42%.

Definitely make sure the waste tube is not bent into a p-trap, gathering a pool of water or submerged in water.

I have done at least 15 batches with the slayer installed and have no DMS issues even with 100% pilsner malt.
Same here several batches with the Slayer and no DMS. Just adjust for the low boil Off. Two first place awards at the Bluebonnet Brew Off.
 
Has any one ordered parts for a condenser off of Aliexpress? I'm in New Zealand so shipping makes things very cost prohibitive! Specifically looking for recommendations on a good spray nozzle and double sided TC fitting (not too concerned with what is on the top, as I can get whatever sized fitting for the incoming water line).

I made mine with this. There is many size options. I ordered 1mm and 0.6 mm. 0.6mm works better for my water pressure and setup.
https://www.aliexpress.com/item/32790032084.html?spm=a2g0s.9042311.0.0.27424c4df2ZhCt
 
Nice job @Charlie139 . One comment that might help with mods over time... you do not need much feed water - a small tube (1/4" / 6mm OD... even 1/8" / 3mm) would provide enough flow.

Agreed, and running a garden hose to your steam condenser really adds a lot of weight to the kettle lid. It's much easier to manage a very small 1/4" hose.
 
Back
Top