• Please visit and share your knowledge at our sister communities:
  • If you have not, please join our official Homebrewing Facebook Group!

    Homebrewing Facebook Group

Basement Brewery Project

Homebrew Talk

Help Support Homebrew Talk:

This site may earn a commission from merchant affiliate links, including eBay, Amazon, and others.

artbrau

Well-Known Member
Joined
Apr 1, 2009
Messages
104
Reaction score
6
Location
Morristown, NJ
THE SPACE.
When we built our house I had the contractor fully excavate the area under the porch to make an brewing room off the basement. Now, a year later, I'm finally getting around to setting the thing up.

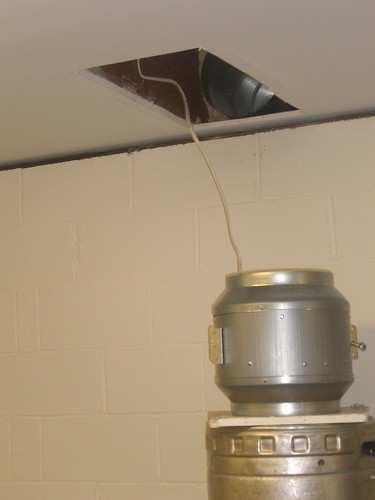
The ceiling is insulated and cement block separates it from the rest of the basement so it stays reasonably cool in the summer. I put in the kitchen cabinets from a house I tore down. The space is big, about 12x30, and wraps around the corner of the house. I would like to put a walk-in cooler at that end some day. There french drains, floor drains, gas, water and an old dishwasher (no, not me).

3564444327_c456afc851.jpg


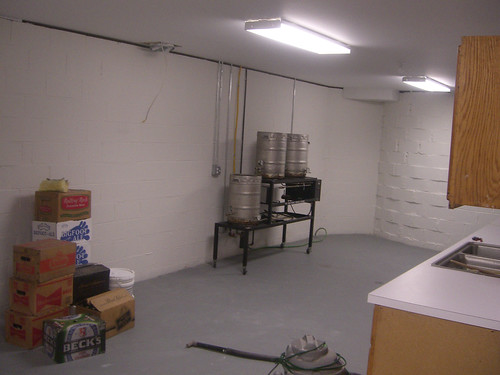
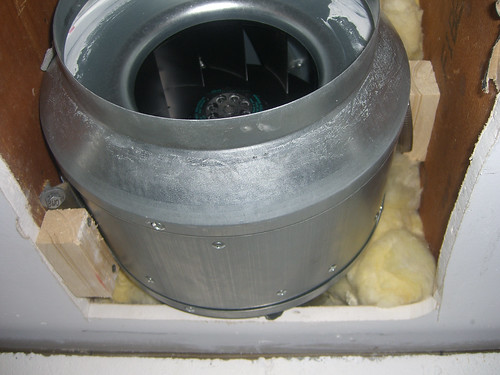
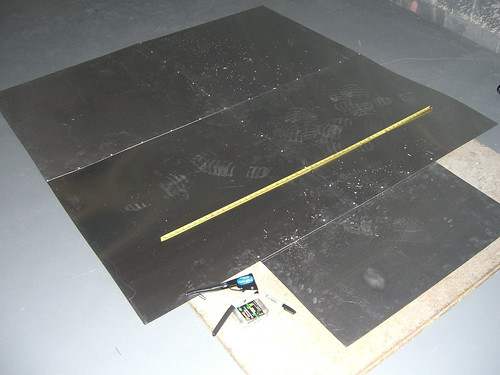
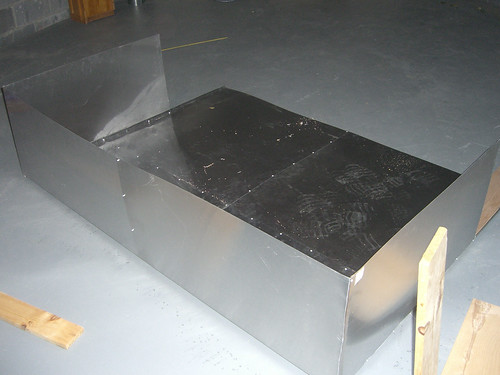
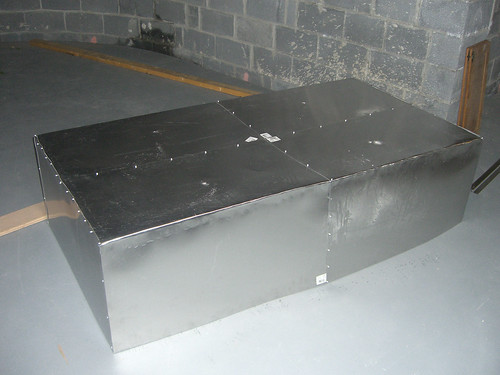
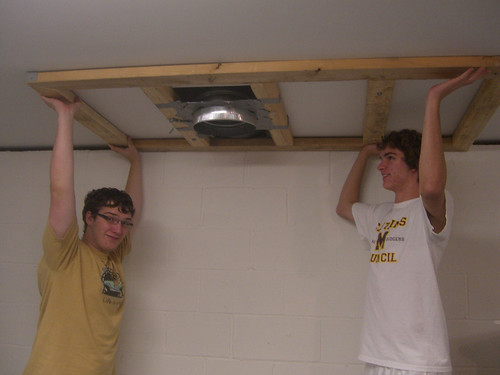
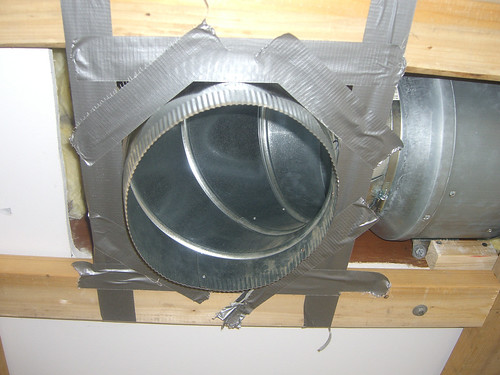
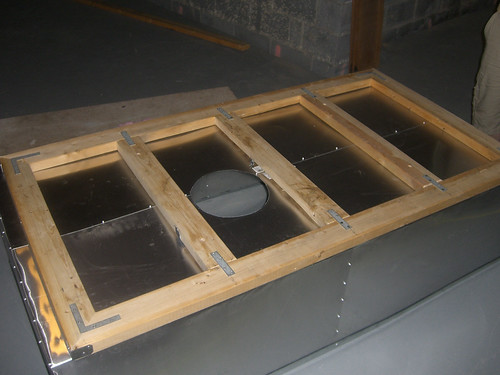
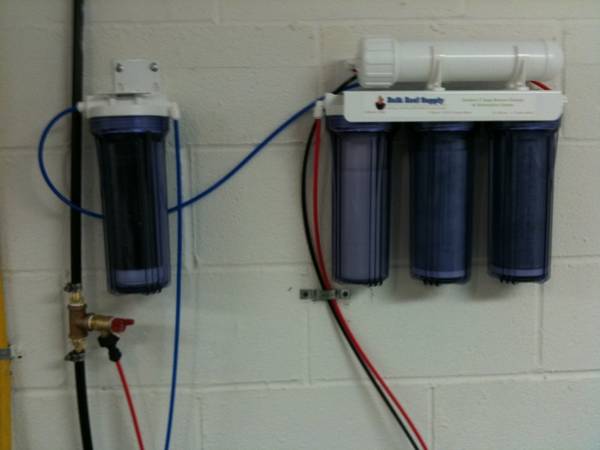
In the next few posts in this thread I'll document some of the more interesting bits: The brewing stand mods, the ventilation system and water treatment.
 
THE BREWING STAND

I have a SABCO RIMS (old style) that I am upgrading to microprocessor control. At some point I'll have the controller work the valves but for now I will just do pump and heat. SABCO was very helpful with upgrade options for my unit but I felt I could get better gear myself.

I put in a new heating element for the RIMS mash heat maintainer. The unit runs on 110v but the stock water heater element was 240v. We are not doing boost heat with this so the wattage drop is actually desired to reduce wort caremelization. The new one is slightly more powerful but is a longer element so the surface temp should be even lower. SABCO sells them but I just picked up the same thing at Home Depot.

I also replaced the single-jet burner with nice impinged jet ones. Thanks to the folks in this forum I looked at the chinese ring burners sold by topfoodservice.com, which is also asianfoodservice.com and has a storefront on Bowery in Manhattan, Kang Sun Foods. Since I work in the city I went over there. Wild place as all the restaurant supply stores in that 'hood are. Seemingly random stuff, stacked floor to ceiling. Here's where I found the burners:

3564628741_7fdbfe7cae.jpg


I went with the (bafflingly more expensive) smaller burners. The 6" does a nice job of hitting the middle third of the keggle diameter and doesn't shoot up the sides. The stated BTU of 75,000 is just a bit more than the 65,000 SABCO says their burner upgrade kit provides. They use the cajun-style ring burner. Impinged jets are just cooler. I've been jonesing for them since I read about the SolarFlo burners on the HBD back in the 90's.

3564484373_39a1f86d44.jpg


I got what amounts to an erector set of gas nipples and elbows at home depot and finally got a configuration that puts the top of the burner dead center and about 3.5 inches below the keg bottom. Very easy.

3564442603_9706115638.jpg


You can see in this photo the original single jet on the left and the ring burner on the right. The cross-piece labeled "Brew Magic.." is the gas manifold and you can just see the ball-valve handles.

There is a lot more to do with the stand but since we have a lot of manly BTU goodness now we better tackle the ventilation issue....
 
I'm looking at setting up a brewing station in the basement as well. Ventilation is my primary concern and I am looking at building a vent hood out of heating duct trunk and flex duct pipe with some serious inline fans (not sourced yet...) I found this site to be very helpful in understanding how exhaust hoods should be engineered.

Exhaust Hoods
 
The Ventilation System

I am brewing in a closed basement room with natural gas burners, each of which is equivalent to to a 6-burner stove. The contractor and I didn't want to go through the trouble of explaining the "brewery" to the local building inspector so we didn't put any exhaust system the plan. I intended to do it myself after the C of O. He did put in a 1000cfm make-up air fan in one corner of the room.

Last weekend I cut open the ceiling
3564441105_534c674edc.jpg


and put in a 10in 910cfm in-line duct exhaust fan. I used the Fantech 10FKD, a fine piece of German engineering (not made in China!). It purrs like a kitten.

You can see how big the fan is in relation to the keg. You can also see daylight coming through the louver. There is only about 8 straight inches from fan to the outside.
3565257340_d11c77d607.jpg


It made for a tight fit in the ceiling. There are two mounting "wings" that made the total width wider than the 16" joist spacing so I had to mount it rotated about 45 degrees. I put in wooden rails to support it and sank a lag screw on one side and a duct clamp around the rail on the other. This guy is going nowhere. The instructions say to use vibration mounts but I don't see the need.

3571246811_5773dd29cd.jpg


I slapped an elbow on it and we're almost there.

3564436941_f6d45a478c.jpg


I figure with 1000cfm in and out I am in good shape but I want to be sure. I am a belt and suspenders kind of guy so I have two CO detectors.

3564438365_a680dd62b5.jpg


The lower one is a dual detector that also senses a gas leak.

Now I just (just!) have to put a hood up there. I have been trolling Craigslist for a restaurant cast off but in the meantime I am fabricating my own with aluminum sheets from Home Depot and pop rivets. I did this once before and it worked pretty well. I will post some pics of that jury rig later.
 
So to save some money (to put toward the conicals) I made my own ventilation hood. A real condensate hood of this size would be over $1000. My hood was less than $100 plus my labor. I used 3x3 aluminum sheets from Home Depot to fabricate a 3x6 box. I held the sheets together with pop rivets and nailed the box to a frame made of 2x4s I had lying around. I bought some "trim" pieces (I don't know what they are really for) that slid over the lower edges of the hood to make it nicely finished

The raw materials
3652028763_24d2ef3f66.jpg


Nearly Completed Box
3652027357_702763b034.jpg


I am no master of metal bending. I did learn that scoring the metal first helps with a clean bend. I also learned that whacking sheet metal with rubber mallet will wake a napping baby.

The completed Box
3652823228_00e44cf059.jpg


I made the wooden frame so I would have something to bolt to the ceiling. I sited the mounting holes under the joists and used 4 inch lag screws to secure it. My teenagers will be old enough to drink before I get this brewery done.

Boys Holding Frame
3652023549_9327fff7cf.jpg


I used tape to mark the position of the duct relative to the frame.

Marking the duct position
3652824420_cab9c13e11.jpg


I put the box on the frame and nailed it down with a generous helping of big headed drywall nails. The box the fan came in had a nice 10" diameter piece of cardboard I used as a duct hole cutting template. I sited it over the tape after I laid the frame in position on top of the hood. I put a box under the hood to provide some backing for the jigsaw. It worked out very well.

Cutting out the duct hole
3652820448_0017a0bfef.jpg


My biggest fear was that I would fail to "measure twice and cut once" so I measured about ten times. Fortunately the duct hole lined up perfectly. I called the boys away from the XBox to hold up the hood again and bolted it in.

Completed Hood
3652819076_c46ddae586.jpg


Pretty slick, if I say so myself!

Now I'm off to make a shopping list of hoses that need replacing and think about the fermentation situation. My old fridge gave up the ghost and I'm looking to move away from glass carboys, which scare me a bit anyway. "Honey, can I buy a stainless conical?"
 
Industrial victorian crown molding would really round off the top of that vent hood :D
Really cool! At 1000cfm make sure you don't loose any hop leaves up that thing when it's on full blast. :mug:
 
Thanks for the encouragement, folks!

Hmmm...some steampunk flavor? Not a bad idea.

I do want to put in a fan speed controller and see if a less-than-twister-speed will do the trick. Less competition for the stereo. Fortunately, the porch is above me so I can crank it.
 
Nice setup.
I wish I could dig out a basement under my house. Brewing outside on 100˚ days with propane is not fun.
-Ben
 
very cool. i just wish i had a house, nevermind a sweet basement brewery. weelll.. i guess id like that too..
 
Well, brew day 1 of brewery 4.0 finally arrived (1.0 was the pot on the stove, 2.0 was the big pot on the Cajun Cooker out back and 2.0 was the SABCO RIMS in the old house). Things went pretty smoothly with a few hiccups. I did a dry (wet) run to understand the workflow and learned a few things.

I was almost shut down when I decided to tap into the water line to create a permanent hookup for the RO filter which I mounted next the to HLT..
bd1_9_.JPG


I cut the ½ black plastic water pipe then found out the CLEARLY LABELED ½ inch barbed “tee” had 5/8 inch barbs. Back to Home Depot where I found some brass that did the trick.
bd1_8_.JPG


The 9-jet wok burner heated the mash/sparge water from 65 to 165 in 45 minutes. Not bad I thought. The CO monitors never registered above zero so the hood is doing it's job even with the fan running at 50%. (This was not the case in my old brewery. The single-jet burners overwhelmed the fan and CO levels got worrisome.) The nat. gas pressure coming from the 3/8 line is not enough to run more than one burner at a time so I have to heat the sparge water for mash out – then heat the mash to the mash-out temp.

While I mashed I had my tunes from the homemade squeezebox boombox
bd1_5_.JPG


And I babysat.
bd1_4_.JPG


I had some annoying mash channeling, detailed here, but nothing a mash paddle won't fix.

The burner got the 12 gal. of wort boiling in about 30 minutes.

I decided to use the whirlpooled-wort-immersion-chiller cooling method. I learned on the dry run that the 50 feet of copper coil was not completely immersed because of the kettle outflow tube. I decided to run the outflow tube through the coils which means the chiller has to stay in the kettle during the whole boil. I recirculated the wort while pumping 60 degree water through. It took about 20 minutes to take the wort down to 70F. Pretty respectable.

I kept the wort outflow tube well below the wort surface until the wort temp. dropped below 100 then I raised it up to aerate the wort. It seemed to work well.
bd1_3_.JPG


I had to prop up the silicone hose so it wouldn't kink.
bd1_2_.JPG


I clearly don't understand the subtleties of the March magnetic impeller pump. I thought if the pump was below the kettle outflow I could just open the valves and the pump would be primed. No. I had to fill the upstream hose first and then connect it to the pump inlet. It's very finicky. It cavitates if you look at it funny.
bd1_7_.JPG


Next up: Fermentation
 
Looking really nice, maybe a few kinks here or there but your figure them out. I'm sure you can get a lot of good tips on the march pump from people here who use them.
 
Artbrau, try turning your pump so the the inlet is at the bottom and the outlet is at the top. I use to run my pumps the same as you and always had problems getting them primmed and then they would sometimes loose the prime for no reason, I don't have any of those problems anymore.
 
Artbrau, try turning your pump so the the inlet is at the bottom and the outlet is at the top. I use to run my pumps the same as you and always had problems getting them primmed and then they would sometimes loose the prime for no reason, I don't have any of those problems anymore.

I hear ya! Had the same problem, not anymore! Turn them pump heads!!! WOOOOOOOOOO!!! :ban: BTW, I am desperately jealous of your brewing space. Mine is outside, in the heat or cold and I don't have much choice but to store my gear in the garage, 15 feet from the cat litter... :( SWEET SETUP!!!!
 
Nice setup.
I wish I could dig out a basement under my house. Brewing outside on 100˚ days with propane is not fun.
-Ben

I'm down near Austin and I hear you about those 100+°F brew days. I think the driveway must be at least 120°C. We've got a detached garage. Thinking about enclosing 1/2 of it when $$$ isn't such a concern.
 
+1 for babysitting methods.

Why not build another crib in the brew room? You'd never have to leave.
 
So after the embarrassment of dry grain in the last batch I made myself a mash paddle. I took a piece of leftover oak flooring and applied some saws, a drill press, a dremel and mineral oil to it. 20 min later, voila!

CIMG7328.JPG
 
Back
Top