
CRJbrewer
Member
Hi All,
This is my first post on Homebrewtalk. I just wanted to share my latest build with everyone. It really is no different then any other coffin keezer with an exception to the Arduino temperature controller. Here are a few pictures of the build.
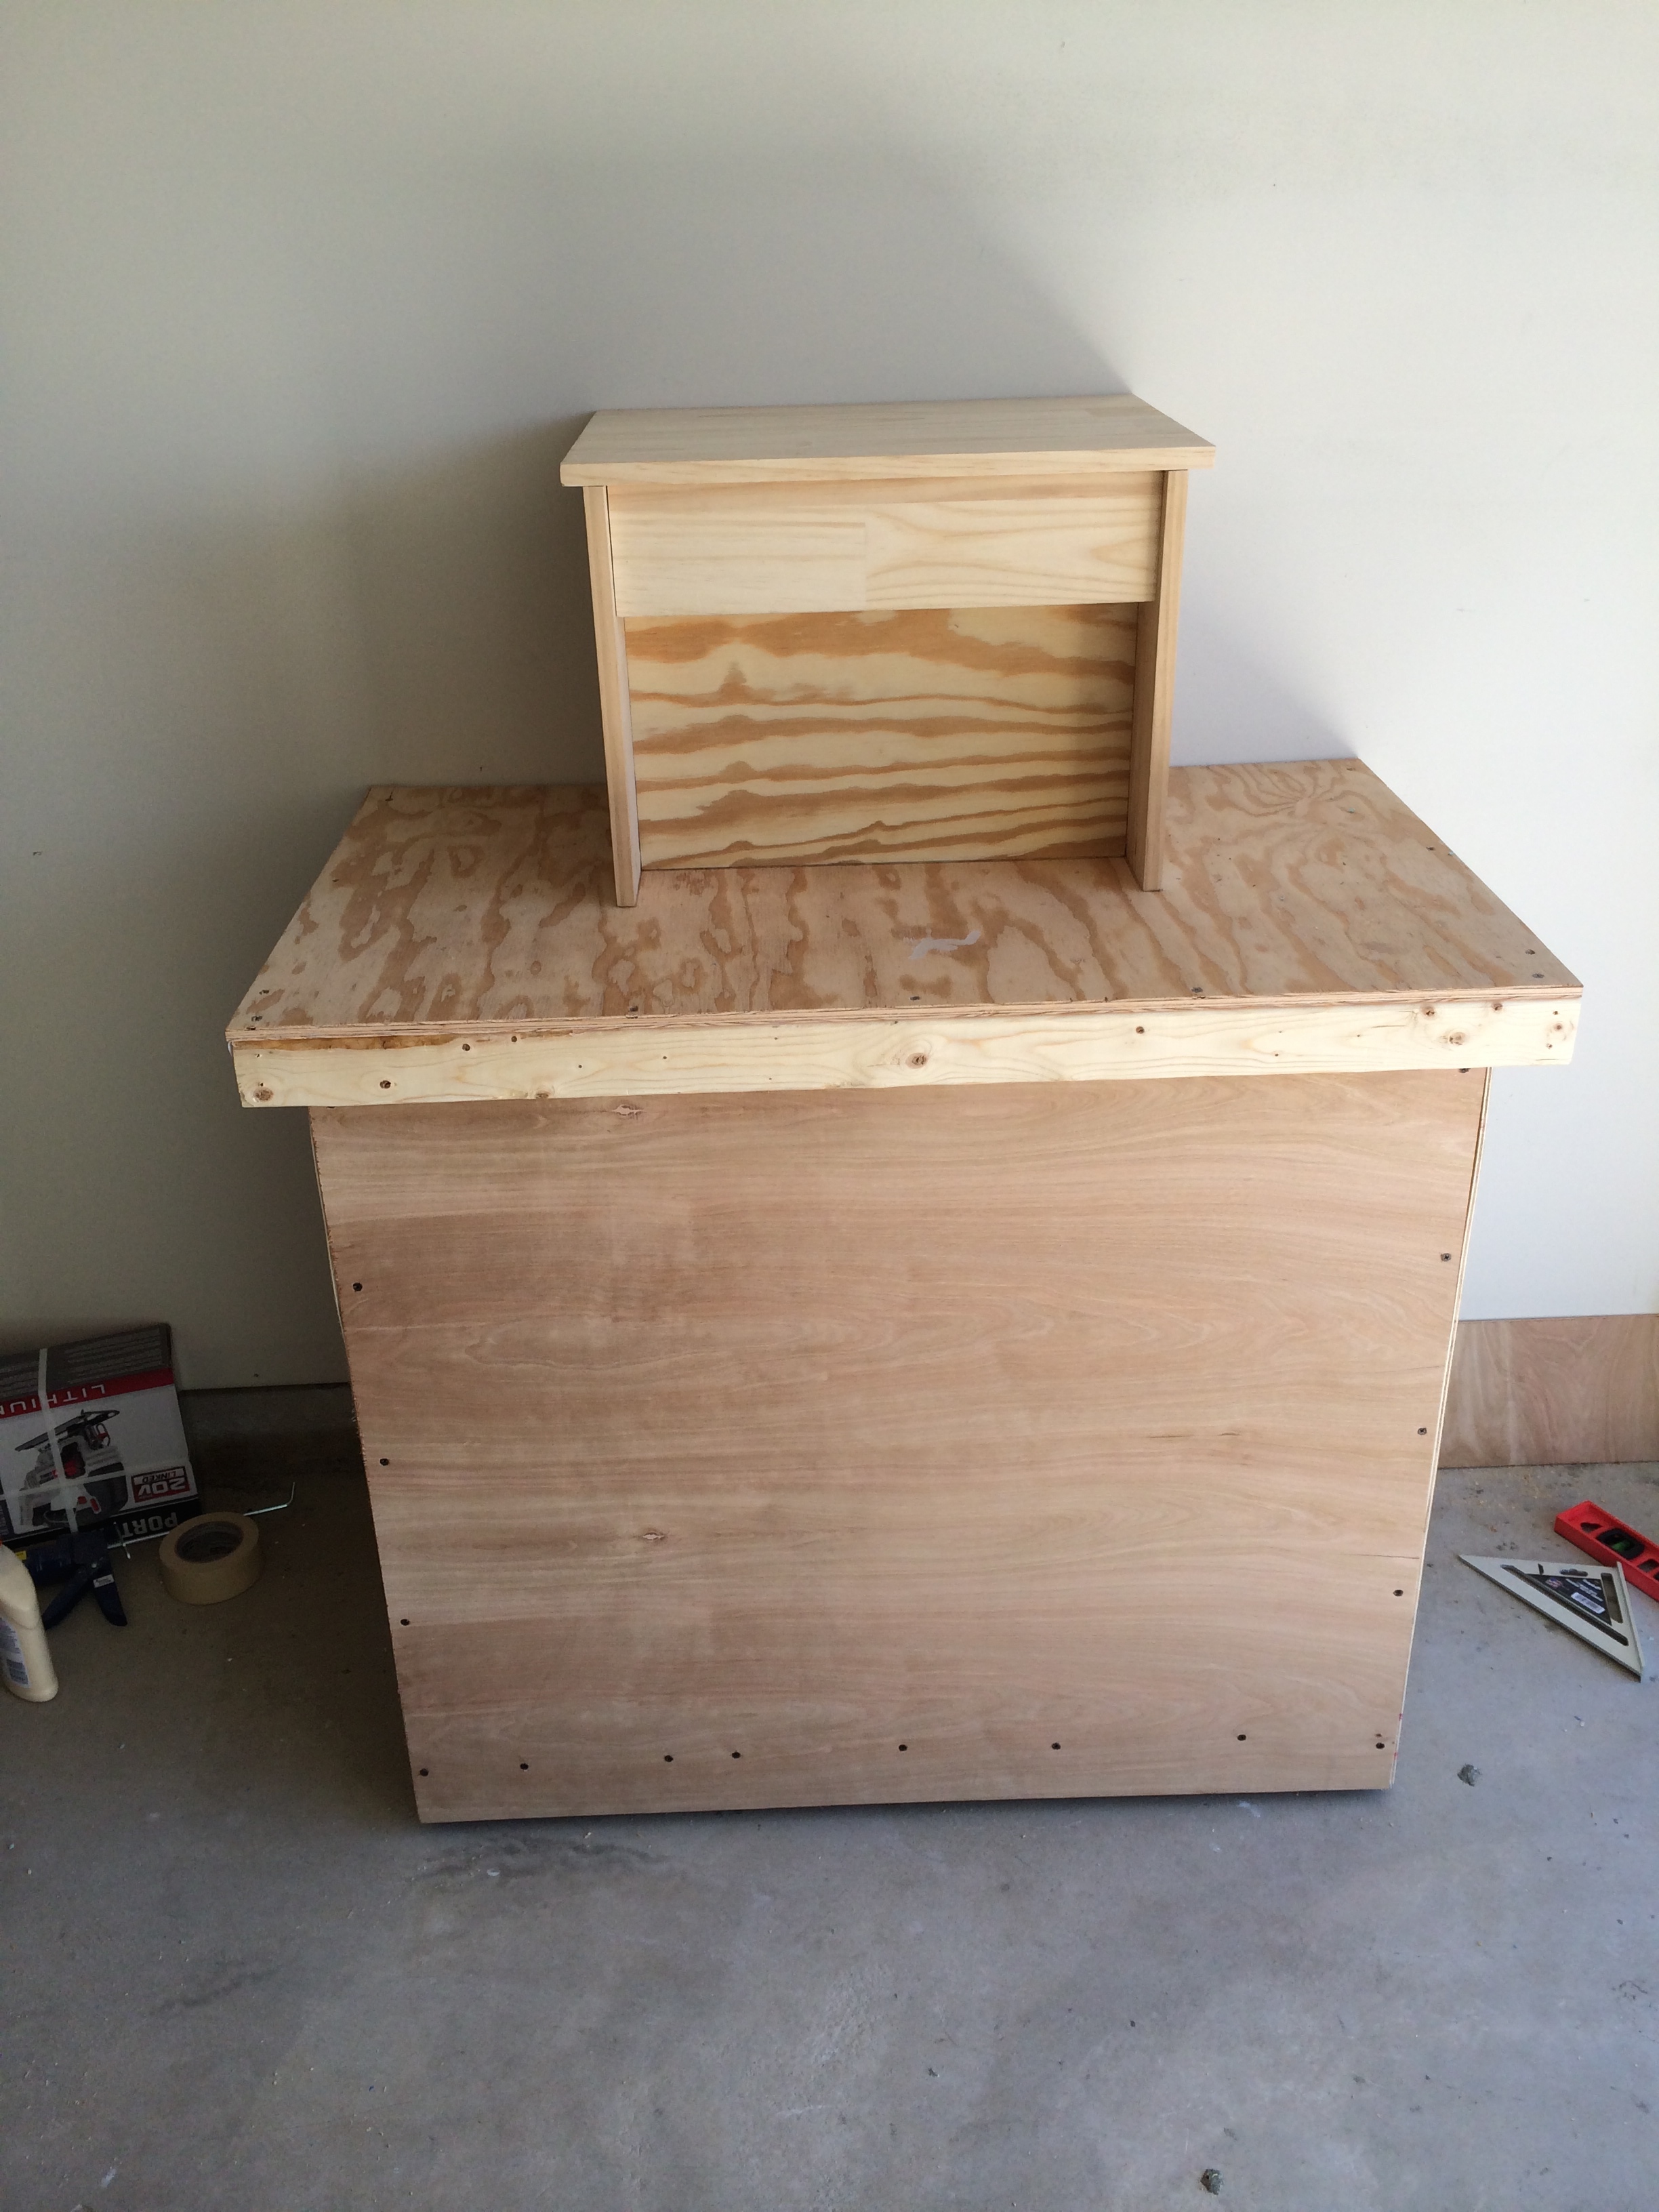
I found a cheap Craigslist Freezer for and went about building the surround.


A picture with the tower on it.
SWMBO agreed to this build as long as she could make it "Look Cool". To her this means that she will distress the wood work and paint. To me this means that I get to keep my beer in the living room:rockin:


The keezer fits a total of 5 cornelius ball lock kegs. a total of 4 5 gallon kegs and a 2.5 gallon keg on the hump.


We picked up some SS tile for the top and a nice mosaic for the backsplash. I also picked up a 19 inch led strip from Lows. I can turn the led's on and off with a switch on the back of the tower and also over the web via the Arduino.

A picture of the insides. I have since added my Raspberry Pi (Not in the picture). The Pi also doubles as my local web server for my tap list and my media server for the house. Eventually the Arduino will track my keg quantities and report this information to my tap list, but I have not yet purchased the flow sensors for each keg line.


I added the steel corners and moved it into the house.
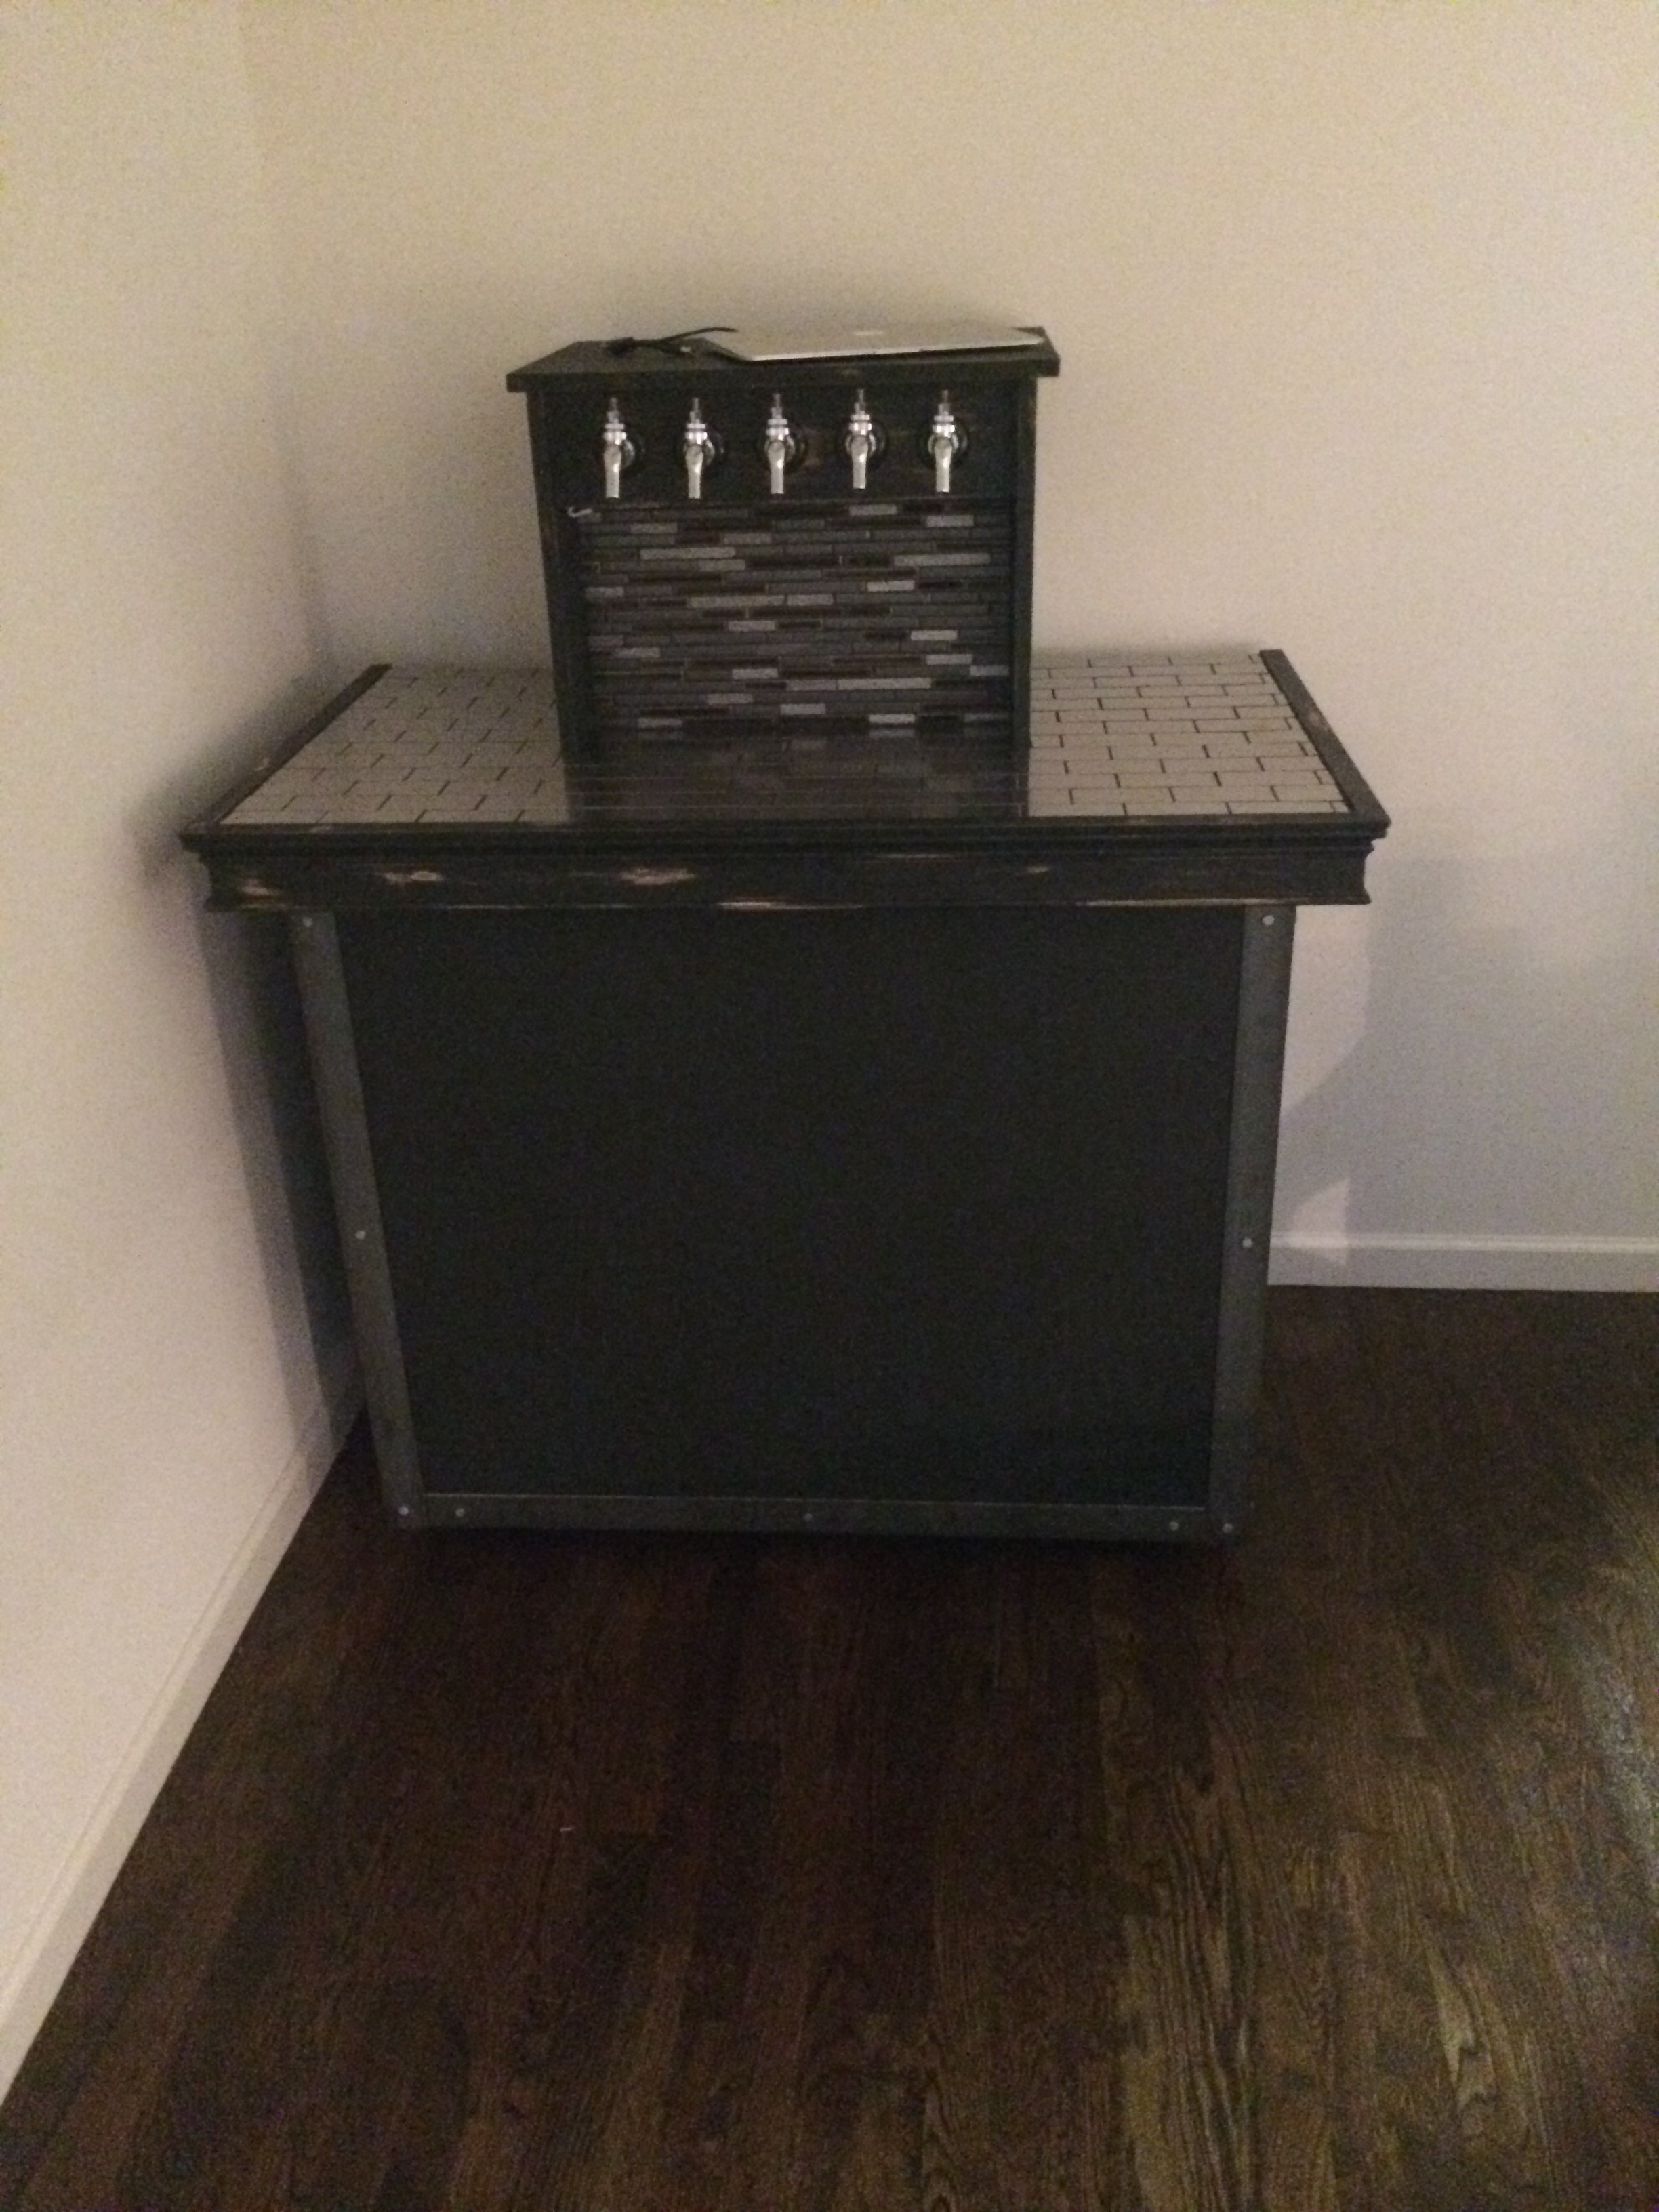
After adding my logo and a little more distressing.


This project has been a lot of fun. We just moved back from Malaysia where home brewing was illegal so I have a couple years of brewing to catch up on. Its time to get brewing!

This is my first post on Homebrewtalk. I just wanted to share my latest build with everyone. It really is no different then any other coffin keezer with an exception to the Arduino temperature controller. Here are a few pictures of the build.
I found a cheap Craigslist Freezer for and went about building the surround.
A picture with the tower on it.
SWMBO agreed to this build as long as she could make it "Look Cool". To her this means that she will distress the wood work and paint. To me this means that I get to keep my beer in the living room:rockin:
The keezer fits a total of 5 cornelius ball lock kegs. a total of 4 5 gallon kegs and a 2.5 gallon keg on the hump.
We picked up some SS tile for the top and a nice mosaic for the backsplash. I also picked up a 19 inch led strip from Lows. I can turn the led's on and off with a switch on the back of the tower and also over the web via the Arduino.
A picture of the insides. I have since added my Raspberry Pi (Not in the picture). The Pi also doubles as my local web server for my tap list and my media server for the house. Eventually the Arduino will track my keg quantities and report this information to my tap list, but I have not yet purchased the flow sensors for each keg line.
I added the steel corners and moved it into the house.
After adding my logo and a little more distressing.
This project has been a lot of fun. We just moved back from Malaysia where home brewing was illegal so I have a couple years of brewing to catch up on. Its time to get brewing!


![Craft A Brew - Safale S-04 Dry Yeast - Fermentis - English Ale Dry Yeast - For English and American Ales and Hard Apple Ciders - Ingredients for Home Brewing - Beer Making Supplies - [1 Pack]](https://m.media-amazon.com/images/I/41fVGNh6JfL._SL500_.jpg)


")


