Just got an email this AM from Blichmann telling me that my Foundry 6.5 and small scale have shipped. 2 weeks from order to ship--cannot complain about that! I better go back and re-read this thread and get ready for the prep work and get a brew going.
You are using an out of date browser. It may not display this or other websites correctly.
You should upgrade or use an alternative browser.
You should upgrade or use an alternative browser.
ANVIL FOUNDRY ALL-GRAIN BREWING SYSTEM
- Thread starter czmkid
- Start date

Help Support Homebrew Talk:
This site may earn a commission from merchant affiliate
links, including eBay, Amazon, and others.
drewmuni8
Active Member
Anybody have experience maxing out the foundry in terms of its grain weight recommendations? Looking to put in 8 lbs (the most recommended for the 6.5) but make a 3 gallon batch rather than a 2.75. My total water would be in the neighborhood of 4.5 gallons, not sure if ill have spill over or not.
This is what I was thinking as well. Obviously no experience yet but look forward to seeing what the community has to say. From reading, it looks like that volume is totally doable.
Locklearmj
Well-Known Member
- Joined
- Aug 22, 2013
- Messages
- 52
- Reaction score
- 4
Got the 10.5 with recirculation kit that I order from a LHBS last week. Was expecting to get one that didn’t use the malt basket support ring, but ended received one that uses the ring. I wasn’t aware there was a version with the top mounted controller which utilized the ring. Is that the only difference between the newest version that no longer utilizes the ring?
Running a water test and clean cycle today and then will break it in later this week.

Running a water test and clean cycle today and then will break it in later this week.
- Joined
- Jan 17, 2017
- Messages
- 302
- Reaction score
- 131
Got the 10.5 with recirculation kit that I order from a LHBS last week. Was expecting to get one that didn’t use the malt basket support ring, but ended received one that uses the ring. I wasn’t aware there was a version with the top mounted controller which utilized the ring. Is that the only difference between the newest version that no longer utilizes the ring?
Running a water test and clean cycle today and then will break it in later this week.
You have the latest except for the hangers. From what I have read the jury is still out on the new hangers. For me I have used a ratcheting hoist since brew #1 so never dealt with the ring and now have brewed without the grain pipe 3 times and may never use it again.
Ryansod
Member
- Joined
- Nov 3, 2018
- Messages
- 15
- Reaction score
- 3
Anybody have experience maxing out the foundry in terms of its grain weight recommendations? Looking to put in 8 lbs (the most recommended for the 6.5) but make a 3 gallon batch rather than a 2.75. My total water would be in the neighborhood of 4.5 gallons, not sure if ill have spill over or not.
This isn't exactly the grain amount your looking for by maybe it will help.
This weekend I did a 3 gallon batch, looking for 3 gallons finished into the keg. I ended with about 3.5 into the fermenter a little more then I was looking for but that's ok.
4.75 gallons of water to start
6.25 LB grain
The grain bed was right at the malt pipe screen. I had to pull a little water/wort out so the screen wasn't underwater. It wasn't much just a cup or two. Added it back at the boil.
With 8LB you may need to do a sparge to get the volume you need.


$76.92 ($2,179.04 / Ounce)
Brewing accessories 1.5" Tri Clamp to Ball Lock Post Liquid Gas Homebrew Kegging Fermentation Parts Brewer Hardware SUS304 Brewing accessories(Gas Hose Barb)
chuhanhandianzishangwu


$44.99
$49.95
Craft A Brew - Mead Making Kit – Reusable Make Your Own Mead Kit – Yields 1 Gallon of Mead
Craft a Brew


$719.00
$799.00
EdgeStar KC2000TWIN Full Size Dual Tap Kegerator & Draft Beer Dispenser - Black
Amazon.com

$53.24
1pc Hose Barb/MFL 1.5" Tri Clamp to Ball Lock Post Liquid Gas Homebrew Kegging Fermentation Parts Brewer Hardware SUS304(Liquid Hose Barb)
yunchengshiyanhuqucuichendianzishangwuyouxiangongsi

$58.16
HUIZHUGS Brewing Equipment Keg Ball Lock Faucet 30cm Reinforced Silicone Hose Secondary Fermentation Homebrew Kegging Brewing Equipment
xiangshuizhenzhanglingfengshop


![Craft A Brew - Safale S-04 Dry Yeast - Fermentis - English Ale Dry Yeast - For English and American Ales and Hard Apple Ciders - Ingredients for Home Brewing - Beer Making Supplies - [1 Pack]](https://m.media-amazon.com/images/I/41fVGNh6JfL._SL500_.jpg)
$6.95 ($17.38 / Ounce)
$7.47 ($18.68 / Ounce)
Craft A Brew - Safale S-04 Dry Yeast - Fermentis - English Ale Dry Yeast - For English and American Ales and Hard Apple Ciders - Ingredients for Home Brewing - Beer Making Supplies - [1 Pack]
Hobby Homebrew


$10.99 ($31.16 / Ounce)
Hornindal Kveik Yeast for Homebrewing - Mead, Cider, Wine, Beer - 10g Packet - Saccharomyces Cerevisiae - Sold by Shadowhive.com
Shadowhive


$176.97
1pc Commercial Keg Manifold 2" Tri Clamp,Ball Lock Tapping Head,Pressure Gauge/Adjustable PRV for Kegging,Fermentation Control
hanhanbaihuoxiaoshoudian


$479.00
$559.00
EdgeStar KC1000SS Craft Brew Kegerator for 1/6 Barrel and Cornelius Kegs
Amazon.com

$7.79 ($7.79 / Count)
Craft A Brew - LalBrew Voss™ - Kveik Ale Yeast - For Craft Lagers - Ingredients for Home Brewing - Beer Making Supplies - (1 Pack)
Craft a Brew


$33.99 ($17.00 / Count)
$41.99 ($21.00 / Count)
2 Pack 1 Gallon Large Fermentation Jars with 3 Airlocks and 2 SCREW Lids(100% Airtight Heavy Duty Lid w Silicone) - Wide Mouth Glass Jars w Scale Mark - Pickle Jars for Sauerkraut, Sourdough Starter
Qianfenie Direct

$28.98
Five Star - 6022b_ - Star San - 32 Ounce - High Foaming Sanitizer
Great Fermentations of Indiana


$22.00 ($623.23 / Ounce)
AMZLMPKNTW Ball Lock Sample Faucet 30cm Reinforced Silicone Hose Secondary Fermentation Homebrew Kegging joyful
无为中南商贸有限公司

$159.99 ($26.66 / Count)
3M High Flow Series System BREW120-MS, 5616001, For Brewed Coffee and Hot Tea, Valve-in-Head Design
SpaceCityProviders


$53.24
1pc Hose Barb/MFL 1.5" Tri Clamp to Ball Lock Post Liquid Gas Homebrew Kegging Fermentation Parts Brewer Hardware SUS304(Gas MFL)
Guangshui Weilu You Trading Co., Ltd


Got the 10.5 with recirculation kit that I order from a LHBS last week. Was expecting to get one that didn’t use the malt basket support ring, but ended received one that uses the ring. I wasn’t aware there was a version with the top mounted controller which utilized the ring. Is that the only difference between the newest version that no longer utilizes the ring?
Running a water test and clean cycle today and then will break it in later this week.
I think the current version on their website could be considered v3.
I have same version you have, and haven't had the misfortune that some have had w/the ring popping out while lifting. I spread it apart a bit when I first got it, and always make sure to make sure it is in place and pushed down prior to lifting the basket. So far (knocking on wood atm), so good.
- Joined
- Jan 17, 2017
- Messages
- 302
- Reaction score
- 131
Saw another trick to keep it in where someone put pieces of hose around the ring where it contacts the kettle.I think the current version on their website could be considered v3.
I have same version you have, and haven't had the misfortune that some have had w/the ring popping out while lifting. I spread it apart a bit when I first got it, and always make sure to make sure it is in place and pushed down prior to lifting the basket. So far (knocking on wood atm), so good.
Saw another trick to keep it in where someone put pieces of hose around the ring where it contacts the kettle.
I think I saw somebody use binder clips too??
I have sealed my AF around the display to housing and housing to kettle. I have seen many have issues with the valve leaking at the wall if they don't properly tighten the valve. This happened to me with just water in the kettle.
I see if you remove the valve looks like there is space to silicone between the two walls around where the valve seats. This way the leak would be 100% external. Has anyone done this?
I had this happen to me too, but it was because I had completely removed the valve to clean it and had forgotten that I hadn't put it back in when I started dumping the first gallon of water the night prior to a brew day. Man I make a lot of stupid moves...
I briefly entertained sealing these after it had all dried out, but then I was thinking maybe there needed to be some movement for the expansion/contraction of the metal?? Any rate..never bothered....but I've always made it a point since then to make sure the darn valve is not only installed, but plenty secure before dumping in the first gallon water. Even then..I only dump in enough to cover it..then let it sit for 30 minutes just to make sure...
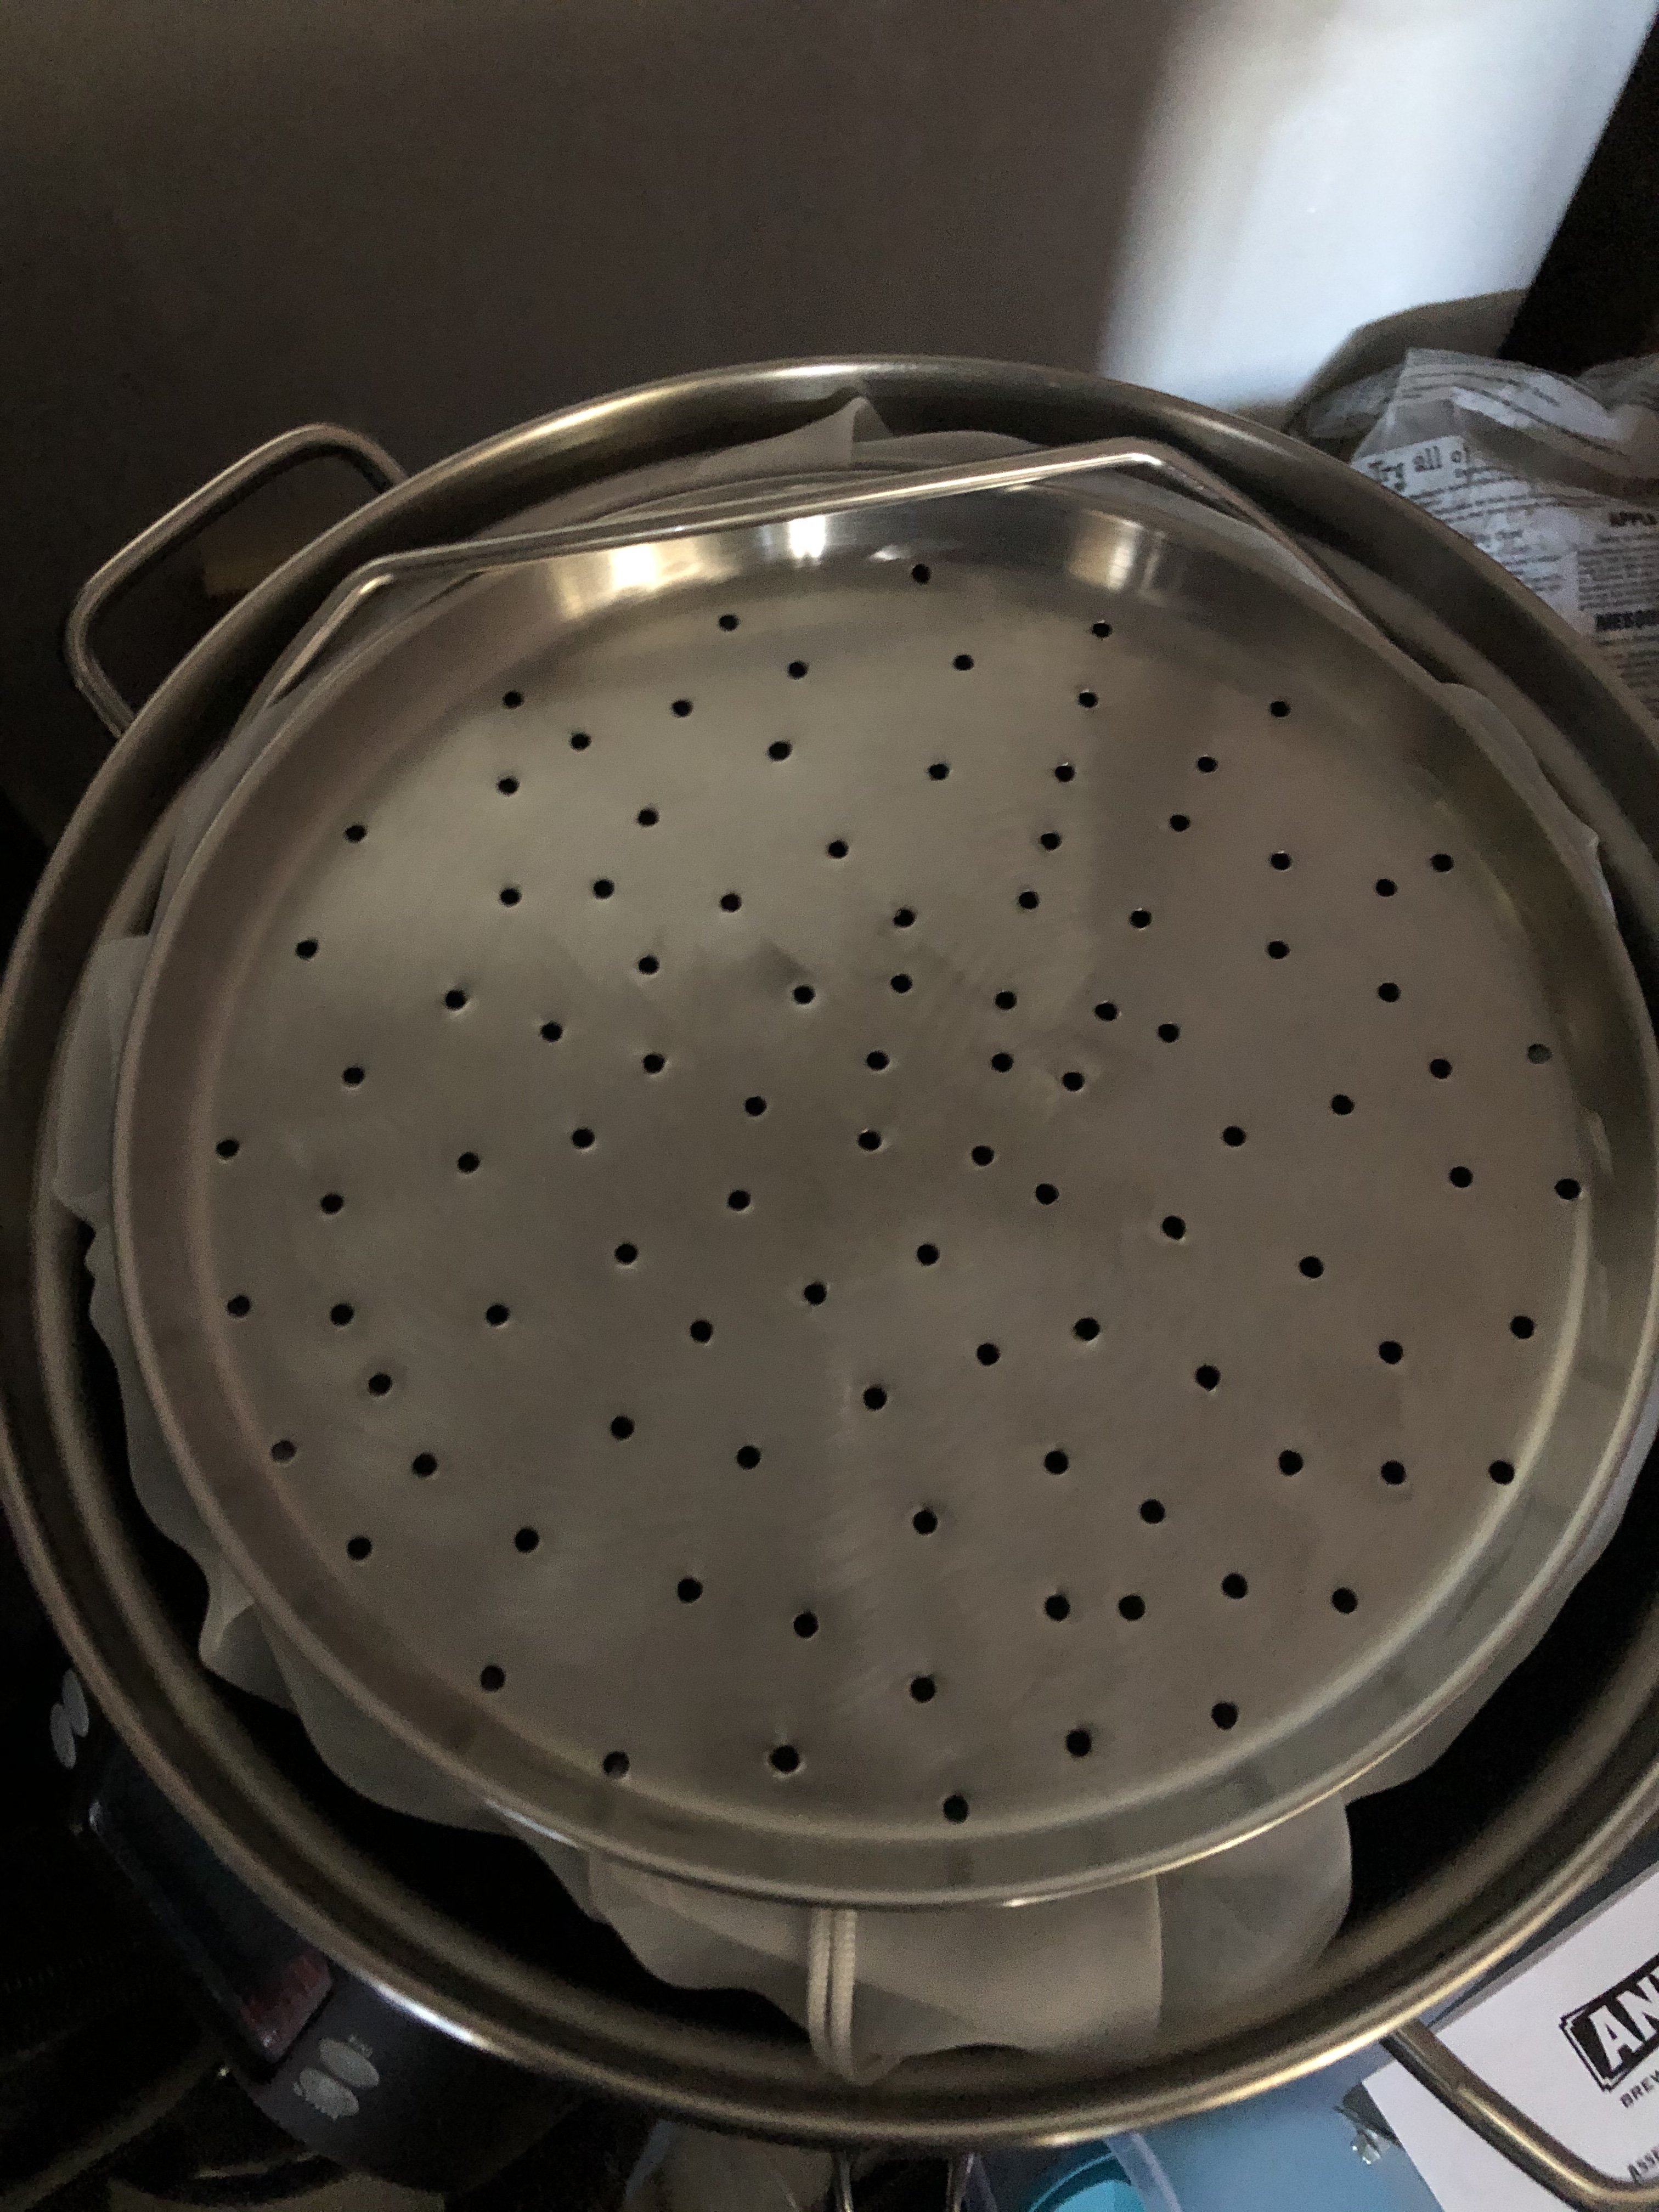
Was able to brew this weekend on my 10.5 and what a great rig so far. I got the recirc kit but haven’t received it so I made a quick screen using stainless burner covers from Walmart that I drilled a bunch of holes in. Worked great, I also used a bag in the malt pipe and everything ran as it was supposed to. The water amounts were spot on, and my only complaint was the strike water took about 15 minutes to drop down to my target temperature of 152 for the mash. So I’ll adjust accordingly next time. No stuck mash, but I’ve got a good idea of wort flow and how to adjust my ball valve on my pump. I figured I shaved off about 2 hours of my brew day with this rig (my hot water comes out at almost mash temp so that helps) and I’m only going to get more efficient with it the more I get used to it.
Attachments
I figured I shaved off about 2 hours of my brew day with this rig
I can't agree enough with this. It saves.me so much time. Let alone cleaning up as I switch between stages of brewing. I did find you kinda need a hop bag / spider if using a fair amount of hops. Regardless I got a new bag and ready to go. 2nd batch done in a month and starting the 3rd batch tomorrow
- Joined
- Jan 17, 2017
- Messages
- 302
- Reaction score
- 131
Was able to brew this weekend on my 10.5 and what a great rig so far. I got the recirc kit but haven’t received it so I made a quick screen using stainless burner covers from Walmart that I drilled a bunch of holes in. Worked great, I also used a bag in the malt pipe and everything ran as it was supposed to. The water amounts were spot on, and my only complaint was the strike water took about 15 minutes to drop down to my target temperature of 152 for the mash. So I’ll adjust accordingly next time. No stuck mash, but I’ve got a good idea of wort flow and how to adjust my ball valve on my pump. I figured I shaved off about 2 hours of my brew day with this rig (my hot water comes out at almost mash temp so that helps) and I’m only going to get more efficient with it the more I get used to it.
That looks like it fits better than the Anvil screen.
These are not all my ideas - I have borrowed many from other users. I preheat to maybe 158 to get 152. Mix the mash in water well before adding the grain and after. I turn the power to 0% when adding grain and let it sit for 10 minutes. Then I set power to about 30%-40%, mix it, start recirculation, and take my pH sample.
Was able to brew this weekend on my 10.5 and what a great rig so far. I got the recirc kit but haven’t received it so I made a quick screen using stainless burner covers from Walmart that I drilled a bunch of holes in. Worked great, I also used a bag in the malt pipe and everything ran as it was supposed to. The water amounts were spot on, and my only complaint was the strike water took about 15 minutes to drop down to my target temperature of 152 for the mash. So I’ll adjust accordingly next time. No stuck mash, but I’ve got a good idea of wort flow and how to adjust my ball valve on my pump. I figured I shaved off about 2 hours of my brew day with this rig (my hot water comes out at almost mash temp so that helps) and I’m only going to get more efficient with it the more I get used to it.
Coming from a traditional all grain setup I'm glad to hear some of the same observations from another brewer. I use Beersmith (have for years and love it) but I'm finding that their defaults just aren't there for an all in one. Strike temps were high and grain absorption was high. I hate getting a new system dialed in but so far I'm very happy with the 10.5 AF. I'm not worried about saving time, it's why I have hobbies, but I do love the easier clean up!
Noob_Brewer
Well-Known Member
Keep in mind that the temp probe for this unit is at the bottom near the element and not in the mash. So its understandable when not recirculating that this water which is below the malt-pipe doesn't change much while doughing in. So I always use my thermapen to check the top of the mash temp right after dough in and again at 10 minutes. With that being said, before dough in, the strike water for me is always equal when comparing the anvil probe vs the thermapen at the top. After dough in it will be cooler at the top compared to the anvil probe, and if not recirculating for the first ten minutes this discrepancy doesn't level out too much. Whats also helped me was that in beersmith I always set the mash tun temp to the strike temp since the water is heated in the unit and then I also adjust my grain temp in beersmith to what the thermapen reads when I put it into my milled grain bucket. This has also helped a lot. In the end, I typically set my temp a little lower than what beersmith predicts to split the difference and hopefully achieve the mash temp I want after dough in. Although I tend to believe that the center of the mash temp is probably somewhere in between the top reading (thermapen) and what the anvil reads. Thats how Ive gone about it. Hope this helps.Coming from a traditional all grain setup I'm glad to hear some of the same observations from another brewer. I use Beersmith (have for years and love it) but I'm finding that their defaults just aren't there for an all in one. Strike temps were high and grain absorption was high. I hate getting a new system dialed in but so far I'm very happy with the 10.5 AF. I'm not worried about saving time, it's why I have hobbies, but I do love the easier clean up!
I used a hop spider with this brew as well and at my 160° hop addition I had to hang the spider off the IC coil for full submersion. Yes the clean up was easy enough considering it was only two vessels but the kettle it a awkward to clean cause of the control panel. Not really a complaint but I just need to get my system downI can't agree enough with this. It saves.me so much time. Let alone cleaning up as I switch between stages of brewing. I did find you kinda need a hop bag / spider if using a fair amount of hops. Regardless I got a new bag and ready to go. 2nd batch done in a month and starting the 3rd batch tomorrow
So part of the reason I left it sit for 15 min was hearing how many issues people were having with stuck mashes, I would probably say 50% of those having issues are probably having it with their pump control and not necessarily the grain bill (my brew was a NEIPA and no issues), that being said on my old system I use to only dough in a few degrees above my mash temp cause after 5-10 min of letting it rest I would start recirculating through the rims tube. Next brew I’ll back down the strike temp to 3-5 above mash temp and start the recirculating at 10 min and see how it goes. Anyhow, what a great thread, tons of info in this.Keep in mind that the temp probe for this unit is at the bottom near the element and not in the mash. So its understandable when not recirculating that this water which is below the malt-pipe doesn't change much while doughing in. So I always use my thermapen to check the top of the mash temp right after dough in and again at 10 minutes. With that being said, before dough in, the strike water for me is always equal when comparing the anvil probe vs the thermapen at the top. After dough in it will be cooler at the top compared to the anvil probe, and if not recirculating for the first ten minutes this discrepancy doesn't level out too much. Whats also helped me was that in beersmith I always set the mash tun temp to the strike temp since the water is heated in the unit and then I also adjust my grain temp in beersmith to what the thermapen reads when I put it into my milled grain bucket. This has also helped a lot. In the end, I typically set my temp a little lower than what beersmith predicts to split the difference and hopefully achieve the mash temp I want after dough in. Although I tend to believe that the center of the mash temp is probably somewhere in between the top reading (thermapen) and what the anvil reads. Thats how Ive gone about it. Hope this helps.
Cheers
I agree on temp differentials when doughing in and have been doing similar to Noob's routine, checking the temps at the top and comparing them to the digital readout. In Beersmith I've always adjusted grain temp as the strike water comes up and made the appropriate change to compensate. I used to also preheat and temp the mash tun and enter that. Now because of the all in one nature I deselect "Adjust Temp For Equipment" as the interior of the mash tun will be the same temp as the strike water as long as you have your grain vessel of choice (bag, pipe or both) in the kettle as the strike water heats up. This makes the mash tun temp irrelevant and reduces the strike temp accordingly. On the second batch my mash temp leveled out much faster, close enough that I think an additional minute or two of stirring will get me there.
I used a hop spider with this brew as well and at my 160° hop addition I had to hang the spider off the IC coil for full submersion. Yes the clean up was easy enough considering it was only two vessels but the kettle it a awkward to clean cause of the control panel. Not really a complaint but I just need to get my system down
I waited until I used the system to order a hop spider as a few I'd seen used with the AF looked awkward. Ended up ordering a 400 micron, 6'x14' steel mesh basket from AHS that has an adjustable hanger. This allows you to really drop it down into the kettle and the size is already confirmed to fit in the IC. Should have it for my next brew day, I'll post up my thoughts.
On the cleaning I've got another idea I'm going to try. I'm going to make a small hose jumper that will connect the pump outlet to a garden hose that I run down to a storm drain. Do an initial flush to get the trub out, then fill it up with about 3 gallons, dump in the appropriate amount of PBW, set it to 130 degrees, put the pump back through the lid with the recirc arm/disc and turn it on. I'll toss everything I can in while it's doing this. Once up to temp the pressure from the pump cycles the warm pbw over everything and gets it spotless with little to no scrubbing. Then connect the pump to the garden hose again and run clean water into the kettle as the pump cycles everything out. Hang to dry and done. In theory anyway.
- Joined
- Jan 17, 2017
- Messages
- 302
- Reaction score
- 131
Coming from a traditional all grain setup I'm glad to hear some of the same observations from another brewer. I use Beersmith (have for years and love it) but I'm finding that their defaults just aren't there for an all in one. Strike temps were high and grain absorption was high. I hate getting a new system dialed in but so far I'm very happy with the 10.5 AF. I'm not worried about saving time, it's why I have hobbies, but I do love the easier clean up!
First this has been an excellent thread for me on dialing in my system.
Temperature probe - I have read elsewhere that the temperature probe in the AF is calibrated to mimic the temperature in the middle of the mash. Seems the more I read there are discrepancies on this.
BeerSmith - I've also been using this too and found it to be far off until I started making adjustments (thanks to @Noob_Brewer I have another adjustment - tun temperature). Will attach my current settings hoping others can help improve on this:


What version of BS are you using? I don't see the ability to deselect "Adjust Temp For Equipment" on your Mash screen? I'm on the older V2 so I'm guessing they got rid of that in which case you will have to enter one manually. (Edit: A little digging indicates that V3 might negate tun temp as long as the equipment profile is properly set to BIAB. This would definitely be worth researching/verifying.)First this has been an excellent thread for me on dialing in my system.
Temperature probe - I have read elsewhere that the temperature probe in the AF is calibrated to mimic the temperature in the middle of the mash. Seems the more I read there are discrepancies on this.
BeerSmith - I've also been using this too and found it to be far off until I started making adjustments (thanks to @Noob_Brewer I have another adjustment - tun temperature). Will attach my current settings hoping others can help improve on this:
View attachment 719769View attachment 719770View attachment 719771
Your BIAB grain absorption also looks really high. I think the default was around 0.56, I've adjusted down to a calculated 0.452 but that's with a healthy squeeze on the bag.

Are you running on 240v? If not the boil off rate of 1.1g/hr will be too high.
And your shrinkage rate is set to 0, I'd go with the default of 4%. This is how much your volume will reduce as you chill from boil to pitching temp and impacts the calculations for batch size into the fermenter.
Last edited:
- Joined
- Jan 17, 2017
- Messages
- 302
- Reaction score
- 131
What version of BS are you using? I don't see the ability to deselect "Adjust Temp For Equipment" on your Mash screen? I'm on the older V2 so I'm guessing they got rid of that in which case you will have to enter one manually. (Edit: A little digging indicates that V3 might negate tun temp as long as the equipment profile is properly set to BIAB. This would definitely be worth researching/verifying.)
Your BIAB grain absorption also looks really high. I think the default was around 0.56, I've adjusted down to a calculated 0.452 but that's with a healthy squeeze on the bag.
Are you running on 240v? If not the boil off rate of 1.1g/hr will be too high.
And your shrinkage rate is set to 0, I'd go with the default of 4%. This is how much your volume will reduce as you chill from boil to pitching temp and impacts the calculations for batch size into the fermenter.
I'm on 240v. Probably not the most accurate but I measure the mash/sparge water volumes with cool water so no need to include 4% expansion compensation.
So do you not worry about pre-boil volume? Always been my understanding that shrinkage is for the back end of the boil, not the cold side.I'm on 240v. Probably not the most accurate but I measure the mash/sparge water volumes with cool water so no need to include 4% expansion compensation.
- Joined
- Jan 17, 2017
- Messages
- 302
- Reaction score
- 131
So do you not worry about pre-boil volume? Always been my understanding that shrinkage is for the back end of the boil, not the cold side.
Don't think I said that. Maybe I'm incorrect but as I understand it the BS volumes start with cool wort in the fermenter and adjust the 4% for heated sparge and mash water.
Do you fill your kettle with cold mash in water and then after it's heated add or deduct to match a volume mark in you vessel?
Here's how I was taught and have always done it. Bring the strike water up to temp, verify your volume for mash in and adjust as necessary. Then if your grain absorption is set up right you'll come to your pre-boil volume. Then if your boil off rate is right you'll hit your post boil volume. Then your batch size, or volume into the fermenter, subtracts shrinkage and any kettle/system losses. The shrinkage rate is calculated on the back end, from boil to pitching temps you will lose roughly 4%. On a 5g batch that's significant enough to factor in. It's been years since I first started brewing with Beersmith, I still use BS2, but when it comes to volumes everything starts with an at temp strike/sparge water volume and subtracts from there.
This doesn't mean my way is the only way. I learned years ago there are several ways to get to the same number when brewing beer.
This doesn't mean my way is the only way. I learned years ago there are several ways to get to the same number when brewing beer.
Yeah I’m def gonna clean it similar to that. I was sinuses to just moving my kettles and cleaning them off my brew stand it was just second nature to me. Will utilize the pump next brew for sure. I’m hindsight I should have waited for the system to get in prior to getting the hop spider but like most here, I wanted to brew ASAPI waited until I used the system to order a hop spider as a few I'd seen used with the AF looked awkward. Ended up ordering a 400 micron, 6'x14' steel mesh basket from AHS that has an adjustable hanger. This allows you to really drop it down into the kettle and the size is already confirmed to fit in the IC. Should have it for my next brew day, I'll post up my thoughts.
On the cleaning I've got another idea I'm going to try. I'm going to make a small hose jumper that will connect the pump outlet to a garden hose that I run down to a storm drain. Do an initial flush to get the trub out, then fill it up with about 3 gallons, dump in the appropriate amount of PBW, set it to 130 degrees, put the pump back through the lid with the recirc arm/disc and turn it on. I'll toss everything I can in while it's doing this. Once up to temp the pressure from the pump cycles the warm pbw over everything and gets it spotless with little to no scrubbing. Then connect the pump to the garden hose again and run clean water into the kettle as the pump cycles everything out. Hang to dry and done. In theory anyway.
Bishop, this process is even easier.Anyone successfully brew a kettle sour in the AF? I've wanted to do one for a while now and searching through this thread I see mention of others planning to try it, but couldn't find anything on success or the process used?
I would think this would be perfect for it, right? Boil the wort 5-10 min, chill and add lactobacillus, plastic wrap the top, clamp down the lid and set it to your preferred temp for a few days. Thinking the element wouldn't need a ton of power, maybe 10-15%. Could it really be this easy with the AF?
Fast Souring - Modern Methods
Just pitch the bugs at the same time you pitch the yeast. Just make sure you don't use any hops. This is what I always forget.

I should have waited for the system to get in prior to getting the hop spider but like most here, I wanted to brew ASAP
Absolutely! I went three years without brewing, when this thing arrived I was itching! Hop spiders are just something I know I'm pretty picky about. They either work for the rig or they don't. The one I ordered apparently has a total depth of 26" which should be perfect and the removable arm should be very beneficial for the cleaning technique I'm envisioning.
Thanks for sharing this! So have you done this? If yes, what was your experience with the flavor of the final beer?Bishop, this process is even easier.
Fast Souring - Modern Methods
Just pitch the bugs at the same time you pitch the yeast. Just make sure you don't use any hops. This is what I always forget.
The one time I tried it I forgot to hold the hops and it didn't sour at all. I've done a couple of Goses and with those I just use the acidulated malt. I have read that it lacks the depth/character, but with added salt and usually other flavors I don't think it makes a big deal. Also, on the thread there are tons of folks who have been successful. Good luck
I have also tried this option with great results: Fruit Beer - Lemon-Lime Hefe Weizen I have this on tap now and plan on doing another one with blueberry lemonade when the keg kicks. I have some sweet mead and 2-1 this beer to mead is awesome.Thanks for sharing this! So have you done this? If yes, what was your experience with the flavor of the final beer?
I have also tried this option with great results: Fruit Beer - Lemon-Lime Hefe Weizen I have this on tap now and plan on doing another one with blueberry lemonade when the keg kicks. I have some sweet mead and 2-1 this beer to mead is awesome.
With only 3 taps (used to have seven) I'm going to try and commit to having at least one on tap that goes over well with a crowd and will definitely give this a try. I was thinking a lime gose or a salted lime lager as well during the hotter months here. Beer!
So to update on this stout. I brewed this today and went very well I think. Not perfect, but well.
In short my process was: 1) ditch the malt pipe, and use the bag only with a brewzilla modified false bottom, 2) mash the 21.75lbs of grain (1lb of rice hulls) for 90 minutes, 3) drain the bag in place by transferring the wort to another (2nd) kettle, 4) sparged 2.25gallons, let drain/pump a little more to 2nd kettle 5) lifted the bag to let the sparged water drain, 6) pump wort back to anvil, 7) one quick/light squeeze of the bag to get about a quart or less to make my pre-boil volume of 8gallons.
As you can see in the pics, the 21.75lbs of grains and 7.5gal of strike water fit well (beersmith estimated about 9.18gallons of space needed) which looked about right. The mash was surprisingly looser than expected (especially compared to the malt-pipe which would likely have been a disaster). The method of draining the wort from the bag was great. Overall, I achieved my best mash/lauter efficiency ever 80% on the nose! rest of the brewday went well.
Watched the torture test by Genus that was posted in this thread and managed to find this post as well as I look into adapting my bigger AVB recipes to the AF. Thanks for sharing this, Noob! I've got three recipes I do pretty regularly that are right at 16lbs that I'm no longer worried about at all. I've also got a 10% stout recipe with 20.63lbs of grains that I feel should be doable.
I've typically mashed this stout in at 1.25qt/lb. Realizing that a full volume mash won't be possible I played around with the numbers tonight on Beersmith. It looks like a 1.45qt/lb ratio would put me at about 9 gallons total mash volume in the kettle and require a 1.3 gallon sparge. I'm not seeing any reason why this couldn't be done with the grain pipe in based on the Genus video and your post. When I did this stout on my previous system I had no issues with a stuck sparge, and that's without rice hulls. At 1.45qt/lb my mash should actually be slightly thinner even after you account for the dead space around the grain pipe.
I'd like to be able to use the grain pipe to keep it simple. I'd much rather sparge through the grain pipe then have to move wort to a 2nd kettle. In fact I'd scale the recipe down before I'd go that route.
So what am I missing?
Noob_Brewer
Well-Known Member
So my first thought about this is...go for it! lol, I love to see peeps push the limits. Ive watched the genus video as well with their barleywine using 20lbs of grains (they later added rice hulls to). Special note is that they also had 3-4 stuck mashes throughout the mash even with recirculating at a seemingly appropriately slow rate. So just know, you will be battling this a little bit Id think. So from my experience with the anvil and using beersmith as well here are some things to think about:Watched the torture test by Genus that was posted in this thread and managed to find this post as well as I look into adapting my bigger AVB recipes to the AF. Thanks for sharing this, Noob! I've got three recipes I do pretty regularly that are right at 16lbs that I'm no longer worried about at all. I've also got a 10% stout recipe with 20.63lbs of grains that I feel should be doable.
I've typically mashed this stout in at 1.25qt/lb. Realizing that a full volume mash won't be possible I played around with the numbers tonight on Beersmith. It looks like a 1.45qt/lb ratio would put me at about 9 gallons total mash volume in the kettle and require a 1.3 gallon sparge. I'm not seeing any reason why this couldn't be done with the grain pipe in based on the Genus video and your post. When I did this stout on my previous system I had no issues with a stuck sparge, and that's without rice hulls. At 1.45qt/lb my mash should actually be slightly thinner even after you account for the dead space around the grain pipe.
I'd like to be able to use the grain pipe to keep it simple. I'd much rather sparge through the grain pipe then have to move wort to a 2nd kettle. In fact I'd scale the recipe down before I'd go that route.
So what am I missing?
1) As long as the total mash volume is at or below ~9.3 gallons (taking grains and mash water into account based on beersmith estimates), your water/wort level will be just below the malt ring where the recirculation disc sits. Ive hit this mark plenty and wouldn't recommend going above much otherwise the wash water will go above the disc. You stated you would be at 9gallons so you should be good to go.
2) I'm not sure how you calculated the mash thickness but (unless my equipment/mash profile is off) the beersmith calculated mash thickness takes into account ALL kettle water which gives the illusion of a thinner mash when its not. Make no mistake about it, if you bring 20+lbs of grain/hulls to the party, this is going to be THICK. So Ive estimated the volume of the malt-pipe to be ~6.97gallons based on the diameter of 10.125inches and 20inches in height if its filled to the brim (using volume of a cylinder equation). Its closer to 6.45gallons is you estimate the height of the malt-pipe to be 18.5inches (just below where the recirc disc sits). So Ill use one of my previous brews as an example here where I brought 19lbs of grain&hulls to the party (Double NEIPA) and beersmith tells me that 19lbs equates to taking up ~1.48gallons of space. So, even if you use my ~7gallons volume in the malt pipe which is generous, that leaves 5.5gallons space in the malt pipe for water. So 19lbs of grain + 5.5 gallons of water equates to ~1.16qt/lb inside the malt pipe. Beersmith told me that my mash thickness would be 1.7qt/lb because it uses all water in the kettle. In that recipe I had 7.86 gallons total of strike water and 1.5gallons of sparge. So my point is that your mash thickness inside the malt-pipe will be thicker than what you'd expect and it also substantiates why Genus had issues with stuck mashes too.
3) Remember, in comparison to your previous mash tun/brewery setup, your previous mash tun was wider for sure and the anvil is narrow (malt-pipe narrower). So even if the mash thickness is equal, your chances of grain compaction are still higher on the foundry because theres more grain stacked on itself vertically. So its difficult to compare mash thickness IMO on two different systems where the mash tun geometry is different, its not an apples to apples comparison.
Again, I say go for it despite all this!
") Keep us posted. I think that worst case scenario, you have to stir more often on this to prevent/remedy the stuck mashes, it will be more work as you are at the limit of the anvil for sure. But you could also say screw it, stop recirc all together, wrap it up and just let it mash as well to avoid compaction.
Keep us posted. I think that worst case scenario, you have to stir more often on this to prevent/remedy the stuck mashes, it will be more work as you are at the limit of the anvil for sure. But you could also say screw it, stop recirc all together, wrap it up and just let it mash as well to avoid compaction.BTW I can't remember, you are using a bag in the malt-pipe yes? I think this would help as well if stirring more so less flour gets through to the element on the bottom. But - you probably will have more flour than normal on the element due to more stirring and agitating the grains anyways.
In the end it will be beer! I started brewing only a little over a year ago and this anvil is my first and only system, so you have more experience overall than me. Hope my experiences here helps.
Cheers!
So my first thought about this is...go for it! lol, I love to see peeps push the limits. Ive watched the genus video as well with their barleywine using 20lbs of grains (they later added rice hulls to). Special note is that they also had 3-4 stuck mashes throughout the mash even with recirculating at a seemingly appropriately slow rate. So just know, you will be battling this a little bit Id think. So from my experience with the anvil and using beersmith as well here are some things to think about:
The only thing I would be concerned with running that much volume mostly would be the handle getting it out. you have to imagine that there is an excessive amount of weight with grains + water until it begins to drain out. All that aside I do not see much else that could pose problematic other than stuck mash etc. ALSO if it is so full the grain is not really floating at any point so to speak it can add water + grain weight and potentially crush the legs?
Just things to keep an eye on. Although its for science so I'm all about it!
2) I'm not sure how you calculated the mash thickness but (unless my equipment/mash profile is off) the beersmith calculated mash thickness takes into account ALL kettle water which gives the illusion of a thinner mash when its not. Make no mistake about it, if you bring 20+lbs of grain/hulls to the party, this is going to be THICK. So Ive estimated the volume of the malt-pipe to be ~6.97gallons based on the diameter of 10.125inches and 20inches in height if its filled to the brim (using volume of a cylinder equation). Its closer to 6.45gallons is you estimate the height of the malt-pipe to be 18.5inches (just below where the recirc disc sits). So Ill use one of my previous brews as an example here where I brought 19lbs of grain&hulls to the party (Double NEIPA) and beersmith tells me that 19lbs equates to taking up ~1.48gallons of space. So, even if you use my ~7gallons volume in the malt pipe which is generous, that leaves 5.5gallons space in the malt pipe for water. So 19lbs of grain + 5.5 gallons of water equates to ~1.16qt/lb inside the malt pipe. Beersmith told me that my mash thickness would be 1.7qt/lb because it uses all water in the kettle. In that recipe I had 7.86 gallons total of strike water and 1.5gallons of sparge. So my point is that your mash thickness inside the malt-pipe will be thicker than what you'd expect and it also substantiates why Genus had issues with stuck mashes too.
This right here is the only real unknown and I planned to do a similar calculation to find out exactly what's lost on the outside of the grain pipe. I mentioned that set at 1.45qt/lb on BS it seemed feasible, but based on your math that will still drop me below the 1.25qt/lb I've used previously when you consider that wort sitting in limbo. If I can push it to 9.3g total mash that puts me damn close though.
I do use a bag and think that would help, I don't need to worry about the disc. And I had the same thought, maybe not bother recirculating at all. I usually brew this end of July, beginning of August so we're talking 90's in the garage here. With the door closed easily over 100F. I'd guess minimal temp loses during the mash given that fact. And since I'll be sparging with a batch this big I should still hit my OG, or close enough to call it good.
Another big difference is I'm not shooting for a 4-5 hour boil like Genus was so my volumes will be lower. And on 120 my boil off is low, further reducing the amount of volume needed. So sparging through the grain pipe should also be easy enough as I'll still only be targeting 6.3g pre-boil.
I'd like to do the whole 5.25 gallons, I usually split it in half and age them on something different. We'll see how it goes later this summer!

The only thing I would be concerned with running that much volume mostly would be the handle getting it out.
I totally agree. I'm planning to put a cheap rope hoist on the ceiling in the garage soon for this reason.
- Joined
- Jan 17, 2017
- Messages
- 302
- Reaction score
- 131
I totally agree. I'm planning to put a cheap rope hoist on the ceiling in the garage soon for this reason.
Why not use a false bottom and bag that fits the kettle? Allows some more space for your grain. I have done this successfully with smaller grain bills and it works fine. I use a ratcheting hoist to drain over the kettle and then move the bag over a cooler, pour sparge water over it, dunk it a few times, and drain.
Not arguing that wouldn't work as well. But I already paid for the grain pipe. And the Brew Bag that fits it. 99% of my recipes will work as is with no problem.
I'm trying to avoid sparging, mostly because I'm lazy and the whole goal with the AF was simplicity. If I do need to sparge I'd much rather pour it through the grain pipe then move a bunch of stuff around and use an additional kettle or cooler.
Care to share the hoist you use? I'm seriously considering a cheap electric because I have other uses for it in the garage beyond brewing.
- Joined
- Jan 17, 2017
- Messages
- 302
- Reaction score
- 131
Yeah I see your reasoning. I bought the hoist with my bag that fits inside the pipe from brewinabag.com. Then of coarse I see brewers starting to use false bottoms and no pipe so I bought another bag since the pipe bag was just a wee bit too small. The full kettle bag is from Wisler biabbags.webs.com. It was more economical than The Brew Bag.Not arguing that wouldn't work as well. But I already paid for the grain pipe. And the Brew Bag that fits it. 99% of my recipes will work as is with no problem.
I'm trying to avoid sparging, mostly because I'm lazy and the whole goal with the AF was simplicity. If I do need to sparge I'd much rather pour it through the grain pipe then move a bunch of stuff around and use an additional kettle or cooler.
Care to share the hoist you use? I'm seriously considering a cheap electric because I have other uses for it in the garage beyond brewing.
The full kettle bag is from Wisler biabbags.webs.com. It was more economical than The Brew Bag.
https://biabbags.webs.com/
Hopefully that link works. I have several of these, I love them. Less $ than the other big site, and while more than Amazon bags they are also better. For me it hits the sweet spot for price / quality. (I've got no affiliation with Wilser just really happy w/ the product).
Similar threads
- Replies
- 12
- Views
- 769
- Replies
- 14
- Views
- 1K
- Replies
- 27
- Views
- 3K
- Replies
- 4
- Views
- 1K
