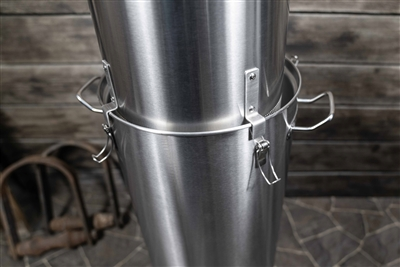
ANVIL FOUNDRY ALL-GRAIN BREWING SYSTEM

Homebrew Talk - Beer, Wine, Mead, & Cider Brewing Discussion Forum

Help Support Homebrew Talk - Beer, Wine, Mead, & Cider Brewing Discussion Forum:

This site may earn a commission from merchant affiliate links, including eBay, Amazon, and others.
I bought a flow control valve from Amazon.
2-Pack In-Line Barbed Ball Valve 13mm For 1/2 Inch Tubing .520 ID - Regulate and Shut-Off/On Water Flow
Quick to open-close-control flow.
 
Im totally with you on the clamp to control flow. I recently added a ball valve myself to finally, after over 30 brews with the clamp, have an easier way to control flow. In the beginning, the clamp was "ok" but as the more I brewed, I found myself fidgeting with it constantly to get the flow I wanted. After a while it just seemed that the tubing would bulge outside of the clamp. So this is how I configured it. (ball valve was brewers hardware).

View attachment 716004
@Noob_Brewer I'm liking that return through the top of the lid. Is that from a different post on the thread? I'm guessing soldered the TC port on top. What do you use on the inside to keep the spray from compacting the grain bed? Sorry for all of the questions, but it looks really good.
 
For the spigot- forget what it’s called but it’s some kind of straight thread pipe. Many (including me) wrap it with several layers of Teflon tape and turn a female 1/2” NPT QD onto it.

Can't say for sure but it sounds like a 1/2" straight thread. Sometimes called BSPP (Brit Std Parallel Pipe I think), or "G Thread". It's what you see on shower hose connections, sometimes sink stuff. Sometimes things work, sometimes need a lot of tape, sometimes you can find a connection like the Blichmann quick-connects that have a big o-ring inside, and though they aren't necessarily intended for straight thread they can sometimes work. Rubber washers may work too, like shower hose connections have, to force the sealing to an area other than the threads themselves.
 
@Noob_Brewer I'm liking that return through the top of the lid. Is that from a different post on the thread? I'm guessing soldered the TC port on top. What do you use on the inside to keep the spray from compacting the grain bed? Sorry for all of the questions, but it looks really good.
I haven't posted this recent mod that I made yet, but I have loc line on the return on the inside such that I can adjust the line to calmly discharge to below the wort level. Pic is just doing a water test but I did use it this past brew and worked great. The 1.5" TC port is actually weldless from brewhardware. The foundry lid already has a 1.5" predrilled hole for those who want to use it for distilling. Simply unscrew the lid handle to remove the metal pieces and it leaves a perfect fitting hole for the 1.5" TC port.
IMG_9186.jpg
 
I haven't posted this recent mod that I made yet, but I have loc line on the return on the inside such that I can adjust the line to calmly discharge to below the wort level. Pic is just doing a water test but I did use it this past brew and worked great. The 1.5" TC port is actually weldless from brewhardware. The foundry lid already has a 1.5" predrilled hole for those who want to use it for distilling. Simply unscrew the lid handle to remove the metal pieces and it leaves a perfect fitting hole for the 1.5" TC port. View attachment 716065
That's great! Was this the adapter you're using to get the quick disconnect and locline attached?
 
Simply unscrew the lid handle to remove the metal pieces and it leaves a perfect fitting hole for the 1.5" TC port.

I have found, via someone else (here I think) that the 2" actually fits perfectly. the 1.5" fits, but it's a touch loose. Works but the 2" is perfect.

It's really counter-intuitive because the 2" is not a 1/2" bigger than the 1.5 in this area, the room needed in the lid to go through.

FYI if anyone cares.
 
Hey does anyone know what size of quick disconnect I would need for the valve? Wanting to upgrade but I’m not sure what to measure. Is it a 1/2” female for the foundry side? Also want to add a valve for flow control instead of this clamp thing that sucks. Anyone find a decent one on Amazon or anything? I was thinking of putting one right where the hose disconnects from the valve as well, every time I disconnect it before the boil I get a bunch of hot wort spilling everywhere. Thx
This is what I bought and works great: https://www.amazon.com/gp/product/B079ZRH8FZ/ref=ppx_yo_dt_b_asin_title_o08_s00?ie=UTF8&psc=1
 
I have found, via someone else (here I think) that the 2" actually fits perfectly. the 1.5" fits, but it's a touch loose. Works but the 2" is perfect.

It's really counter-intuitive because the 2" is not a 1/2" bigger than the 1.5 in this area, the room needed in the lid to go through.

FYI if anyone cares.
I think you are right that someone here used the 2" TC. Honestly though, the 1.5" seems to be great. I tightened down the locking nut on the underside and theres absolutely no wiggle room whatsoever. I do think the silicone oring helps to seal it perhaps.

Cheers
 
I haven't posted this recent mod that I made yet, but I have loc line on the return on the inside such that I can adjust the line to calmly discharge to below the wort level. Pic is just doing a water test but I did use it this past brew and worked great. The 1.5" TC port is actually weldless from brewhardware. The foundry lid already has a 1.5" predrilled hole for those who want to use it for distilling. Simply unscrew the lid handle to remove the metal pieces and it leaves a perfect fitting hole for the 1.5" TC port. View attachment 716065

So assumption is that you're no longer utilizing the mash basket plate, just putting the loc line end into the wort so that it doesn't create channels in the mash?

If so..this looks really interesting, but I've got camlocks. I was poking around on the site to see if he (Bobby) had anything similar with a cam lock fitting, or perhaps even an adapter for this QDC to Camlock, but that doesn't appear to be the case..until I just utilized the damn search function!

https://www.brewhardware.com/product_p/mashrecirculationtc15xcam.htm

This is correct. When I did this for a couple of brews I was suspending the disc in mid air by attaching the disc to SS wire secured to the handles. I showed pics of that on my imperial stout in this thread somewhere. It worked but was a little bit of a PITA as it tilted a lot and was just a little cumbersome to me. This way, I don't need it at all. When recirculating with the loc line, I still recirc relatively slow (about 0.5gpm) and it discharges under the wort level kind of sideways and not straight down so the grain bed isn't disturbed. Haven't been concerned about channeling at all.
 
This is correct. When I did this for a couple of brews I was suspending the disc in mid air by attaching the disc to SS wire secured to the handles. I showed pics of that on my imperial stout in this thread somewhere. It worked but was a little bit of a PITA as it tilted a lot and was just a little cumbersome to me. This way, I don't need it at all. When recirculating with the loc line, I still recirc relatively slow (about 0.5gpm) and it discharges under the wort level kind of sideways and not straight down so the grain bed isn't disturbed. Haven't been concerned about channeling at all.

Any chance you took a stab at whirlpooling w/this thing too? Seems like it might work?
 
Any chance you took a stab at whirlpooling w/this thing too? Seems like it might work?
Ha! I hadn't thought of that! Its long enough to bend it to try it out but it won't reach down in the wort that far. I actually use the spin cycle overboard from @Bobby_M for chilling. Helps a ton! I actually don't whirlpool when hop steeping, I like my hops roaming free and my pump clogged once or twice doing it, so I just let them steep and haven't noticed a difference. For giggles, I might try this though with water just to see how it would work out. Don't think I can post videos on this forum though could I?
 
Ha! I hadn't thought of that! Its long enough to bend it to try it out but it won't reach down in the wort that far. I actually use the spin cycle overboard from @Bobby_M for chilling. Helps a ton! I actually don't whirlpool when hop steeping, I like my hops roaming free and my pump clogged once or twice doing it, so I just let them steep and haven't noticed a difference. For giggles, I might try this though with water just to see how it would work out. Don't think I can post videos on this forum though could I?

Yeah..I have the same. I had him put a cam lock fitting on mine, so I was pretty happy finding that same recirculation bit you have, but with a cam lock fitting instead. I ordered one a short time ago. Thanks for sharing this, pretty excited to see how it works out. I've really hated lifting out that stupid plate to stir the mash and have often wondered how many times I'd be able to lift out, push back into place before the bag I'm using rips because of it.
 
I’m planning on a first brew this weekend with my 6.5, the manual mentions a PBW cleaning but also barkeepers friend.

Will a PBW clean be sufficient to get this thing ready to brew? I don’t use the pump. Just want to make sure to get any grease or manufacturing oils off it.

thx!

For the AF, being stainless steel it's recommended to periodically passivate the metal after using a cleaner like PBW/Oxy+TSP.

Barkeeper's friend does this passivation. A StarSan or similar acid sanitizer would also.
 
Hi guys , I got my anvil today. I’m missing the holder for the mash basket when you lift it. Has anyone had that happened?
 
Hi guys , I got my anvil today. I’m missing the holder for the mash basket when you lift it. Has anyone had that happened?
If you are talking about the handle on the basket, that would be odd. Give them a call.

If you are talking about the basket support ring, they redesigned the basket and eliminated the ring.
1611951650390.png
 
Is there a repository somewhere for all of the mods that folks have done to their AF setup? Thanks!
This thread IS the repository lol. I agree its kind of a PITA to search long threads though. Beware, long and probably boring post here! ;)

I honestly think this is what I like most about the AF is that it is modifiable friendly and flexible for users to mod and brew how they want. In this thread you will mostly find one of three main types of people from what Ive gathered here: 1) people who have brewed for years on other 3V (propane or electric) or BIAB propane systems who now bought the foundry for its simplicity, electricity, and to have easier brewdays with the option to brew indoors, 2) people (like myself) who bought this as a gateway into brewing who started out with ZERO other equipment, and 3) people who are like #1 and decided to mod the unit using some equipment they already had (like a pump for example) for a variety of reasons.

IMO, out of the box, (depending on whether you bought the recirc package or not) this unit does a great job at allowing new people like myself to learn brewing and make good beers along the way. Since I fall into the category #2 from above, I've made some modifications that have allowed me a little better perceived control on brewday, make BIG OG beers, or simply made me happy because its fun lol. Here is a list of modifications that I have either made to the AF itself or to the general brew "setup":

Modification #1: brewzilla false bottom (morebeer.com) and wilser bag. This allows me to brew without the malt-pipe. The upsides of this modification? There's a couple: I believe you get much better homogenous wort (no water not mixing with the wort on the sides of the malt-pipe) and more stable and responsive temperatures overall. My conversion efficiencies have been slightly better than just using the bag inside the malt-pipe. Without the malt-pipe and with the bag, I crush at 0.030", use some rice hulls, and have had no worries about a stuck mash. If you put ~17-19lbs of grain in the malt-pipe, its doable, but you need to stir often to avoid this IMO. Last upside is that you can use more grain. Ive posted in this thread my RIS I brewed with this mod and fit over 21lbs of grain in the kettle with no issues. The downside of this modification? If you want to sparge, you need to make some other additional modification lol. The malt-pipe is SUPER easy to sparge with the ring, but I now had to find a way to sparge (when not able to do full volume mashes) with just the bag. (see modification #3)

Modification #2: added an in-line ball valve. Why? Better and quicker and more repeatable control of recirculation during mash and/or draining for the sparge. I liked the simplicity of the clamp, but over ~30 brews, I grew tired of the clamp to get t he exact slow flow that I wanted. Ball-valves are easier to adjust hands down. This mod simply made my brew day much easier and less fidgeting with the damn clamp! lol.

Modification #3: added a second kettle to drain the mash to the kettle and sparge with the bag (mod#1) in place. Without using the malt-pipe this is a necessity OR you could try putting the bag in a colander/bucket etc, do dunk sparge etc. That didn't appeal to me. Now when I sparge, I drain to the second kettle at a slow pace and when the water line gets close to or at the top of the grain bed, I slowly add 1 qt at a time sparge water. So this is like a manual or "poor mans" fly sparge. Once I add the sparge water to the bag and grains, I wait about 5minutes then hoist the bag for draining. When I hoist the bag it is much lighter as I have typically 6 or so gallons in the second kettle. Once the bag is hoisted, I pump the wort back to the anvil foundry.

Modification #4: replaced the recirc disc and added loc line through the top of the lid to allow the recirc to discharge below the wort line. When I switched to the bag and false bottom, I was suspending the disc with SS wire to the handles. It worked but, I was fidgeting with it lots, had to mode it if I wanted to stir, and was just a little too much of a PITA. My post in this thread here: ANVIL FOUNDRY ALL-GRAIN BREWING SYSTEM shows me using the disc before I got the loc-line. Again it was functional though.

Modification #5: Use spin cycle overboard from brew hardware.com for chilling. I bought the non-modified version and the white plastic clips hold the hose onto the spin cycle well. This mod was a HUGE help for chilling in the NC summer rather than me stand there and move around the chiller manually which I grew old of doing lol.

So - those are my mods that I have done overall and why I did them. Are any necessary to make good beer? Nope. But I believe that my beer has improved overall and I simply enjoy this process better now. FWIW, if you are interested in efficiencies, most of my brews were simply using the wilser bag in the malt-pipe before completing mods 1, 2, 3, and 4. I got solid mash/lauter efficiencies (~75-76% typically). With this current setup, Ive been ~80-82% (if sparging). I didn't really make these mods just to increase efficiencies though but I thought some people just might want to know.

Cheers!
 
Last edited:
This thread IS the repository lol. I agree its kind of a PITA to search long threads though. Beware, long and probably boring post here! ;)
...
Cheers!
Hey thanks for that! I was afraid that this was the repository, now I know :) I'm your cat #1 brewer. Been brewing since 2004, but decided I wanted to try this electricity stuff lol
 
Hi All, has anyone carried or lifted a full foundry? My brew room is in the basement, but I'ld like to brew upstairs tonight while having movie night with my kids. I'll have to take the foundry down to my brew room to hook up the chiller. I'm not worried about managing the weight (its only a 2.5 gallon batch and I did this with an SS BrewTech kettle many times), but I am worried about the handles breaking! Thanks!
 
Hi All, has anyone carried or lifted a full foundry? My brew room is in the basement, but I'ld like to brew upstairs tonight while having movie night with my kids. I'll have to take the foundry down to my brew room to hook up the chiller. I'm not worried about managing the weight (its only a 2.5 gallon batch and I did this with an SS BrewTech kettle many times), but I am worried about the handles breaking! Thanks!

Maybe wrap it in a towel if it's hot and then hold it from underneath to support it?
 
Hi All, has anyone carried or lifted a full foundry? My brew room is in the basement, but I'ld like to brew upstairs tonight while having movie night with my kids. I'll have to take the foundry down to my brew room to hook up the chiller. I'm not worried about managing the weight (its only a 2.5 gallon batch and I did this with an SS BrewTech kettle many times), but I am worried about the handles breaking! Thanks!

I have been in an unfortunate situation to have “needed” to lift an AF with a full 5.5G batch on top of a chest freezer so I could transfer to my fermenter. The handles will hold just fine.
 
Adding some ball valves to the pump kit to better control the flow and prevent spills when disconnecting. What are you guys using for hose clamps?
Thinking something like this would work to protect the soft silicone. Thoughts?
 
yeah good point, I'm currently just doing that on my kitchen counter, but you do have to also accommodate for draining the wort into fermenter. I'm on the 6.5 brewing today making a partial boil pilsner with 8.5lbs of grain and the grain basket wasn't too heavy to pull out. I'm just using a stepstool I have.

How would you drain this thing if it was lower to the ground? I use a SS brewbucket.
 
Last edited:
Forgive me all for this rather shameless re-post, but I was worried it got lost in the above...
Plus, I ordered a chiller.
Again- thanks to all who have contributed here already. I did read ALL of the posts in this thread (it took about a week over some time).

Took a few days, but i just finished this thread. Many thanks to all that have provided input so far.
I ordered an AF 10.5 on the last day of 10% sale. I opted for the pump, too.
It has not shipped yet, but no worries. I want to get prepped in the mean time.
I have a couple of questions for you all... I think these have not be answered in the above, or they are extensions based on what I've read over the last 1,463 posts.
So- forgive me if these have been answered. Many thanks to @Noob_Brewer , especially post 1462 above (and others) for some great points.

#1: Hop Spider/Basket. I think it is best to plan on containing hop material if I can. Is there a recommended length for the hop spider (I am using this in a generic term). I plan on hop-stands, so I think it should fit inside the chiller, correct? How deep of length can I go? Is there an item where a lot of items will do basically the same thing?

#2: Hose Connects. I am sure I need & want these for ease of use. I have not used before- what is difference between 'camlock' and 'quick disconnect'? Is there an easy spot to get a crash course on these? What size should I need for the AF hoses?

#3: Chiller. I have not used an immersion chiller before. I am not opposed to the C.U.S.S. price (that all-in-one tricool looks sexy) but any other brands/options out there? I plan on using the included chiller for a bit first. Follow-up: What are the issues with the hoses/tubing? Should I order a different type hose/tubing? Will the connects mentioned above in #2 help this? *Update- I decided to go ahead and order the CuS.S. chiller. It was similar to the Hyrda, and about $30 cheaper after shipping.

#4: Power. I decided on the AF due in large part to the flexibility of 120/240. I do not want to cut the cord- I like the idea of the adapter plug shown above. However- my only 240 plug is my dryer plug- it is a 4-prong plug (see picture. bad quality, sorry). What are my options for this? I assume I need a 4-prong plug... but I am only used to the 3-prong 120. I will purchase a 220 GFCI of course. 20 Amp is enough, yes?

#5: Whirlpool arm: I like the BrewHardware Spincycle Overboard- when it comes in stock, I will grab it (and get the proper connect for it, too). BUT- what size is best for the 10.5 AF? the 12" or the 18"? I assume I can get the 18" and just have it stick up higher, right?


Many thanks again to all of you who have posted on here. As I use my AF 10.5 I will be happy to share results and tips here.

20210128_085850.jpg
 
Last edited:
Hop Spider - biggest that will fit, and yes bonus if it fits in the chiller. 6 x 14 for starters, and that may simply be enough. I like 400 micron (vs. 300) to make sure a little more water moves through it.

Connections - look up Cam lock to see how it works, and QD's too for that matter. Seeing them should make it explanatory. You can start with just hose clamps for now, see what you want later if anything. For hose clamps though I'm a fan of the stainless worm drive clamps with a built-in key. Look for 3/4" or so. Or just start with what Anvil gave you, they work. but no need to get ahead on this one, you'll be fine if you wait.

Chiller - cool, the more copper, the better. Flow rate through it and chill water temp are a factor. Bonus if you can use a pump to whirlpool the wort past the chiller.

Adapter - big subject to get right. There are a number of DIY's, start there. If they make sense, and you are comfortable, maybe go for it. Otherwise... maybe hire someone for more advice. Not the best answer (for a fun hobby), but in a way, it is (i.e. safety).

Whirlpool - longer w/ adjustability is ideal so you can decide where to end up with it. And you'll be fine without it, it's just nice to have. Feel free to brew before it arrives.

Choose a simple recipe too. Like a 2-row, Cascade hopped, pale ale. Maybe even dry yeast. Don't go for a NEIPA w/ a yeast starter your first time out. Ease into things.
 
Forgive me all for this rather shameless re-post, but I was worried it got lost in the above...
Plus, I ordered a chiller.
Again- thanks to all who have contributed here already. I did read ALL of the posts in this thread (it took about a week over some time).

Took a few days, but i just finished this thread. Many thanks to all that have provided input so far.
I ordered an AF 10.5 on the last day of 10% sale. I opted for the pump, too.
It has not shipped yet, but no worries. I want to get prepped in the mean time.
I have a couple of questions for you all... I think these have not be answered in the above, or they are extensions based on what I've read over the last 1,463 posts.
So- forgive me if these have been answered. Many thanks to @Noob_Brewer , especially post 1462 above (and others) for some great points.

#1: Hop Spider/Basket. I think it is best to plan on containing hop material if I can. Is there a recommended length for the hop spider (I am using this in a generic term). I plan on hop-stands, so I think it should fit inside the chiller, correct? How deep of length can I go? Is there an item where a lot of items will do basically the same thing?

#2: Hose Connects. I am sure I need & want these for ease of use. I have not used before- what is difference between 'camlock' and 'quick disconnect'? Is there an easy spot to get a crash course on these? What size should I need for the AF hoses?

#3: Chiller. I have not used an immersion chiller before. I am not opposed to the C.U.S.S. price (that all-in-one tricool looks sexy) but any other brands/options out there? I plan on using the included chiller for a bit first. Follow-up: What are the issues with the hoses/tubing? Should I order a different type hose/tubing? Will the connects mentioned above in #2 help this? *Update- I decided to go ahead and order the CuS.S. chiller. It was similar to the Hyrda, and about $30 cheaper after shipping.

#4: Power. I decided on the AF due in large part to the flexibility of 120/240. I do not want to cut the cord- I like the idea of the adapter plug shown above. However- my only 240 plug is my dryer plug- it is a 4-prong plug (see picture. bad quality, sorry). What are my options for this? I assume I need a 4-prong plug... but I am only used to the 3-prong 120. I will purchase a 220 GFCI of course. 20 Amp is enough, yes?

#5: Whirlpool arm: I like the BrewHardware Spincycle Overboard- when it comes in stock, I will grab it (and get the proper connect for it, too). BUT- what size is best for the 10.5 AF? the 12" or the 18"? I assume I can get the 18" and just have it stick up higher, right?

20210128_085850.jpg

Many thanks again to all of you who have posted on here. As I use my AF 10.5 I will be happy to share results and tips here.

#4 I built a plug from these items for 240 volt, that works fine.
gfci
plug

nema 10-30p

12/3 600 volts flexible cable.


#5 I use whirlpool arm brewhardware.com
 
#4 I built a plug from these items for 240 volt, that works fine.
gfci
plug

nema 10-30p

12/3 600 volts flexible cable.
Thank you- now I notice the link you show is a three-prong to go into the 220V outlet. My outlet appears to be a four-prong plug. I guess what I do not understand is what is the difference between the 3-prong and 4-prong?
20210128_085850.jpg
 
Thank you- now I notice the link you show is a three-prong to go into the 220V outlet. My outlet appears to be a four-prong plug. I guess what I do not understand is what is the difference between the 3-prong and 4-prong?
View attachment 716634
I'm no electrician, but one is neutral and one is for ground. you don't use the neutral.

Here's a good video to help some.

240 plug video

It's pretty easy to do. But I've wired outlets etc in my house before.
 
Im totally with you on the clamp to control flow. I recently added a ball valve myself to finally, after over 30 brews with the clamp, have an easier way to control flow. In the beginning, the clamp was "ok" but as the more I brewed, I found myself fidgeting with it constantly to get the flow I wanted. After a while it just seemed that the tubing would bulge outside of the clamp. So this is how I configured it. (ball valve was brewers hardware). At about 30 degrees of the valve turning open, I calculated a flow of about 30 seconds per quart equating to 0.5 gal per minute. Very easy to achieve the flow I want without fidgeting with the clamp.

View attachment 716004
Awesome mod! I'm working on a copper whirlpool arm and going to use it as is from there to hone in the numbers and the new process.

1st brew session was a couple weeks ago. So much easier than my old 2 vessel system. Almost felt like I was missing a part of the process. 😂
 
Back
Top