Another Fermentation chamber build

Homebrew Talk - Beer, Wine, Mead, & Cider Brewing Discussion Forum

Help Support Homebrew Talk - Beer, Wine, Mead, & Cider Brewing Discussion Forum:

This site may earn a commission from merchant affiliate links, including eBay, Amazon, and others.

E_Marquez

Well-Known Member
Joined
Jun 18, 2013
Messages
444
Reaction score
51
Location
KEMPNER
The internet is free, so why NOT add yet another DIY Fermentation chamber build.

My desire to control Fermentation temps was going to involve a STC1000 digital controller in a box with receptacle and a old side by side refrigerator.


Then, things changed, the fridge was called into duty as a water bottle cooler in my garage. And a 7.9 CF freezer a few years old was offered for $45.. SOLD.

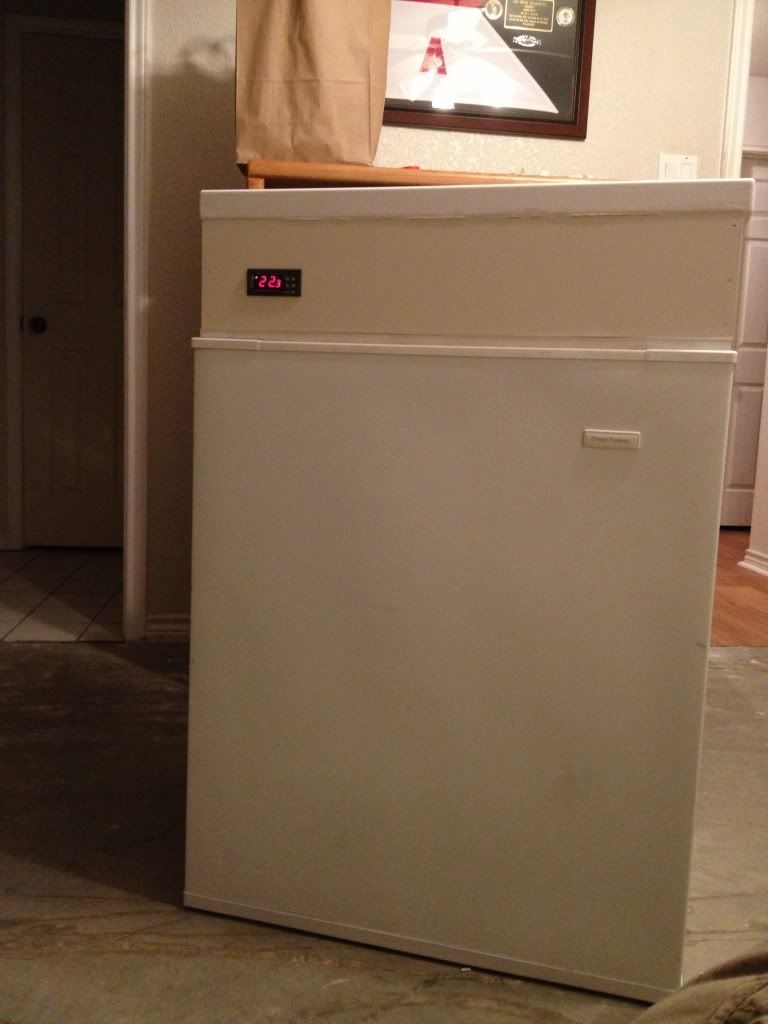
So now the build will be freezer with a new wood top insulated and 6" collar with the STC1000 and single 120v receptacle build in to the collar.


That makes getting the temp probe 'inside" and attached to the primary easier as it will already be inside the chamber.

Still waiting on my STC1000 to arrive, but we will build the new top in the morning....

More pics then...:mug:
 
Good luck I think my beers improved exponentially when I moved to using a STC1000 and a chest freezer to control my fementations. I have 2 temp controllers to control 2 different fermentations at the same time. Keep up with the pics as you build this.
 
Ah hah! You have now started down the slippery slope of building brew equipment. Seems like it never ends. ;).

Great CL score.
 
Ah hah! You have now started down the slippery slope of building brew equipment. Seems like it never ends. ;).

Great CL score.

:D

This is my third "brew equipment" build so far.
  1. Wort chiller and pre chiller set up.
  2. Wort o2 infusion ring.
  3. Fermentation chamber

Not sure i'll ever get to the full electric brew, full grain, on board automatic sparging with elec pump transfer to ........... ect ect ect :eek: type of set up... But building items to make the smaller set ups work better, faster, easier, clean up faster.. yes, that I'll continue with.

Building (making).. both beer and equipment is really why Im doing this.... otherwise, I'd just go by a 6 pack if drinking beer was all I was about :drunk:
 
Building (making).. both beer and equipment is really why Im doing this.... otherwise, I'd just go by a 6 pack if drinking beer was all I was about :drunk:

+1 to that. I'm on the same page and it's fun.
 
Pulled the top off this morning and test fit a 5gal carboy and 6.5gal bucket


Both fit as planned, with room for a keg and small CO2 cylinder if I decide to use this fridge for doubly duty at some point later.

Collar built from cabinet grade pine 1x6 and attached to the lid with 6 screws and silicone adhesive.

Set to dry over night.

Then I'll cut some foam insulation hard board to cover the wood collar, and router out the hole for a 120v 15 amp receptacle.

STC1000 not due here till the 9th or so..., so once the lid is back on,, Im stuck waiting on parts.
 
Ran into the first screwup on this build.. all mine.
While it may be both traditional and almost required to drink beer while brewing beer....It would seem best if one does not drink beer while ordering parts to make beer.

In effort to save a future reader for screwing this screwup.. I'll out my self on a very amateurish mistake made..

BigFloyd introduced me to the STC1000 controller... (thank you by the way) I did some quick research, and then opened my ebay account home page, did a search, and selected the 1st STC1000 link I found that looked good..


All is well, good price, good seller feedback,, shipping not bad from china..
Until I noticed today..... farther down the page...


Erik you damn moron,,,,, did you really just buy a 220vac controller???? Yes, Yes I did. :mad:

Already shipped and on it's way, nothing I can do..set to be here on the 11th.

Found another for sale (110vac this time) shipping from the US, bought it.. and it should get here on the 9th :D
So in the end I'll get my needed last item for the build 2 days before the wrong version arrives :mug:

BUT it cost me for being inattentive in the first purchase.
Did not see this issue mentioned in the threads or vids I watched about building the controller... likely as they assumed anyone building the controller would be smarter than a hand full of trub :D

Hope this helps someone from making the same dumb mistake.
 
Silicone adhesive all set up, so i put the lid insulation back , cut down the plastic panel, and glued it in place.


Laid out the markings to cut the receptacle hole.


and made some wood chips.
15 amp receptacle installed temporally for fitment,


Next up is to cut the foam board... but will wait on install until the digital sender is all wired in, so i can use the foam board to seal off the back of the receptacle and STC1000 from the inside of the freezer (moisture and all that. )
 
Lid refitted to unit for test fit


All is well, so back off it came, to have the hole for the STC1000 made, foam panels cut.

Just need the STC1000 now to finish the install, then some sanding and paint to make it a cleaner overall project.

As the unit will be in my house, and never need a heater element inside.... Im considering removing the dual receptacle and installing a single.

If the day comes that a heater element is needed, it'll be hard wired on the inside of the unit to the STC100 anyway.. so really other then, it's what I had on hand, there is no need for a dual receptacle .

And then there is the gas strut idea Im working on for the lid...:D
 
Not having all the components in hand while I build a projects ALWAYS leads to design changes mid stream....:eek:

If it's all there it gets built, and then maybe later I make changes....

So..... as I don't know how well the STC1000 will do in a moisture laden environment, and the needs to seal it and the receptacle from moisture plus the need for a longer, heaver gauge power lead to reach from wall receptacle to inside the unit to the STC1000, I've decided to put it all in a small project box like so many others have.

I will install a large LED digital temp gauge in the front that has an alarm for temp monitoring, but that will be self contained and battery operated.
 
are you going to pump the liquid out?

My back hurts just thinking of lifting a 6.5 gal of beer out.
- now i sound old-:p
 
Not having all the components in hand while I build a projects ALWAYS leads to design changes mid stream....:eek:

If it's all there it gets built, and then maybe later I make changes....

So..... as I don't know how well the STC1000 will do in a moisture laden environment, and the needs to seal it and the receptacle from moisture plus the need for a longer, heaver gauge power lead to reach from wall receptacle to inside the unit to the STC1000, I've decided to put it all in a small project box like so many others have.

I will install a large LED digital temp gauge in the front that has an alarm for temp monitoring, but that will be self contained and battery operated.

No need for the LED temp gauge unless you think the one on the STC-1000 is too small. I can read the temp readout on my keezer's STC from across the room.

I'd suggest using one of these inside the chamber to control moisture - http://www.amazon.com/Eva-dry-Renewable-E-333-Wireless-Dehumidifer/dp/B000H0XFCS/ref=pd_sbs_hg_1 or http://www.amazon.com/Pingi-Dehumidifier-Sachel-450-grams/dp/B008AJT0PE/ref=sr_1_2?ie=UTF8&qid=1373150786&sr=8-2&keywords=pingi

Also, whatever gauge wiring that came on the freezer will do fine. The STC-1000 doesn't draw many amps itself.

Since you already have a 2-plug receptacle installed on the back of the freezer, I'd leave it be. It'll make no difference if only one plug is active. If you ever decide to move it to the garage, you'll be all set to heat if needed.
 
Last edited by a moderator:
are you going to pump the liquid out?

My back hurts just thinking of lifting a 6.5 gal of beer out.
- now i sound old-:p

No sir, just set them in the freezer.
Im a strapping young 47, so for now it works.

I would have preferred a larger full size side by side,so i cold do two controlled temps..and four containers total.. but this unit dropped in my lap at next to nothing, so it is what it is.

Once I find a screaming deal on the perfect side by side .. I'll re-purpose this chest freezer build something for taps and kegs.
 
The desire to use a digital temp gauge with an alarm is three fold....

1: the STC1000 will not be visible as it'll be tucked back behind the unit against the wall If i remove it from the collar and put it in a project box)
2: the STC1000 is in Celsius... and my mind works in Fahrenheit so just a personal want there.
3: I wanted an alarm to yell at me if the temps go out of value.. and I wanted it as a stand alone unit from the fridge power, temp controller.

Moisture control.. is it an issue?

The 2-plug receptacle and STC1000 installed and open to moisture is my concern... I guess if I mitigate that, then it wont be an issue.

Hmmm, resigne stage 4
 
Great job and thanks for the pics. I am getting ready to make one as well. So doing research now.
 
Collar insulated with Owens Corning INSULPINK® Foam Insulation Board.


Want to cut the hole for the STC1000 so I can sand and paint the wood.. But I don't have the part in hand....

Various web sites show the dimensions as:
Front panel size75(L)×34.5(W)mm;
Mounting size:71(L)×29(W)mm;
Product size75(L)×34.5(W)×85(D)mm
But Im hesitant to cut based on translated data from china and way to impatient to wait :D
 
Took a trip to Austin Brewery supply today. needed a new HEPA filter for my O2 infusion set up, then decided I'd try a .5 micron air stone in place of my copper tube infuser, and well a few bottle brushes, and a carboy brush.....and some other goodies Then made the mistake of looking though the recipe book, Blue Moon Clone partial mash recipe jumped on to the checkout counter as well..

Cut the hole in the lid collar for the digital temp controller and tossed on a coat of primer.


Soon as it dries I'll giver a coat of gloss white and let it dry till morning.
 
Hot damn (no really it's frigging HOT here in central texas this week)
My STC-1000 arrived at last.... (and the 110v one I ordered second time around, the 220v one seems to have gone missing in the mail.. Ebayed again)

Time to wire it up and see what works.
 
Hot damn (no really it's frigging HOT here in central texas this week)
My STC-1000 arrived at last.... (and the 110v one I ordered second time around, the 220v one seems to have gone missing in the mail.. Ebayed again)

Time to wire it up and see what works.

no you got chinaed haha cool build tho great work so far
 
Hot damn (no really it's frigging HOT here in central texas this week)
My STC-1000 arrived at last.... (and the 110v one I ordered second time around, the 220v one seems to have gone missing in the mail.. Ebayed again)

Time to wire it up and see what works.

LOL. When I made that comment in the other thread about the 220V, I didn't know that you had ordered one. Oops. ;)

Once you wire it up, a small lamp works nicely for testing the outlets. Remember that, when it first switches to cool mode, it will not send power to the cool outlet right away. It will go into compressor protection mode (little red light blinking) for several minutes and then power up that outlet.
 
LOL. When I made that comment in the other thread about the 220V, I didn't know that you had ordered one. Oops. ;)

Yes I did, irritating to say the least.. I had no idea there were voltage options.. I found and ordered it from my phone, and just simply missed the part of the add that noted it was a 220V version. :drunk:

Of course when i went to check on the purchase and shipping a few days later on the laptop and it's larger screen, that little 220V tidbit was a bit more noticeable.

Funny that the second one ordered, showed up before the first one.
 
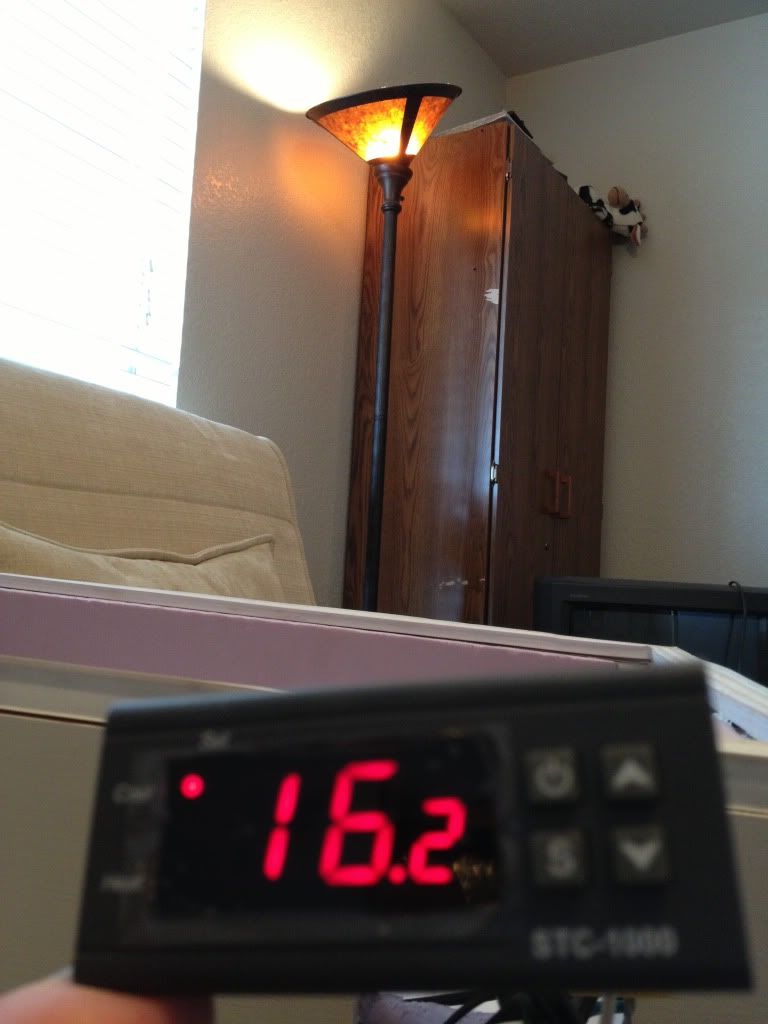
Welp, all done, installed the lid, plugged in and cooling down.


Thus ends the build thread.


If things go wrong, I'll start a .. "Insurance claim and adjuster comments " in the morning.. after the fire department has cleared out.
 
Nice build Erik. Congrats.:rockin:

Every bit of effort, time and energy this took will be so worth it once you taste your first brew done under controlled fermentation temps.

For your next ale, start it at the low end of optimal for the yeast, keep it there 4-5 days and then let it slowly come up about 5*F or so to help the yeast finish and clean up.
 
Pardon my ignorance at my electric knowledge. I am guessing that you had an extension cable that had prongs on both side, one to plug into the wall and one to plug into that outlet? Is that how it got the power to run? Do they make any of these controllers that you can just plug into an outlet?
 
Pardon my ignorance at my electric knowledge. I am guessing that you had an extension cable that had prongs on both side, one to plug into the wall and one to plug into that outlet? Is that how it got the power to run? Do they make any of these controllers that you can just plug into an outlet?

There are many ways to do this... from hard wiring the freezer power cord into the controller to wiring the STC1000 controller to a standard duplex 120v receptacle and then plugging the freezer into it, just like you would the wall.
 
Back
Top