• Please visit and share your knowledge at our sister communities:
  • If you have not, please join our official Homebrewing Facebook Group!

    Homebrewing Facebook Group

Advice on kggles

Homebrew Talk

Help Support Homebrew Talk:

This site may earn a commission from merchant affiliate links, including eBay, Amazon, and others.

malibrew

Member
Joined
May 17, 2012
Messages
13
Reaction score
2
Location
camden
First post so a little background: I hit the ground running when I picked up this hobby. In a matter of a few months I've brewed an insane number of partial mash kits from the not so local HBS (I'm a two hour drive away), converted a chest freezer to a keezer, had an awful run in with a plastic inductor tank, and I'm in the process of building a 30x28 bar. I'll have questions on shanks later. So to my question.

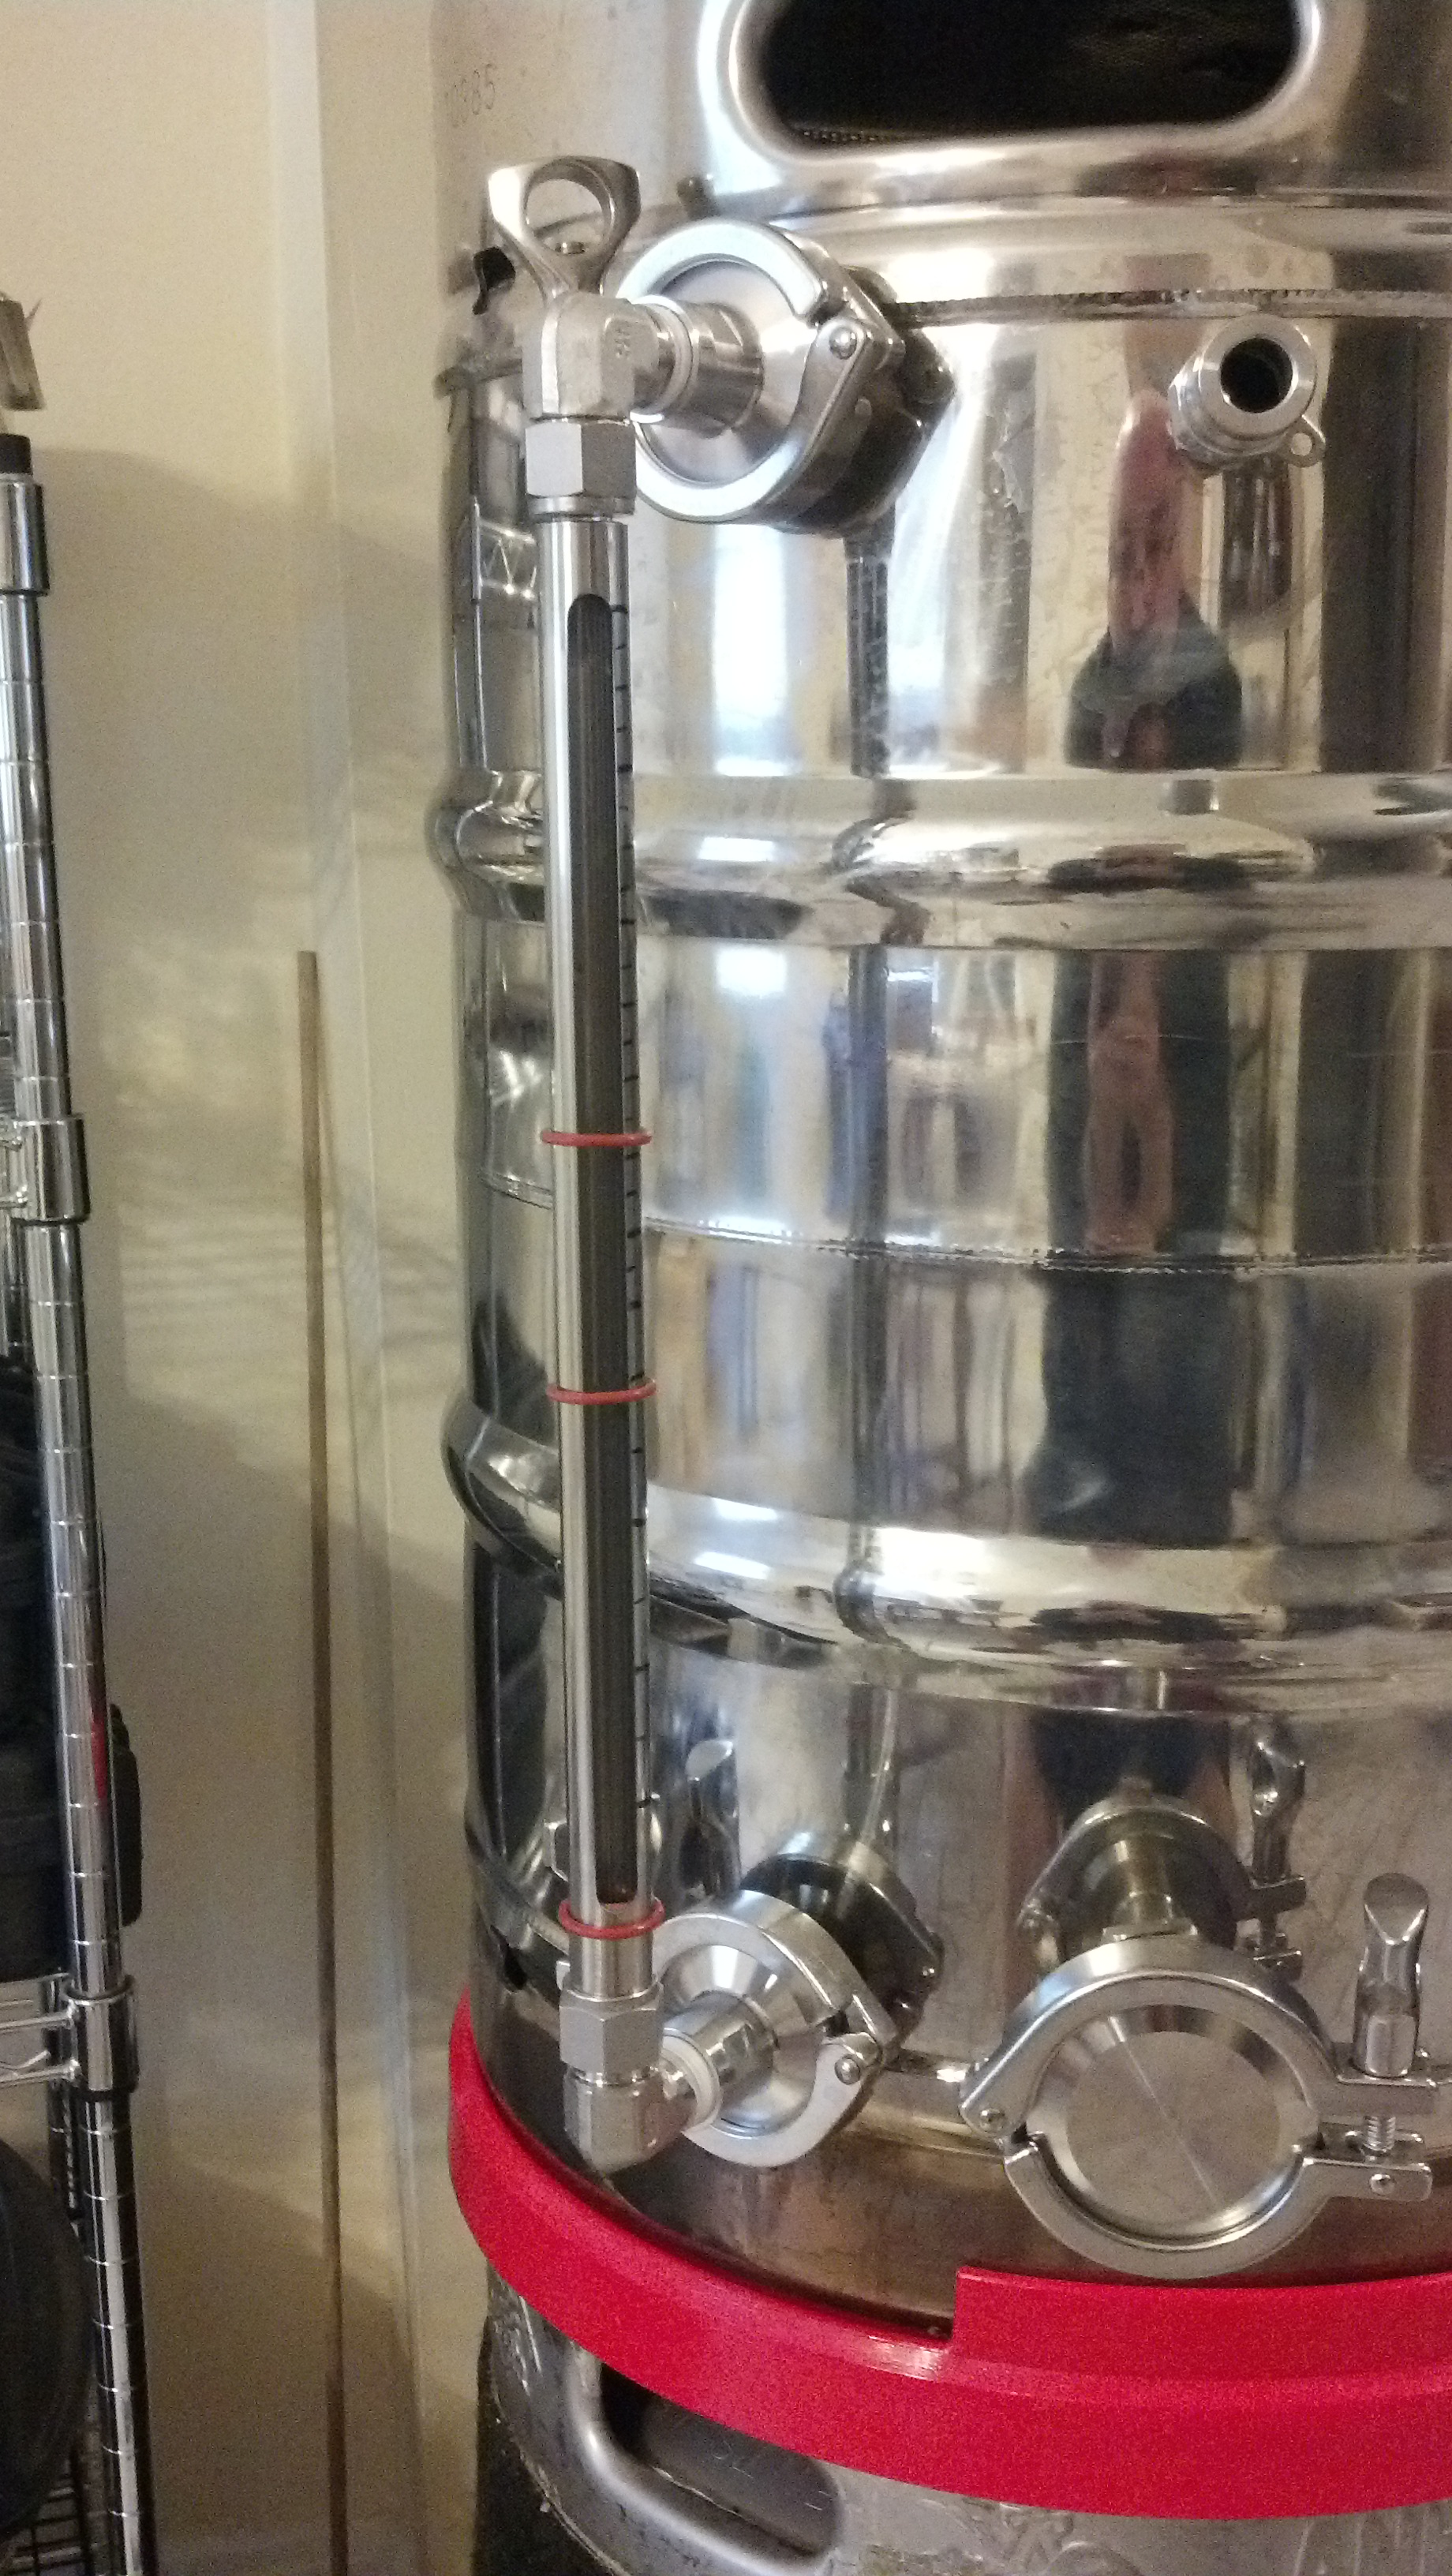
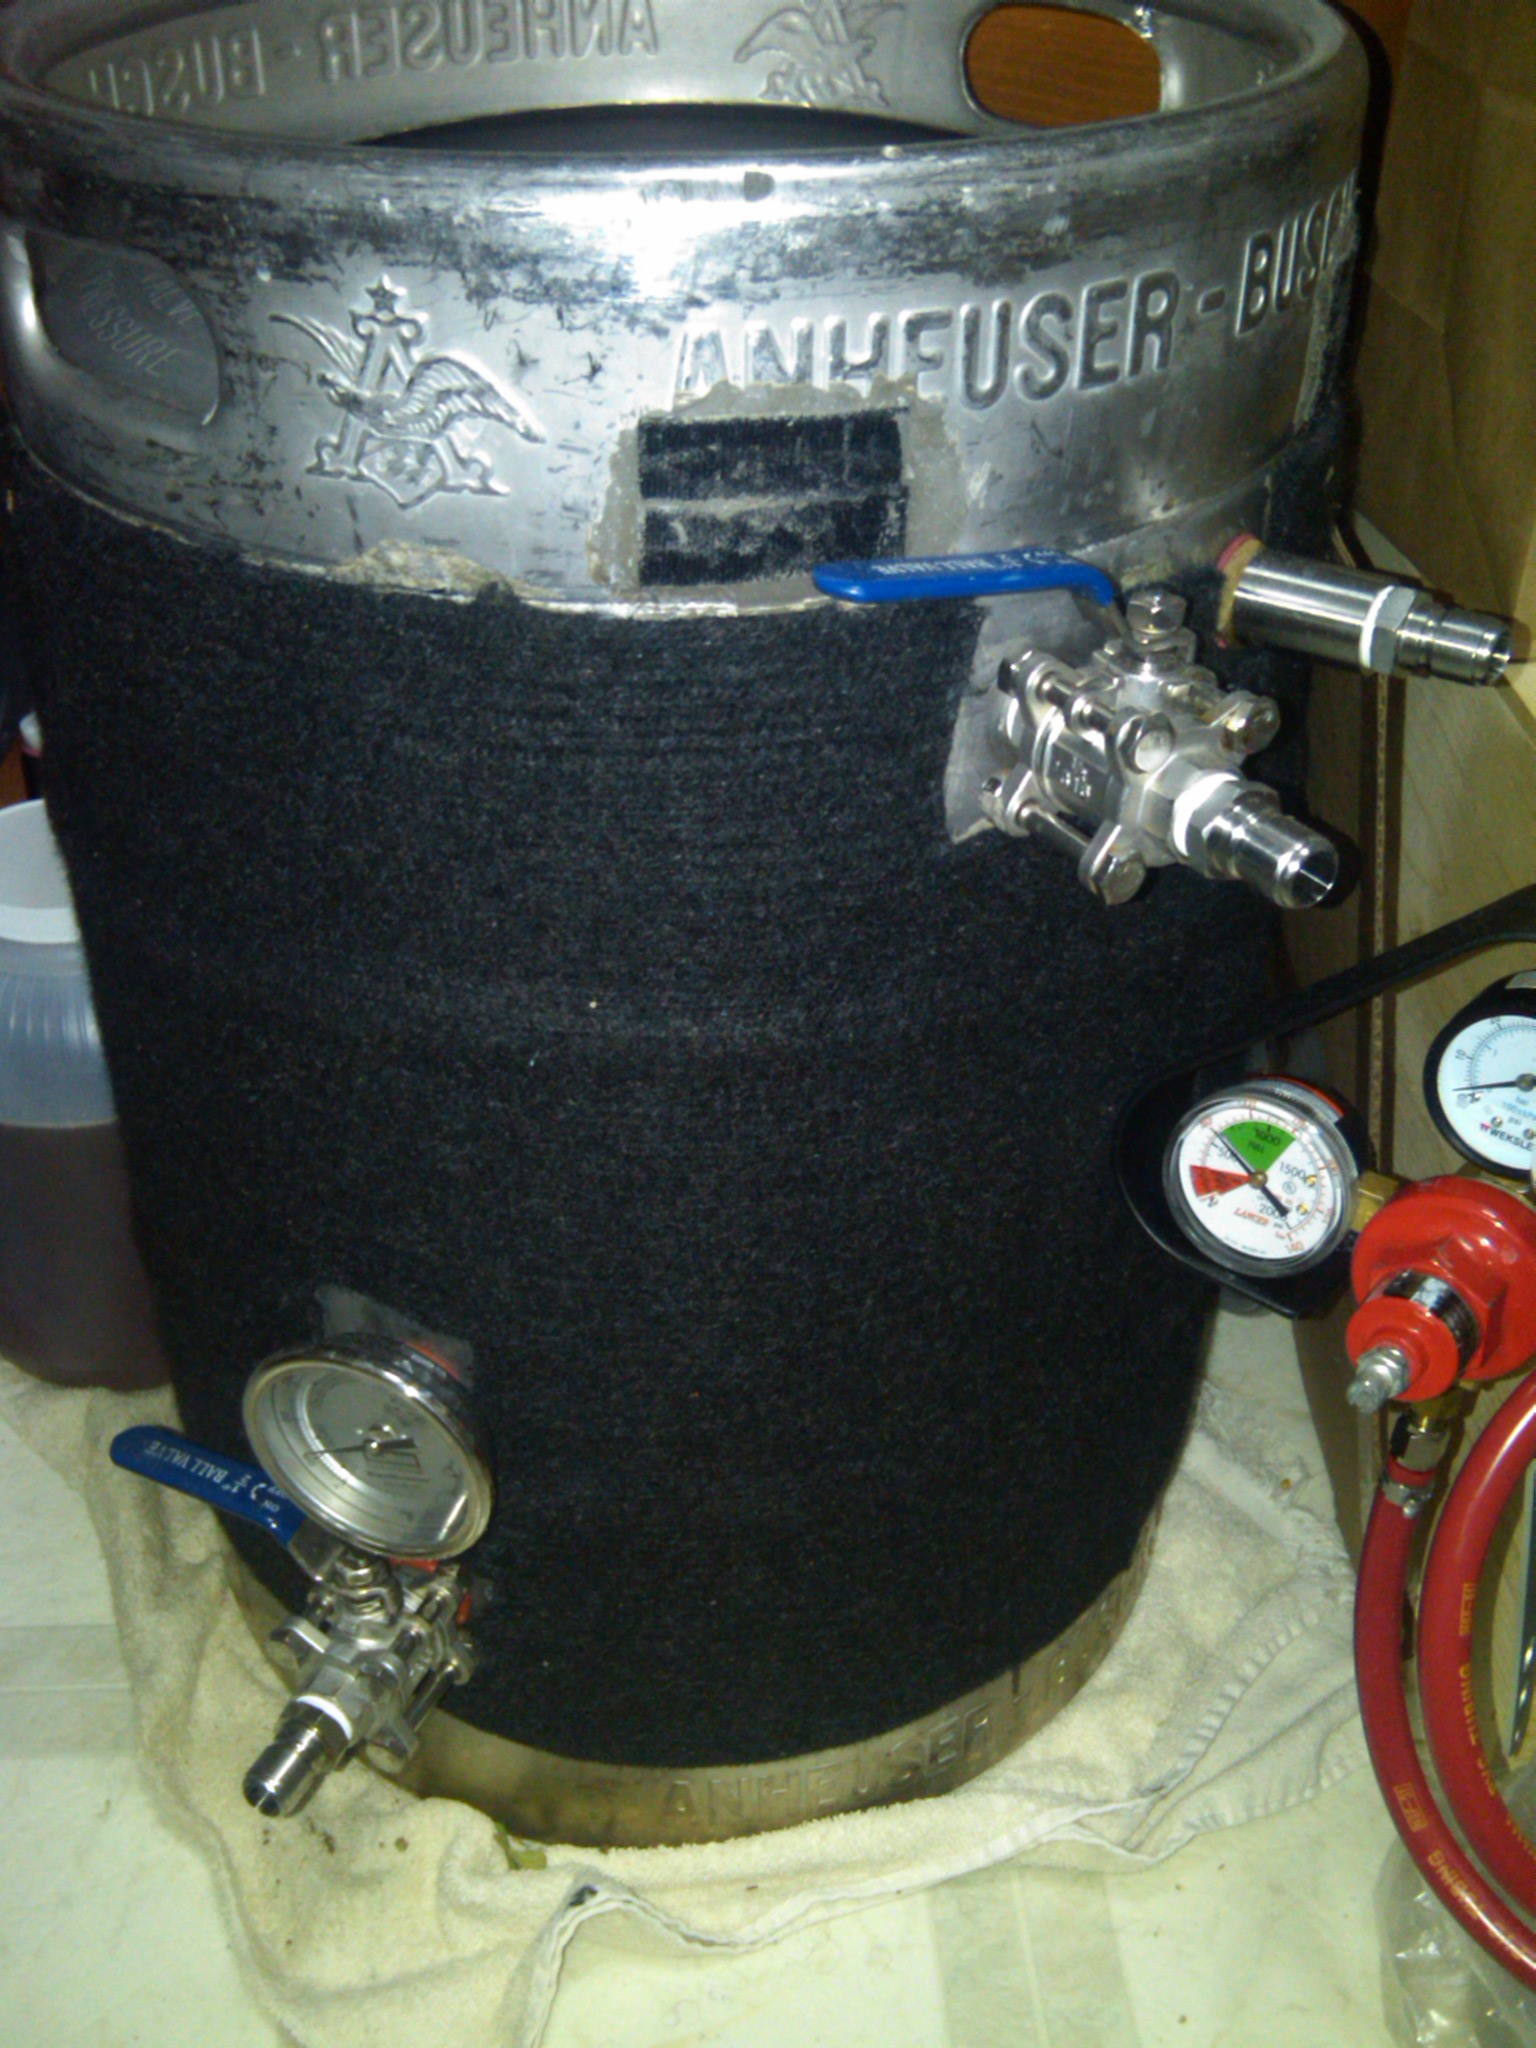
After scouring the corners of the earth I finally got 3 kegs (discontinued from a local party shop) if you experienced brewers had no equipment and your current knowledge how would you set up a one tier system? Just want to get it right the first time. Gas fired system btw. Mostly interested in the keggles how many valves,sight glass,thermometers? Any info would help no clues as to how to proceed confidently.
 
I wouldn't say I'm a pro by any means but I've been working on a electric single teir and 2 pumps and I would suggest

- sight glass on each
- thermometer on each
- bottom valve on each

- add a valve to the top of sparge tank and mash tun so u can recirculate ummm
- valve on top of boil also I guess for transfer or drape hose over the top

Idk I guess that's super broad suggestions I'm in the middle of my build control panel is built and I have 3 kegs I'm polishing b4 I purchase all the hardware and then I'll b doing a lot of soldering joints good winter project I guess sorry I don't know really anything for a gas setup u can look up my build thread sorry I don't have a link for good luck!
 
Just some pics of a polishing day

image-202546620.jpg


image-1051180319.jpg
 
Guess I'll have to add that to the list as well that looks a hell of a lot better than mine do.
 
That was my first keg I just experimented with I got three others in the polishing then ill cut tops off u get a lot of junk inside the keg with the top cut and I just didn't want that stuff in my good kegs
 
The angle grinder in the pic is for polishin or cutting the top? palnned n cutting the tops of mine with a plasma cutter tomorrow guess I may tryto polish first just figured you would have to repolish the top after cutting
 
Lol I will forewarn it is time consuming I'm just in no hurry angle is for polishing we used a plasma cutter b sure to let the pressure out and pull the dip tube out so u can fill it with water keeps the slag and junk from getting all over the inside walls that's we did and we had no issues but the hold a lot of pressure so b careful first tube I pulled I about took my face out
 
Make the opening as big as possible but think about lids before cutting. (if you cut carefully, you can use the tops as lids, though I hear an uncovered rolling boil is better for boiling off nasties)

Safety tip: MAKE ABSOLUTELY SURE THERE ARE HOLES DRILLED IN THE ROLLED METAL LIP ON THE BOTTOM OF THE KEGS. WHEN YOU WASH THEM, WATER WILL GET IN THERE. WHEN YOU START HEATING THEM, THEY CAN FLEX/EXPAND, CLOSING OFF THE WATER INSIDE THE ROLLED EDGES. WHEN IT GETS HOT ENOUGH, THE EXPANDING WATER/AIR CREATES PRESSURE AND IT CAN EXPLODE. NO JOKE. DRILL A FEW HOLES IN THE BOTTOM ROLLED EDGE (THE PART THAT TOUCHES THE SURFACE WHERE IT IS SITTING)
 
Good call on the holes in the base! I've heard nasty stories
Def think about lids I'm going with the 3 washers I the tips I cut off for lids mainly for mash and sparge tanks but they'll b nice for storing just to keep stuff out
 
Ok so good on the holes and my face is still in tact after removing two of the tubes denately will save the tops so false bottom or bazooka tube better for batch sparge from my reading batch sparge seems like the way to go for a beginner in AG
 
Ok so good on the holes and my face is still in tact after removing two of the tubes denately will save the tops so false bottom or bazooka tube better for batch sparge from my reading batch sparge seems like the way to go for a beginner in AG

Sounds like you have a lot of fun "work" ahead, to me making stuff is part of the homebrewing joy.

BTW, don't sell batch sparging off as limited to only new brewers, many experienced homebrewers batch sparge. It's simple and works quite well but like most everything in homebrewing there are varying opinions. :mug:
 
I finished my keggles a few months ago, I built a 3 tier so I can't help you there. I bought 2 sight glass kits with thermometers (HLT, BK) and a 3" thermometer for my mash tun from Brew hardware and am very satisfied the quality is excellent. All have weld less ball valves from my LHBS l
 
Sight glass on boil keggle and maybe on HLT. NO sight tube on mash tun (pretty much useless).
Maybe a thermometer on the HLT, none on the BK or mash tun (I use a Fluke 52II with sensors/probes that can be submerged for better readings).
Jaybird/NorCal false bottom in the mash tun.
3 piece stainless ball valves in all, with dip tubes to work in all/each.
Line up all the fittings with the handles of the kegs/keggles. Less chance of anything getting caught while carrying around.
Get at least two, or three, March pumps (815 or 809 with the 815 impellers). Fit ball valves on the outlet side of each. Stainless heads if at all possible.
Cut the opening in the boil keggle as large as possible (12" or better) but leave the handles intact. The mash tun can be closer to 10" (or even below, as long as you can stir the mash).
Wrap mash tun in something to insulate it. I'm using carbon fiber welders blanket on mine. Does a solid job of insulating the mash tun.

I've made my own sight tube assembly with borosilicate glass, stainless fittings, and designed it to recirculate back into the keggle. Can't see going any other route now. I can make it either welded or weldless (which costs less). I've also removed the thermometers from my boil keggle and mash tun since I don't need them. Plus, in the mash tun, it was more in the way than of use. I'd rather have the sensor in there that I can move around, and get a reading in the middle of the mash. Plus, it's not in a fixed position (which can be a bad thing).

Current boil keggle:
keggle_sight_tube_assemly_welded-57028.jpg


Older image of my mash tun. Since dropped one of the fittings at the top (for a Blichmann AutoSparge) and the thermometer.
insulatedmashtun-52186.jpg


I have other/more pics in my gallery. I'll be posting updated pics of the mash tun soon. I'm also converting a short 1/4 barrel keg into a new HLT. Simply put, it fits on my Blichmann burner better than the 10 gallon BoilerMaker does.
 
I have two, virgin, kegs in the basement right now. Trying to decide what to do with them. On one side, I'd like to make them into something to use. On the other, I'd like to get some $$ for them. I would be more inclined to sell the AB keg than the other one. Just not looking to do any shipping (costs too much).

Still, I might just hold onto them and use them later. I'm getting ready to start working on getting the basement setup for brewing. That will make brewing easier on me. Especially in the winter time, or when it's raining out, or snowing out, or dark out. :D

I'm extremely happy with the Fluke unit. I also picked up the additional sensors at a good rate (found them on another site, needed to add the connectors, but that's pretty easy). I get better readings this way. I've plugged the holes in the mash tun, so I have no issues there. Since the 1/2" NPT plugs were hollow, I installed them in reverse (hex head inside). Now, no grain gets left inside post mashing. :D
 
Back
Top