• Please visit and share your knowledge at our sister communities:
  • If you have not, please join our official Homebrewing Facebook Group!

    Homebrewing Facebook Group

7.2 cu ft Magic Chef Chest Freezer

Homebrew Talk

Help Support Homebrew Talk:

This site may earn a commission from merchant affiliate links, including eBay, Amazon, and others.
$40 off of craigslist in perfect condition. Had a friend fab the collar (3/4" thick x 6" tall). I insulated the collar using flat foam insulation from HD (bonded using door/window seal) and then covered the insulation with Gorilla tape.

Keezeroutside1.JPG

KeezerFullFrontal1.JPG


How long should a 5# tank last with 4 kegs? Will I be refilling it quite often? I'm trying to determine if it is worth it to build a collar to accomodate a 10# tank....thanks in advance
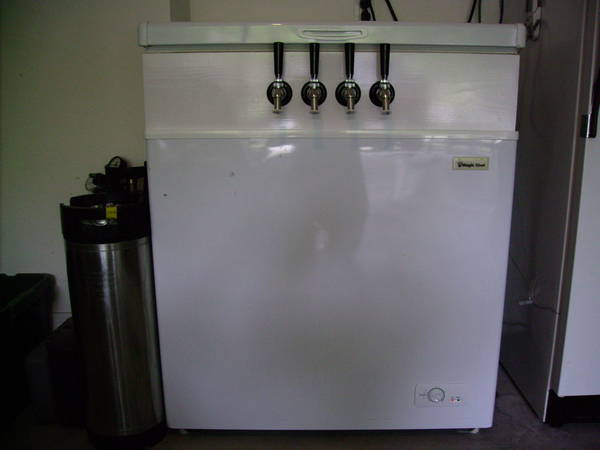
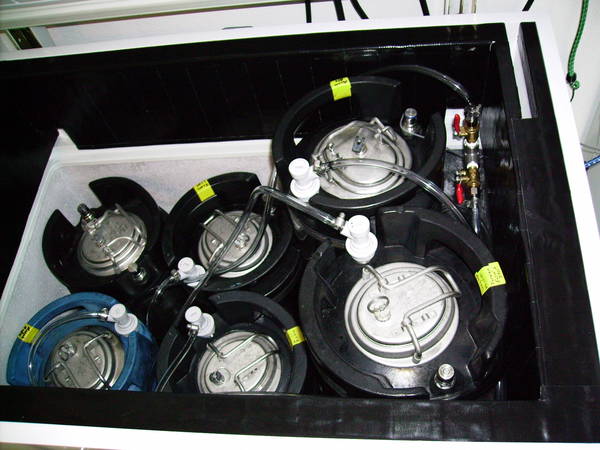
IMO, get a 20# tank and keep the 5# tank as a spare (for when the 20# tank runs out). Also, keep the CO2 tank out of the keezer imo (you can see the 20# tank behind the keg to the left of my keezer).
 
Just finished mine last night - I got the deal from Home Depot as well. I decided to do only 3 Perlick 525SS taps - 3 beers on tap, 3 aging behind them. All of the other tubing, connections, etc came from Midwest. Only task left is to get the missing gas QD for the incoming line - thankfully I've got NB and Midwest within 20min drives :)

On the first photo below, it shows the front corner detail. Routing skill aside, I decided to frame the collar in 1x8" pine and then face the sides in 1/4" oak plywood and the front with a real slab of 1x8" oak. The plywood was half the cost - I think all the wood together was < 30 bucks. The bottom frame is also 1x8" pine with 6 casters rated at 90lbs each.

I routed the corners to help hide the fact that I routed the bottom edge of the front to get it over the lip - making less of a mess for drops on the front. If you go the plywood route, I highly recommend using a flush cut router bit - I cut all the pieces long, then used the router to size things precisely. Know thy limitations....

If you are making a collar for this freezer that will sit inside the lip, you might want to space the hinges off of the back just a bit - I needed to to get the rear seal to line up properly. I used a 1" washer I had laying around - put it right above the _bottom_ two screws between the hinge and wood. Placing it higher will tweak the lid angle just enough that it won't seal around the front very well. I also used exterior grade white caulking to seal the collar to the top - more moisture and temp friendly. I also sealed the whole mess with the spray-on Minwax Poly - spraying was much quicker and easier than having to deal with brushes, sanding, etc.

All in all - it doesn't look like the dog chewed on it and more importantly....it serves beer :)

Obligatory Peer Born:

main.php


main.php


main.php


More photos here
 

Latest posts

Back
Top