caligula455
Member
- Joined
- Nov 26, 2012
- Messages
- 14
- Reaction score
- 11
Hi Everyone,
First off, I've learned so much from reading this forum over the past couple of months and I hope that this is helpful for someone else out there.
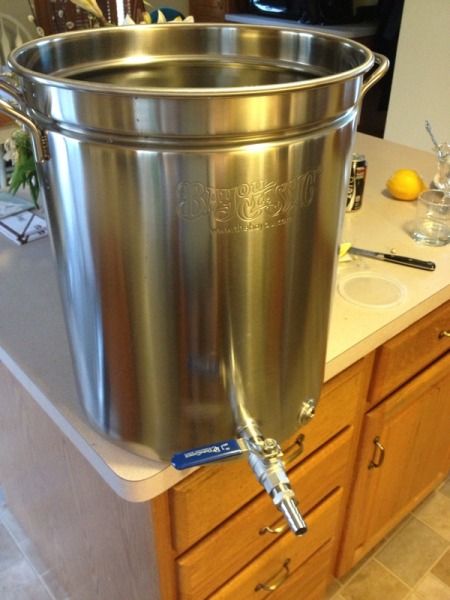
I'm putting together a new brew kettle and wanted to dimple and solder in a coupler but thought there had to be a cheaper alternative to the stainless parts from mcmaster that everyone has been using.
I didn't want to do any machining and I didn't want any ferrous metal scraping on the stainless and this version meets both criteria.
Here's what I came up with - it looks pretty ghetto but it sure did work! Total cost from Home Depot - $4.87
Parts:
(1) 3/4" x 1/2" copper coupling - $2.27
(1) 1" PVC coupling - $0.46
(1) 1/2" x 5" bolt - $1.21
(1) 1/2" nut - $0.20
(2) 1/2" cut washers $0.70
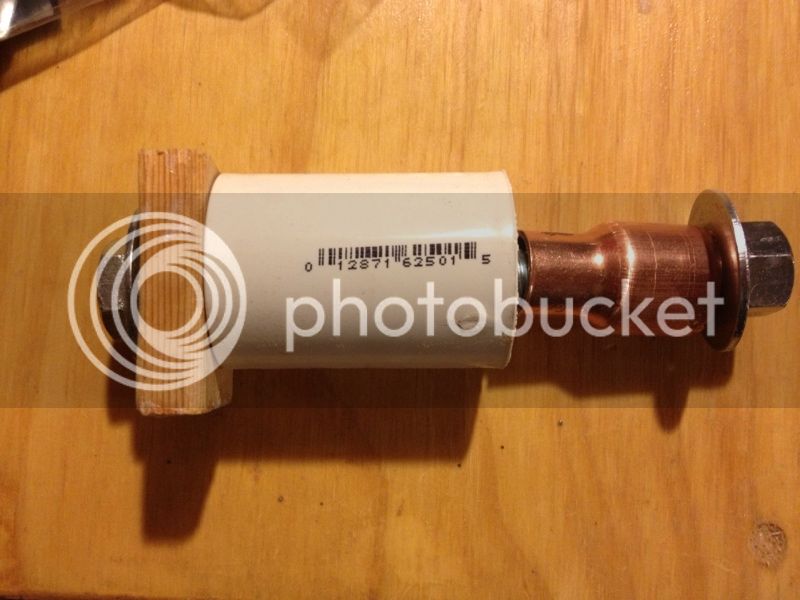
Here is the procedure, it's basically the same but here's what it looks like with my cheapo version.
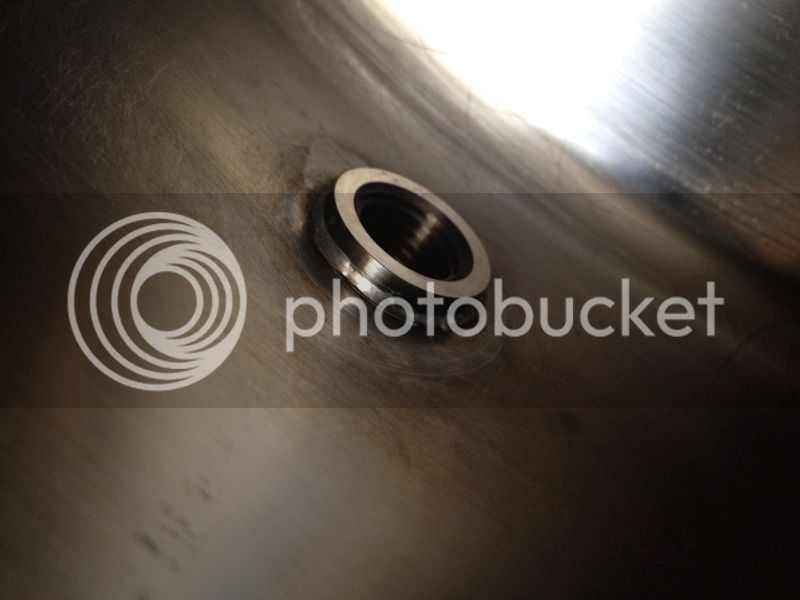
First drill a 7/8" hole and run the copper coupling through till the washer bottoms out.
Then re-thread the bolt with the stainless full coupling behind the copper coupling. The diameters are close, but the stainless is a bit bigger. This is no problem at all, it self centers in the dimple and pulls right into place.
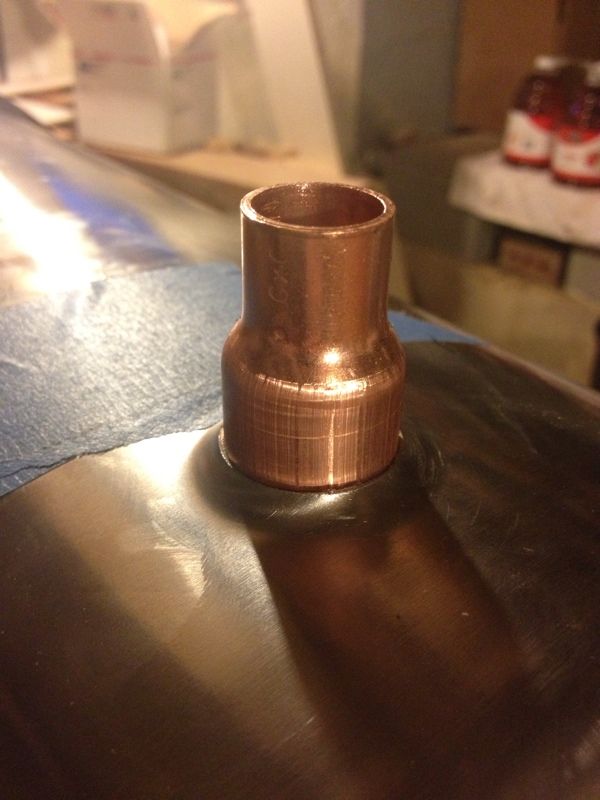
You might think that this copper piece is too thin to handle the pressure, but being a circle makes it very strong under compression on all sides. The copper is fairly soft but I'm pretty confident that it has some more life in it if I had any more dimples to make.
http://s307.photobucket.com/user/ca...6E-10766-000002ABF620B221.jpg.html?sort=3&o=1
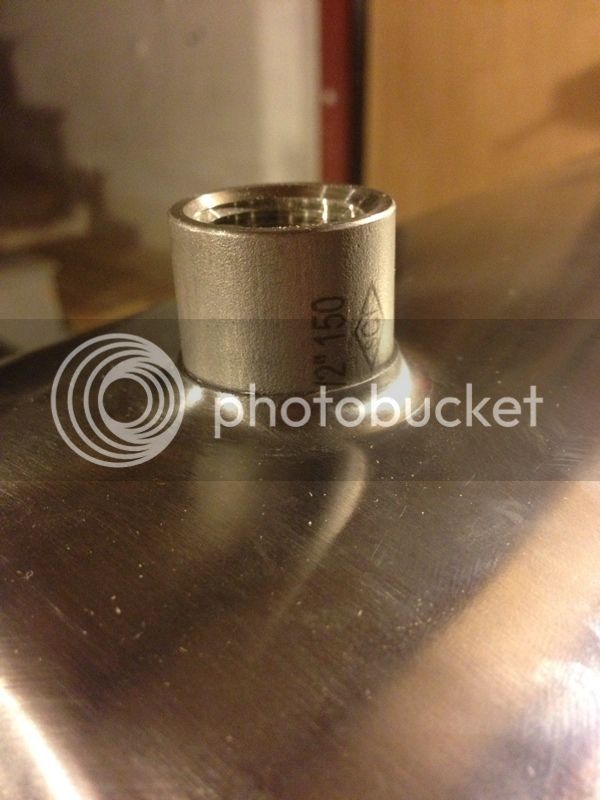
So here is the end result, a nice secure dimple ready for solder and some extra beer money in my pocket.

First off, I've learned so much from reading this forum over the past couple of months and I hope that this is helpful for someone else out there.
I'm putting together a new brew kettle and wanted to dimple and solder in a coupler but thought there had to be a cheaper alternative to the stainless parts from mcmaster that everyone has been using.
I didn't want to do any machining and I didn't want any ferrous metal scraping on the stainless and this version meets both criteria.
Here's what I came up with - it looks pretty ghetto but it sure did work! Total cost from Home Depot - $4.87
Parts:
(1) 3/4" x 1/2" copper coupling - $2.27
(1) 1" PVC coupling - $0.46
(1) 1/2" x 5" bolt - $1.21
(1) 1/2" nut - $0.20
(2) 1/2" cut washers $0.70
Here is the procedure, it's basically the same but here's what it looks like with my cheapo version.
First drill a 7/8" hole and run the copper coupling through till the washer bottoms out.
Then re-thread the bolt with the stainless full coupling behind the copper coupling. The diameters are close, but the stainless is a bit bigger. This is no problem at all, it self centers in the dimple and pulls right into place.
You might think that this copper piece is too thin to handle the pressure, but being a circle makes it very strong under compression on all sides. The copper is fairly soft but I'm pretty confident that it has some more life in it if I had any more dimples to make.
http://s307.photobucket.com/user/ca...6E-10766-000002ABF620B221.jpg.html?sort=3&o=1
So here is the end result, a nice secure dimple ready for solder and some extra beer money in my pocket.


![Craft A Brew - Safale S-04 Dry Yeast - Fermentis - English Ale Dry Yeast - For English and American Ales and Hard Apple Ciders - Ingredients for Home Brewing - Beer Making Supplies - [1 Pack]](https://m.media-amazon.com/images/I/41fVGNh6JfL._SL500_.jpg)