• Please visit and share your knowledge at our sister communities:
  • If you have not, please join our official Homebrewing Facebook Group!

    Homebrewing Facebook Group

3-in-1 "Boil Kettle, Jacketed Chiller, Conical Fermenter" by Brewha

Homebrew Talk

Help Support Homebrew Talk:

This site may earn a commission from merchant affiliate links, including eBay, Amazon, and others.
Re your comments about the ETC and the power controller, I would like to have the dual temp control the new ETC Nathan is selling, but don't want to spend what it takes to get the digital power controller.

I have given some thought to experimenting with my analog power controller, which Nathan was packaging with the medium BIAC in November 2014 when I placed my order. Want to be able to use the element to add heat when needed during fermentation.

I would have to learn a lot more about electronic devices in order to find an alternative to the power control box. I noticed the post by Jubalon, read his post explaining the system, but I don't have the fundamental electronics knowledge to get it.

Thanks for your post. I'll try to stay in touch to see how your experiences with the BIAC are going.

Ron8
 
Nathan sells a great system that incorporates a power controller and a non-glycol chiller. I purchased the entire system and I have to say that it works great. If you decide to only purchase the partial system like Ron8 has decided to do, then it is almost impossible to replicate what Nathan had envisioned the way the system is supposed to operate. Lets face it, Nathans system is expensive and is not accessible to the the average home-brewer. I have ...almost...complete control over the temperature throughout the brewing process with as little as pushing a few buttons on my temperature controller. You will be amazed at how great the system is once you actually have the power controller and chiller to do all the work for you.
 
Hello, a general question for Brewha users;

How is the experience of brewing smaller batches than than the system is designed for? I'm thinking about starting with a 5BBL for a small brewery and brewing smaller batches for the beginning or off season / quiet times.

I guess the question is how small a batch have you been able to make comfortably in relation to the size of your system and what are the things to be aware of (I guess that taking care that the water level doesnt drop below the elements during sparge is a big one)

Thanks for any feedback about this..

As you mention, keeping the level above the element is a major concern, but I would say that the limiting factor for batch size is the dead space under the mash colander. The large volume under the colander means that you start to run into mash thickness issues with small batches.

I've got the medium BIAC (1/2BBL) and find that 5.3-6 gallons (about 1/3 capacity) is about the smallest I can go when using the colander depending on the wort gravity I'm after. Compounding this is that at higher gravities the efficiency drops, requiring more grain and an even thicker mash. I'm not sure if that translates to the larger systems. You'd need to ask Nathan @ BREWHA for that info.
 
Nathan sells a great system that incorporates a power controller and a non-glycol chiller. I purchased the entire system and I have to say that it works great. If you decide to only purchase the partial system like Ron8 has decided to do, then it is almost impossible to replicate what Nathan had envisioned the way the system is supposed to operate. Lets face it, Nathans system is expensive and is not accessible to the the average home-brewer. I have ...almost...complete control over the temperature throughout the brewing process with as little as pushing a few buttons on my temperature controller. You will be amazed at how great the system is once you actually have the power controller and chiller to do all the work for you.
Hello Hgearle,

Thanks for your insightful comment. I agree, not having a chiller is certainly a disadvantage for quickly cooling post boil.

If you have the dial type power controller, have you ever thought about attempting to use it at a very low input in order to add heat when needed during fermentation?

I have given that much thought recently. Haven't tried it yet, however.

I was thinking of purchasing Nathan's dual temp controller and using it to power the analog controller and the pump for circulating cold water in the jacket.

Concerning digital control vs. analog power control on the unit shipped with my BIAC in Nov. 2014, I have been trying to learn if there is some way of just replacing the analog dial device with a digital controller. It is hard to find an answer to that. Do you, or any one else out there, know how that would be done, if it is even possible. I have seen a lot of videos and comments here about digital control, PIDs, solid state relays, pulse width modulation, and on. But haven't run across anything specific to my question. The BIAC power controller is too custom I guess for there to be much written about it.

By the way, a little off topic: My home made chiller is city water running through a coiled garden hose in an ice water bath then into the jacket. In April 2017 in Charlotte, NC, this cools wort to 80F in about 45 minutes. I switch to circulating cold water bath, around 38 F for final cooling to 68 F in ~20 minutes. After that cooling continues down a few more degrees in the half hour to hour it takes to do final steps before closing up the fermenter (dump trub, taking OG reading, pitch yeast starter, add yeast nutrient, sanitizing lid, connecting air lock).

Thanks again for your helpful comments.

- Ron8
 
As you mention, keeping the level above the element is a major concern, but I would say that the limiting factor for batch size is the dead space under the mash colander. The large volume under the colander means that you start to run into mash thickness issues with small batches.

I've got the medium BIAC (1/2BBL) and find that 5.3-6 gallons (about 1/3 capacity) is about the smallest I can go when using the colander depending on the wort gravity I'm after. Compounding this is that at higher gravities the efficiency drops, requiring more grain and an even thicker mash. I'm not sure if that translates to the larger systems. You'd need to ask Nathan @ BREWHA for that info.
Hello Mdime,

Likewise, I have the medium BIAC, optimized for 10 gallon batches. I brewed two 5 gallon batches of a high gravity Belgian golden strong ale. I recall having lengthy back and forth emails about your question with Nathan before I decided on the medium instead of the small. The small is very limiting. I wanted to be able to brew 10 gallon batches and that was not going to be possible with the small. You can brew as high as 12 gallons in the medium BIAC if you are brewing so called session styles. I hope this is relevant to your question.

- Ron8
 
Sorry for the delayed response, but I see you already may have had this answered. I do have the unit that can be tuned to low percentages and although I haven't verified the accuracy of the power output at these low levels, it does the job for me. I'm able to keep the temps from getting too low with this with no overshoot. I also use this to ramp up my lagers for a dactyl rest (slowly going from 50F to mid-60's over a few days.
Hello Solstice Brewing,

Thanks very much for your comments. If I could just ask for clarification, what reading do you set the dial controller at during fermentation, and in the case of when ramping up for diacetyl rest with lagers?

I almost missed reading this, and my apologies for not replying back sooner. Thanks very much for sharing that.

- Ron8
 
I was thinking of purchasing Nathan's dual temp controller and using it to power the analog controller and the pump for circulating cold water in the jacket.

Concerning digital control vs. analog power control on the unit shipped with my BIAC in Nov. 2014, I have been trying to learn if there is some way of just replacing the analog dial device with a digital controller. It is hard to find an answer to that. Do you, or any one else out there, know how that would be done, if it is even possible. I have seen a lot of videos and comments here about digital control, PIDs, solid state relays, pulse width modulation, and on. But haven't run across anything specific to my question. The BIAC power controller is too custom I guess for there to be much written about it.

- Ron8

From what I've seen of the analog power controller in Nathan's videos it looks interchangeable with the digital one. Both have sockets to plug the heating element into with dials to adjust the output power, and a signal power cord that either plugs into an outlet (for manual control) or plugs into the temperature controller (for automated control). The main difference is how the power is regulated internally.

While the boxes themselves are custom to the BIAC, there's nothing special about what they do or how they provide power to the element. Any power controller designed to supply power to a 220V element would work. In fact, I have a controller from Brew-Boss which is app-controlled and provides some automation and it works great with the BIAC.

That said, I did notice an older power controller in one of his videos that looked to be mounted directly to the heating element at the tri-clamp. That doesn't look interchangeable but without seeing it it's hard to tell for sure.
 
If you have the dial type power controller, have you ever thought about attempting to use it at a very low input in order to add heat when needed during fermentation?
- Ron8

Yes, however I have the Electronic Temp Controller. I have set the power controller to 3% to hold the temperature just above the temperature in my basement (ie. 67F in the basement and I want to hold a fermentation temp of 70F). The Electronic Temperature Controller is a great piece of equipment.

I was thinking of purchasing Nathan's dual temp controller and using it to power the analog controller and the pump for circulating cold water in the jacket.

- Ron8

The chiller is an expensive piece of equipment, but to me it is a necessity to hold fermentation temps with little thought or attention. I, too, use city water to cool all the way to pitching temps (cold water from Lake Michigan year round), then hook the BIAC to the chiller.

- Ron8[/QUOTE]

Looking at the picture you posted of your system, I see that you have 2 ball valves on the top of your lid. Why would you need any valves there? I have never seen the need, but would like to know if I'm missing something.
Also, I noticed that you are using a small cup for the blow off tube. The way my DIPA is bubbling away right now it would blow the water right out of that cup!
 
I have the original analog controller and use it during fermentation all the time when brewing my Berliner Weisse.

Turn the dial back to about 1/3 power, plug the element control into the Ranco, and use the Ranco to control the on/off of the element.
 
Hello Solstice Brewing,

Thanks very much for your comments. If I could just ask for clarification, what reading do you set the dial controller at during fermentation, and in the case of when ramping up for diacetyl rest with lagers?

I almost missed reading this, and my apologies for not replying back sooner. Thanks very much for sharing that.

- Ron8

Howdy and no worries, my original reply was MONTHS later than your original question :)

For my medium system, I set my controller to 1% and that seems to do the job of holding the temps steady with no signs of scorching on the heating element post kegging. I might bump this up to 2% when ramping up, but that's not always necessary unless I want to have the temps rise quickly. I've got the entire fermenter within a 2" foam box to stabilize the air temps around it, so the heating element doesn't come on that often - even in the dead of winter (fermenter and box are in an unheated, but insulated garage).

As for wort chilling, I have a similar set up with hose water run through the jacket for part one of my chiller. In the winter, water temps are about 56F, so I just run it straight in. In the summer, water is more like 75-80F, so I run the hose to an immersion chiller in a 10 gal jug full of ice water. Part two of the chiller is to recirculate from the bottom of the conical back to the racking port with a 90 degree racking arm attached. This allows a number of things: a) it keeps the hot wort moving against the cool water jacket GREATLY reducing chilling time - very important. It also allows you to add gadgets between the pump and the racking port like a plate chiller. I've got a therminator inline with this system and run the same water from either the hose or the pre-chiller (via a wye connector) through the plates. Just cooled a Russian Imperial Stout this weekend from boiling to 66F in 14 minutes (granted, boiling at my elevation is about 198F). When I have a large hop load, I'll put a Hop Rocket in front of the plate chiller with either some rice hulls or some leaf hops to act as a filter to keep the break and veggies out of my therminator.

Hope this helps :mug:
 
Yes, however I have the Electronic Temp Controller. I have set the power controller to 3% to hold the temperature just above the temperature in my basement (ie. 67F in the basement and I want to hold a fermentation temp of 70F). The Electronic Temperature Controller is a great piece of equipment.


The chiller is an expensive piece of equipment, but to me it is a necessity to hold fermentation temps with little thought or attention. I, too, use city water to cool all the way to pitching temps (cold water from Lake Michigan year round), then hook the BIAC to the chiller.

- Ron8

Looking at the picture you posted of your system, I see that you have 2 ball valves on the top of your lid. Why would you need any valves there? I have never seen the need, but would like to know if I'm missing something.
Also, I noticed that you are using a small cup for the blow off tube. The way my DIPA is bubbling away right now it would blow the water right out of that cup![/QUOTE]
Hi Hgearle,

Thank you very much for your comments about the power controller.

So it seems possible to replace the analog dial type power controller (potentiometer) with one that gives a % readout (digital?). I understand the pot will not control precisely enough to assure a 3% setting will really be 3%. True?

I have read on BREWHA site where it is VERY IMPORTANT to avoid going too high in power input (voltage input) during fermentation so yeast is not scorched.

Blowoff tube/cup. Works well, even during rapid fermentation, even with uncontrolled ferm temp, even above 75 F, poor technique, but I have done it, and it does not blow out the air lock. 50 starsan / 50 water.

Valves on lid. Valve on air lock so that when racking I can close it without having to remove the air lock. I use CO2 to push beer out the cone mounted racking port.
Valve on the other lid port is there to close while removing the pressure vacuum relief valve (PVRV), then attach a CO2 keg post for delivering CO2 to push beer out the racking port. Both ball valves are open during fermentation. The PVRV is a valuable safety feature to protect the medium BIAC from deformation in case of a major unplanned cooling event sucking in the inner wall of the vessel. Somebody on this thread had bad luck one time and sucked his vessel in. Expensive situation.
 
Looking at the picture you posted of your system, I see that you have 2 ball valves on the top of your lid. Why would you need any valves there? I have never seen the need, but would like to know if I'm missing something.
Also, I noticed that you are using a small cup for the blow off tube. The way my DIPA is bubbling away right now it would blow the water right out of that cup!


So it seems possible to replace the analog dial type power controller (potentiometer) with one that gives a % readout (digital?). I understand the pot will not control precisely enough to assure a 3% setting will really be 3%. True?

I have read on BREWHA site where it is VERY IMPORTANT to avoid going too high in power input (voltage input) during fermentation so yeast is not scorched.

Blowoff tube/cup. Works well, even during rapid fermentation, even with uncontrolled ferm temp, even above 75 F, poor technique, but I have done it, and it does not blow out the air lock. 50 starsan / 50 water.

Valves on lid. Valve on air lock so that when racking I can close it without having to remove the air lock. I use CO2 to push beer out the cone mounted racking port.
Valve on the other lid port is there to close while removing the pressure vacuum relief valve (PVRV), then attach a CO2 keg post for delivering CO2 to push beer out the racking port. Both ball valves are open during fermentation. The PVRV is a valuable safety feature to protect the medium BIAC from deformation in case of a major unplanned cooling event sucking in the inner wall of the vessel. Somebody on this thread had bad luck one time and sucked his vessel in. Expensive situation.

Hi Ron8...I have never used an analog controller so I cannot answer the 3% question. I used 3% power on the electronic controller and it worked well, but the next time I need to do this I will try 1 or 2 % as a previous post said they use 1%. (This is in reference to holding a fermentation temperature with the electric heating probe in the BIAC using the electronic power controller).

******Update**** Just increased the temp in my medium BIAC by using 1% power and it took 1 hour to raise the temp almost 2 degrees F. So, in the future I will use 1% power to increase and hold a higher temp.********

Valves on the lid....Once my pressure relief valve is on the lid it stays there until I take the top off to clean it. I would not pressurize the vessel unless that valve was on the opposite inlet port on the lid top. When I am ready to rack the beer to kegs, I remove the blow-off tube momentarily and connect the co2 keg post. I use less than 3 psi to push the beer out.

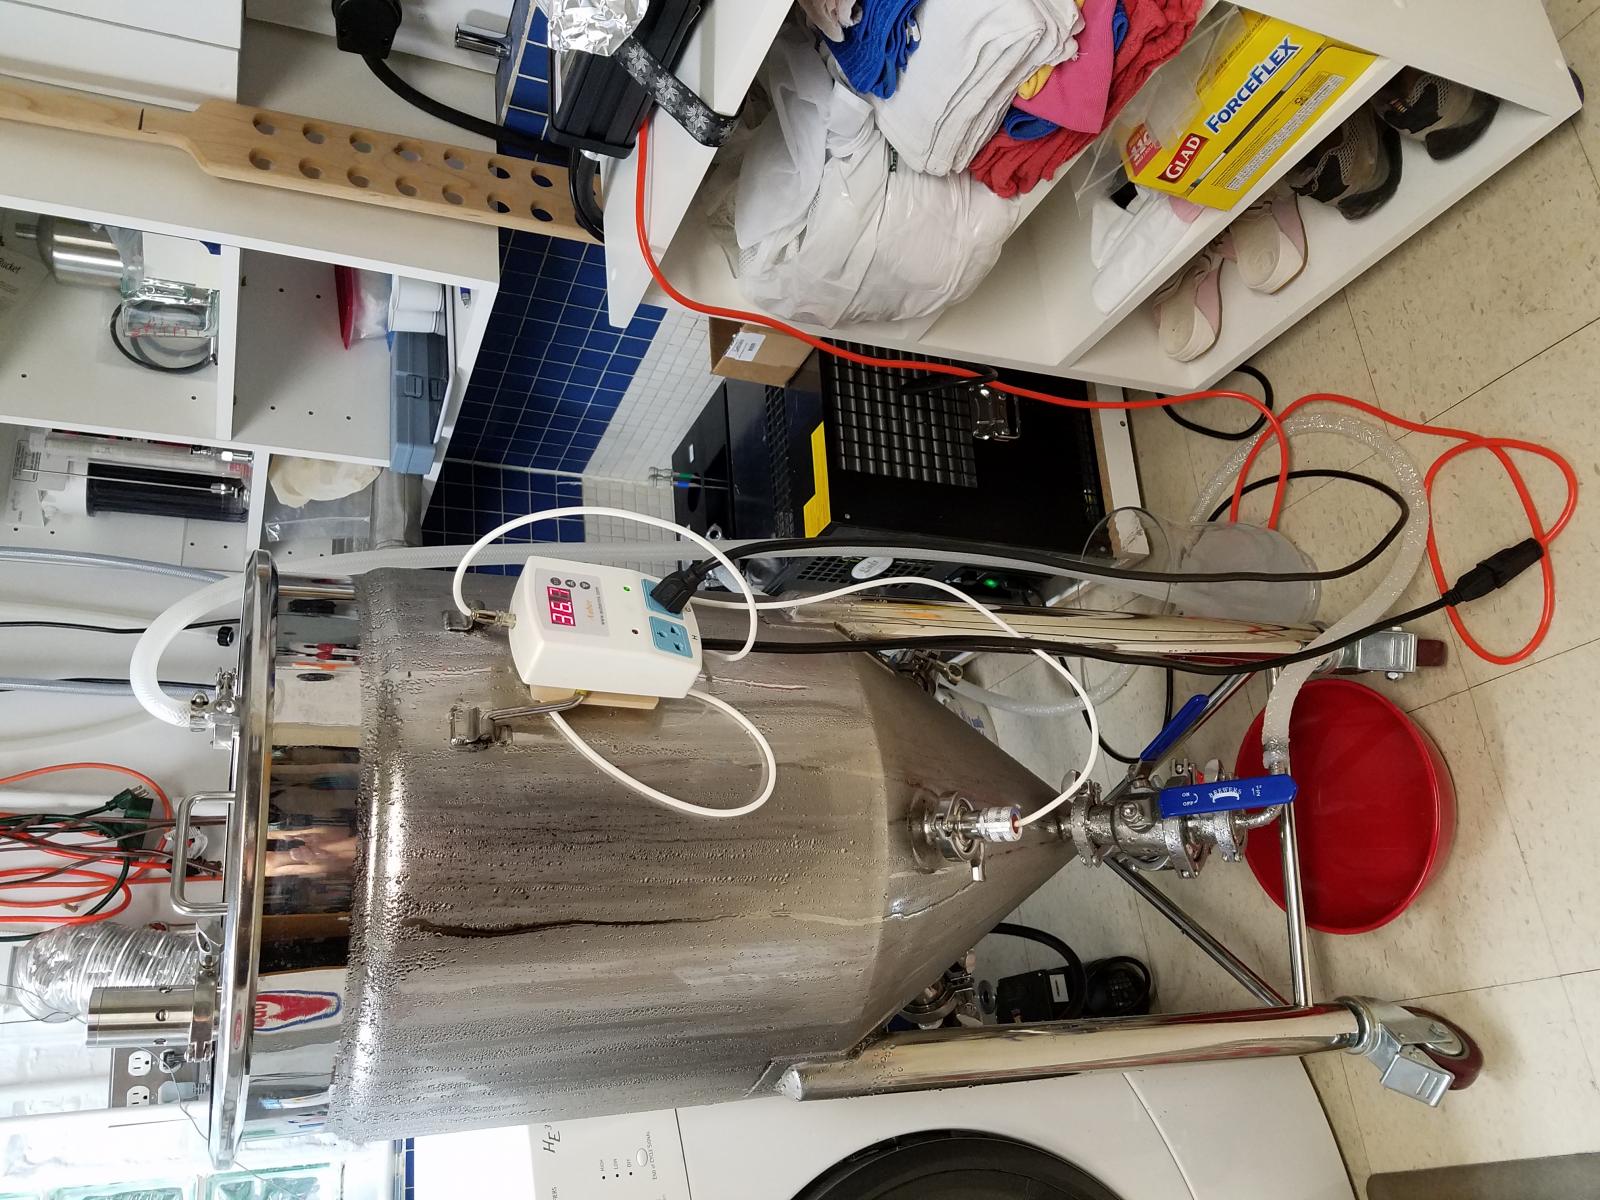
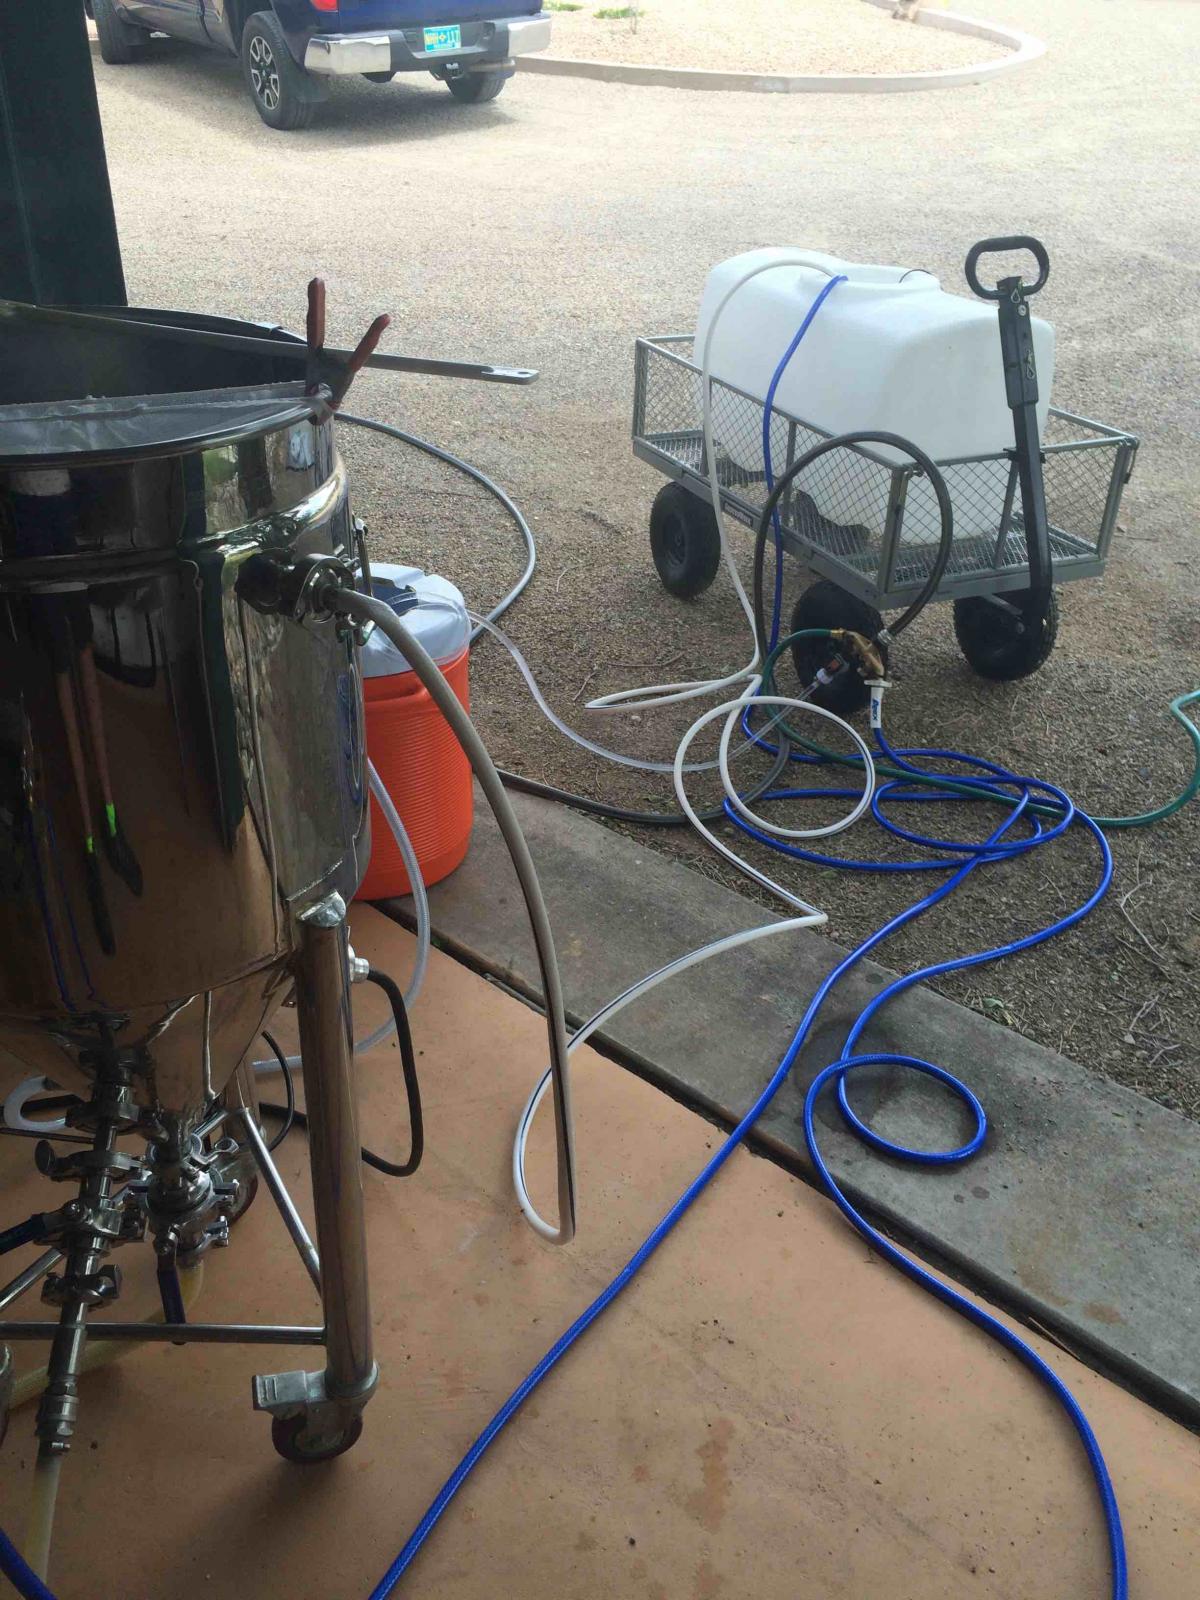
The picture shows how my system sits during fermentation and is currently sitting at 36F to cold crash for a few days before adding gelatin. I have since elevated the chiller as I was having flow-back water issues into the overflow bucket. Elevating the chiller resolved the issue.
I tried several times to rotate the pic without luck. Can someone tell me how to do it?

20160805_075207.jpg
 
Howdy and no worries, my original reply was MONTHS later than your original question :)

For my medium system, I set my controller to 1% and that seems to do the job of holding the temps steady with no signs of scorching on the heating element post kegging. I might bump this up to 2% when ramping up, but that's not always necessary unless I want to have the temps rise quickly. I've got the entire fermenter within a 2" foam box to stabilize the air temps around it, so the heating element doesn't come on that often - even in the dead of winter (fermenter and box are in an unheated, but insulated garage).

As for wort chilling, I have a similar set up with hose water run through the jacket for part one of my chiller. In the winter, water temps are about 56F, so I just run it straight in. In the summer, water is more like 75-80F, so I run the hose to an immersion chiller in a 10 gal jug full of ice water. Part two of the chiller is to recirculate from the bottom of the conical back to the racking port with a 90 degree racking arm attached. This allows a number of things: a) it keeps the hot wort moving against the cool water jacket GREATLY reducing chilling time - very important. It also allows you to add gadgets between the pump and the racking port like a plate chiller. I've got a therminator inline with this system and run the same water from either the hose or the pre-chiller (via a wye connector) through the plates. Just cooled a Russian Imperial Stout this weekend from boiling to 66F in 14 minutes (granted, boiling at my elevation is about 198F). When I have a large hop load, I'll put a Hop Rocket in front of the plate chiller with either some rice hulls or some leaf hops to act as a filter to keep the break and veggies out of my therminator.

Hope this helps :mug:
Hi Solstice Brewing,

Yeah, I like your foam box idea. Any photos?

Circulating the wort during cooling is something I haven’t thought of. I don’t circulate wort anytime. The first time I brewed with the BIAC I had major plugging in the pump during mash. So, I do not circulate ever. I know my efficiency would be better if I did, but just don’t bother. Also avoids having to clean out the pump and tubing. I may change mind in the future. 14 minutes to cool wort surely is a great goal to shoot for. Is that for 10 gallons?

Maybe some time you could share photos of your immersion chiller and terminator in action.

Thanks for your comments and help.

Ron8

Here are a few pics:
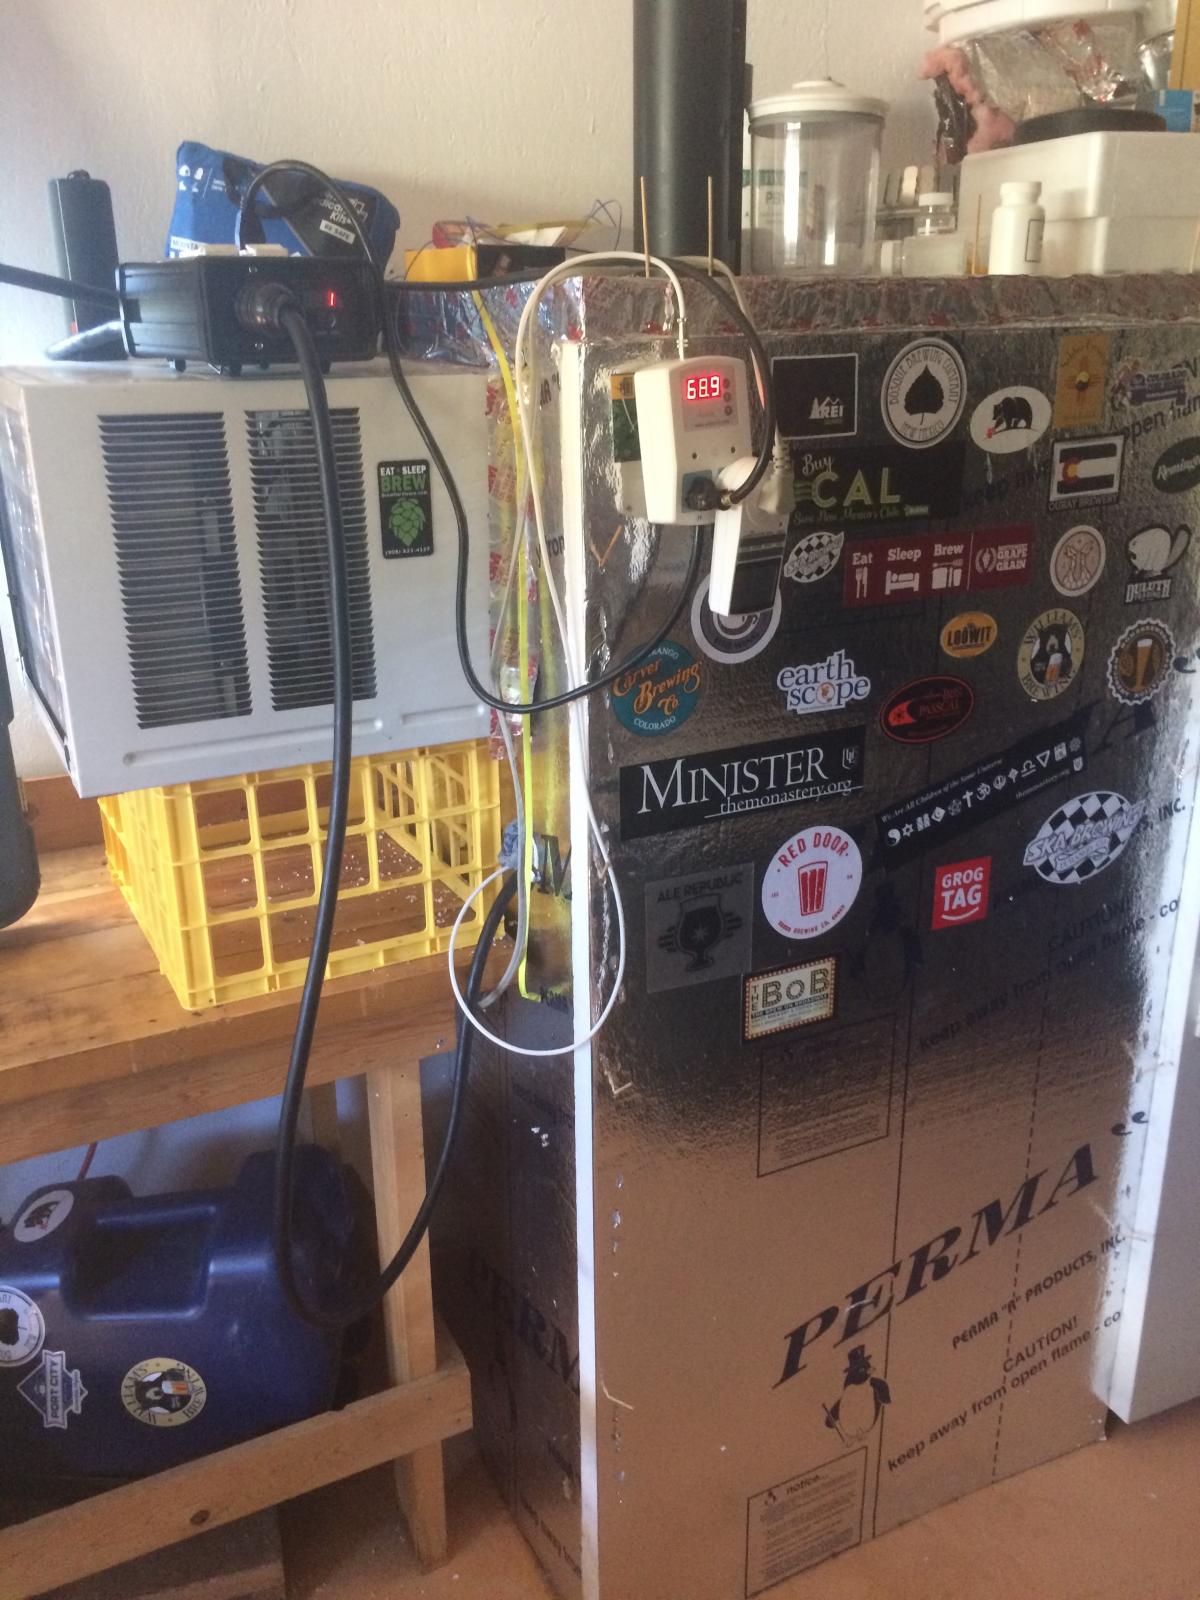
First, the fermentation chamber (BIAC inside). The AC unit is hot-wired so that the fan and AC come on high when power is applied. This was a cheap workaround to make the system work like a cool-bot - but <$300 :). Also note that the cool side of the temp controller has cheap light timer that only allows the AC unit to come on for 2 out of every 3 hours to avoid icing up. Again, a cool-bot will do this as well, but costs a bit more.
attachment.php


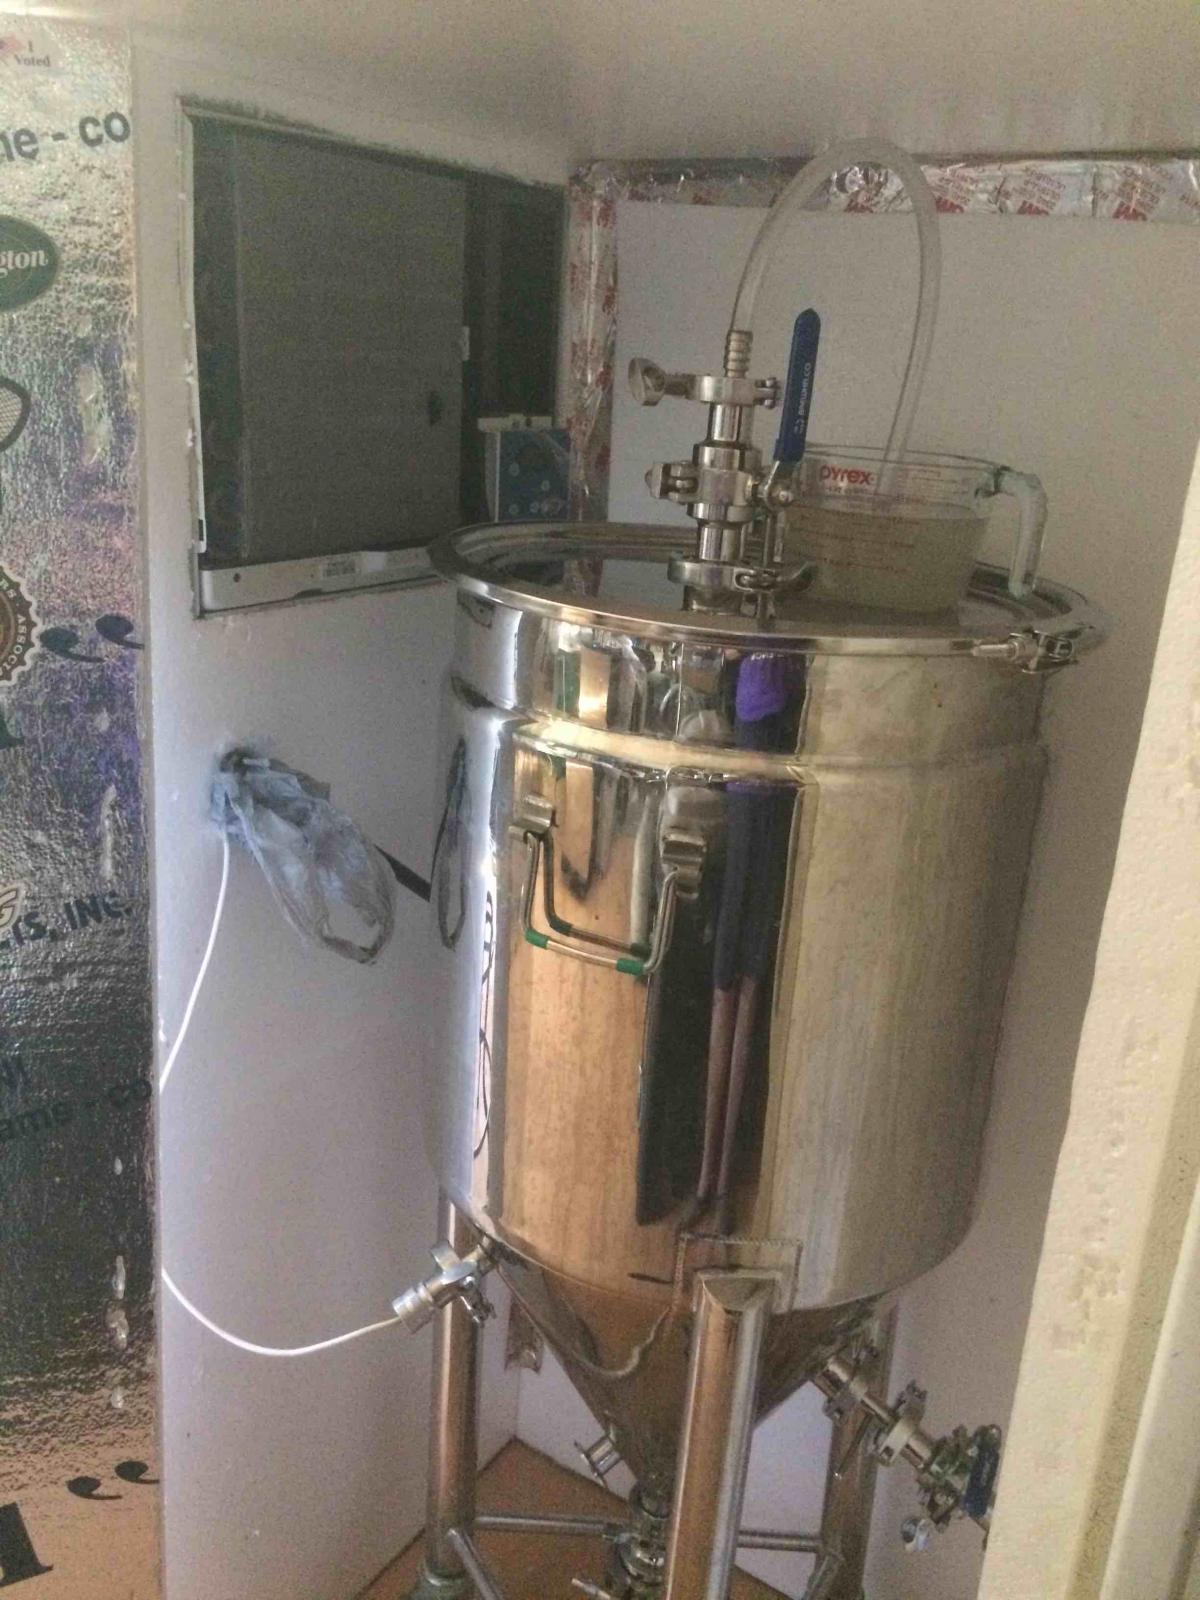
This is the inside of the ferm chamber - Fermentation is about done, just doing a diacetyl rest on the RIS. The vacuum relief valve is on the other port behind the blow-off pot.
attachment.php


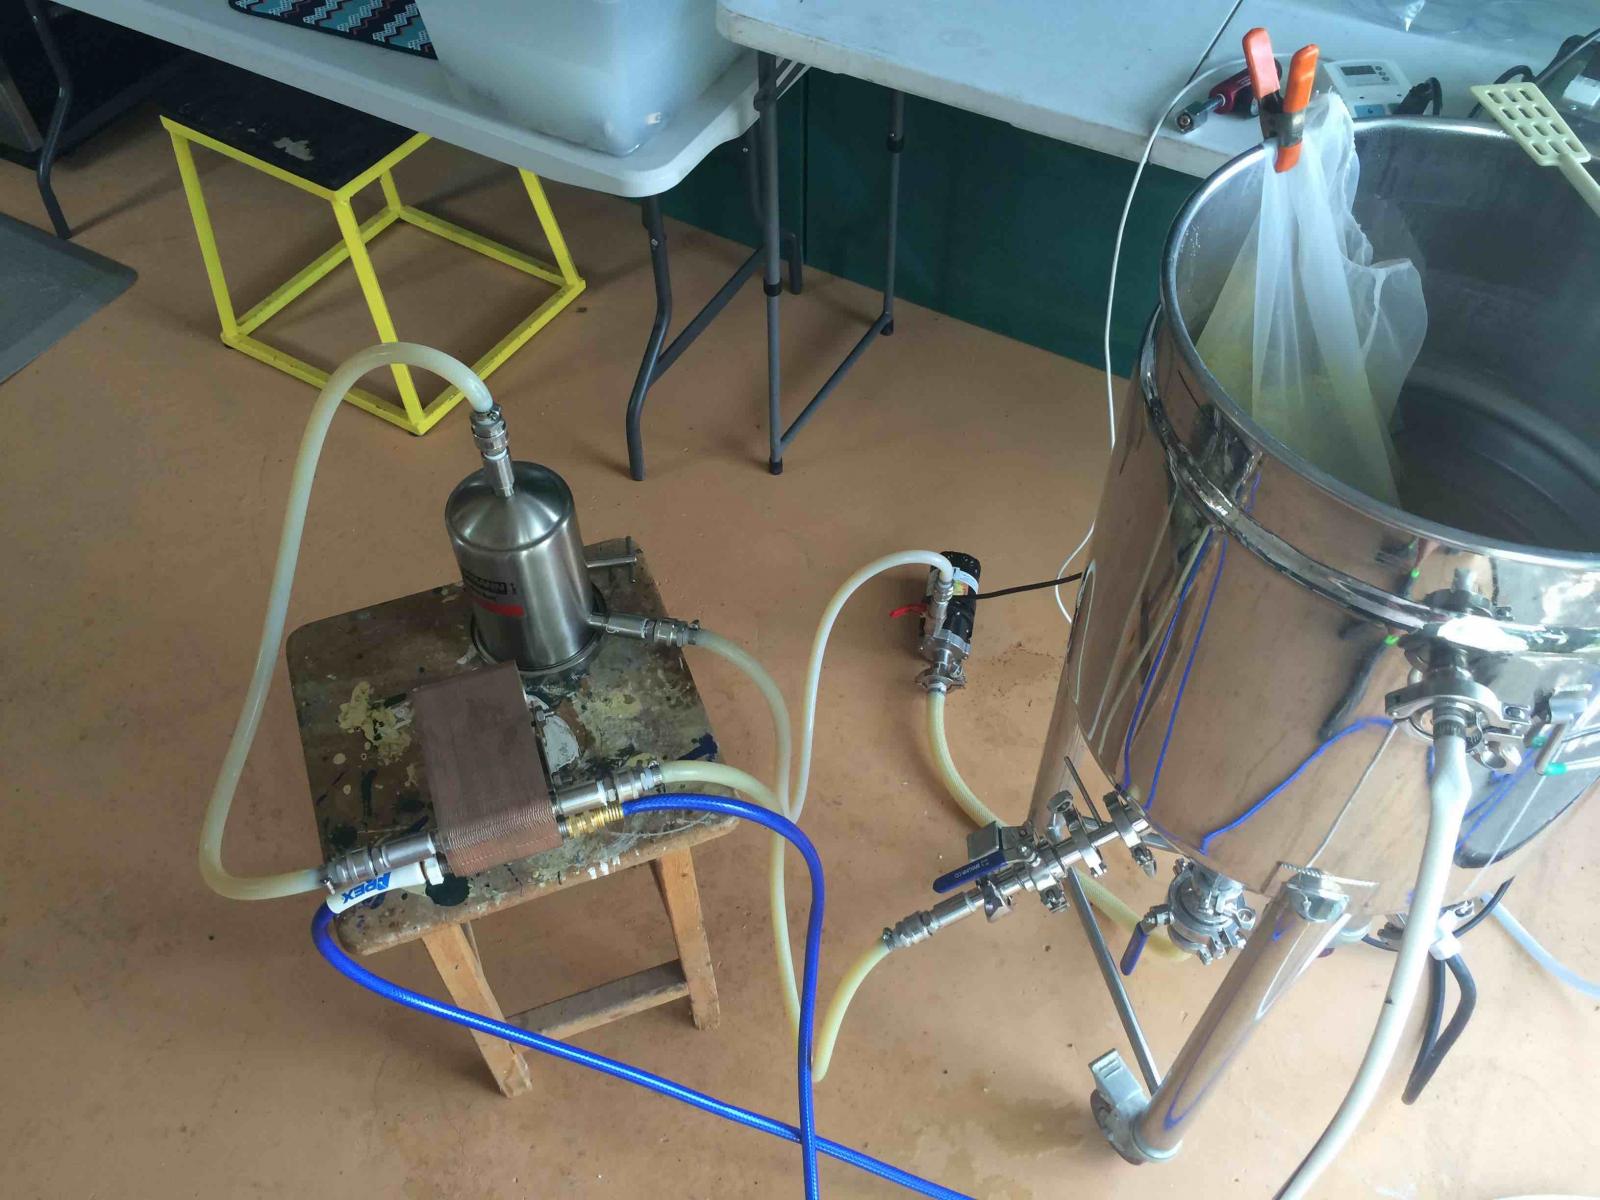
Here's the plumbing system for the whirlpool/chilling cycle.
https://www.homebrewtalk.com/attachment.php?attachmentid=399591&stc=1&d=1494201512

And last - my water collector. I catch the the water from the jacket and the plate chiller to use for clean up and watering the plants.
https://www.homebrewtalk.com/attachment.php?attachmentid=399592&stc=1&d=1494201512

cheers

solstice-ferm-chamber-lores.jpg


inside-ferm-chamber-lores.jpg


whirlpool-plumbing-lores.jpg


water-collection-lores.jpg
 
Thank you for the photos, Solstice.

I like your set up. I have thought more than once of creating an insulated room for the BIAC. I like the AC idea making it fully automatic. Although I have my cold water loop working pretty well now and am pretty happy with it.

Your insulated foam box ferm chamber on the other hand is something I have given a lot of thought to in the past. I&#8217;ve thought about just using lights as a heat source, or maybe an electric space heater.

How long have you been using this foam room setup?
I imagine you picked the smallest air conditioner you could find. Did you calculate the heat duty needed? What is the AC rating?
It looks like you bound the walls together with tape inside. Are you using any additional fasteners to hold the walls together?

Ron8
 
Hi Ron8,

Using the jacket for cooling sounds great! I haven't worked that into the system yet, but if I ever end up with a glycol chiller, that will certainly be used. Might have to consider that if the AC unit goes out.

As for my chiller: no calculations went into the AC unit. I happened to have an old window AC unit that I no longer used on the house. Certainly don't need much as you're only chilling about 20 cubic feet. I've been using this for over a year now and brew about once every 3 weeks. I just got another fermenter, so I can brew more often. I plan on doubling the size of the fermentation chamber and always keep the AC on the cold side and build another temperature controller (STC1000) to either control a fern-wrap around the secondary fermenter, or to send power to a vented fan between the AC side chamber and the secondary chamber. That ought to allow me to control temps on both sides as long as the primary is cooler than the secondary. We'll see how that works.

As for the "structure" (using that term loosely): I used bamboo skewers and 3M metal tape on all the seams. Hasn't fallen apart yet ;). When I build the bigger system, I may frame this out to allow some more structure and proper doors. We'll see how much free time I end up with this summer.

On the road right now. I'll try to look up the AC unit rating when I get home in a couple weeks.

cheers,
 
Circulating the wort during cooling is something I haven’t thought of. I don’t circulate wort anytime. The first time I brewed with the BIAC I had major plugging in the pump during mash. So, I do not circulate ever.

Ron8

Forgot to respond to this. First time I used the system, I doughed in and THEN turned on the pump - clog city. Ever since, I have the water recirculating as I dough in and the grain that makes it through the colander on the first stages of the mash generally get caught up the next go around and the pump doesn't clog any more. I make sure it's running while I stir the mash as well - about every 15 minutes to equilibriate the temperature in the mash colander and move some of the liquid move through the wort - getting more uniform wort for intermediate SG and pH readings.

Then, of course, running the pump while chilling keeps hot wort in contact with the relatively cool jacket. Physics wins again!! :)
Hi Solstice,

I think I understand: running pump before dough in helps prevent a slug of packed-in malt from plugging the pump. If I get brave I may try it in the future.

And the benefit of moving the wort, circulating bottom to racking port, creates better heat transfer: Q = m(dot) x Cp x delta T. Where m(dot) is mass flow rate (pounds per second, or whatever units you want. So, the greater the flow rate the greater the heat transfer, Q, BTU/hr.

Encouraging, I may even decide to take up that habit.

- Ron8
 
Another option is to vorlauf after mashing in to clarify the wort before turning the pump on. I usually drain a gallon or two from the bottom valve and dump it on top of the grain. Once the wort is running clear, I hook up the pump and turn it on.
 
Another option is to vorlauf after mashing in to clarify the wort before turning the pump on. I usually drain a gallon or two from the bottom valve and dump it on top of the grain. Once the wort is running clear, I hook up the pump and turn it on.
Hgearle,

I never thought of doing that. Great advice. Should also help remove some of the fines with the malt.

Do you ever remove any solids from the bottom after mashing, before boiling?

Thanks...Ron8
 
Hgearle,

I never thought of doing that. Great advice. Should also help remove some of the fines with the malt.

Do you ever remove any solids from the bottom after mashing, before boiling?

Thanks...Ron8
Hi Ron8 et al.,

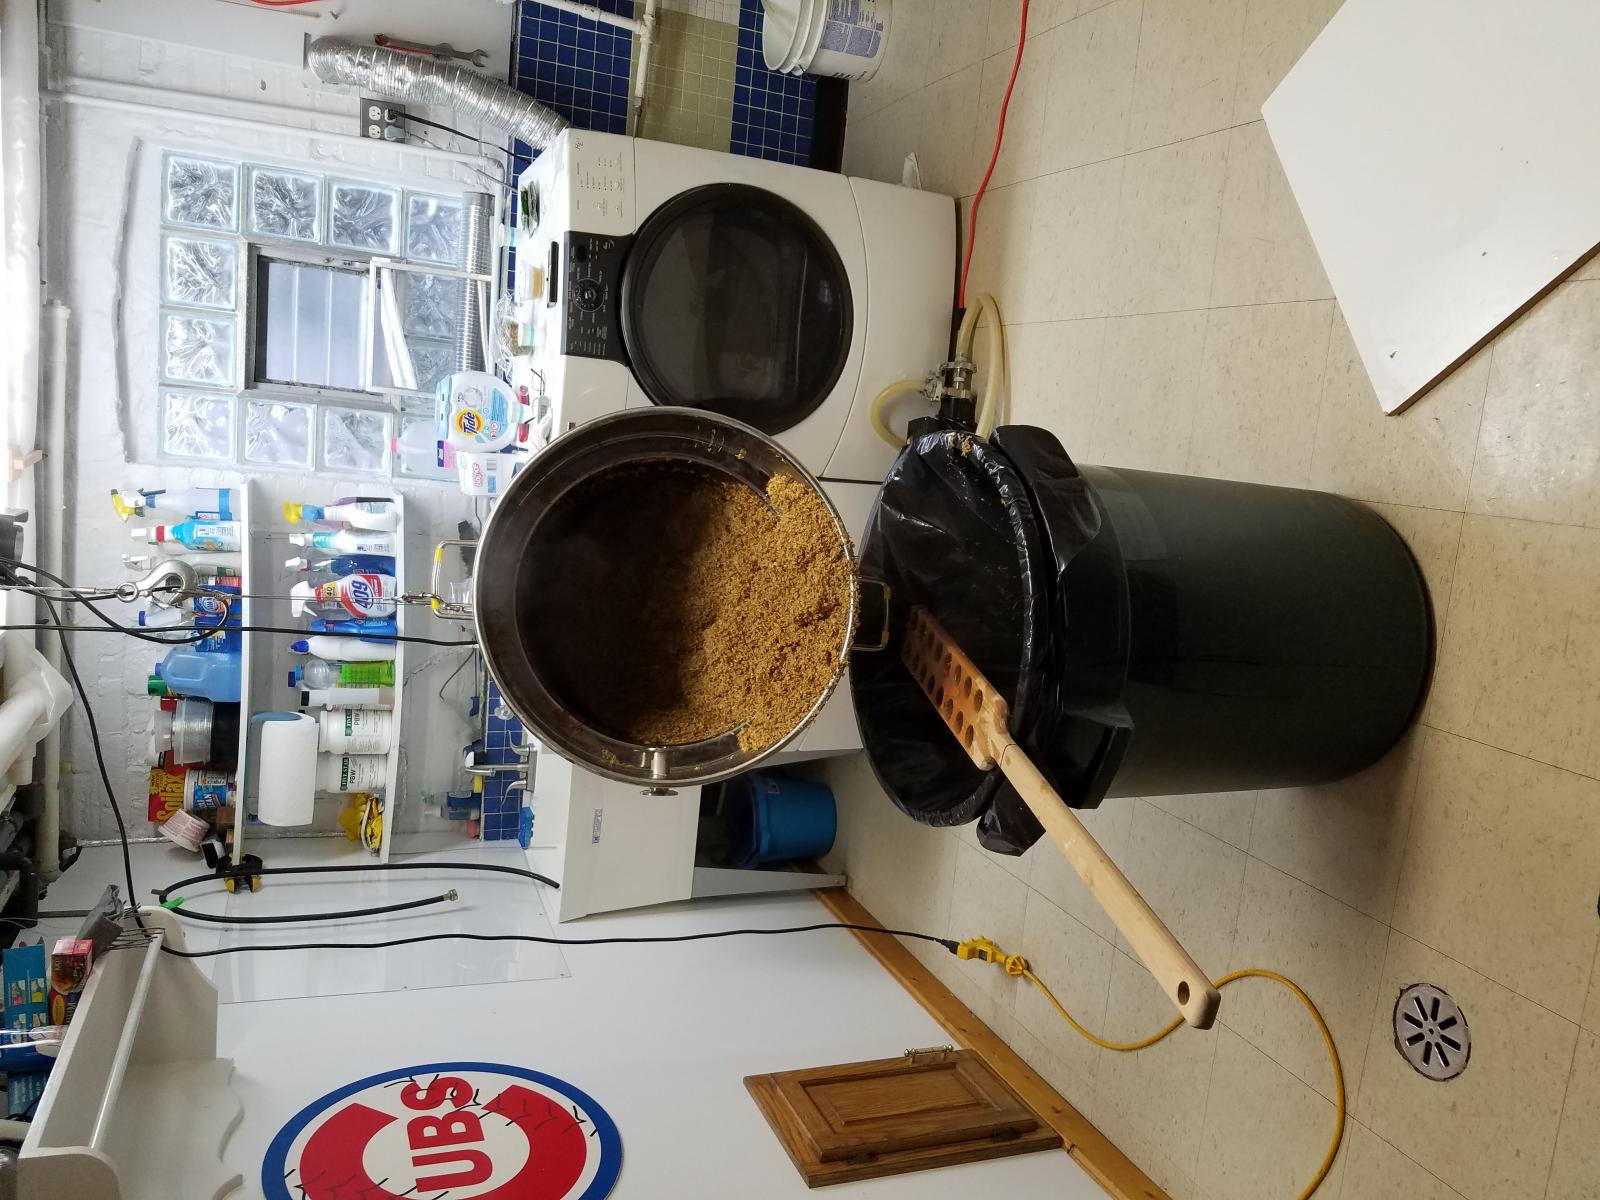
At the end of the mash, I raise the temperature to 172+ and mash out for 10 minutes. Then, I raise the colander until it is above the wort and dripping into the kettle and continue to run the pump so I sparge the grains. I will let the wort flow until I get a few inches above the grain bed. There is still a lot of sugars to be gotten from the grain and this helps with efficiency. This can be done for 10 to 30 minutes until you feel you have gotten the most out of the grain. I then set the temp controller to 195F so as the wort is heating up as I remove the pump from the bottom and top of the BIAC. As the grain bed continues to drain, which can take 20+ minuets, the wort is heating up. At the end when I am tired of waiting for the the grain bed to drain, I place a large garbage bag over the mash tun so I can move the kettle outside my door to boil. This gives me the opportunity to start the boil as the last 2 quarts of wort are draining into the bag. I will then re-hoist the mash tun with the top and bottom handles connected to the hoist, raise it and then dump the grains into a large garbage barrel. If I think I need to, I will bring the half gallon of wort that was drained into the garbage bag over to the kettle and slit the bag with scissors to add the wort to the kettle.

The setup of the recirculating pump is only set aside, because I am going to hook it back up again once the boil is finished to whirlpool the hops and help with circulation during cooling. Heating the wort to boiling only take minutes now.

I recirculate from the bottom valve for the mash, BUT I recirculate from the wort transfer port for whirlpooling. With b1v1r 's great post (post 652) to build a whirlpool device, you can get a raging whirlpool not only to whirlpool hops for amazing juicyness, but to aid in cooling as you recirculate cold water through the jacket to cool the wort. Also, there is no reason to recirculate from the bottom valve where all the sediment is if you can do is at a higher altitude. I also have the SP400RA (1240) Racking Arm for Fermenters from Stout Tanks and Kettle($39.99) which I feel is a necessity for the BIAC. It gives you complete control over the depth or wort being transferred to your kegs. With the Racking arm facing right, and the raging whirlpool going right, you can dump on 8 ounces of juicy whirlpool hops and not worry about clogging your pump. But when you are transferring wort to your kegs, you are taking beer from about 2 inches above the level of the racking port outlet which is critical in getting clear wort into the keg. I almost always brew high gravity IPA's so the racking port hole is always covered in sludge. With the SP400 above, the wort is clear because the inlet valve is above the wort and I rotate the racking arm down as the beer transfers until I feel I an getting....not clear wort, then stop.

After my boil is finished, I hook up the pump again to the racking port (previously, the bottom port), and to the top to the whirlpool racking arm port connected to the kettle top. (I do purge the racking port before connecting).

Once the whirlpool is done, I hook up city water to cool to fermentation temp (I am lucky to have cool city water), then hook up to the chiller to hold whatever temp I desire.

I will finish with this ....the water your brew with is critical to what you are brewing. You cannot brew a Guinness Stout with German pilsner water and you cannot brew a German pilsner beer with water from Ireland. Maybe start with RO/distilled water and add salts (gypsum and calcium chloride) to get to you to where you need to be (https://www.homebrewtalk.com/showthread.php?t=198460).

I realize that there are many ways to brew with this amazing BIAC. If you see that I can improve on the way I am doing things....please don't be shy in telling me the way you do it. Thanks.

Cheers

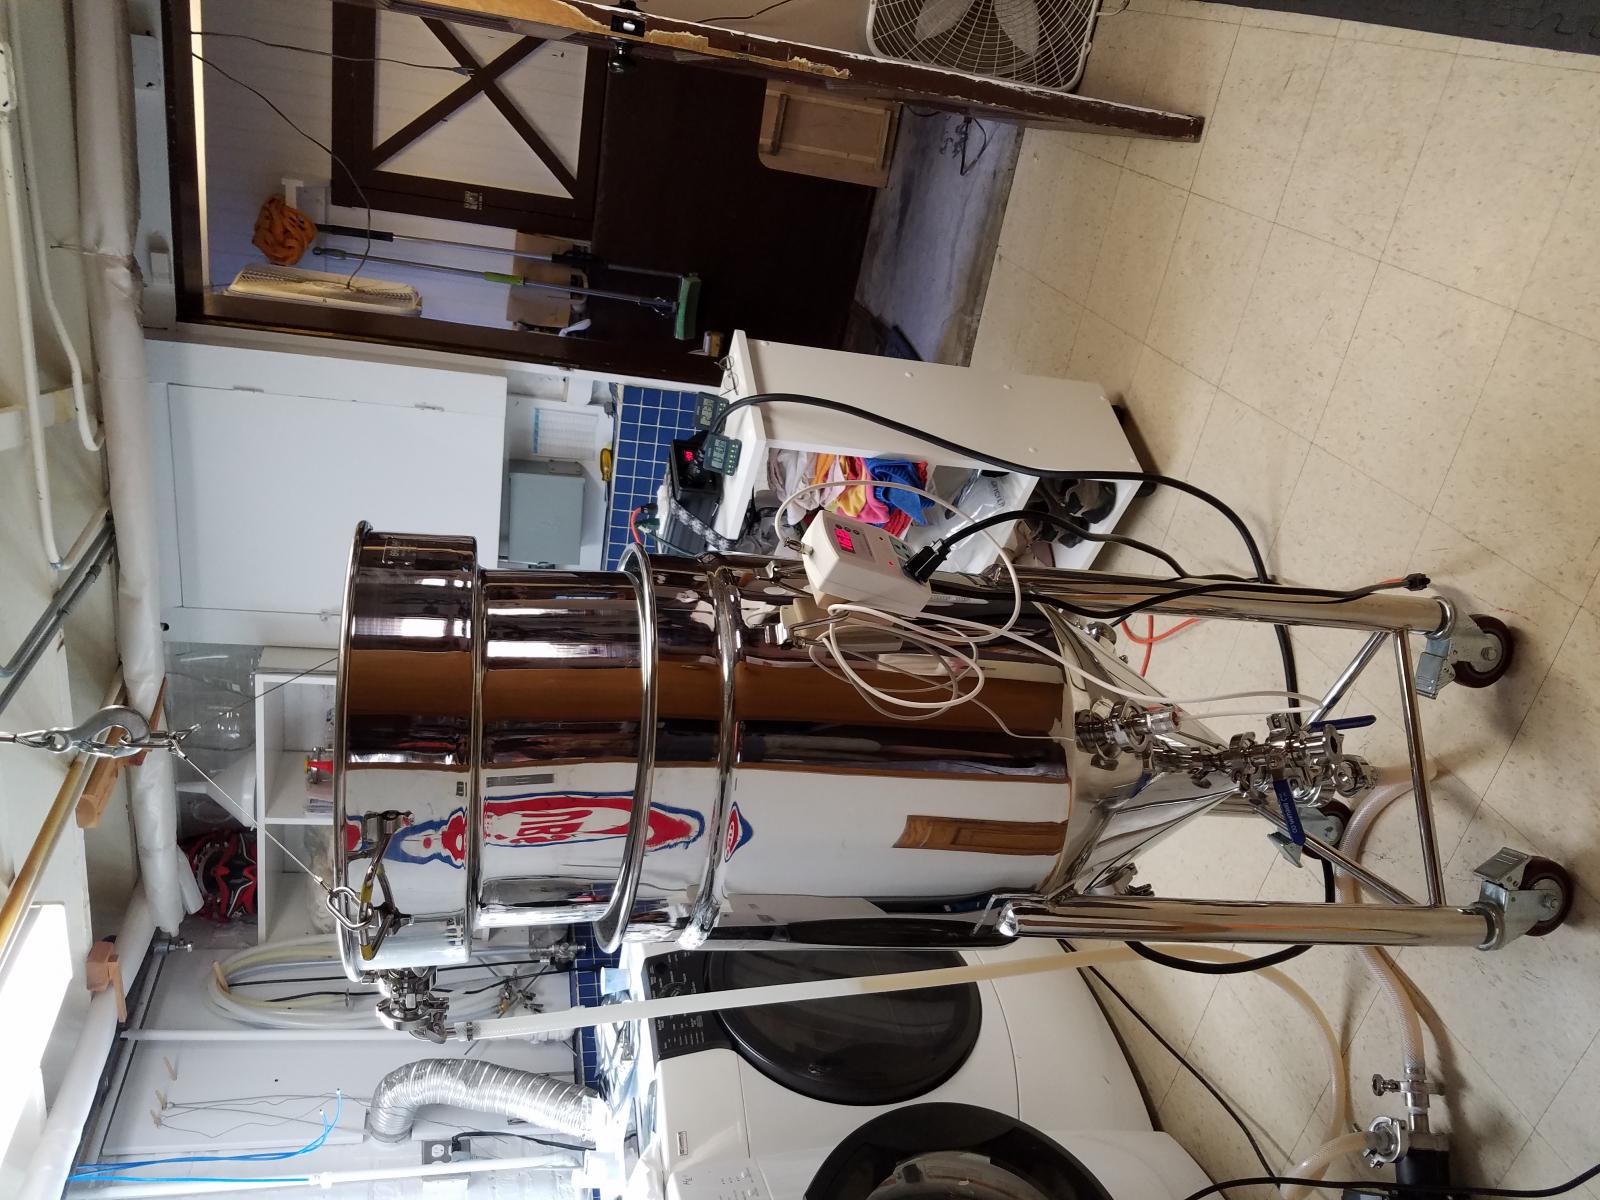
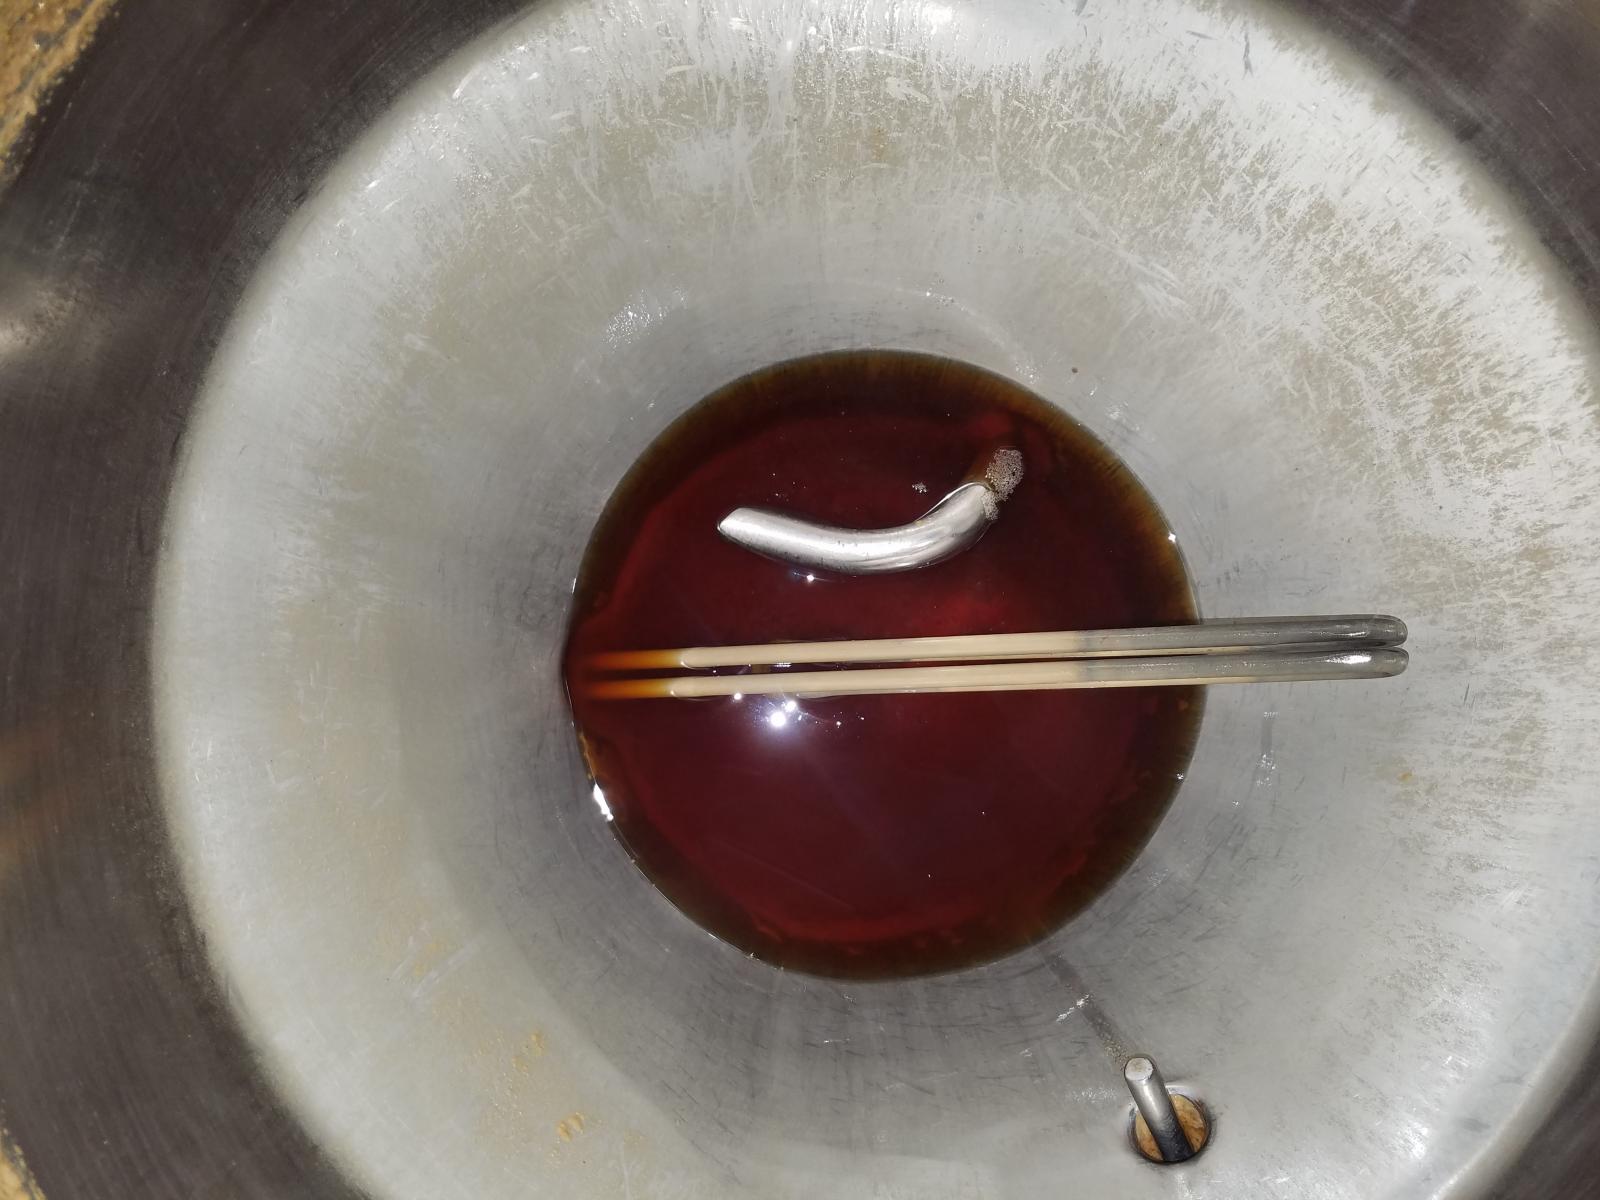
PS. I still cannot figure out how to get this site to NOT turn my pictures sideways. If you can tell me how to display my pics the way they show on my computer, it would be appreciated.

20160708_105918.jpg


20170105_144514.jpg


20170315_115244.jpg


20161030_145900.jpg


20170105_131532_001.jpg
 
Here are a few pics:
First, the fermentation chamber (BIAC inside). The AC unit is hot-wired so that the fan and AC come on high when power is applied. This was a cheap workaround to make the system work like a cool-bot - but <$300 :). Also note that the cool side of the temp controller has cheap light timer that only allows the AC unit to come on for 2 out of every 3 hours to avoid icing up. Again, a cool-bot will do this as well, but costs a bit more.
attachment.php


This is the inside of the ferm chamber - Fermentation is about done, just doing a diacetyl rest on the RIS. The vacuum relief valve is on the other port behind the blow-off pot.
attachment.php


Here's the plumbing system for the whirlpool/chilling cycle.
https://www.homebrewtalk.com/attachment.php?attachmentid=399591&stc=1&d=1494201512

And last - my water collector. I catch the the water from the jacket and the plate chiller to use for clean up and watering the plants.
https://www.homebrewtalk.com/attachment.php?attachmentid=399592&stc=1&d=1494201512

cheers
Hi again Solstice,

I am copying your AC unit idea. Just wondering what your thought process was for deciding to sit the AC unit near the top of the chamber? instead of near the bottom. I understand heat rises. But I have been tossing around in my head what would be the best arrangement for getting the air to flow all over the outside of the vessel to hopefully achieve uniform cooling on all surfaces of the vessel.

I have just purchased the dual ETC from BREWHA. And will use the AC for cooling, while continuing my water circulation through the jacket when heating is required, using 90 F water in an insulated box, circulating with the pump.

I noted you used 2" insulating board. Any tips on how you cut the board? My neighbor handy man didn't think it wise to use a power saw. Too much bits of material flying around.

Thanks for your help,

Ron8
 
Hey Ron8,

I figured putting the cold air in at the top would allow the colder, denser air to drop and mix it up a bit - allowing a more uniform temperature in the box. No calculations done - just seemed to make sense.

As for cutting the foam board, I just used my table saw. Yes, it made a bit of a mess, but not as bad as I thought it would. Certainly, the cleaner cuts were work a little sweep up afterwards.

Good luck with the new chamber!

SB
 
Thanks Solstice. I thought more about your set up and, likewise, I concluded at the top is best. The cold air will not impinge directly on the cylinder, avoiding local over-cooling.

I found the idea of using a sharpened putty knife and straight edge, 2 by 4, for cutting the insulation. Thanks for letting me know. It certainly would be faster with a power saw.

- Ron8
 
Finally got around to ordering a custom whirlpool arm from Norcal Brewing Solutions. I'm also ordering a racking arm from Stout if I can ever get their ordering feature to work.

DSC_0320.jpg
 
I like the whirlpool you got from Norcal, Limulus.

Would you share the info you gave them to get the right dimensions? I'd like to make sure I don't get the 'length' and 'width' dimensions on their site mixed up and end up with one that won't fit my medium BIAC. Thanks!
 
I like the whirlpool you got from Norcal, Limulus.

Would you share the info you gave them to get the right dimensions? I'd like to make sure I don't get the 'length' and 'width' dimensions on their site mixed up and end up with one that won't fit my medium BIAC. Thanks!

1. Total length of the tube is 21.25in. from tip to tip.
2. From the TC flange that attaches to the kettle lid to the end of the tube is approx 19.25".
3. The section of tubing between the TC flanges is 1.5in.
4. The length from the bottom TC flange (the one that attaches to the kettle lid) to the middle of the 90-degree bend is 17in.

The bend on mine is 1-2 in above the seam where the cone joins the rest of the fermenter. I have not tried it yet, but plan to this next week. I also bought a racking arm from Glacier tanks.

I think that whirlpooling while cooling will greatly decrease the time needed to reach pitching temperatures.

I thought my explanation in my order was pretty accurate, but they called me anyway to confirm what I wanted. Of course keeping the top end of the tube straight was the most important part. The one on the Norcal site has a 90-degree bend. He made it the next day and shipped it. I was impressed that I had it w/in a week.
 
Back
Top