• Please visit and share your knowledge at our sister communities:
  • If you have not, please join our official Homebrewing Facebook Group!

    Homebrewing Facebook Group

20g Stout/Kal Build and Bar

Homebrew Talk

Help Support Homebrew Talk:

This site may earn a commission from merchant affiliate links, including eBay, Amazon, and others.

November

...relax...
HBT Supporter
Joined
Aug 14, 2009
Messages
812
Reaction score
313
Location
Southern AZ
It is time to replace my current propane rig. I have decided to go electric and spent a few months putting together spreadsheets of all the parts and costs. There are a bunch of these build threads, but when I was putting my plans together, I found the threads very helpful to pull ideas from. Hopefully someone will find parts of this useful.

Here is the general plan:

Tanks
-Vessels are custom ordered from Stout. ETA is June.

Boil Kettle 20g
-Dome Bottom
-1.5" TC element port
-1.5" TC output
-1.5" TC tangential inlet
-Butterfly valves
-Sight glass
-replace 1/2" NPT thermowell with 1.5" TC moved to 10:30 position
-No NSP adapter (using brewhardware enclosure for element)

MLT 20g
-Bottom drain
-False bottom
-1.5" TC outlet
-1.5" TC recirculation inlet
-Butterfly valve
-No Thermowell (using instrument tees at outlet)

HLT 20g
-Bottom drain like MLT
-1.5" TC element port
-1.5" TC recirculation port
-1.5" output port
-1.5" TC HERMS inlet
-1.5" TC HERMS outlet
-Butterfly valves
-Sight glass
-No thermowell (see above)
-No HERMS coil (using custom made 1/2" x 50' version)
-No NSP adapter (see above)
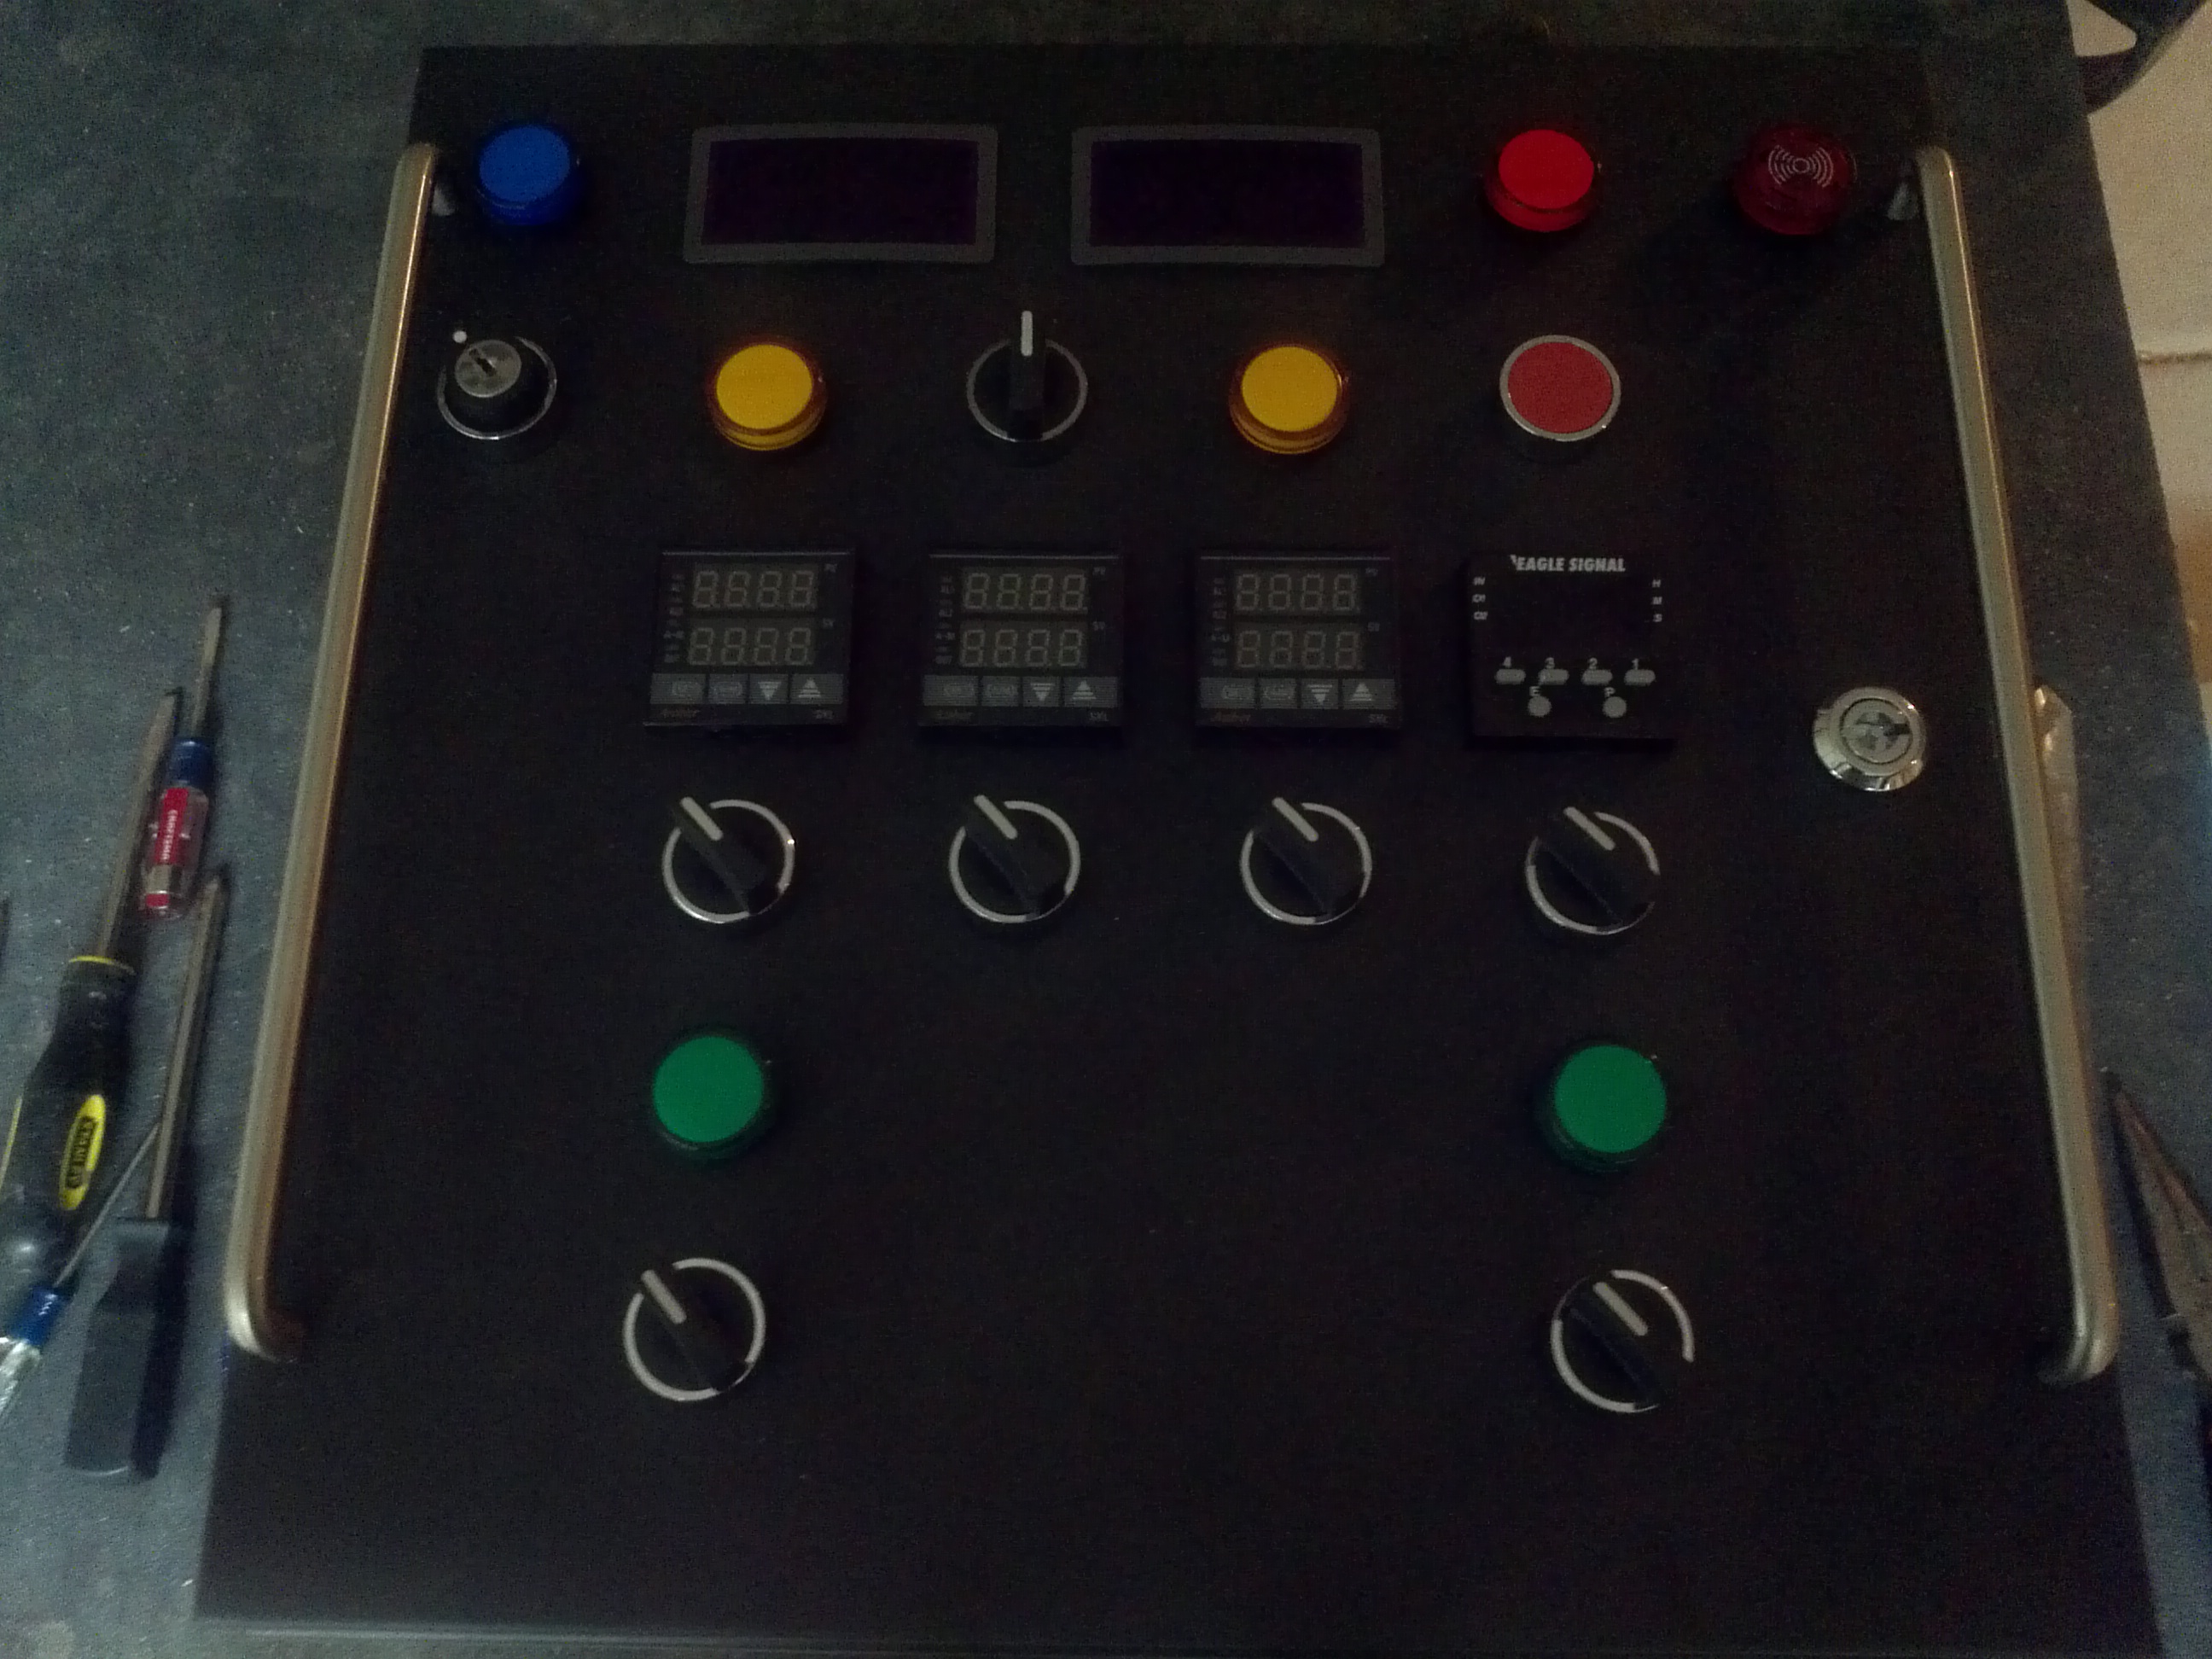
Control panel

-Kal DIY kit 240V/30A

Table
-8' long, 34" tall, 24" deep
-Wood construction using knotty alder to match the bar being put in the garage.
-Post for mounting panel to swing out TV mount

Fittings/Other parts

-1.5" TC throughout
-Brewershardware trub filter
-March 815-plc center inlet pump x2
-Dudadiesel B3-36A 40 plate chiller

I have ordered almost everything. I am just waiting to order a few final fittings until the tanks get here so I can make sure of some measurements. Besides the brewing rig, I was also going to install a bar.

The bar plan has changed slightly, I was able to get a granite topped bar for free, but it needs some repair work since parts of the granite and wood are broken. So instead of building one from scratch, I am going to rebuild this one.

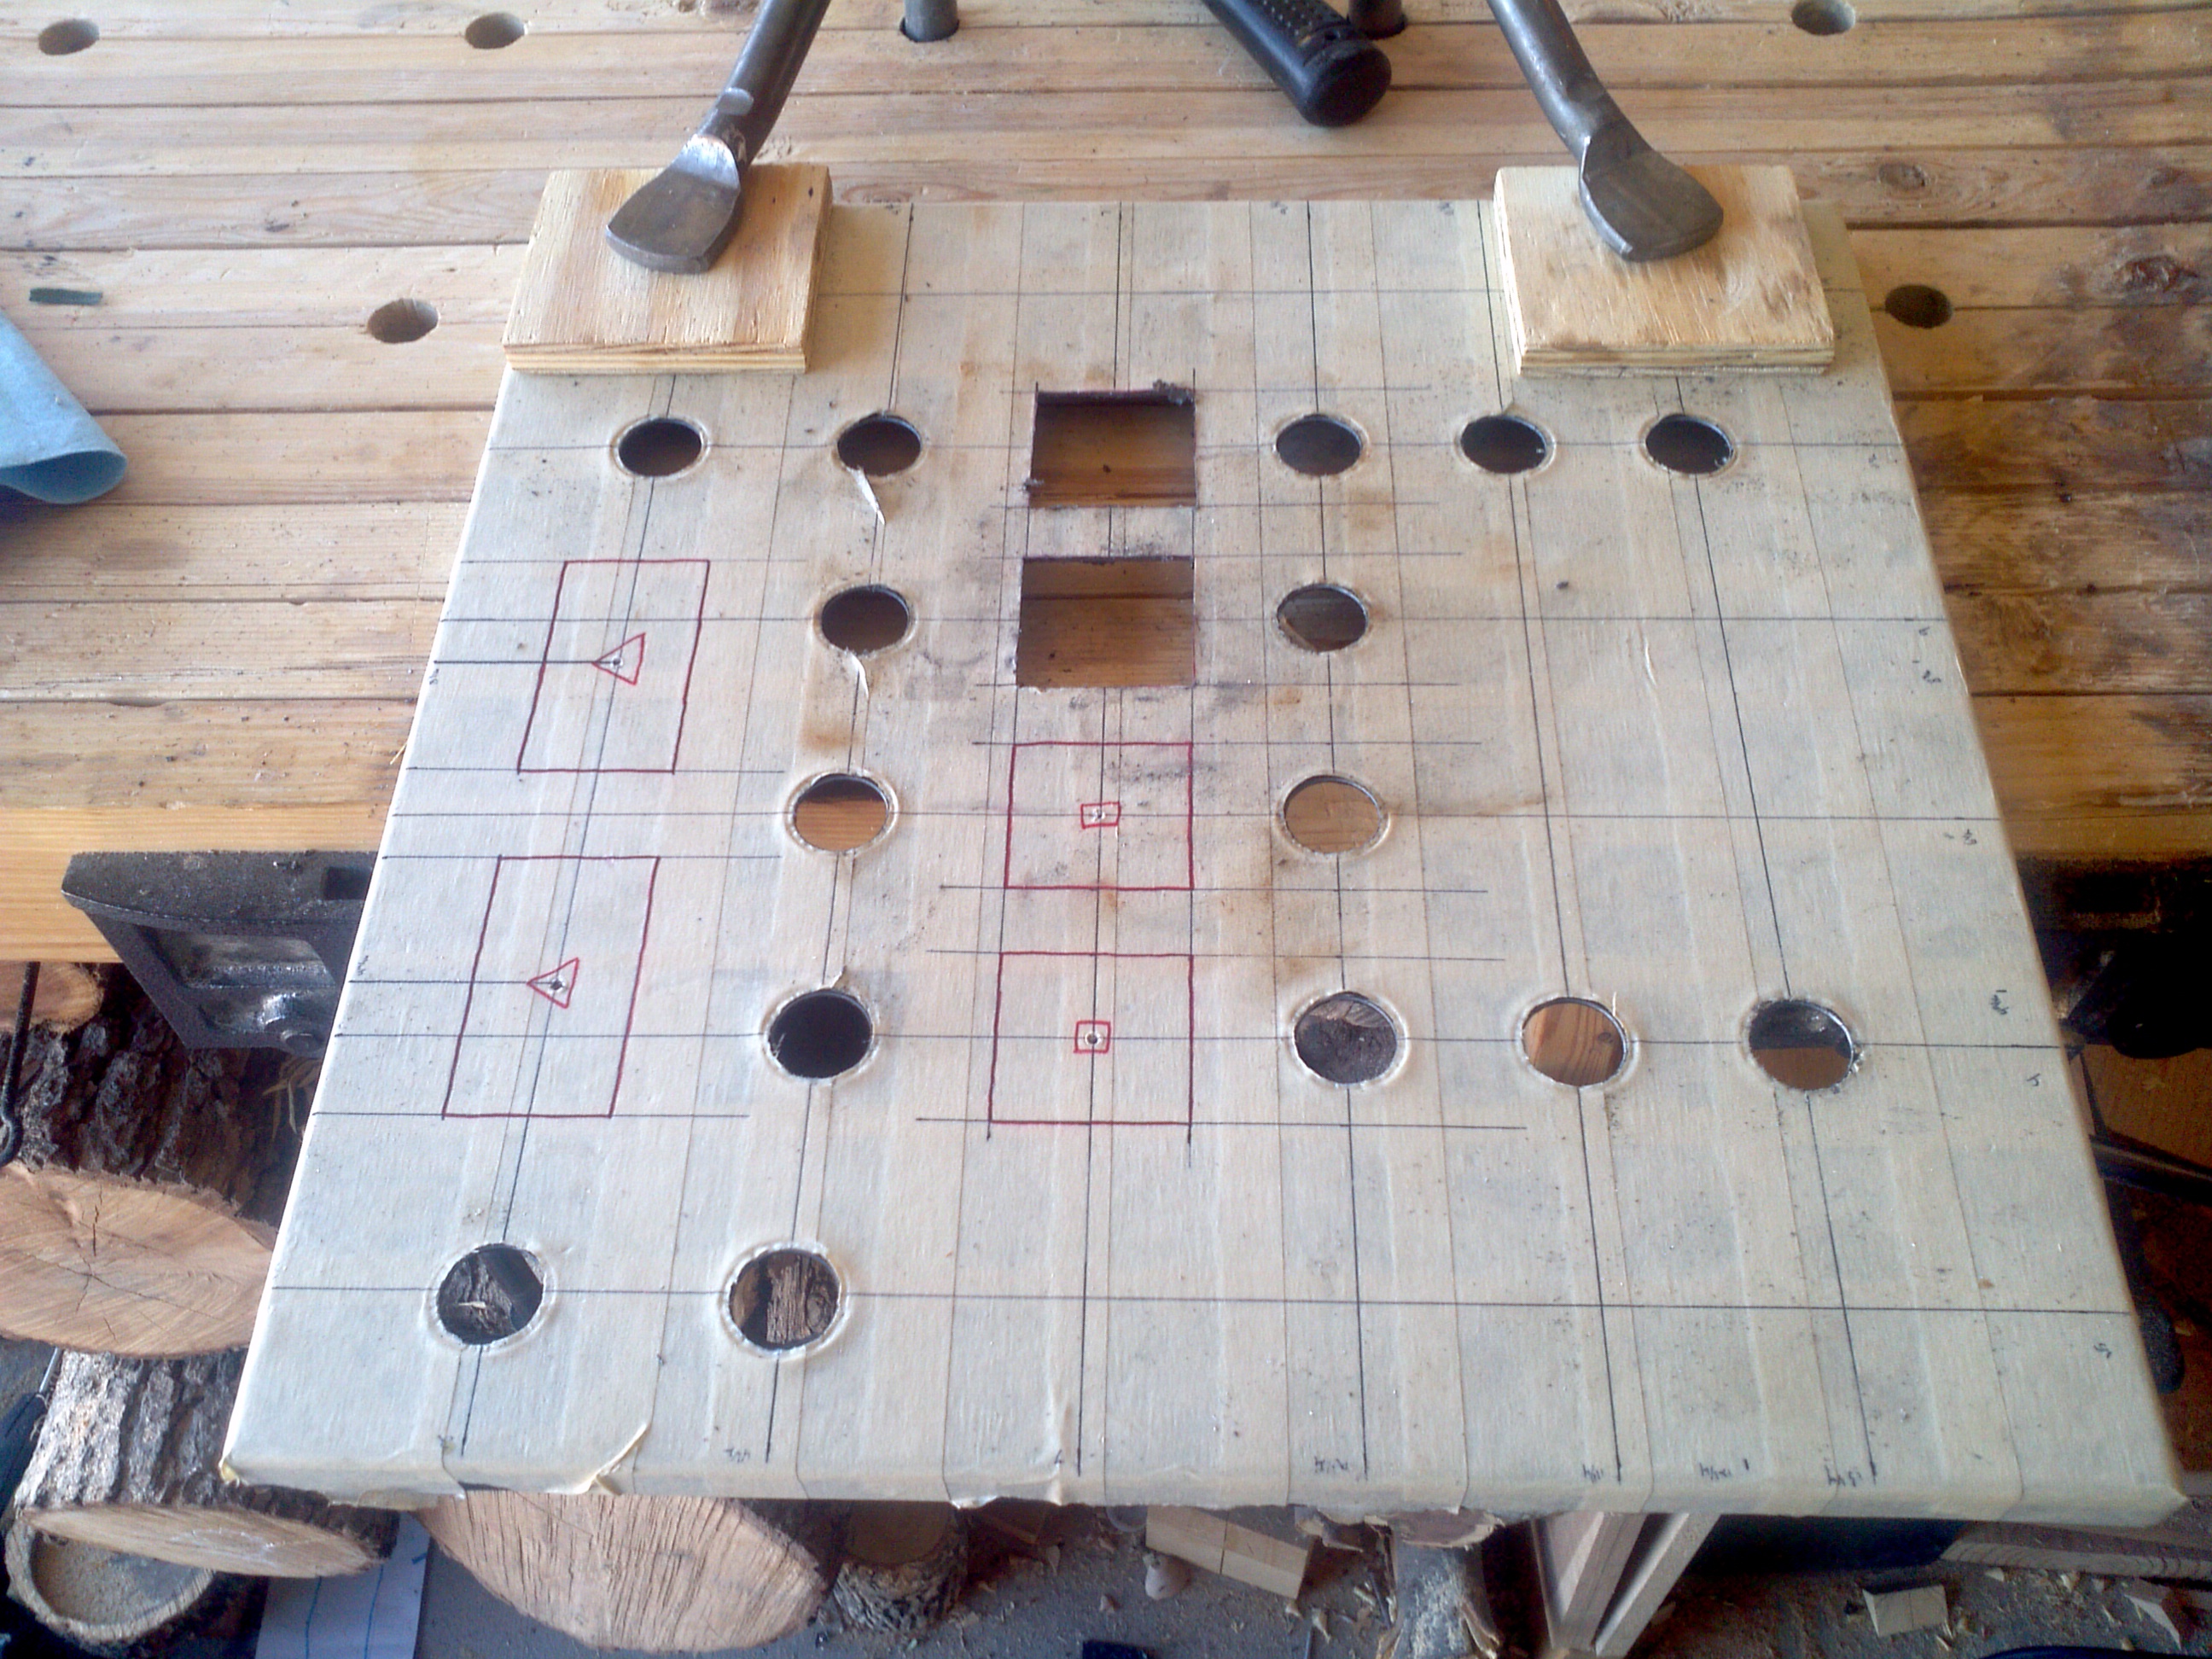
My control panel kit arrived yesterday, so I will be working on that and the bar first. I have been planning out this build for about 3 months so Its nice to final start making progress. I will post the final cost sheet once that gets fully hashed out. Pictures of the build in progress and updates are coming soon.
 
I forgot to submit that first post till today, but I have been working on the bar for a couple days and worked on the panel today.

Here is the panel progress.

img_20140322_122329-62573.jpg


img_20140322_160843-62574.jpg


So the back story on the bar is this. I'm having an addition put on my house and the builder said he had a bar I could have that he had removed from a build. The only catch was the granite was broken and he wasn't sure if he had it all or if it could be fixed. I took it and set to trying to piece it together. The top and bottom are suppose to be two long pieces each. They each broke into 3 big pieces and one little piece. It also had a back splash made of a bunch of small rounded off pieces.

I managed to find every piece out of his scrap pile and then we put it back together. I filled in a hole in the wood on one side but I still have to stain it and I have to close up the far side since it used to have another cabinet. I'm also going to eventually fill in the seams and chips with epoxy but it looks nice figuring that it cost me 20 bucks in adhesive.

img_20140322_165849-62572.jpg


img_20140322_170002-62570.jpg


img_20140322_165907-62571.jpg
 
Congrats on build. Sounds like my build with a couple changes I said I would make if doing over. Hopefully the thermowells for your temp probe are a little lower than mine. That fact alone makes it more difficult to brew 5g batches.


Almost Famous Brewing Company
 
I cut the receptacle holes on the bottom, cut the hole for the heatsink, and drilled tapped and mounted the SSRs. It all went well. The tapping went smoother than I expected. I just finished laying out the components on the backplate. I will probably start drilling and tapping that tomorrow.
 
Hey I am working on a 30 gallon BCS build right now. I am just down the road from you too! Where in Southern AZ are ya? I am down the street from Dragoon. I'd love to check out your setup in person one of these day if it works out.

I haven't finished my build yet but I am already thinking about what to change... DER! I thought I had it planned out pretty well but I guess not.
 
I know how that goes. I read your build and started double guessing whether or not I should have gone with BCS. Too late now, and I am sure I will like it when I finish.

When I finish it, swing on down and take a look if your ever by this way. I'm a good ways south of you, in Nogales, about 6 miles north of the border in the mountains east of town.

Just finished drilling and tapping the back plate and mounting the components. That didn't take as long as I expect. I might even start wiring tomorrow, though I probably still have three months before my tanks are built.
 
Oh yeah, nogales is down there! I'll try and make a point to come down this fall. I will be fine all summer so that won't work.

It seems that there are so many ways to do this that you just have to pick on and go with it!

Good luck on the build. I am looking forward to following along!
 
Finished wiring power, ground, pumps, and most of the volt and amp meters. Hit a snag with the volt meter, I lost the pin connector. I have to try to hunt one down.

Powered it up and everything powered as it should.
 
Work on the panel continues. I finished all of the wiring except the safe start. The wiring is a mess since I ran out of zip ties. As soon as I get some more, I should be able to clean it up a bit. I put together the first of four tri clamp rtd probes. That took forever. After I got it all together, it didn't work. After a bit of troubleshooting, I found that a frayed piece of the steel cable was touching one of the pins. Works fine now.

Plan is to wire in the safe start, get more zip ties and clean up the wiring, and finish the probes.

Going to go look at wood for the brewstand this weekend. I have been offered some mesquite at a good price, but I need to get it down a bit more before the wife will bite...
 
Finished wiring the interlock today.

Subscribed! I'm curious to see how it all turns out.... (good luck!)

Kal

Sorry, Kal. I didn't read the interlock instructions well enough and used some creative and colorful words in conjunction with your name during the testing. I officially owe you a pint if you ever find yourself in Southern Arizona. Works fine now.
 
This build looks awesome. And as far as the stout tanks, you will not be disappointed. Couldn't be happier with mine. Good luck.
 
Sorry, Kal. I didn't read the interlock instructions well enough and used some creative and colorful words in conjunction with your name during the testing. I officially owe you a pint if you ever find yourself in Southern Arizona. Works fine now.
Usually I only hear my wife using those colourful words in conjunction with my name... ;) Glad you got it working!

Kal
 
If you haven't ordered all the accessories, I would recommend using 1" triclover to minimize all the extra volume. Even 1" is big for homebrew equipment.
 
Flying out to Vegas for the week, so no progress. Still planing on starting on the stand next. The mesquite deal fell through, so I am going to use Alder. To match to wrought iron metal accessories I plan on using, I am probably going to use knotty alder.
 
nice score on the free bar and the panel build looks great. Excited to see your finished product.
 
Still waiting for the tanks to arrive.

Just got done off loading 70 board feet of knotty alder. I need to pick up a few more parts for the stand but I should get to start on the carcass this week.
 
I finally got some work done on this last night and this morning.

I built the top carcass and the legs. Both are made out of pine but the carcass will be covered in alder, it just serves as support. I made the top frame with half lap and edge laps joints that alternate and used glue and some screws for good measure.

Here is the top carcass done.

cam002131-63320.jpg


I planed the boards square with a number 6 fore plane and then cut it with a miter saw and used a hand drill, chisels and a rasp to cut the lap notches and fit it together.

cam002122-63321.jpg


This morning I cut the 4x4s for the legs on the miter, my arms are sore, and then planed them square.

Going to build the bottom stretcher and attach the legs next, then I need to cut and plane a bunch of alder to cover the thing.
 
Still working. I put together the frame and squared up the alder. Starting to put on the planks.

20140722_2056361-63421.jpg


Today I got all the top planks attached and started adding the facing boards.
 
Your build is looking awesome. Someday there will be a bar in my home. Renting now so no bar. Nice looking work on your control panel. I love mine.
 
Back
Top