• Please visit and share your knowledge at our sister communities:
  • If you have not, please join our official Homebrewing Facebook Group!

    Homebrewing Facebook Group

1950s GE Fridge to Kegerator - with some mods

Homebrew Talk

Help Support Homebrew Talk:

This site may earn a commission from merchant affiliate links, including eBay, Amazon, and others.
Aggie, you are a true stud. I've been watching your build along with Kerber's and am just blown away. You've taken this thing so much further than I thought possible.

I am restoring a nearly identical model that has a TON of rust. It's a slow going process. While I'm waiting to connect with someone who can weld for me I had some questions for you.

Can you tell me a bit more about the process involved in fitting and wiring up the STC-1000? I was just going to spend the $75 and get a Johnson but my engineering major buddy told me he'd help me get it set. Just wondering if you could offer a guide or overview of your process regarding that to help.

Thanks so much and keep up the amazing work!
 
I've put these up before, but I love showing it off so here it is again. nothing fancy, only two taps, but it is a '49 Frigidaire. It has worked betters than I ever expected.

image-2435777862.jpg


image-4146379529.jpg


image-455664748.jpg
 
Aggie, you are a true stud. I've been watching your build along with Kerber's and am just blown away. You've taken this thing so much further than I thought possible.

I am restoring a nearly identical model that has a TON of rust. It's a slow going process. While I'm waiting to connect with someone who can weld for me I had some questions for you.

Can you tell me a bit more about the process involved in fitting and wiring up the STC-1000? I was just going to spend the $75 and get a Johnson but my engineering major buddy told me he'd help me get it set. Just wondering if you could offer a guide or overview of your process regarding that to help.

Thanks so much and keep up the amazing work!

You're making me blush, thanks for the kind words. I'll gladly help you out with the STC once I get there :)

I couldn't pass up how well the STC fit in that freezer box area and reallllly didn't want a controller on the side/back/underneath the fridge that was hard to get to. Sorry it took me so long to get back to you, I don't check this often and the site usually emails me...
 
I've put these up before, but I love showing it off so here it is again. nothing fancy, only two taps, but it is a '49 Frigidaire. It has worked betters than I ever expected.

Looks great, did you have the jewelry rechromed? That fridge was in rough shape! :mug:

And lastly:

Most unexciting update post ever, but another big hurdle overcome... I got the oil canning out of the bad side of the box. If you are unfamiliar with this term, it's when a flat (rarely curved) piece of sheet metal will "pop" in and out if you push on it in a certain spot. It is your worst nightmare. I tried to fix it by planishing the welds, but went a step too far and made it worse. I was just pushing it around, then stopped before I got frustrated and re-read some literature on fixing the problem.

I needed to shrink an area, but don't have a torch.... So I burned some metal with the MIG and the thing popped back into position perfectly. :dunno: Beginner's luck. Here's a tip: find the center of the oil-can. Pop it up and down with one hand and using the thumb of your other hand push around the perimeter of the affected area. When it stops moving, you've found the "real" problem spot.

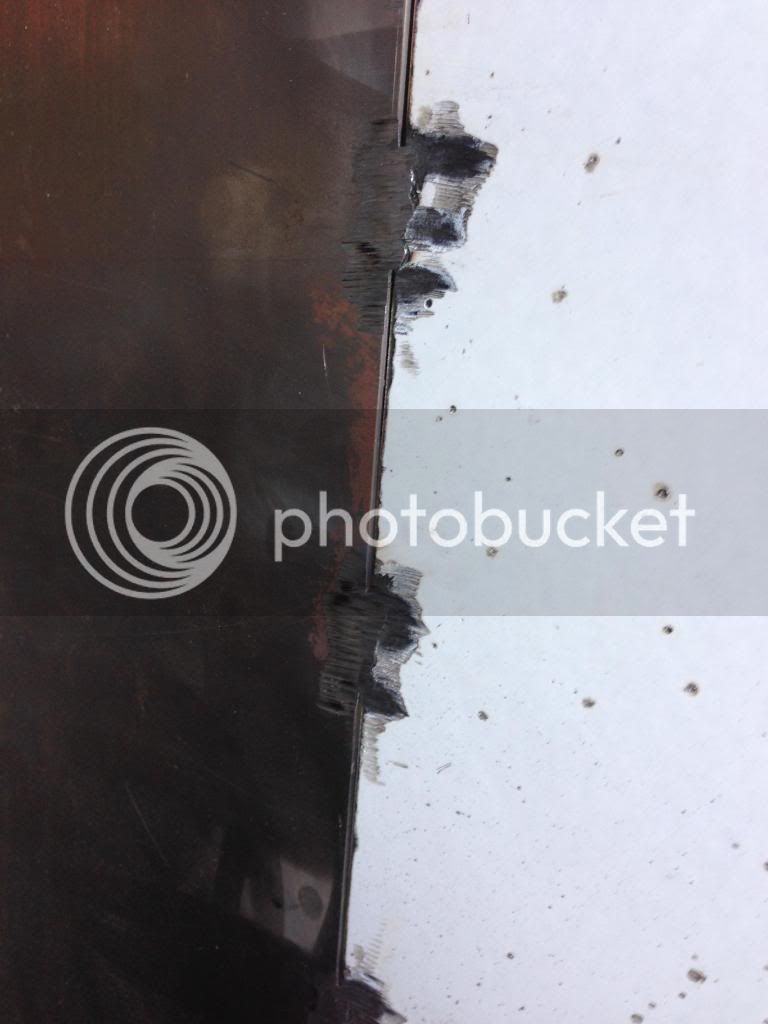
Welded, 90% ground, and planished about 36" of weld... only another 16 feet to go.


Getting some "undercutting" on the ceramic side. The stuff is nearly impossible to grind and really dirties up the welds. If anyone knows of a way to remove baked on porcelain/ceramic "coatings" I'd love to know.

Thanks for reading.
 
aggies08brewer said:
Looks great, did you have the jewelry rechromed? That fridge was in rough shape! :mug: And lastly: Most unexciting update post ever, but another big hurdle overcome... I got the oil canning out of the bad side of the box. If you are unfamiliar with this term, it's when a flat (rarely curved) piece of sheet metal will "pop" in and out if you push on it in a certain spot. It is your worst nightmare. I tried to fix it by planishing the welds, but went a step too far and made it worse. I was just pushing it around, then stopped before I got frustrated and re-read some literature on fixing the problem. I needed to shrink an area, but don't have a torch.... So I burned some metal with the MIG and the thing popped back into position perfectly. :dunno: Beginner's luck. Here's a tip: find the center of the oil-can. Pop it up and down with one hand and using the thumb of your other hand push around the perimeter of the affected area. When it stops moving, you've found the "real" problem spot. Welded, 90% ground, and planished about 36" of weld... only another 16 feet to go. http://s1299.photobucket.com/user/whiskeytrader/media/IMG_0606_zps0ca8ce55.jpg.html Getting some "undercutting" on the ceramic side. The stuff is nearly impossible to grind and really dirties up the welds. If anyone knows of a way to remove baked on porcelain/ceramic "coatings" I'd love to know. Thanks for reading.

Thought about getting it rechromed, but tried a polish by Eagle One I got at an auto parts store first. Did a great job at a fraction of the price. Was hard taping it off to avoid getting paint on it. Wish I had the time/ equipment/know how to do a complete rebuild like you. Inside is beat up, but looks good from the outside, And it serves cold homebrew. So I guess the essentials are covered.
 
Thought about getting it rechromed, but tried a polish by Eagle One I got at an auto parts store first. Did a great job at a fraction of the price. Was hard taping it off to avoid getting paint on it. Wish I had the time/ equipment/know how to do a complete rebuild like you. Inside is beat up, but looks good from the outside, And it serves cold homebrew. So I guess the essentials are covered.

Having kegged beer again is starting to be my biggest motivator. Almostttt regret going down this road.


Almost. :D
 
Ok Aggies & hopefully Kerber as well -

I just acquired a 25# CO2 tank for my nearly identical-yet-still-in-shambles 50's GE Fridge. I can fit 2 five gallon corny kegs in the fridge with the tank OR 3 five gallon corny kegs AND 1 two gallon keg if I pipe in the CO2. My question is.. where would you do this? Would you drill a hole in the bottom or top rear corner and pipe it in that way? If you did do this what would you do to insulate/protect the transition? I'm not a super handy man but I can dream.

I'd love anyone's thoughts on this. I'm so ready to get this thing put back together so I can finally have beer on tap as well! :tank:
 
I just finished refurbishing a fridge exactly like this one. I got it for free and plugged it in and let it run for a day and it worked well. So I tore it all apart, cleaned and painted it. I just got it back together last night and plugged it in. After 45 minutes it was down to 37*. When I went to check on in this morning, it was 55* and not running. No amount of fiddling with the wires or unplugging would do anything. <sigh> I'm so bummed. Oh well.

I hope you have better luck than me!

Casey

ps: I don't want to seem like a downer, I just needed to vent. :)

I had a similar experience with a 1949 GE fridge. It's currently the largest paperweight in the house. Mine ended up being a freon issue. You have to be REALLY careful pulling out the evaporator. I thought I was careful, but apparently not as careful as I could have/should have been.

If yours isn't running, it sounds like a compressor issue or a thermostat issue. I was able to diagnose the same problem on a mini fridge by shorting the thermostat and the compressor kicked on. I'm not sure off hand how to do this with the older GE fridges, but the principle should be the same. If shorting the thermostat does not kick on the compressor, then it's either the start relay or the compressor is dead. Unfortunately, I'm not qualified to help you in either of those cases.
 
Ok Aggies & hopefully Kerber as well -

I just acquired a 25# CO2 tank for my nearly identical-yet-still-in-shambles 50's GE Fridge. I can fit 2 five gallon corny kegs in the fridge with the tank OR 3 five gallon corny kegs AND 1 two gallon keg if I pipe in the CO2. My question is.. where would you do this? Would you drill a hole in the bottom or top rear corner and pipe it in that way? If you did do this what would you do to insulate/protect the transition? I'm not a super handy man but I can dream.

I'd love anyone's thoughts on this. I'm so ready to get this thing put back together so I can finally have beer on tap as well! :tank:

You can do it almost anywhere, there's about 4" of insulation on all the sides. To do this you'd use a bulkhead fitting that's rated for your intended pressure. Look them up, it's essentially what the tail of a beer faucet is. I'd do the hole right below the wire shelf to help hide it visually, however you'd have to take the back off, if you haven't already.

I can't think of much that would insulate it, except maybe thick rubber gaskets. The better solution is to add a 10.5" stretch and fit 4 kegs in there.... :)
 
I had a similar experience with a 1949 GE fridge. It's currently the largest paperweight in the house. Mine ended up being a freon issue. You have to be REALLY careful pulling out the evaporator. I thought I was careful, but apparently not as careful as I could have/should have been.

If yours isn't running, it sounds like a compressor issue or a thermostat issue. I was able to diagnose the same problem on a mini fridge by shorting the thermostat and the compressor kicked on. I'm not sure off hand how to do this with the older GE fridges, but the principle should be the same. If shorting the thermostat does not kick on the compressor, then it's either the start relay or the compressor is dead. Unfortunately, I'm not qualified to help you in either of those cases.

Do this and then let us know the results. The rheostat on these is a mechanical marvel with lots of potential for breakages too.
 
Just found this thread and read the whole thing.
I have a very similar fridge waiting for me to take it home form work.
Boss was going to throw it away and i asked if i could have it, now its mine!
Have to sell my motorcycles to fit it in the garage though, and a little clean up will be mandatory.
Thanks for the inspiration, ill post some pictures of mine once i get it!

Keep on building, its exciting!
 
how did you remove the badge/emblem? ive only got to look at it for a few minutes due to my restoration of the fridge is going to be a supprise from me to my mom. i kind of only have a week to complete i know i can do it if i plan it out right.

 
how did you remove the badge/emblem?...

The emblem has several pegs that extend through holes into the interior of the door. I'm not sure what the kind of fastener is called, but each peg is retained by a small flat square of metal with a slit in it. After removing that sealant glue, I was able to just work them off with a needle nose pliers.
 
Use a heat gun and paper towel to knock that wax off. Won't be a problem at all. Those are friction nuts, I believe, and like kerber said, they just pry off. You can kind of "unthread" them.
 

Latest posts

Back
Top