Ok I have a chance to get a 12 X 16 building pretty cheap. It is right next door and less than a year old BUT it was VERY poorly put together. It is one of those tall barn looking ones so adding a loft would be a piece of cake as both of my boys have done a lot of building and construction work. will this be big enough to brew and store all of my equipment and bottles in? maybe even make a small cold room?
You are using an out of date browser. It may not display this or other websites correctly.
You should upgrade or use an alternative browser.
You should upgrade or use an alternative browser.
12X16 building with a loft big enough?
- Thread starter OHIOSTEVE
- Start date

Help Support Homebrew Talk:
This site may earn a commission from merchant affiliate
links, including eBay, Amazon, and others.
I've got slightly less space than that, so I don't see why not.
OHIOSTEVE
Well-Known Member
I've got slightly less space than that, so I don't see why not.
what about the cold room? or rather a temp controlled room?
mcflyfisher
Member
My brewery is 10x14. I could easily lose a 4x6 chunk of this for a cold room. That should work just fine for you.
jeepinjeepin
Well-Known Member
I am guessing that's larger than what you have now, so yes.
what about the cold room? or rather a temp controlled room?
My basement hovers between 64 to 70F year-round... the most the temp fluctuates in a couple degrees up or down on any given week.
Having said that, I have a 4'x4' spot that I will be turning into my ferment room. I have no ambition at all to brew lagers, so I'll be able to ferment and condition everything in that separate space.
I got a few pictures as I started setting up my new space this afternoon.. I'll start a thread at some point and include a link to it in my sigline.


$7.79 ($7.79 / Count)
Craft A Brew - LalBrew Voss™ - Kveik Ale Yeast - For Craft Lagers - Ingredients for Home Brewing - Beer Making Supplies - (1 Pack)
Craft a Brew


$33.99 ($17.00 / Count)
$41.99 ($21.00 / Count)
2 Pack 1 Gallon Large Fermentation Jars with 3 Airlocks and 2 SCREW Lids(100% Airtight Heavy Duty Lid w Silicone) - Wide Mouth Glass Jars w Scale Mark - Pickle Jars for Sauerkraut, Sourdough Starter
Qianfenie Direct


$53.24
1pc Hose Barb/MFL 1.5" Tri Clamp to Ball Lock Post Liquid Gas Homebrew Kegging Fermentation Parts Brewer Hardware SUS304(Liquid Hose Barb)
yunchengshiyanhuqucuichendianzishangwuyouxiangongsi


![Craft A Brew - Safale S-04 Dry Yeast - Fermentis - English Ale Dry Yeast - For English and American Ales and Hard Apple Ciders - Ingredients for Home Brewing - Beer Making Supplies - [1 Pack]](https://m.media-amazon.com/images/I/41fVGNh6JfL._SL500_.jpg)
$6.95 ($17.38 / Ounce)
$7.47 ($18.68 / Ounce)
Craft A Brew - Safale S-04 Dry Yeast - Fermentis - English Ale Dry Yeast - For English and American Ales and Hard Apple Ciders - Ingredients for Home Brewing - Beer Making Supplies - [1 Pack]
Hobby Homebrew

$22.00 ($623.23 / Ounce)
AMZLMPKNTW Ball Lock Sample Faucet 30cm Reinforced Silicone Hose Secondary Fermentation Homebrew Kegging joyful
无为中南商贸有限公司

$10.99 ($31.16 / Ounce)
Hornindal Kveik Yeast for Homebrewing - Mead, Cider, Wine, Beer - 10g Packet - Saccharomyces Cerevisiae - Sold by Shadowhive.com
Shadowhive


$53.24
1pc Hose Barb/MFL 1.5" Tri Clamp to Ball Lock Post Liquid Gas Homebrew Kegging Fermentation Parts Brewer Hardware SUS304(Gas MFL)
Guangshui Weilu You Trading Co., Ltd

$58.16
HUIZHUGS Brewing Equipment Keg Ball Lock Faucet 30cm Reinforced Silicone Hose Secondary Fermentation Homebrew Kegging Brewing Equipment
xiangshuizhenzhanglingfengshop


$176.97
1pc Commercial Keg Manifold 2" Tri Clamp,Ball Lock Tapping Head,Pressure Gauge/Adjustable PRV for Kegging,Fermentation Control
hanhanbaihuoxiaoshoudian

$172.35
2 Inch Tri Clamp Keg Manifold With Ball Lock Posts, Pressure Gauge, PRV (0-30 PSI) – Homebrew, Fermentation, Kegging System
wuhanshijiayangzhiyimaoyiyouxiangongsi


$33.95
Five Star - 6022b_ - Star San - 32 Ounce - High Foaming Sanitizer
Bridgeview Beer and Wine Supply


OHIOSTEVE
Well-Known Member
I am guessing that's larger than what you have now, so yes.
Actually it isn't. I have my entire upstairs along with a wall in the computer room lol.
bendavanza
Well-Known Member
Best thing to do is mark the ground where you want to place it and walk around in it. Maybe bring your brew stand, some kegs and buckets etc into the designated area for scale.
Best thing to do is mark the ground where you want to place it and walk around in it. Maybe bring your brew stand, some kegs and buckets etc into the designated area for scale.
Exellent idea!
OHIOSTEVE
Well-Known Member
Best thing to do is mark the ground where you want to place it and walk around in it. Maybe bring your brew stand, some kegs and buckets etc into the designated area for scale.
good idea. I think maybe use the loft ( if I put one in) to store all of these damned bottles.
flatrockbrewing
Well-Known Member
If you dont want to build an aging room from the ground up you could try an old hot tub. I found one on craigslist for about $150. It hovers around 65 degrees in the summer and i just stick a small space heater inside during the winter. i have corny kegs in the middle and bottles stacked up in milk crates on the sides. The tubs come well insulated already.
Im_Lars
Well-Known Member
I have a shed that is about the same size with a loft. I wish I could turn that into my brew room but it is stacked full of tools and lawn equipment. The space I brew in now is about have the size of my shed. If you can get it for a good price and be able to add power and water to it, I'd say jump on it.
Laughing_Gnome_Invisible
Well-Known Member
- Joined
- Jan 4, 2008
- Messages
- 12,262
- Reaction score
- 734
Sounds plenty big enough to me! That was a good idea posted above to mark the ground. Also, you can save a hell of a lot of space by imaginative storage. Go have another look inside it and look for places that you might be able to hang stuff, shelve stuff and generally utilise every inch of space that can leave the floor space clear. I would even be looking at hanging or shelving kegs. Walls and ceilings are my friend.......Maybe that's just me though.
OHIOSTEVE
Well-Known Member
If you dont want to build an aging room from the ground up you could try an old hot tub. I found one on craigslist for about $150. It hovers around 65 degrees in the summer and i just stick a small space heater inside during the winter. i have corny kegs in the middle and bottles stacked up in milk crates on the sides. The tubs come well insulated already.
Ok, I need to see pics. I can't figure out how you are doing this?
BrewMoreBeers
Well-Known Member
Best thing to do is mark the ground where you want to place it and walk around in it. Maybe bring your brew stand, some kegs and buckets etc into the designated area for scale.
This is how I laid out my entire basement which includes a media room, kitchen, utility area, storage, wash tub with extra cabinets and some more storage. It worked great and gave me a reason to spend many hours drinking in the basement and planning by project. I am very happy that I taped everything out and lived with it for a while. I only made a few changes during this time, but they were very good changes and they made the cabinets fit much better than they would have has I used my initial design.
OHIOSTEVE
Well-Known Member
I have been kickin around some ideas. electrical stuff is no big deal as my nephew is a certified electrician, PLUS I hve a friend who is an electronics whiz ( may get him to help me go electric in the future) and a neighbor / friend who owns an electric company..... I thought about water supply but do not really want to get into digging a trench and laying piping etc. maybe a sink with a french drain and a quick disconnect to attach the garden hose. No hot water supply but cold water is better than no water I guess. However a small under counter type water heater would be no big deal IF I did plumb it.
wildwest450
Well-Known Member
- Joined
- Dec 27, 2007
- Messages
- 8,978
- Reaction score
- 191
That's only 8 sq. ft. smaller than mine, and I managed to squeeze in a bar and urinal, you'd be surprised how little space a brew rig takes up, go for it!!!
_
_
jeepinjeepin
Well-Known Member
OHIOSTEVE said:I have been kickin around some ideas. electrical stuff is no big deal as my nephew is a certified electrician, PLUS I hve a friend who is an electronics whiz ( may get him to help me go electric in the future) and a neighbor / friend who owns an electric company..... I thought about water supply but do not really want to get into digging a trench and laying piping etc. maybe a sink with a french drain and a quick disconnect to attach the garden hose. No hot water supply but cold water is better than no water I guess. However a small under counter type water heater would be no big deal IF I did plumb it.
Electricity is a no brainer. Water would be nice but would make sewer a necessity by code and a real good idea anyway. It just depends if your houses main drain is near where the building is going.
OHIOSTEVE
Well-Known Member
Electricity is a no brainer. Water would be nice but would make sewer a necessity by code and a real good idea anyway. It just depends if your houses main drain is near where the building is going.
I am certain that I would be required to upgrade EVERYTHING if I attempted to attach to my septic system.
OHIOSTEVE
Well-Known Member
well I got the building bought dirt cheap. Now to decide if I am gonna try to move it or disassemble it and rebuild it.. Moving would be easier but disassembling would allow me to rebuild it correctly
OHIOSTEVE
Well-Known Member
Rebuild it. You'll be happier in th long run. And for a long time.
I was afraid someone would say that. It was nailed together so it will be a slow tedious process but I think the RIGHT way to do it.
Im_Lars
Well-Known Member
Time to picture up!!!!!!!!!!!! Sharing is caring and then we can better assess the project ")
Sounds like a great summer project
Sounds like a great summer project
OHIOSTEVE
Well-Known Member
Time to picture up!!!!!!!!!!!! Sharing is caring and then we can better assess the project
Sounds like a great summer project
will do, but it is POURING right now.
OHIOSTEVE
Well-Known Member
Just had a mover come and give me an estimate on moving the building. It will be moved to my property tomorrow morning. We are still gonna basically rebuild it, but according to my wife if I tried to tear it down, then move and rebuild it it would never get done lol. I went and did a closer "inspection" of it this afternoon and tearing it apart will be easy. there are probably only about 25 nails in the entire thing..... And I am NOT exaggerating that by a whole lot... There are outside sheeting pieces that have TWO nails in an entire 4x8 sheet. One in each of the top two corners and the rest is just hanging loose. The upside is that it is so new it still even smells like fresh cut wood inside. Pics will follow, but don't expect quick work, this will be a slow drawn out process I believe.
OHIOSTEVE
Well-Known Member
make sure that if you go with the water hose connection for water supply that it is a potable hose if you plan on using it for filling the HLT.
I fill my HLT from my garden hose right now when I brew outside lol... I KNOW it is supposed to not be good but I drink out of it all the time when I am outside.
OHIOSTEVE
Well-Known Member
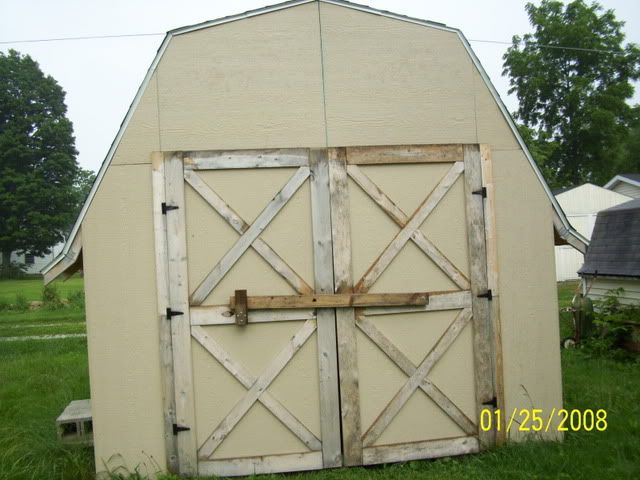
Ok a few pics of the screwed up mess I am starting with.
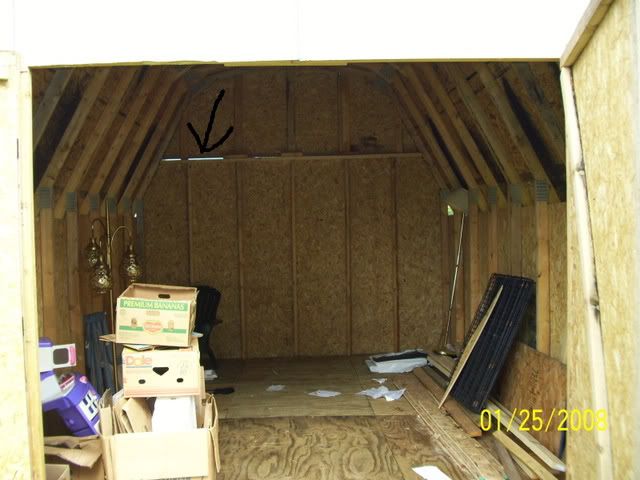
As you can see, this building is basically BRAND NEW. It still even smells like fresh cut wood inside. BUT if you will look closely at the upper left hand corner you can see daylight through the wall.. BTW it is so new, the papers on the floor are the construction instructions that were obviously ignored.
As you can see, this building is basically BRAND NEW. It still even smells like fresh cut wood inside. BUT if you will look closely at the upper left hand corner you can see daylight through the wall.. BTW it is so new, the papers on the floor are the construction instructions that were obviously ignored.
OHIOSTEVE
Well-Known Member
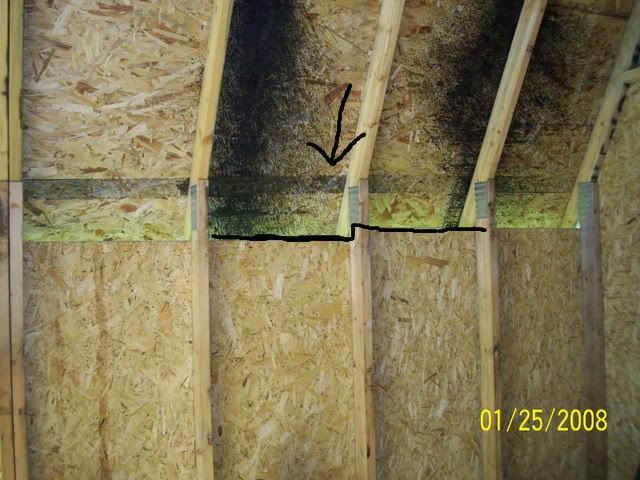
As you can see, the walls were just haphazardly put up. Fortunately they didn't actually cut anything, and they used VERY few nails. The black line is to show you how unlevel they put the walls up. the ground was sloped and they actually put up the walls with the slope!
BTW ignore the dates on the pics. My camera had been dead for months. I forgot to reset the date.
OHIOSTEVE
Well-Known Member
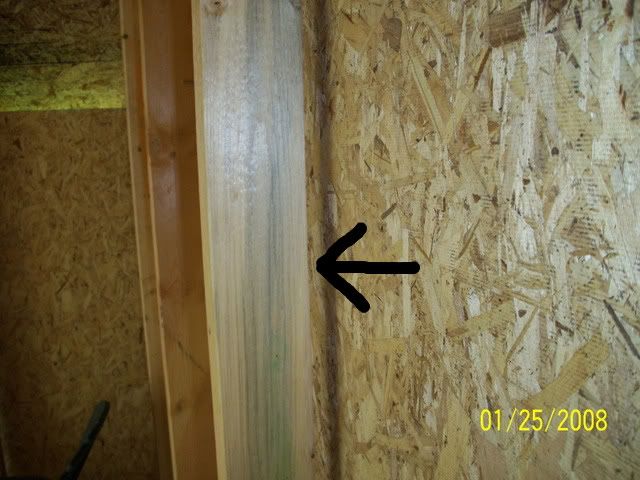
when I told you they used very few nails I was NOT joking. This wall board literally has 2 nails in it. one in each top corner and it is just hanging loose. you can see the gap between the plywood and the 2x4.
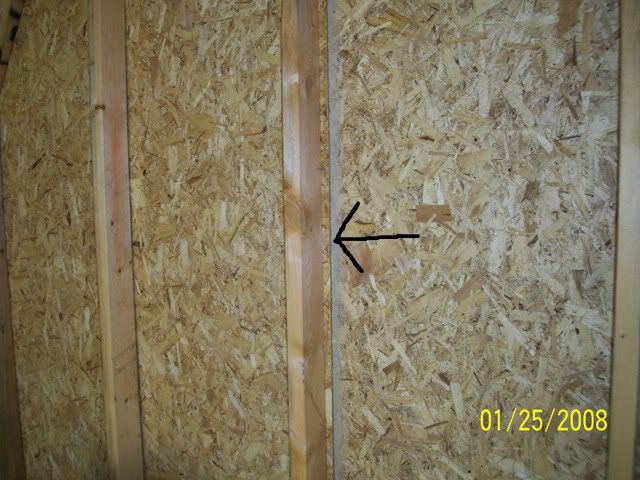
When they put the plywood on, they didn't even make sure they caught 2x4s at the seams
I hired someone to come in the morning and move it to my property. Once it is set in my sons and I are pulling off all of the exterior plywood and squaring everything up and fixing it as best as we can then reattaching the plywood. Some of you may wonder why I am going to the trouble and didn't just buy a new building. AFTER I have it set on my property ( including the price of setting it on a trailer and moving it to my property and setting it where i want it.) will be $400.00 building and moving and all.
Similar threads
- Replies
- 9
- Views
- 2K
- Replies
- 1
- Views
- 3K
- Replies
- 1
- Views
- 2K
- Replies
- 1
- Views
- 1K
