You might want to add some yeast nutrient to make them happier.I'm gonna try a whacky idea this weekend
Since, word is, gallon bottles of water (like distilled) come sterilized, making hard seltzer should be as easy as sanitizing a stick blender, sanitizing a fermenter, pitching the water, tossing in salts and corn sugar, blending (which probably oxygenates sufficiently, though I'll hit it with pure O2 because why not), and pitching yeast.
Right?
You are using an out of date browser. It may not display this or other websites correctly.
You should upgrade or use an alternative browser.
You should upgrade or use an alternative browser.
1-Gallon Brewers UNITE!
- Thread starter JeffoC6
- Start date

Help Support Homebrew Talk:
This site may earn a commission from merchant affiliate
links, including eBay, Amazon, and others.
- Joined
- Feb 10, 2016
- Messages
- 107
- Reaction score
- 79
I figured that was implied (I'm using Seltzer Max, because it was given to me for free - I bet that Omega Labs stuff works great too), but hey, might as well spell it out for anyone who doesn't explicitly know, and if starting from distilled it probably wouldn't hurt to toss in some CaCl2, though I haven't yet pulled up my old saved Hard Seltzer articles so don't quote me on that, or the quantities
newtwobrew
Member
- Joined
- Feb 24, 2022
- Messages
- 12
- Reaction score
- 11
As a new brewer I welcome the chance to brew more. I had never really considered doing small 1-2.5 gal batches but this has given me something to think about. Smaller batches = more times to improve processI have considered dropping down batch volume. I don't drink that much so 5 gallons lasts me a long long time. Even when I give it away. The only drawback I see is the increased frequency of brewing.
- Joined
- Feb 10, 2016
- Messages
- 107
- Reaction score
- 79
Smaller batches = more times to improve process
100%, and it gives you the freedom to brew truly outrageous beers. That's what I dig about it the most, probably, now that I think about it, the fun of engineering the rig aside
BrewnWKopperKat
(Ο_Ο)
There appears to be a product Pint Sized Brewing Kit (link) for making pint sized batches (via the topic "super duper mini-micro-tiny brewing setup?" in another forum.
This does not appear to be an early April/All Fools Day joke.
This does not appear to be an early April/All Fools Day joke.
- Joined
- Feb 10, 2016
- Messages
- 107
- Reaction score
- 79
There appears to be a product Pint Sized Brewing Kit (link) for making pint sized batches (via the topic "super duper mini-micro-tiny brewing setup?" in another forum.
This does not appear to be an early April/All Fools Day joke.
Funnily enough they brought that up to me over the summer when I was in NYC, and yeah they don't do it a ton but apparently it is a real thing

$58.16
HUIZHUGS Brewing Equipment Keg Ball Lock Faucet 30cm Reinforced Silicone Hose Secondary Fermentation Homebrew Kegging Brewing Equipment
xiangshuizhenzhanglingfengshop


$49.95 ($0.08 / Fl Oz)
$52.99 ($0.08 / Fl Oz)
Brewer's Best - 1073 - Home Brew Beer Ingredient Kit (5 gallon), (Blueberry Honey Ale) Golden
Amazon.com


$172.35
2 Inch Tri Clamp Keg Manifold With Ball Lock Posts, Pressure Gauge, PRV (0-30 PSI) – Homebrew, Fermentation, Kegging System
wuhanshijiayangzhiyimaoyiyouxiangongsi


$7.79 ($7.79 / Count)
Craft A Brew - LalBrew Voss™ - Kveik Ale Yeast - For Craft Lagers - Ingredients for Home Brewing - Beer Making Supplies - (1 Pack)
Craft a Brew


$22.00 ($623.23 / Ounce)
AMZLMPKNTW Ball Lock Sample Faucet 30cm Reinforced Silicone Hose Secondary Fermentation Homebrew Kegging joyful
无为中南商贸有限公司


$53.24
1pc Hose Barb/MFL 1.5" Tri Clamp to Ball Lock Post Liquid Gas Homebrew Kegging Fermentation Parts Brewer Hardware SUS304(Liquid MFL)
yunchengshiyanhuqucuichendianzishangwuyouxiangongsi


$53.24
1pc Hose Barb/MFL 1.5" Tri Clamp to Ball Lock Post Liquid Gas Homebrew Kegging Fermentation Parts Brewer Hardware SUS304(Liquid Hose Barb)
Guangshui Weilu You Trading Co., Ltd


![Craft A Brew - Safale BE-256 Yeast - Fermentis - Belgian Ale Dry Yeast - For Belgian & Strong Ales - Ingredients for Home Brewing - Beer Making Supplies - [3 Pack]](https://m.media-amazon.com/images/I/51bcKEwQmWL._SL500_.jpg)
$176.97
1pc Commercial Keg Manifold 2" Tri Clamp,Ball Lock Tapping Head,Pressure Gauge/Adjustable PRV for Kegging,Fermentation Control
hanhanbaihuoxiaoshoudian


$10.99 ($31.16 / Ounce)
Hornindal Kveik Yeast for Homebrewing - Mead, Cider, Wine, Beer - 10g Packet - Saccharomyces Cerevisiae - Sold by Shadowhive.com
Shadowhive


$39.22 ($39.22 / Count)
Brewer's Best Home Brew Beer Ingredient Kit - 5 Gallon (Mexican Cerveza)
Amazon.com
This does not appear to be an early April/All Fools Day joke.
Hmmm...$18 for a kit to make 16 oz of beer? I guess that makes those $18 4-packs seems more reasonable! To be far, it looks like most of the expense of the kit is in the "equipment" pieces included like the canning jar, lid and swing top bottle. I am curious what the "Green Fermentation Lid" is. It must be something like this silicone lid: Silicone Fermentation Airlock for Mason Jars | MoreBeer
- Joined
- Feb 10, 2016
- Messages
- 107
- Reaction score
- 79
Fyi, we can now order 6g sachets of Steam Hops through Beermkr's website, which could be pretty useful - in principle, one could make a simple malt/hop "tea" by adding character malts and steam hops to water at ~170˚, letting it cool, adding it to sterile water, blending in DME, pitching yeast, et voila - some of the easiest beer imaginable
I'll personally be trying out this exact method shortly - imagine that plus Lutra and a spunding valve and you could have a two- or three-day Stout with basically zero effort!
I'll personally be trying out this exact method shortly - imagine that plus Lutra and a spunding valve and you could have a two- or three-day Stout with basically zero effort!
- and for what - $40 for a 12 pack by the time you’re done?Fyi, we can now order 6g sachets of Steam Hops through Beermkr's website, which could be pretty useful - in principle, one could make a simple malt/hop "tea" by adding character malts and steam hops to water at ~170˚, letting it cool, adding it to sterile water, blending in DME, pitching yeast, et voila - some of the easiest beer imaginable
I'll personally be trying out this exact method shortly - imagine that plus Lutra and a spunding valve and you could have a two- or three-day Stout with basically zero effort!
Hmmm...$18 for a kit to make 16 oz of beer? I guess that makes those $18 4-packs seems more reasonable! To be far, it looks like most of the expense of the kit is in the "equipment" pieces included like the canning jar, lid and swing top bottle. I am curious what the "Green Fermentation Lid" is. It must be something like this silicone lid: Silicone Fermentation Airlock for Mason Jars | MoreBeer
Hmmm. Why not:
Save and sanitize a 1L soda bottle. Prepare 75cL of wort by your preferred method. Add wort and yeast to bottle, leave the cap loose until the krausen falls then tighten the cap, give the bottle a test squeeze every day until it's good and taut, then cold crash & gently decant into a pint glass.
BrewnWKopperKat
(Ο_Ο)
Please "report back" with your experiences with Steam Hops.Fyi, we can now order 6g sachets of Steam Hops through Beermkr's website, which could be pretty useful - in principle, one could make a simple malt/hop "tea" by adding character malts and steam hops to water at ~170˚, letting it cool, adding it to sterile water, blending in DME, pitching yeast, et voila - some of the easiest beer imaginable
I'll personally be trying out this exact method shortly - imagine that plus Lutra and a spunding valve and you could have a two- or three-day Stout with basically zero effort!
- Joined
- Feb 10, 2016
- Messages
- 107
- Reaction score
- 79
- and for what - $40 for a 12 pack by the time you’re done?
Sorry, how exactly are you calculating that figure? And if cost efficiency is your goal, you may be in the wrong thread haha
- Joined
- Feb 10, 2016
- Messages
- 107
- Reaction score
- 79
Please "report back" with your experiences with Steam Hops.
Will do!
- Joined
- Feb 10, 2016
- Messages
- 107
- Reaction score
- 79
Re: Steam Hops, they definitely work - I have yet to make a hop-forward beer, like an Ordinary Bitter, which I will definitely be trying at some point, but to add IBUs to a Porter and even a Hazy, they worked like a charm. If adding IBUs is your goal, give them a shot, and I'll update y'all once I've tried to, you know, taste them.
Oh, and what could the use case for these possibly be? An all-DME (i.e. no character malt) beer, which you could literally stick blend together with sterile (read: bottled) water at room temp (15 minute Golden Ale, anyone?), or the more obvious route: hopping a sour. Though in fairness, since we don't really have access to isomerized hop extract, these could be used to nudge up IBUs in a finished beer as well.
Oh, and what could the use case for these possibly be? An all-DME (i.e. no character malt) beer, which you could literally stick blend together with sterile (read: bottled) water at room temp (15 minute Golden Ale, anyone?), or the more obvious route: hopping a sour. Though in fairness, since we don't really have access to isomerized hop extract, these could be used to nudge up IBUs in a finished beer as well.
Lurker, first time poster, and one gallon brewing lover here - seriously read most of this thread over the last month when I started this hobby. Best part of one gallon brewing is how often I get to brew. I’ve got 5 LBMB going right now with an Imperial Lager, a seltzer, two red ales, and an IPA - all in different stages. This weekend I’m bottling up the lager and seltzer and have already drank a few gallons of different ales with 20 or so bottle conditioning now. In a month I already have about a dozen brews under my belt and keep getting more confident with the process (AG and extract). Also bought a one gallon keg to get some experience there as well. Some things I’ve already learned:
Cheers everyone!
- Mashing is ridiculously easy in the oven. Get the water to 170, add the grain, stir, then the oven at the lowest setting is pretty much set it and forget it.
- Heating a little over a gallon of clean water, then sparging the mash slowly over the boiling kettle makes the process super easy with almost no mess.
- For my hoppy beers I’ve been skipping the last two hop additions and instead add it to my cooling wort for much better aroma and flavor.
- Started harvesting yeast and it’s already starting to overtake my fridge. I can make a gallon for $5-6 now.
- Oxidation is my #1 enemy, but that beer still goes down smooth if I throw some grapefruit juice in the glass with it.
- Kegging in a one gallon keg is easy and lets me drink my beer almost immediately. I also seem to get a lot less oxidation this way.
- My SO supports my hobby because the kitchen is almost always immaculate.
- Winging recipes is stupidly fun once you have a basic understanding of what things do what.
Cheers everyone!
BrewnWKopperKat
(Ο_Ο)
Welcome to HomeBrewTalk @aceluby !
With regard to oxidation, if you are bottling, there are a couple of topics where people talk about bottling techniques that minimize the impact - ancedotals of NEIPAs good for a couple of months after bottling. If you stay with bottling & can't find the topics, let me know.
With regard to oxidation, if you are bottling, there are a couple of topics where people talk about bottling techniques that minimize the impact - ancedotals of NEIPAs good for a couple of months after bottling. If you stay with bottling & can't find the topics, let me know.
- Joined
- Feb 10, 2016
- Messages
- 107
- Reaction score
- 79
- Oxidation is my #1 enemy, but that beer still goes down smooth if I throw some grapefruit juice in the glass with it.
- Kegging in a one gallon keg is easy and lets me drink my beer almost immediately. I also seem to get a lot less oxidation this way.
If you're looking for fairly extreme oxygen protection, you can do what I do (if you have a fermenter with a spigot, this wouldn't work with most racking canes) which is to:
- purge a keg, and fill it with a few psi of CO2
- rig a gas ball lock to a few feet of tubing that can fit inside the neck of an airlock - not the S-type
- rig a liquid ball lock to tubing which will fit onto your spigot
- hook up both connectors at the same time, so they're both CO2 purged (I partially engage each so I can do them one at a time, that works too)
- place the gas tube into the neck of your fermenter, which, of course, is virtually oxygen-free, and the liquid tube onto your spigot, and gravity rack (though an inline transfer pump would also be fine)
The beer flowing into your keg will push the CO2 in the keg through the tubing and into your fermenter, blanketing your beer, meaning you have a virtually flawless transfer. This is essentially a closed transfer, but it's not conducted under pressure, and I doubt purging the tubing would be so crucial if you had a larger volume of beer to work with, so I figured I'd call it out as opposed to just saying "do a closed transfer."
Or, ferment in a keg with a spunding valve, and transfer under pressure! I'm nervous about getting kegs that dirty, or rather I don't like to deep-clean kegs often and I feel like you'd have to if fermenting in them, but that's probably a marginally better option if you're willing to do it.
If you knew all this, my apologies, and hey, someone probably didn't!
Homebrew Harry
Well-Known Member
- Joined
- Jul 25, 2021
- Messages
- 387
- Reaction score
- 397
Great first post ! I also use the oven for mashing small batches.Lurker, first time poster, and one gallon brewing lover here - seriously read most of this thread over the last month when I started this hobby. Best part of one gallon brewing is how often I get to brew. I’ve got 5 LBMB going right now with an Imperial Lager, a seltzer, two red ales, and an IPA - all in different stages. This weekend I’m bottling up the lager and seltzer and have already drank a few gallons of different ales with 20 or so bottle conditioning now. In a month I already have about a dozen brews under my belt and keep getting more confident with the process (AG and extract). Also bought a one gallon keg to get some experience there as well. Some things I’ve already learned:
I’m hoping my order of grain comes in so I can make a pseudo lager this weekend. Otherwise I’ll finish off the last gallon of my 5 gallon IPA kit and have a LBMB ready for when my order comes next week.
- Mashing is ridiculously easy in the oven. Get the water to 170, add the grain, stir, then the oven at the lowest setting is pretty much set it and forget it.
- Heating a little over a gallon of clean water, then sparging the mash slowly over the boiling kettle makes the process super easy with almost no mess.
- For my hoppy beers I’ve been skipping the last two hop additions and instead add it to my cooling wort for much better aroma and flavor.
- Started harvesting yeast and it’s already starting to overtake my fridge. I can make a gallon for $5-6 now.
- Oxidation is my #1 enemy, but that beer still goes down smooth if I throw some grapefruit juice in the glass with it.
- Kegging in a one gallon keg is easy and lets me drink my beer almost immediately. I also seem to get a lot less oxidation this way.
- My SO supports my hobby because the kitchen is almost always immaculate.
- Winging recipes is stupidly fun once you have a basic understanding of what things do what.
Cheers everyone!
I think I’ve figured out my oxidation issues. Last few batches have been on point by skipping racking to a pot with sugar and priming the bottles directly, filling one bottle then capping it immediately, being very careful with dry hopping and moving in general, and only bottling with the 4 LBMB I have with a spigot and kegging the one that needs a racking cane.
Bottled up my imperial honey pseudo-lager last night and it’s probably my best one yet. Gave it 3 weeks with lutra, so it’s super clear, and the taste of it was exactly what I was going for pre-bottling.
My grain order was delayed, but a local shop had some 5 gal extract kits for $20 each, so I picked up a few of those to hold me over. I really want to do a lager next, but will have to wait until next weekend
- Joined
- Feb 10, 2016
- Messages
- 107
- Reaction score
- 79
I think I’ve figured out my oxidation issues. Last few batches have been on point by skipping racking to a pot with sugar and priming the bottles directly, filling one bottle then capping it immediately, being very careful with dry hopping and moving in general, and only bottling with the 4 LBMB I have with a spigot and kegging the one that needs a racking cane.
Nice! Yeah, pre-priming the bottles kinda blows but that definitely helped me avoid Oxygen as well, especially for hoppier beers
jpitz31
Wild Yeast Brewing


There’s two things I love most about brewing a gallon at a time. I can do it fairly quickly on my stove, and I have a wide variety of beers on hand.
Tomorrow I’m bringing a case to my sisters 4th of July party that will contain Imperial Honey ale, a red ale, a grapefruit seltzer, a pseudo lager/blonde ale, and some IPAs. The next day I’m brining a small keg of blonde to a friends party.
On the brewing side, I bottled a hefe that tasted like bananas in a really good way, so I made a batch adding some sugared apricots that I’m very excited for. I also just tweaked my imperial honey recipe to something I’d call a German Imperial Honey Ale that has a little munich for color and a bit less honey than the last one I did. No joke, the lutra I used was already down the blowoff tube within 30 minutes.
I also had a really bad batch I bottled of a Belgian that I’m going to wait as long as possible on. It was an abbey ale yeast that I just don’t think I like with a 5 gallon kit. So I modified the kit the for the second gallon, added a bit more hops (chinook at flame out), and used S-04 for the yeast. Will be a very different beer, hoping for something extremely balanced.
In just a few months I have 20+ brews under my belt and am starting to feel very confident in my process and think I can make some excellent beer shortly. I probably should upgrade to a 3 or 5 gallon eventually, but dang if I’m not having a great time with 1 gallon brews
RevA
Well-Known Member
mashpaddled
Well-Known Member
I think I’ve figured out my oxidation issues. Last few batches have been on point by skipping racking to a pot with sugar and priming the bottles directly, filling one bottle then capping it immediately, being very careful with dry hopping and moving in general, and only bottling with the 4 LBMB I have with a spigot and kegging the one that needs a racking cane.
Bottled up my imperial honey pseudo-lager last night and it’s probably my best one yet. Gave it 3 weeks with lutra, so it’s super clear, and the taste of it was exactly what I was going for pre-bottling.
My grain order was delayed, but a local shop had some 5 gal extract kits for $20 each, so I picked up a few of those to hold me over. I really want to do a lager next, but will have to wait until next weekend
I always felt like I got too much bottle variation this way but that may be my imagination.
I bottle my one gallon batches out of a bottling bucket but the usual bottling buckets are too big for our purposes and I feel like it leaves a lot of beer behind in the bucket. I bought a two gallon bucket and drilled a hole for the spigot as low to the bottom as I could get. I have a lot less oxidation with this bucket and only lose a few ounces which tend to have some trub in it anyway.
All you need is to hit up a hardware store in the paint section. You'll find two gallon white HDPE buckets. (You could buy a one gallon bucket if you would rather.) You also need a drill with a hole saw bit to cut the hole. You will need to measure the diameter of the spigot you already have and use a hole saw bit as close to the diameter of the exterior of the threads on the back of the spigot. Some spigots are larger than others so measure what you have. It doesn't need to be precise because the gasket will seal the hole as long as the hole isn't too much bigger. When you cut the hole you need to secure or hold down the bucket so it doesn't go flying and cut slowly. The smaller buckets are thinner than larger buckets so it won't take much to cut through it or to catch the bit and cut the hole in an irregular shape.
Been cruising through my brews, doing 3 brew days a week after the kids go to bed. Weekdays I’ll do an extract brew, just to cut down on time, then one to two full grain brews on the weekend. Two carboys are dedicated to two week fermenters, while my smaller one is a weekly one I do with Lutra - either a blonde, citra APA, or honey beer - all of which are easy drinkers and staples in the fridge.
Other than that I’ve got a couple IPAs, a DIPA, an apricot hefe, a mango hefe, a black IPA, a lager, a California common, an amber, an imperial honey, and a blonde ale all in various states of fermenting and bottle conditioning.
The good drinkers right now are the citra, IPA, and the blonde - so need to make more of those. Started a brew log to start keeping track so I can reproduce and get better. My wife is even starting to drink them
I might not be playing by the rules, as this was a 3 gallon batch that was split into 3 fermenters. These are ready to bottle today, so I have not tried any samples since I pitched the yeast. The beer itself is a Marris Otter + BRU-1 SMaSH.
It was my first time trying out the "1-gallon" Fermonster that I have had for a year or so. The fermenter tops out at about 1.2 gallon to the very top, so a full 1 gallon bath is pushing the limits, but worked fine for a temperature controlled US-05 ferment. The biggest flaw with the Fermonster is how thin and flexible the wall are (the same for the 3-gallon, my 7-gallon is much thicker).
I have used the PET Little Big Mouth Bubblers a few times. I love the thicker walled sides and the extra space in the LBMB. I had to strap down the lid on the Lutra batch to keep it from popping out. I tried flipping over the gasket as I have seen suggested, and it did not really help.
I did put out this video recently on brewing a pair of 1-gallon extract-based single hop batches. These turned out excellent. This was my first time using Lutra.
Recipe for Simcoe and Azacca Samplers.
• 1.25 gal [4.75L] Water*
• 1 lb [450g] of Golden Light Dry Malt Extract
• 0.15 lbs [2.4 oz or 68 g] Table Sugar
• 0.25 oz [7 g] Hops - boil 10 minutes
• 0.75 oz [21 g] Hops - steep 20 minute steep at 180°F [82°C]
• 2.75 g Lutra dry yeast
* 1.20 or 1.15 gallons of water might be a better amount to get 1.0 gallons into the fermenter.
Yeah, the lutra with little headroom pretty much requires a blowoff tube. I’ve been dry hopping on pitch lately, but for the lutra I have to wait a couple days because it clogged my blowoff tubeI might not be playing by the rules, as this was a 3 gallon batch that was split into 3 fermenters. These are ready to bottle today, so I have not tried any samples since I pitched the yeast. The beer itself is a Marris Otter + BRU-1 SMaSH.
It was my first time trying out the "1-gallon" Fermonster that I have had for a year or so. The fermenter tops out at about 1.2 gallon to the very top, so a full 1 gallon bath is pushing the limits, but worked fine for a temperature controlled US-05 ferment. The biggest flaw with the Fermonster is how thin and flexible the wall are (the same for the 3-gallon, my 7-gallon is much thicker).
I have used the PET Little Big Mouth Bubblers a few times. I love the thicker walled sides and the extra space in the LBMB. I had to strap down the lid on the Lutra batch to keep it from popping out. I tried flipping over the gasket as I have seen suggested, and it did not really help.
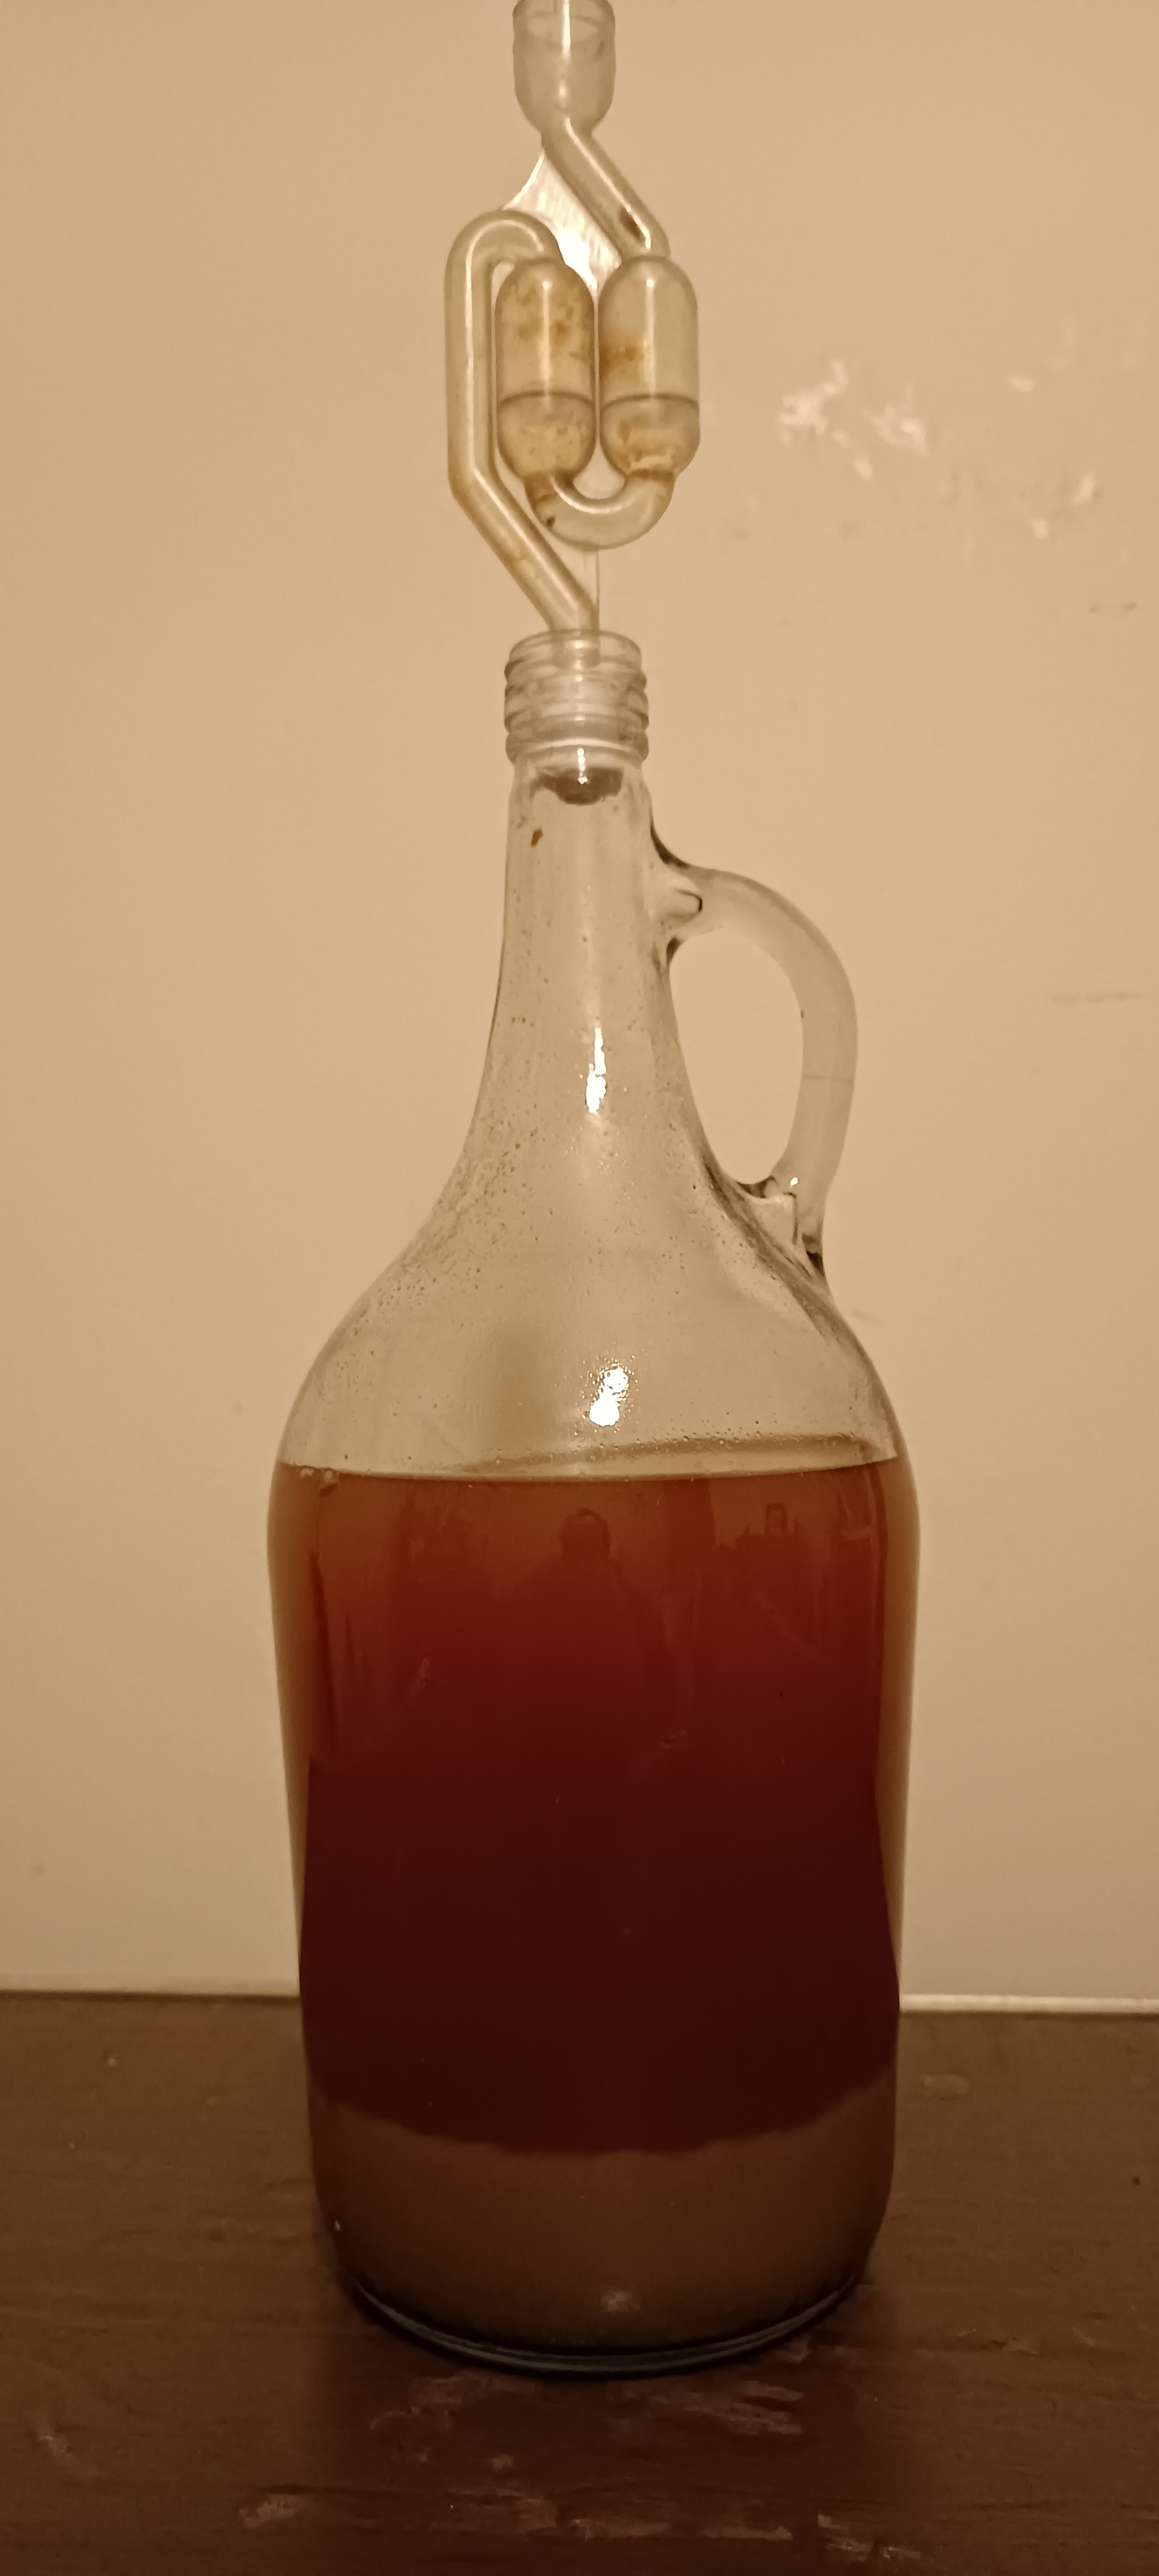
View attachment 775797
Ok, so made a pale ale smash with citra and harvested lutra just now. Between the time I pitched and aerated and prepped the area it’s going to ferment in (about 3 minutes), it had already formed a krausen and was coming out the blowout hole before the tube got attached. Never seen or heard anything like that before. Thought I’d at least have 10 minutes, but should have known when after I pitched and before aerating I was already seeing some action in the carboy. Crazy!
To date Lutra has been the most explosive yeast I've used.Ok, so made a pale ale smash with citra and harvested lutra just now. Between the time I pitched and aerated and prepped the area it’s going to ferment in (about 3 minutes), it had already formed a krausen and was coming out the blowout hole before the tube got attached. Never seen or heard anything like that before. Thought I’d at least have 10 minutes, but should have known when after I pitched and before aerating I was already seeing some action in the carboy. Crazy!
Similar threads
- Replies
- 55
- Views
- 3K
- Replies
- 22
- Views
- 2K
- Replies
- 16
- Views
- 2K
- Replies
- 4
- Views
- 1K
- Replies
- 18
- Views
- 2K
