2-tier Small Footprint Wood Brew Stand for Induction Brewing

Homebrew Talk - Beer, Wine, Mead, & Cider Brewing Discussion Forum

Help Support Homebrew Talk - Beer, Wine, Mead, & Cider Brewing Discussion Forum:

This site may earn a commission from merchant affiliate links, including eBay, Amazon, and others.

brettwasbtd

Awesomeness Award Winnner
HBT Supporter
Joined
Apr 20, 2010
Messages
1,793
Reaction score
165
Location
Damascus, MD
Been talking about building my brew stand and working on my setup for what seems like WAY TOO long. Finally got around to constructing my brew stand and documenting the build here:

Stand at Rest
brewstand.jpg


Stand in hypothetical Sparge Mode
brewstand-spargeMode.jpg


Hypothetical Boil Mode
brewstand-boil.jpg


Hypothetical Siphoning to fermenter
brewtsand-toFermenter.jpg


Any recommendations on stains or varnishes to protect from moisture and spills would be appreciated!
 
I really dig your stand. If you think of it/have time, post an update after you've taken 'er out for a test drive. Also, do you do no-sparge or do you have a separate vessel somewhere that you're sparging with?

I boil with electric and have been doing a lot of no-sparge lately, so this has got the wheels turning as the small footprint is certainly appealing. Very original design and I dig the simplicity (that's meant to be a compliment).

Cheers and enjoy the brew.

Thanks! I was dreaming about a 3 vessel system, pid, and pumps, but it was just too much money at this time for me (rather save more for delayed gratification for my future self). I also was thinking about what is going to make brew day quicker and figured cleaning a bunch of pumps and hoses was not the answer.

I have always gravity fed mash tun into boil kettle. Typically I do my mash with roughly 50% of my water, disregarding grist ratio, with a few exceptions, and the remaining water in one batch sparge. Usually use an additional 22qt pot to heat the strike and sparge water. For the sparge water i overshoot temp on purpose - let it sit while draining off first runnings. Same practice could be employed with an extra bucket

I have not tried a no sparge yet, but it is on my to do list and would make things even easier. Did you experience much efficiency difference?

Will definitely report back once I Brew. Currently over analyzing sink plumbing and how to vent!
 
I have not tried a no sparge yet, but it is on my to do list and would make things even easier. Did you experience much efficiency difference?

Will definitely report back once I Brew. Currently over analyzing sink plumbing and how to vent!

Howdy. I'm certainly not a no-sparge expert, but I've been using it for my last handful of batches, plus a few here and there over the last couple of years. I brew a lot of low-gravity beers (low 1.040's) and with those small grain bills I've only noticed a drop of about 2 or 3% in mash efficiency. My mash tun is only 10 gallons so for no-sparge I'm limited to pretty small grain bills, but I suspect there could be some more significant drops in efficiency with larger grain bills. For higher gravities I use basically the exact batch sparge process you described above. Just a separate 5 gallon pot that I heat up with an element during the mash.

I really like the no-sparge though - a quick vourlauf and you just start running off the wort. It's also a little more convenient as you're only measuring out one volume of water, one set of salt additions, etc.

Anyway, nice work again. Look forward to update.

Cheers.
 
Didn't feel like starting another new thread document the remaining parts of my basement brewery build, so I will be putting them here!

Yesterday I FINALLY got time to tackle installing the utility sink in my basement. I had multiple hours here and there, but yesterday was the first full day I could allocate to this and good thing, cause I needed the whole day!

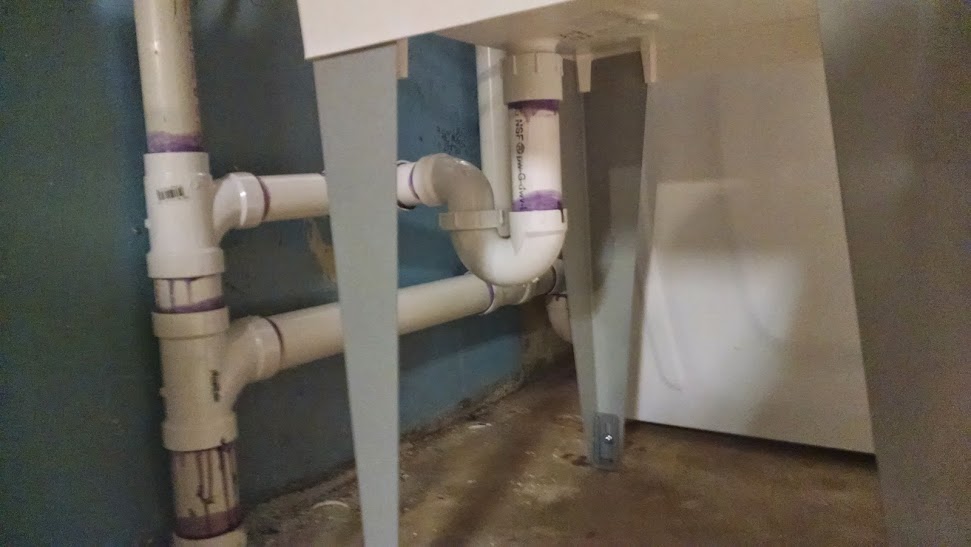
My existing plumbing in basement only had a laundry standpipe and hot/cold water. The laundry standpipe also wasn't up to code as the pipe was 2" but the p-trap and other piping was 1 1/2". I redid the standpipe and added a new vent connection to meet code - and more importantly not have the laundry siphon out my the p-trap on the sink :)

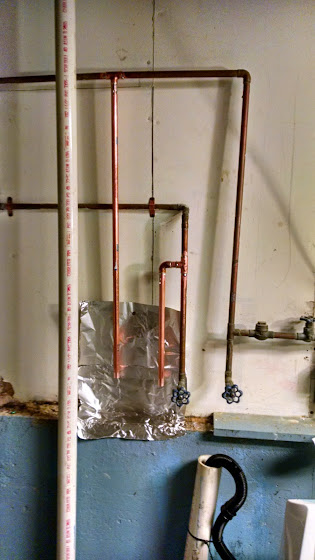
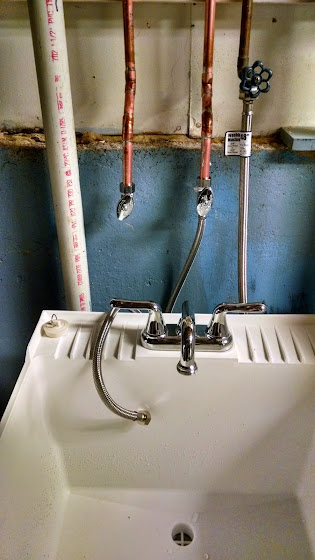
First, I turned off the water. Public Service Announcement - make sure to exercise (turn off and on) your gate stop valves on your water lines a few times a year. A few were REALLY hard to loosen. I then started to cut into the top pipe and my pipe cutter was walking all around on me and almost "threading" the pipe. Not sure if it was just a dull cutting blade or if its done. Regardless, trip 1 to the hardware store was made to get a new pipe cutter. I then got back and cut the pipe, cleaned and soldered in my fittings. I used tin foil held up by a metal thumb tack to prevent from burning my walls and/or house down - worked really well. I could have had some really nice solder joints, but I was scared the little bit of solder didn't make a good seal so I melted on more than I should have (probably totally unnecessary).

Soldered new pipe
IMG_20150412_135509205_HDR.jpg


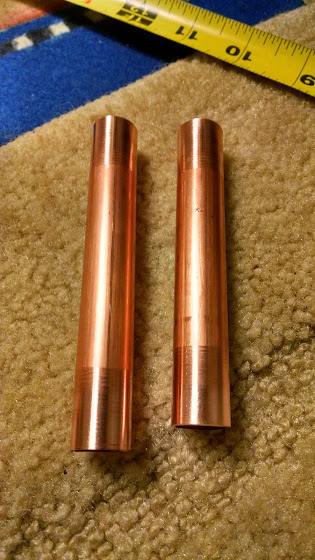
Here is a pic of some cleaned pipe
IMG_20150412_141012346_HDR.jpg


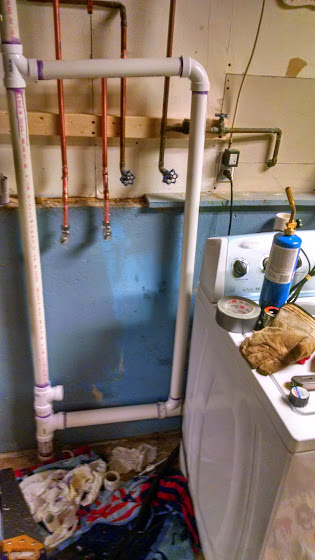
Then I added two 45 degree fittings in alternating directions to extend me away from the wall and over the cement foundation wall.

Then I began the vent and drain piping. I started with a normal hand saw, moved to a hack saw and then remembered I had a little multi-tool. That thing is a life saver! Towards the end I was getting pretty good at making even cuts. You can barely see the laundry standpipe behind the machine, but its there. I actually had to make trip number 2 to the hardware store (right before Home Depot closed on a Sunday night) to get a slip joint and more 2" pipe for an extender for the standpipe since I had only purchased 2' sections #smallCarProblems.

Laundry standpipe and venting installed:
IMG_20150412_201102173_HDR.jpg


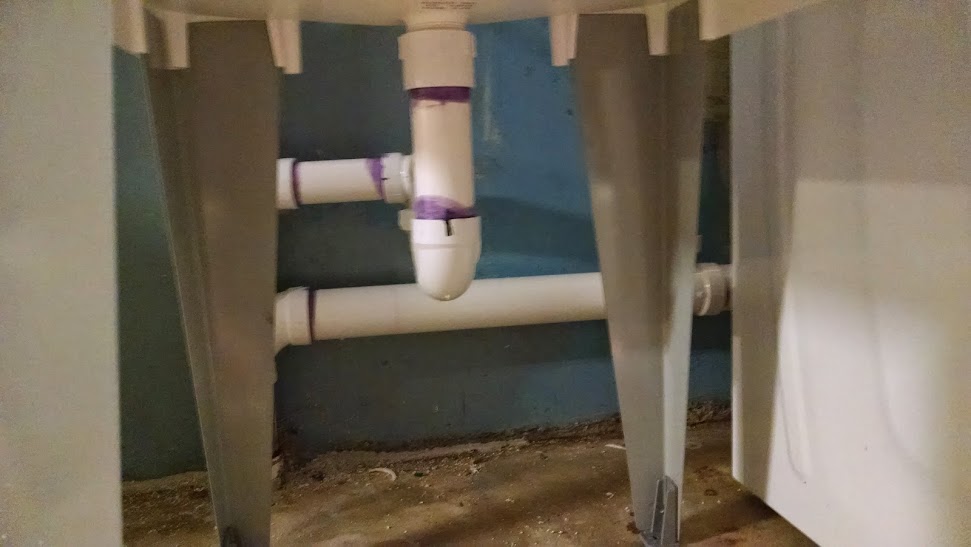
I then measured everything for the sink and glued it up. Had to be more precise here. I end up gluing the stub out and one part of the p-trap, then the sink tub and the other part of the p-trap. Everything fit perfect so I was able to slip the trap underneath and tighten it down.

Laundry drain front view:
IMG_20150412_212858587.jpg


Laundry drain side view:
IMG_20150412_212846320.jpg


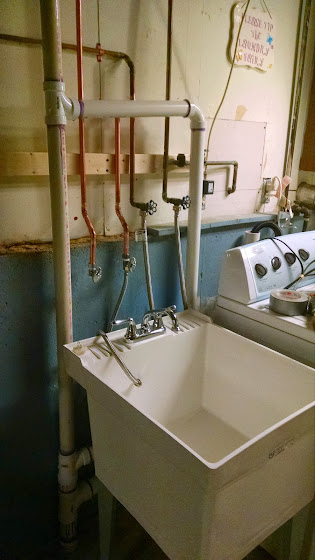
Im thinking to myself, "Awesome I'm done just need to connect the supply hoses to the shut-off valves...Oh crap! I didn't buy 2 of the same hoses like I thought I did. Hardware store is closed, oh well." So I plan on going to get the correct hose tonight. I did check it with the one hose and worked and no leaks! Wife also did some laundry this morning with no issues. I call this a success!

IMG_20150412_212907453_HDR.jpg


Another Angle. You can see the 45s on the water pipes better.
IMG_20150412_212916027.jpg


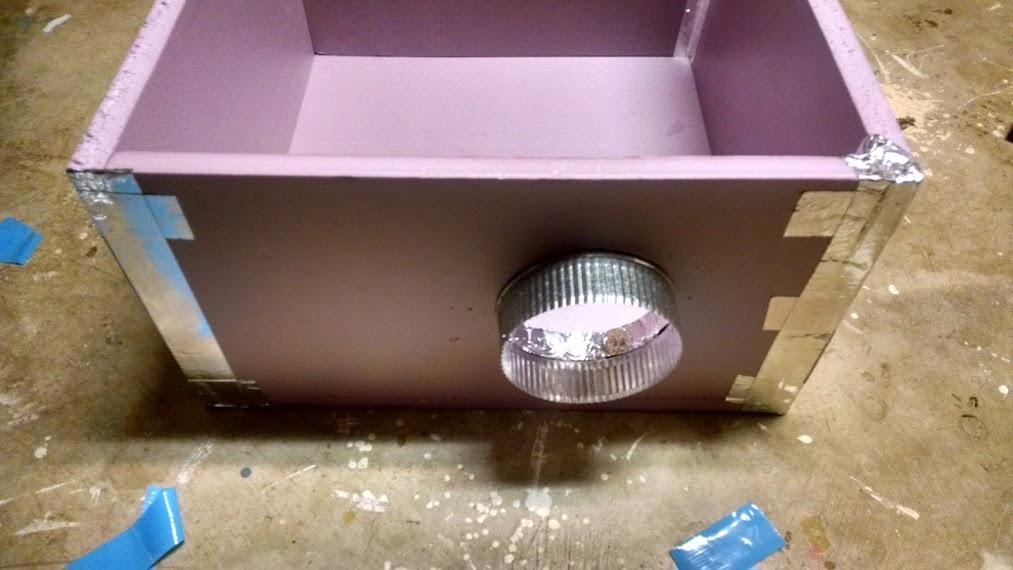
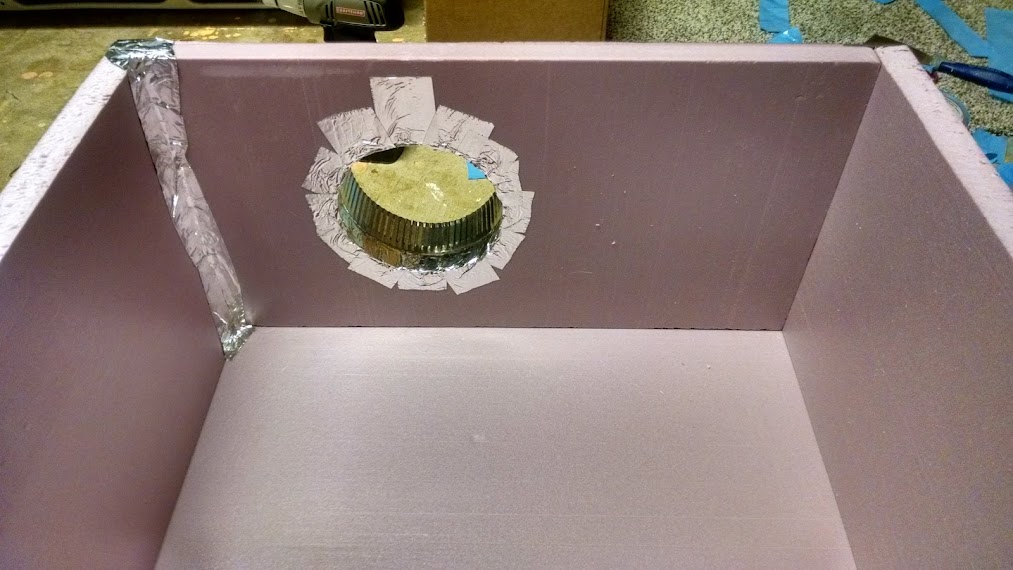
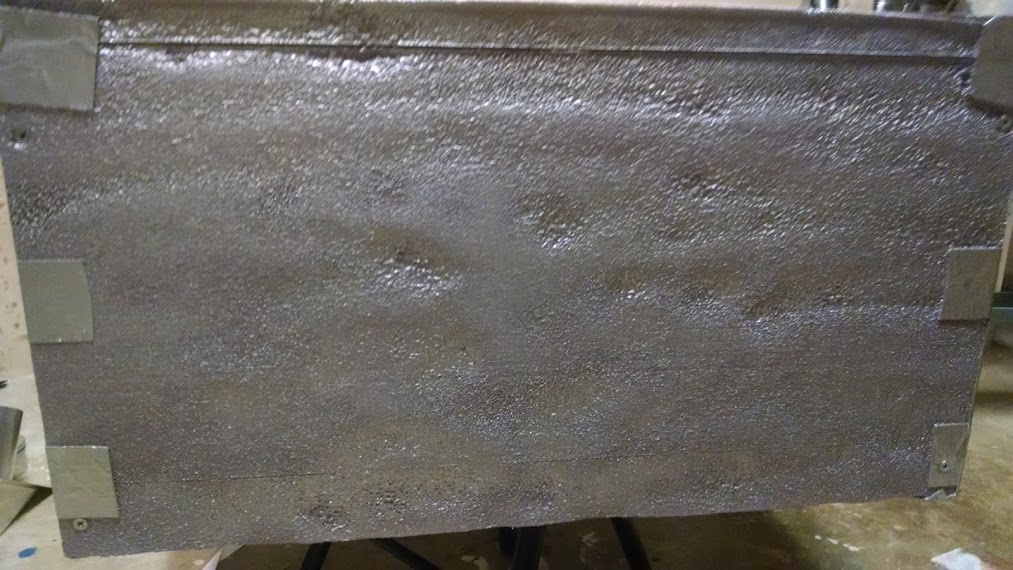
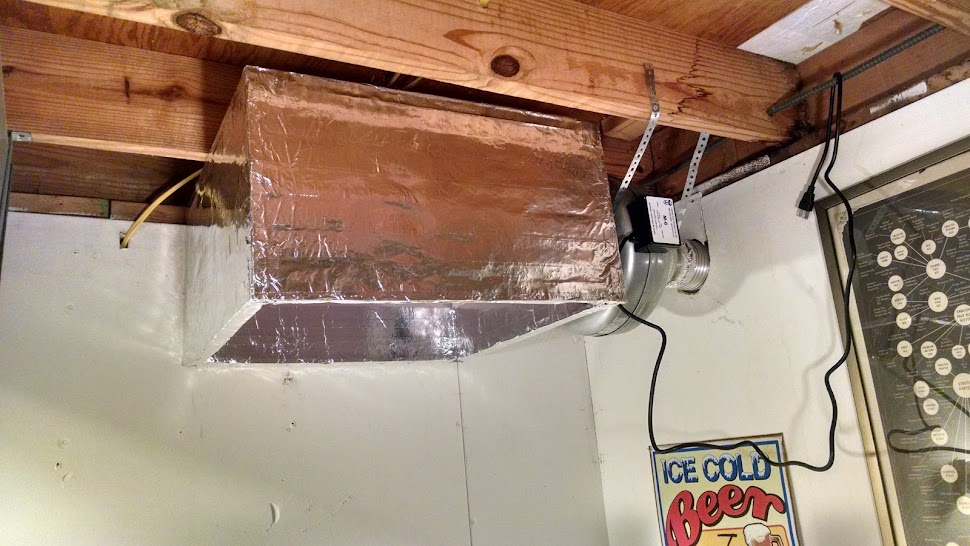
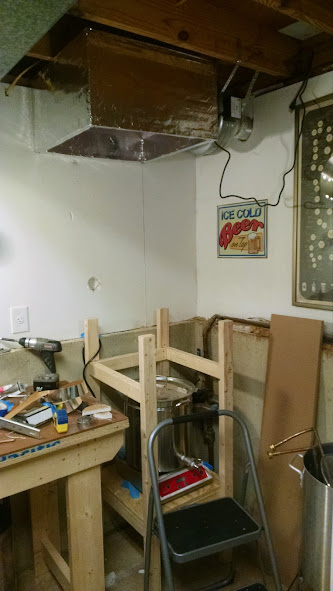
Now I just need to installing my venting solution for the boil and can make some beer!
 
Finally pulled the trigger, ordered the 6" tjernlund fan (530 cfm) and a speed controller* I have seen a lot of people say the speed controller is pointless cause they need to run at full speed anyways, but I feel I might need it especially on 3 gal batches.

Stay tuned!
 
Working on my ventilation this weekend and while it was probably common sense in hindsight I will throw it out there - Spray paint melts pink foam board. I figured I could make a cheap foam board vent hood and then spray paint in a metallic steel color because the wife said the pink would be to much of an eyesore (has she looked at the rest of my whole brew area haha?)

Before
IMG_20150530_160009995.jpg


IMG_20150530_160017558_HDR.jpg


IMG_20150530_160024624_HDR.jpg


After
IMG_20150530_194950350.jpg


The picture actually makes it look better than it is! Anyone have an bright ideas on how to salvage this? Was thinking about wrapping it with aluminum foil?
 
I ended up just using a bunch of the aluminum foil tape, hopefully it lasts. I think it looks decent. Just need to set up my water lines and wire up the fan variable speed controller and then I can start making some beer!

IMG_20150601_211806072_HDR.jpg


IMG_20150601_211855705.jpg


Oh and clean up...basement is a mess
 
Last edited:
Yay! Finished everything up last weekend - planning to brew this Saturday! Can't decide what to brew...Im thinking a good ole pale ale, but I have a bunch of ingredients for other fan favorites: belgian pale ale, brown ale, blonde, ipa... too many choices!

Hoping to grab some footage this weekend to show her in action.
 
So brewday went really well and I am really pleased with the system. It was absolutely POURING outside Saturday which normally would have cause a rain check, but not anymore! Start to finish (including cleanup it was about 4 hours and 15 minutes (did a 40 min mash) and went pretty smoothly - probably my fastest brewday EVER. I attribute this to everything being right in one place. I used to waste so much time going back and forth to grab stuff from the fridge and storage area. Now it is all there and I even had my laptop there for quick recipe adjustments.

The only issue I had was a little bit of condensation on the fan. I had heard this is a common problem. When I noticed it (about 30 minutes into the boil) I drilled a tiny hold in the bottom of the fan expecting a bunch of drops to com out, but the didn't. The dripping was actually coming from the exit of the fan where it goes to the 6 >4 reducer AND it was coming from the right under the electrical box housing. I had silicone caulked the inside of the electrical box hole where the wires go into the box, however, I think the hole from the fan into the box is not tightly seal and it therefore leaks down. I think I am going to try and rotate the fan 90 degrees so the electrical box is directly on top (see my first pic from post 11 for reference).

Made a "session" IPA 44 IBU ~4% beer and used WLP002. I was lazy and given the low gravity I didn't (well really I forgot to) oxygenate prior to pitching the yeast. I had a 1 L starter so I'm not worried especially with all these exbeeriments @Brulosopher is doing.

Should be posting some footage via a Home Brew Wednesday video this week so keep an eye out. Her is a pic of me all setup from Saturday.

IMG_20150627_145834239.jpg
 
Had my second brewday this past weekend. Made a brown ale, which I guess is now 13B British Brown ale according to the new 2015 guidelines. Leaves more room for interpretation. Brewday was pretty good except I think I tried to drain the mash too quickly as after a few gallons it stopped running off. I had to scrape a few "lines" in the top of the mash to get things going again...twice. Forgot to take a OG in my haste!

I just got a new puppy so I tried to make this brewday a speed brew and was able to finish in 3 hours. I did a 30 min mash, 45 min boil (with first wort hop), and I am fermenting in my boil kettle. If this works out well I may continue with the boil kettle fermenting. I rarely brew at a frequency that would require the use of the boil kettle prior to the next brew day. I also won't have to clean a fermenter and racking equipment!

Took some video, but have yet to edit it all together. Instead enjoy a few pics:

Mmmmm brown ale mash:
IMG_20150815_104759131.jpg


The one and only hop addition Magnum 14.7% First wort hop
IMG_20150815_102402443.jpg


And my ridiculous sloppy harvested yeast from a session ipa. I will be interested to see how much hop flavor from this yeast comes through (if any)
IMG_20150815_121041946.jpg
 
Last edited:
Back
Top