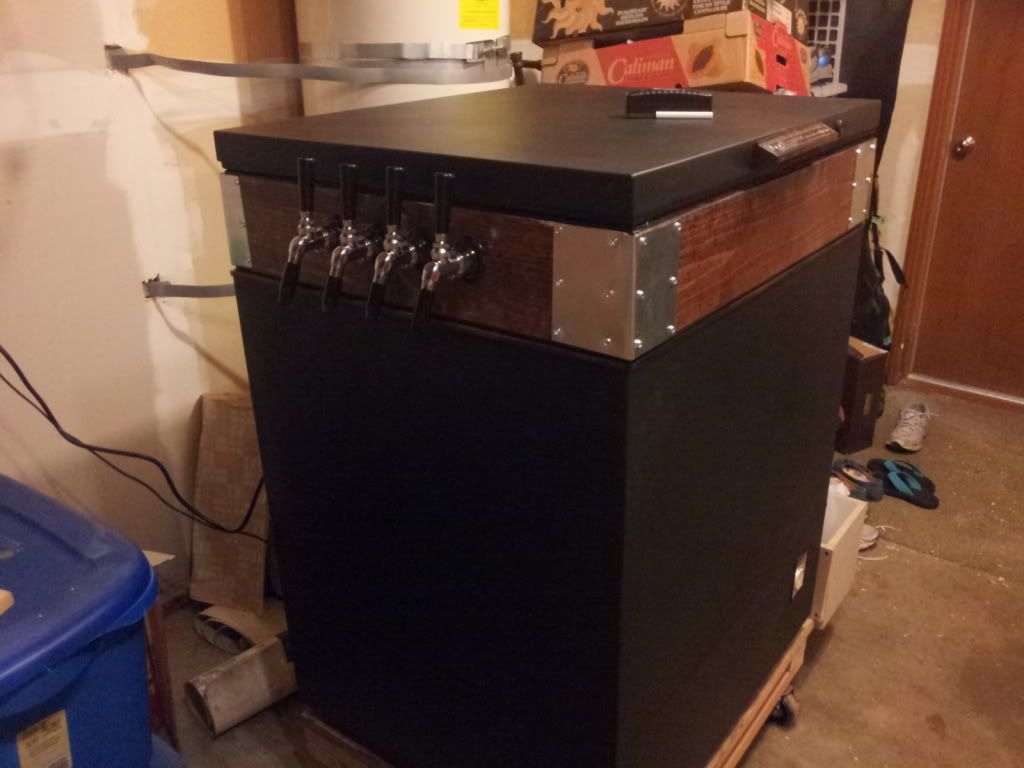
I scored an old Amana off CL for $20. Turned it...slowly into my keezer. I had kegs in there for about 3 months with plastic picnic taps and finally had the time to do the rest today:
The lid with the collar (1x6 pine) mounted with 4 gusset angles. I lined the corners with rope weatherstripping (grey stuff) to plug the holes. I'll also line the outside seam where the pine meets the gasket with silicone. The caulk tube I bought today was stuck so I'll be returning it for another and finish that tomorrow.
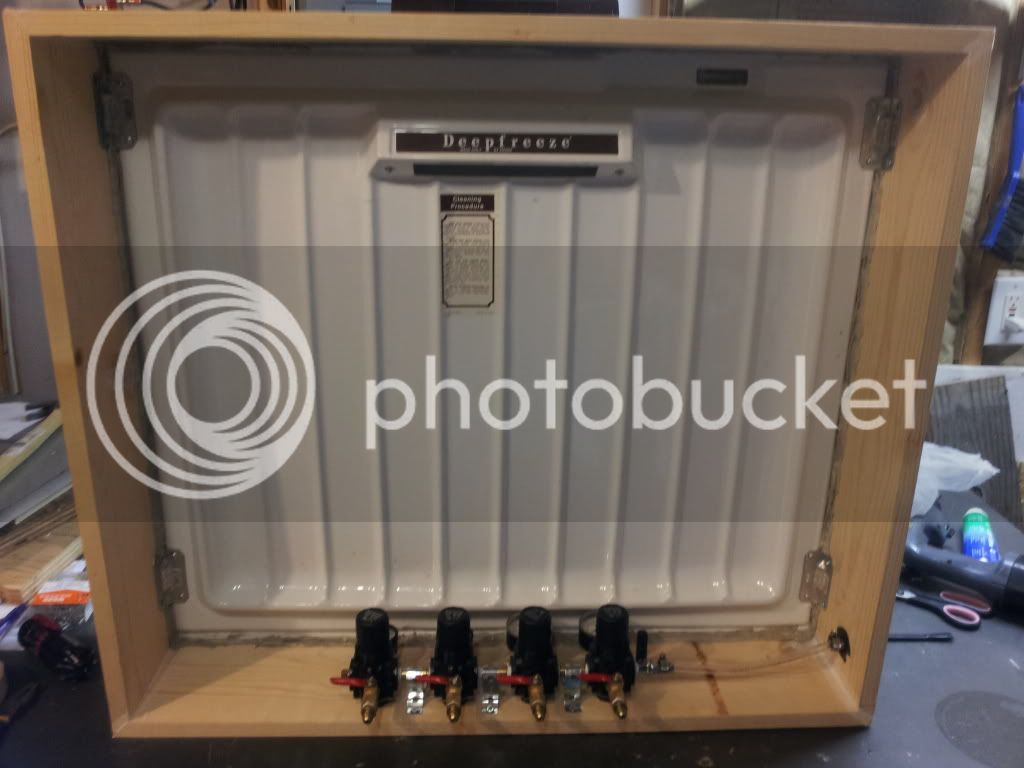
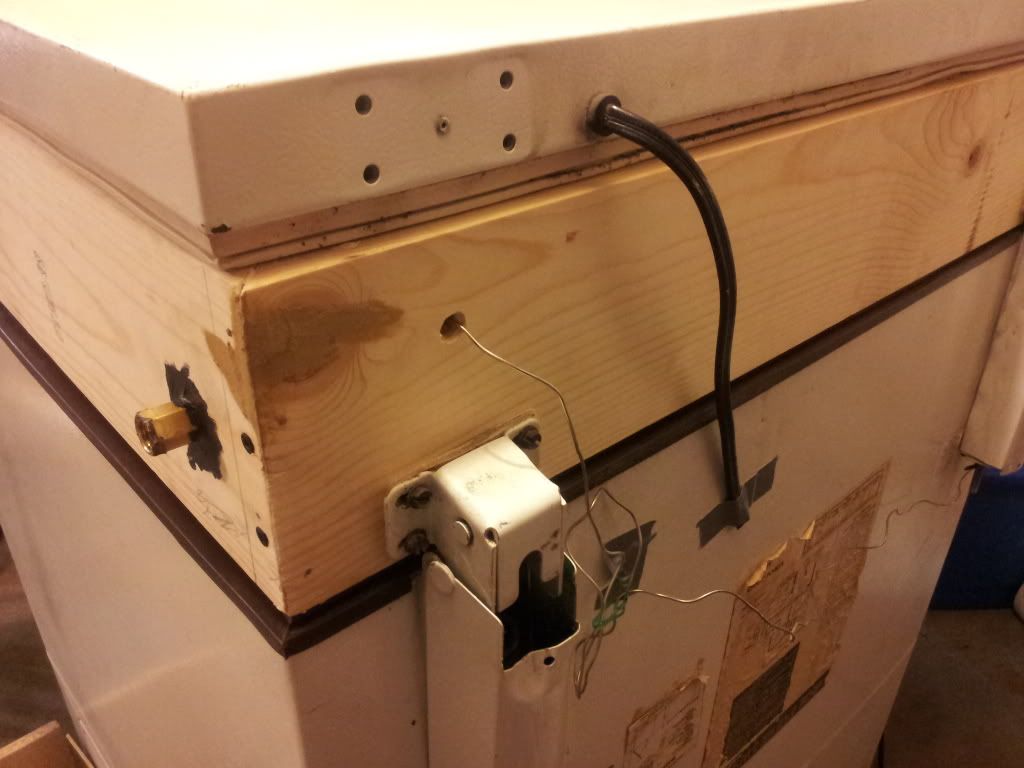
Mounting the secondaries that I built here to the back. I was forever trying to make a pretty box with a sheet metal face to hold it in. Then I said "screw it" and used the flexible steel plumber's tape. On the right is a barbed piece that actually goes through the wood to the other side.
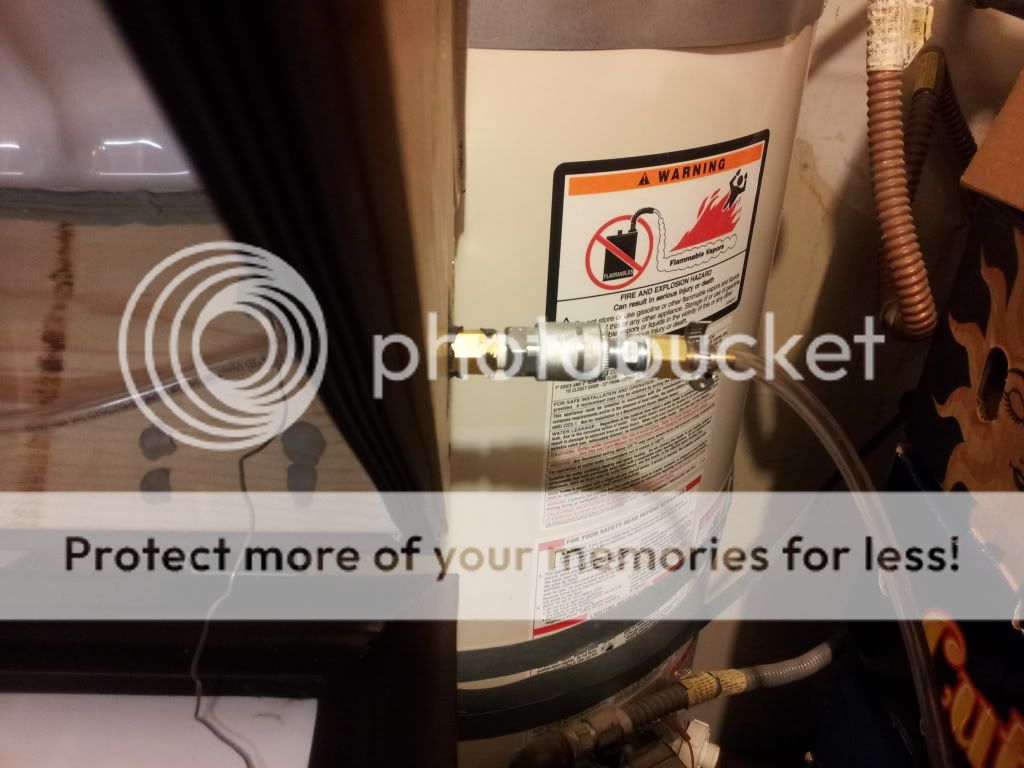
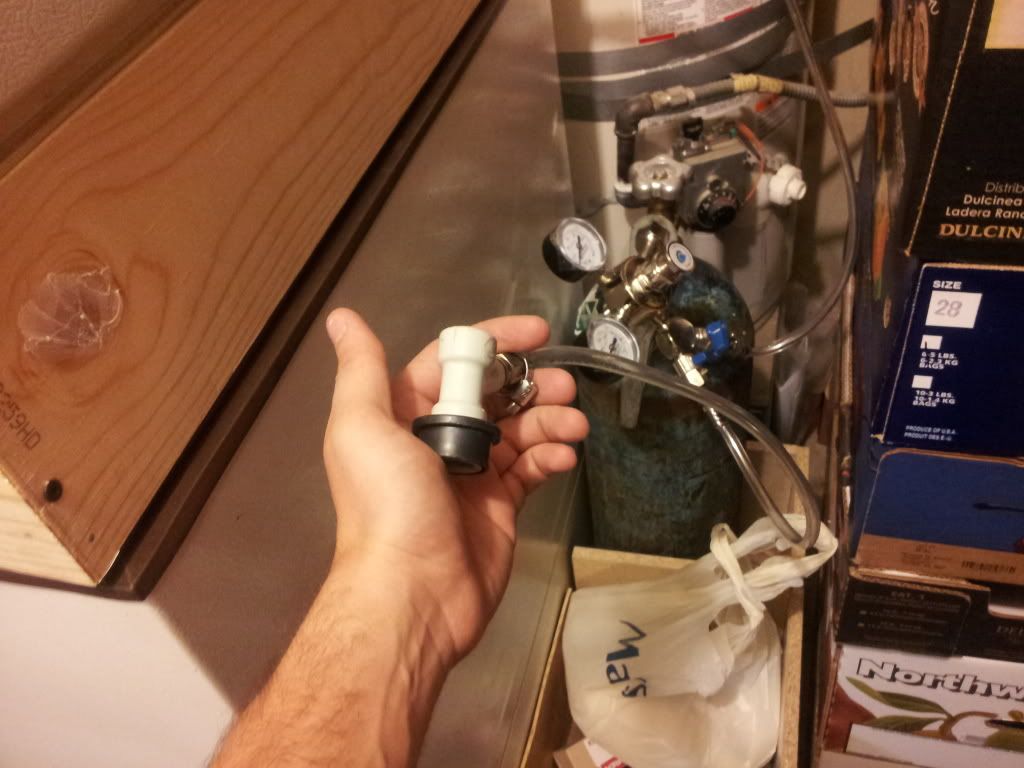
The other side has a female QD. I thought this was a nifty idea since I can leave the system closed when i need to fill up my tank. Also, I don't have a tube running through the wood leading to a potential cold air leak. So from inside to outside it follows: 5/16" barb to 1/4" NPT --> 1/4" female pipe coupling --> 1/4" NPT to female QD --> male QD to 1/4" NPT --> 1/4" female NPT to 1/4" barb --> regulator with 5/16" barb
The back, where I made a small hole to stick my Johnson Controls probe through, then filled it with the rope weatherstripping. I had to get creative when dismantling the tops of the hinges from the freezer lid. There's no hole for a nail to go through (like whirlpool and frigidaire) so I had to jam the thin metal hinge cover into the crease that closed in order to keep it from snapping back after removing the bolts. I then made pilot holes into the wood and re-attached the bolts. On the inside, I filled the holes (although plugged with the bolt) with more weatherstripping. I also cut the wire going from the lid to the compressor as that's the light sensor. Right now I don't care about the light, but I kept the wire taped to the back in case I want light in there. I'll just splice an extra 8" of wire and I'll be good. Until then, electrical tape is covering it.
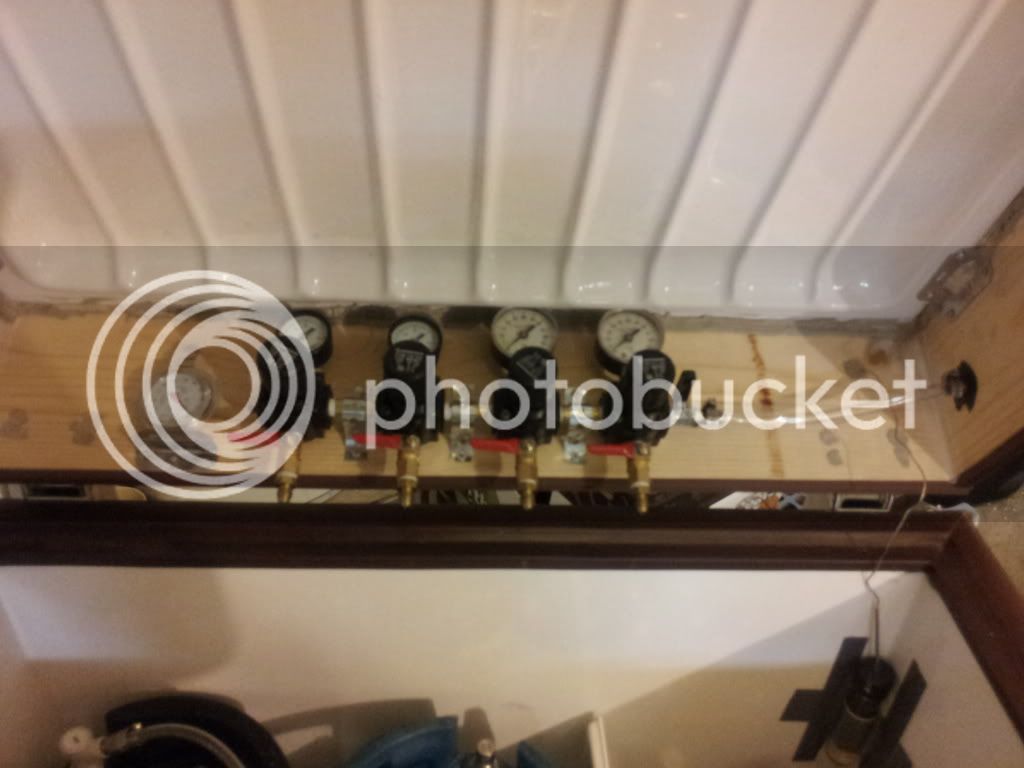
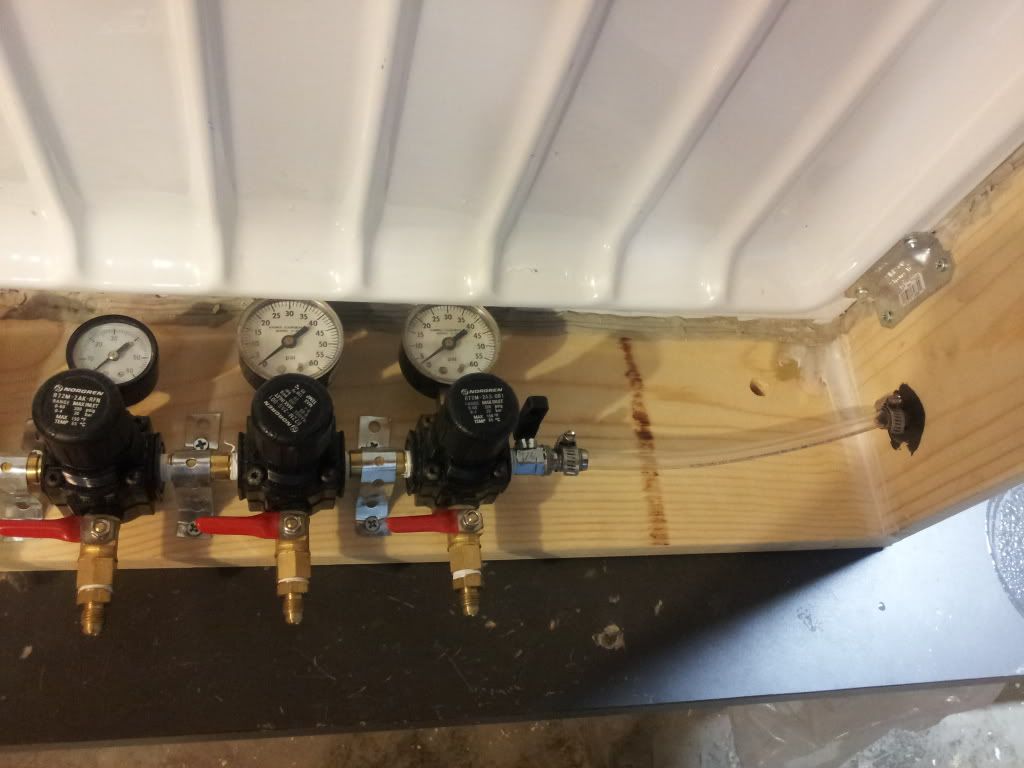
The probe is in water mounted into the corner there by the world's best mounting device...duct tape. On the left of the regs I bent back the bottom of my refrigerator thermometer and screwed it into the wood for easy reading.
On my primary regulator is a Y splitter. One goes into the keezer via QD and the other stays with a gas-in piece for purging my kegs after racking.
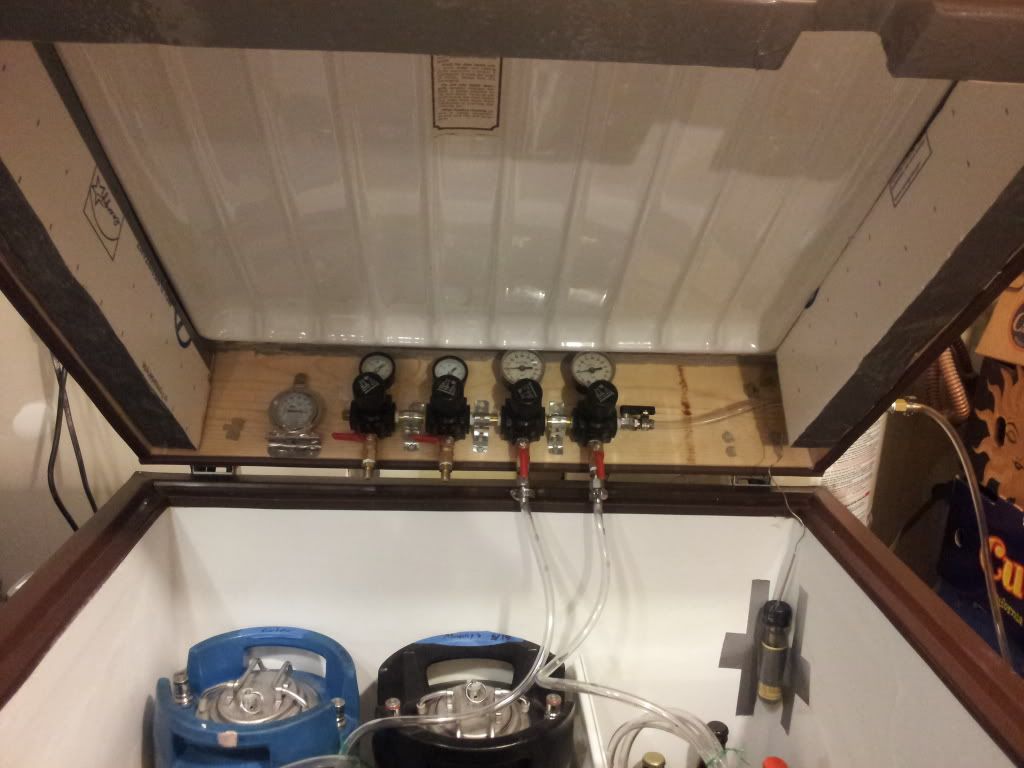
Everything hooked up (all MFL connects except the small segment going from secondary to wall of keezer, which is barbed). I only had enough line to hook my two hefeweizens up. The other is a cider, which is just aging and a Manny's clone I just kegged and I'm aging it for a bit while dry hopping. I also taped some of that foam insulation board to the walls. easy enough, although maybe not necessary. And under the pine is rubber weatherseal with the "all" pattern (likes like 5 points on a rectangle) rather than the simple P design. When i close it i can hear a "whip" so i know it's sealing good.
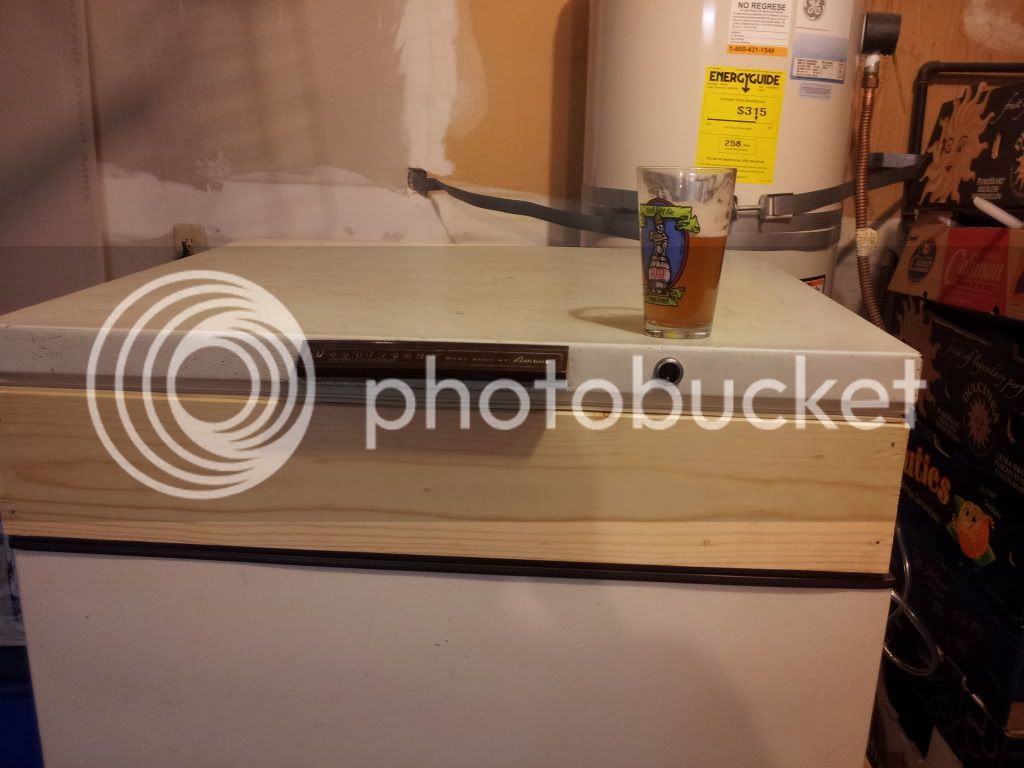
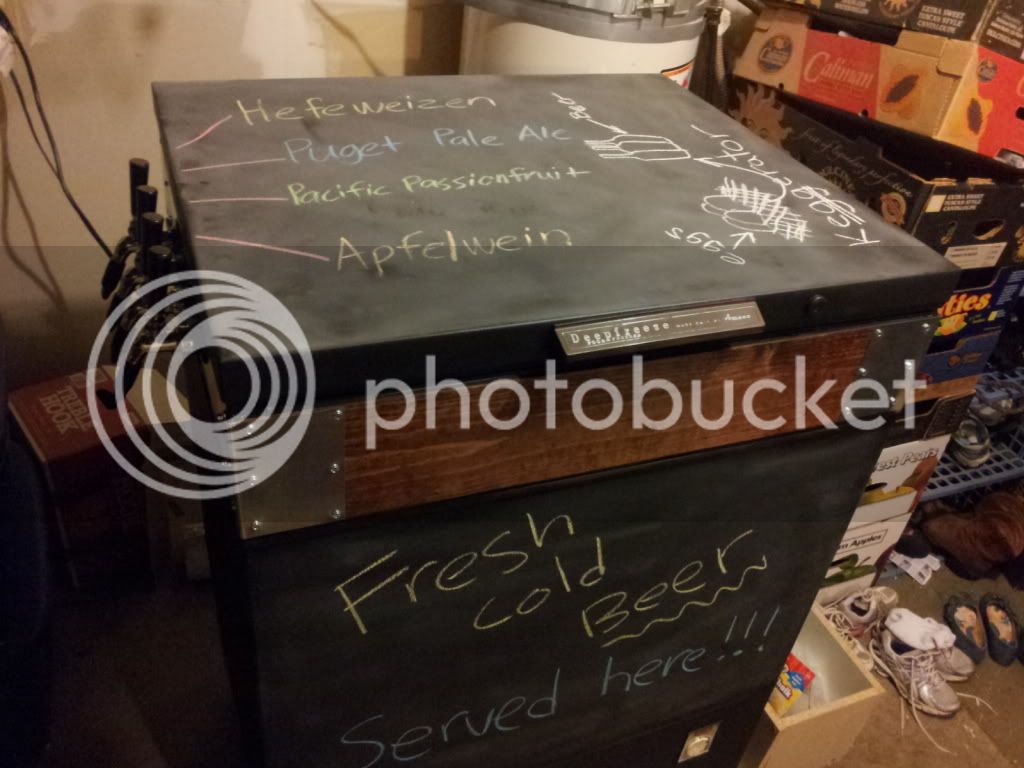
Time to relax now with a nice hef. You'll see there are no taps mounted on the front. I'm still using my picnic taps until I find a good price on used taps and shanks, then I'll put 5 on the front since 5 kegs will fit in there. I'll eventually put a Y on one of the secondaries, or maybe just keep 4 on tap and one aging at any given time.
Happy Brewing!
The lid with the collar (1x6 pine) mounted with 4 gusset angles. I lined the corners with rope weatherstripping (grey stuff) to plug the holes. I'll also line the outside seam where the pine meets the gasket with silicone. The caulk tube I bought today was stuck so I'll be returning it for another and finish that tomorrow.
Mounting the secondaries that I built here to the back. I was forever trying to make a pretty box with a sheet metal face to hold it in. Then I said "screw it" and used the flexible steel plumber's tape. On the right is a barbed piece that actually goes through the wood to the other side.
The other side has a female QD. I thought this was a nifty idea since I can leave the system closed when i need to fill up my tank. Also, I don't have a tube running through the wood leading to a potential cold air leak. So from inside to outside it follows: 5/16" barb to 1/4" NPT --> 1/4" female pipe coupling --> 1/4" NPT to female QD --> male QD to 1/4" NPT --> 1/4" female NPT to 1/4" barb --> regulator with 5/16" barb
The back, where I made a small hole to stick my Johnson Controls probe through, then filled it with the rope weatherstripping. I had to get creative when dismantling the tops of the hinges from the freezer lid. There's no hole for a nail to go through (like whirlpool and frigidaire) so I had to jam the thin metal hinge cover into the crease that closed in order to keep it from snapping back after removing the bolts. I then made pilot holes into the wood and re-attached the bolts. On the inside, I filled the holes (although plugged with the bolt) with more weatherstripping. I also cut the wire going from the lid to the compressor as that's the light sensor. Right now I don't care about the light, but I kept the wire taped to the back in case I want light in there. I'll just splice an extra 8" of wire and I'll be good. Until then, electrical tape is covering it.
The probe is in water mounted into the corner there by the world's best mounting device...duct tape. On the left of the regs I bent back the bottom of my refrigerator thermometer and screwed it into the wood for easy reading.
On my primary regulator is a Y splitter. One goes into the keezer via QD and the other stays with a gas-in piece for purging my kegs after racking.
Everything hooked up (all MFL connects except the small segment going from secondary to wall of keezer, which is barbed). I only had enough line to hook my two hefeweizens up. The other is a cider, which is just aging and a Manny's clone I just kegged and I'm aging it for a bit while dry hopping. I also taped some of that foam insulation board to the walls. easy enough, although maybe not necessary. And under the pine is rubber weatherseal with the "all" pattern (likes like 5 points on a rectangle) rather than the simple P design. When i close it i can hear a "whip" so i know it's sealing good.
Time to relax now with a nice hef. You'll see there are no taps mounted on the front. I'm still using my picnic taps until I find a good price on used taps and shanks, then I'll put 5 on the front since 5 kegs will fit in there. I'll eventually put a Y on one of the secondaries, or maybe just keep 4 on tap and one aging at any given time.
Happy Brewing!