HOWTO - Make a BrewPi Fermentation Controller For Cheap

Homebrew Talk - Beer, Wine, Mead, & Cider Brewing Discussion Forum

Help Support Homebrew Talk - Beer, Wine, Mead, & Cider Brewing Discussion Forum:

This site may earn a commission from merchant affiliate links, including eBay, Amazon, and others.
Status
Not open for further replies.
Ok ladies, someone tell me how to "calibrate" ds18b20 probes under BrewPi.
I've dug into the Wiki, Googled the hell out of the BrewPi "forums", and what I get out of all of that isn't enough to give me a clue.

I'm looking for something explicit here.
You know, the way I write up stuff, so any knucklehead can get it...

Cheers! ;)
 
Seriously, do you really believe I couldn't find that page without help?

OK, so where do the commands get entered?
In a random terminal session, or what?

Cheers!
 
There are several ways to do it. First you should stop BrewPi so that it "lets go" of the serial port. Next, you need to be sure you know the serial port path to your Arduino (e.g. /dev/ttyACM0). Finally, you need to send the string to the Arduino, by using your favourite terminal emulator (I like gtkterm), or "screen", or maybe a simple "echo" command.

There is a little more discussion here:
http://forum.brewpi.com/discussion/448/temperature-probe-calibration
 
Ok, for the record, here's how to calibrate probes in BrewPi.
Assumes an RPi host with network connectivity, with the entire procedure performed remotely via Putty or equivalent terminal emulator.

- tie all probes to a trusted thermometer and allow to normalize
- use the BrewPi web gui to record the probe temperatures and note any variances from the trusted reading

- use the BrewPi gui to Stop the running Script

- open a Putty session and log into the RPi host
- if the program Screen is not installed on the RPi, install it as follows:

$ sudo apt-get update
$ sudo apt-get install screen

- use Screen to connect to the serial port used by the Arduino.
Note if you have a multi-instance configuration to be sure to use the correct port reference.
In this example I'm using a Bluetooth-connected Uno using rfcomm1.
For a single-instance, USB-connected Uno, the most likely ports used are either /dev/ttyACM0 or /dev/ttyUSB0.

$ screen /dev/rfcomm1 57600

There will be no indication that Screen is connected.

- dump the data associated with all probes:

h{v:1}

- probes are referenced using an index i with values of 0 through 2.
Examine the data stream dumped above, looking for each value of "i", and the corresponding temperature reading. The One-wire address of each probe is also provided to help correlate datasets with probes.

- apply the desired adjustment factor for each probe:

U{i:n,j:v.v}

where n=probe index (0 through 2) and v.v is the adjustment value (if negative, then -v.v).

For example, I applied a negative 1.4°F adjustment to a room temperature probe, using:

U{i:2,j:-1.4}

After applying the adjustment factor you can use the dump command to verify the setting.

- Disconnect Screen from the serial port using

ctrl-a, k then answering "y".

- Use the BrewPi web gui to start the script and verify the probe data has been adjusted as desired.

Cheers!
 
Very nice writeup @day_trippr. I saved that off so I can refer to it later.

Now tell us how you got Bluetooth to work. :)
 
So I kinda just wanna be super cheap here... I have pretty much everything but the relay switch laying around. Is there a way I could cannibalize my STC and rip the switch out?
 
It was a question. I literally have all the other parts around me and was eager to try it out. Saving money is saving money haha especially when I still need to get through college...
I was planning on cannibalizing my STC temp controller anyway so if I can just use it all then why not? Otherwise I would just have the STC laying around.
 
OK so I have received a new batch of sensors. All of them are labeled ds18b20 on the outside but when running the sketch to see if parasite power is used they register some as Ds18b20 some as Ds18s20 and one does not register at all. There are definitely some bad sensors out there.
Will this project work with the ds18s20? In looking at the datasheet the difference seems to be in that the b20 can change resolution and also is a shorter conversion time. The ROM code is also a little different format as well 28h vs 10h. The conversion time might be the same between the s20 and b20 it could only be that the ds1820 is the longer conversion time. I don't know enough about these differences to see if they will work in the brewpi.
 
lol! I understand - being confronted with such deep threads can be daunting for anyone who wasn't around when all these schemes were hatching ;)

If I was King of HBT I could do something about it, but, heck after 30 days I can't even edit my own posts, so...

Cheers!
 
Does anyone know how to access the actual database with the beer profiles? I have ended up with quite a few extra raws in my profiles and it is driving the OCD die of me crazy! Unfortunately I don't know how to access database without a handy cPanel.

OK so I have received a new batch of sensors. All of them are labeled ds18b20 on the outside but when running the sketch to see if parasite power is used they register some as Ds18b20 some as Ds18s20 and one does not register at all. There are definitely some bad sensors out there.
Will this project work with the ds18s20? In looking at the datasheet the difference seems to be in that the b20 can change resolution and also is a shorter conversion time. The ROM code is also a little different format as well 28h vs 10h. The conversion time might be the same between the s20 and b20 it could only be that the ds1820 is the longer conversion time. I don't know enough about these differences to see if they will work in the brewpi.

Have you thought about maybe just going with a different vendor? I got my sensors from Adafruit and have had no issues.
 
Does anyone know how to access the actual database with the beer profiles? I have ended up with quite a few extra raws in my profiles and it is driving the OCD die of me crazy! Unfortunately I don't know how to access database without a handy cPanel.[...]

"cPanel"?

Assuming a stock installation with a file set rooted in /var/www, if you look under /var/www/data you'll find a bunch of folders corresponding to BrewPi scripts, and inside those there will be a .csv file and typically a bunch of .json files.

My understanding it the .csv file represents the latest time slice while the .json files cover earlier slices.
You can edit the .csv file to remove "noise" if desired...

Cheers!
 
Does anyone know how to access the actual database with the beer profiles? I have ended up with quite a few extra raws in my profiles and it is driving the OCD die of me crazy!

If you are referring to extra rows in the profile editor. You can right click on the row and choose remove row, I believe. My brewpi is not running right now to verify.
 
"cPanel"?

Assuming a stock installation with a file set rooted in /var/www, if you look under /var/www/data you'll find a bunch of folders corresponding to BrewPi scripts, and inside those there will be a .csv file and typically a bunch of .json files.

My understanding it the .csv file represents the latest time slice while the .json files cover earlier slices.
You can edit the .csv file to remove "noise" if desired...

Cheers!

Thanks! Looks like it might be advisable to avoid doing this though, as it changes the owner of the file (at least when using Cyberduck on a Mac) and you then can't save changes to the profile via the web interface. Moral of the story: live with the flaws you (I) have created.
 
:confused: I thought those daily json files were the data logged not the profile

You're right, they are. Thought that's what the OP was actually looking for.
But if it's really the profiles, they're in /var/www/data/profiles by default.
So one can remove profiles or even edit existing ones...unless on a Mac?

Cheers!
 
I assumed that "raws" was a mis-spelling and thought he was referring to removing extra rows from the profile. In which case it can be done from the web interface with a right click. Or a control-click on a Mac.
 
I was indeed looking for the source code, if you will, for the profiles. I didn't realize you can right click on the rows, that is so much easier!
 
Thanks! Looks like it might be advisable to avoid doing this though, as it changes the owner of the file (at least when using Cyberduck on a Mac) and you then can't save changes to the profile via the web interface. Moral of the story: live with the flaws you (I) have created.

It's a problem (feature) of cyberduck, I believe.
It will change the ownership of a uploaded file to who you are logged in as, not the ownership of the original file already there (with cyberduck, you're not editing the file on the Pi -- you download a copy from the pi to the mac via cyberduck, edit the file on the mac, then upload the file via cyberduck, it just looks seamless).
Since those files are owned by the 'brewpi' user, you probably need to use that login when providing the login info to cyberduck, not the normal 'pi/raspberry' login.

Cheers,
-Th
 
I seriously doubt that. I'm an electrical engineer who has worked on 1-wire interfaces, and the pull-up impedance isn't that critical, Its only impact is on the rise time, and this is a slow interface.


Feel free to argue with the datasheet.
 
It's a problem (feature) of cyberduck, I believe.
It will change the ownership of a uploaded file to who you are logged in as, not the ownership of the original file already there (with cyberduck, you're not editing the file on the Pi -- you download a copy from the pi to the mac via cyberduck, edit the file on the mac, then upload the file via cyberduck, it just looks seamless).
Since those files are owned by the 'brewpi' user, you probably need to use that login when providing the login info to cyberduck, not the normal 'pi/raspberry' login.

Cheers,
-Th

Yeah, I ended up having better luck logging to via VNC with the brewpi user and changing the files that way. Then I learned about right clicked :mug:
 
Brewpi will use the ch340 just fine. you only need to change one line in config. if they don't have a boot loader, you'll need a working arduino to program one.
 
Have you thought about maybe just going with a different vendor? I got my sensors from Adafruit and have had no issues.[/QUOTE]

I have and that is what I am doing right now. I took the one Ds18b20 that I got from the previous vendor and used that one and it works with the brewpi. So I am ordering another two from a different vendor. I'm glad to know that I was able to get it working with the sensor and that all that I need to finish it is the two sensors.
 
Tried this Advanced Setting yet?

brewpi_max_temp.jpg

Cheers!
 
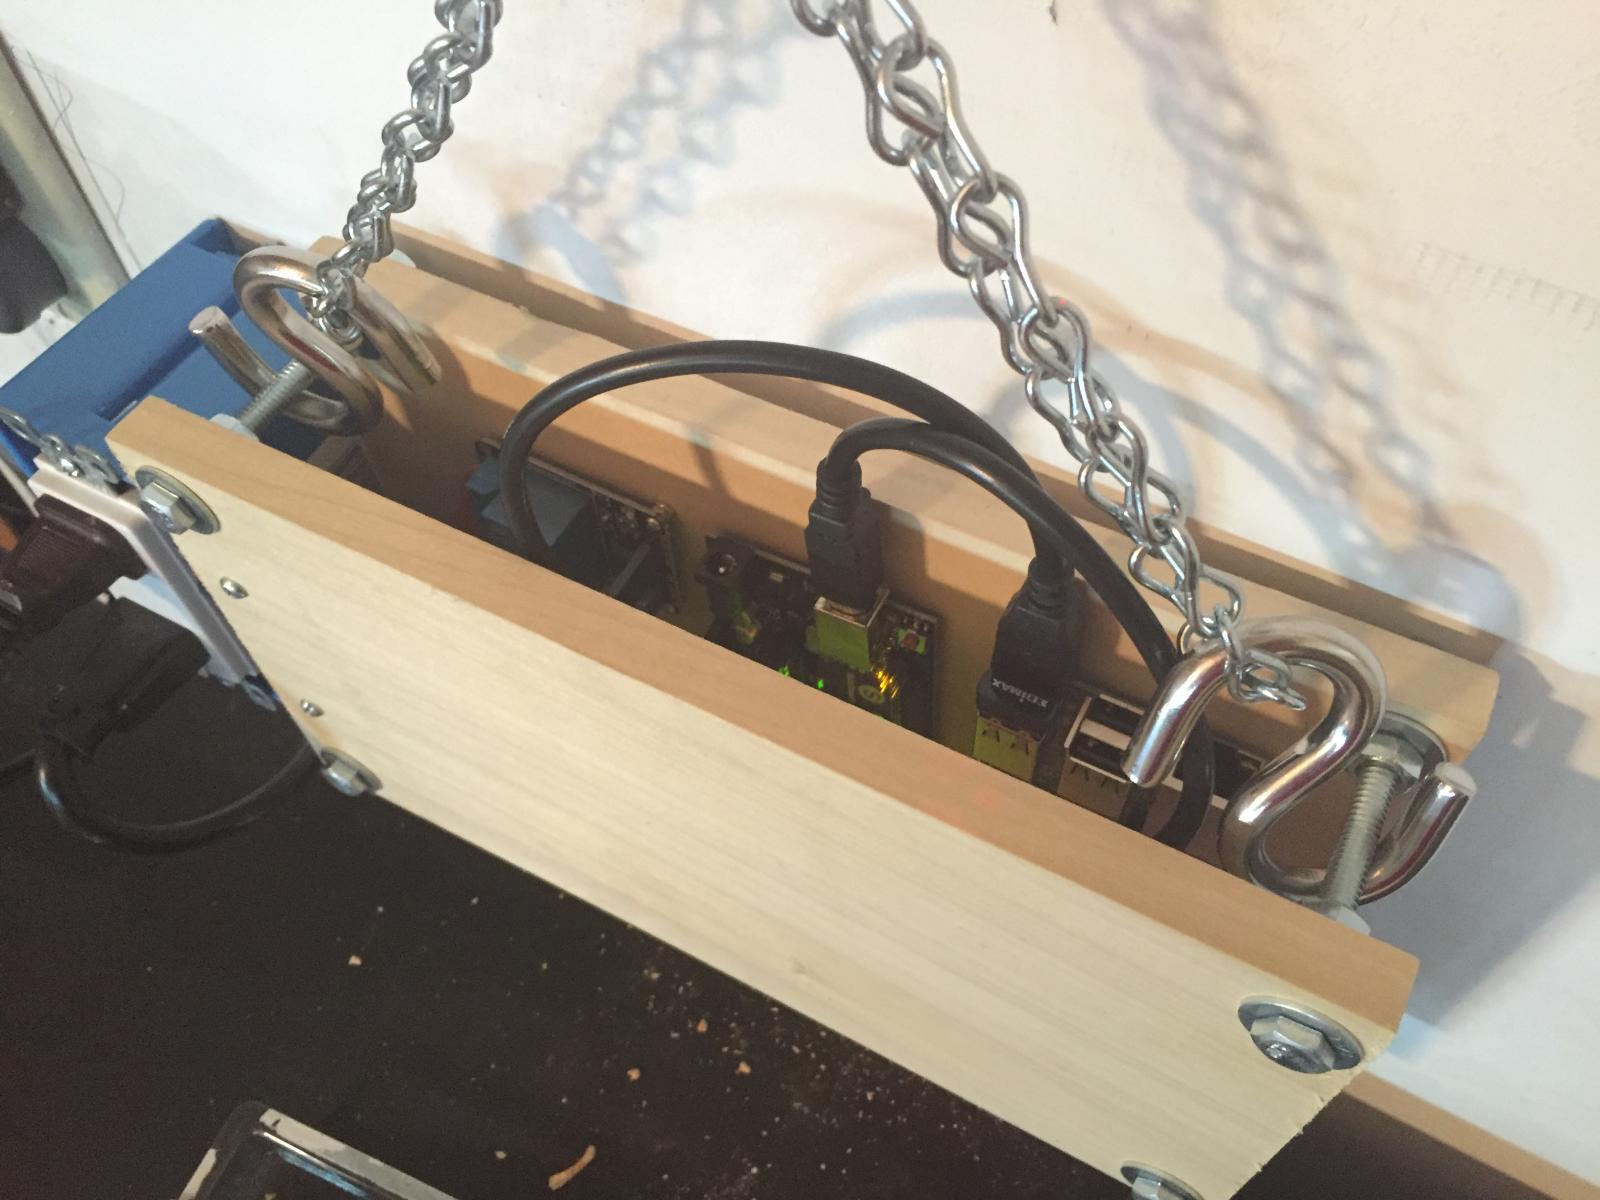
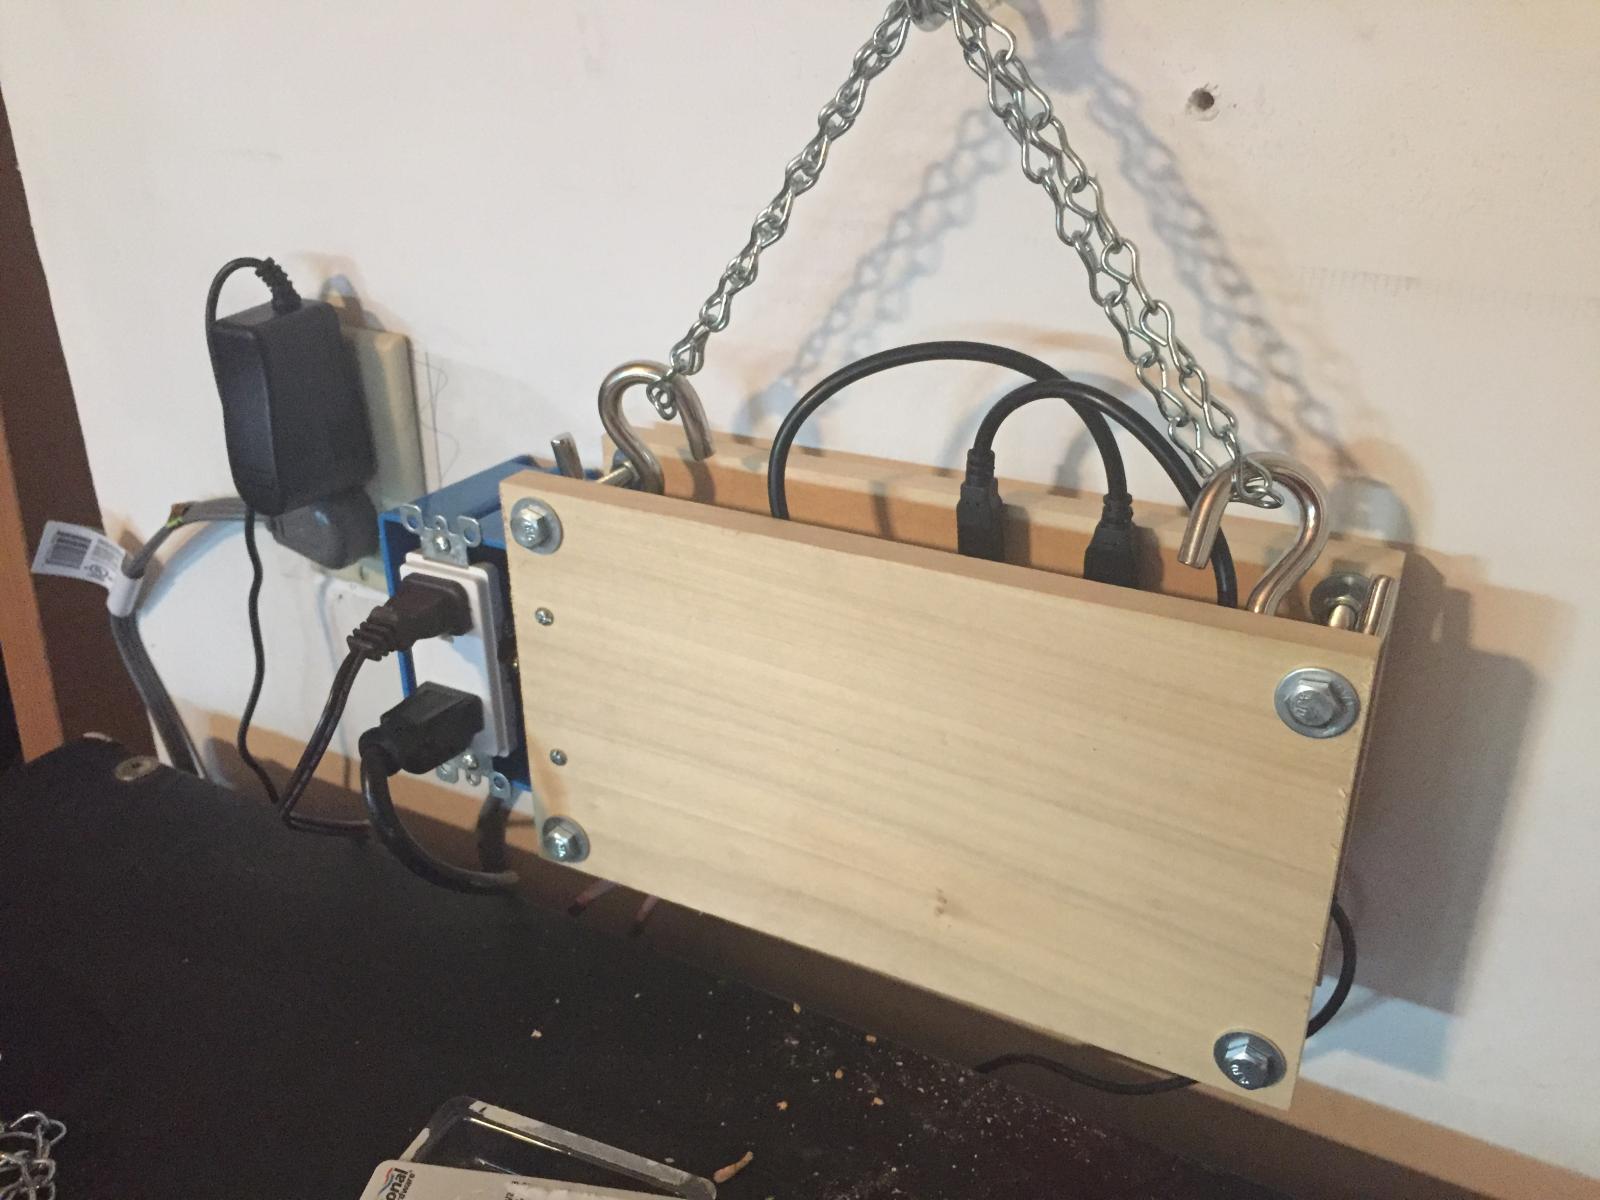
It's all finally done, and working! My thermowell came in today (took a detour down to Puerto Rico), so I drilled the top of my Speidel and put that in as well as hung the BrewPi case. Eventually I'm going to rebuild the lid of my chamber since it still has holes from its days as a kegerator. At that point I'll be building the components into the lid.

IMG_0510.jpg


IMG_0509.jpg
 
Thanks guys for the feedback and I found the bit on here talking about you having to change the configuration file. It's nice to see people working togeather :)
 
I have searched around on this post and maybe I am searching the wrong terms. I am wondering if there is a c way to change the address from the ip to a custom name? I keep getting results on making the brewpi public and his to access it from outside the lan.
 
Status
Not open for further replies.
Back
Top