3 tap, 5 cu. ft keezer

Homebrew Talk - Beer, Wine, Mead, & Cider Brewing Discussion Forum

Help Support Homebrew Talk - Beer, Wine, Mead, & Cider Brewing Discussion Forum:

This site may earn a commission from merchant affiliate links, including eBay, Amazon, and others.

adamensis

Active Member
Joined
Jan 30, 2009
Messages
39
Reaction score
1
Location
Tucson
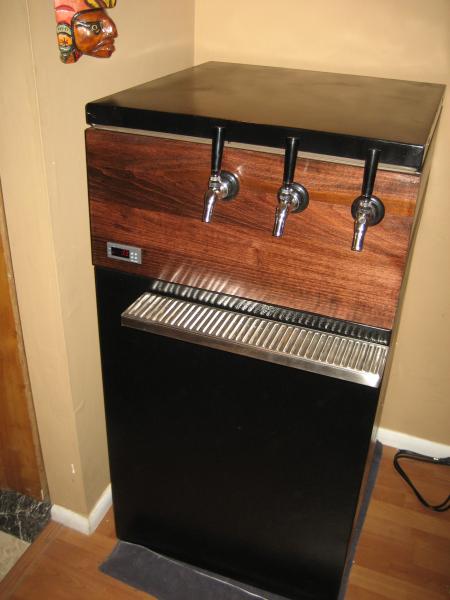
I've been trolling the keezer threads for sometime now and I thought I would share my build for anyone interested in building a keezer with a smaller 5 cu. ft. model. This works best for my needs, particularly because space is a factor (and we don't have basements in Tucson).


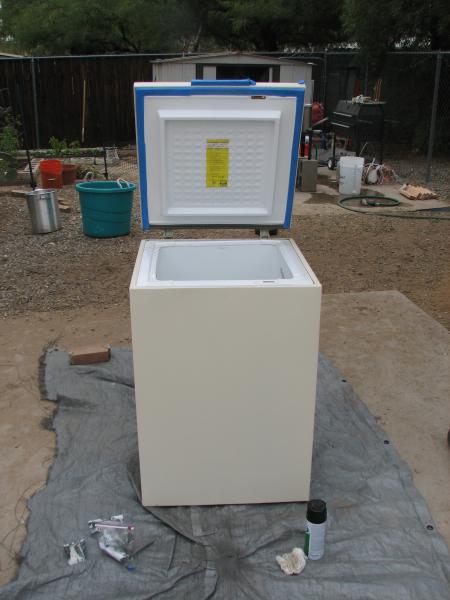
Here is the freezer prior to painting (I painted in black using appliance paint, pictures to come).
IMG_9045.jpg
 
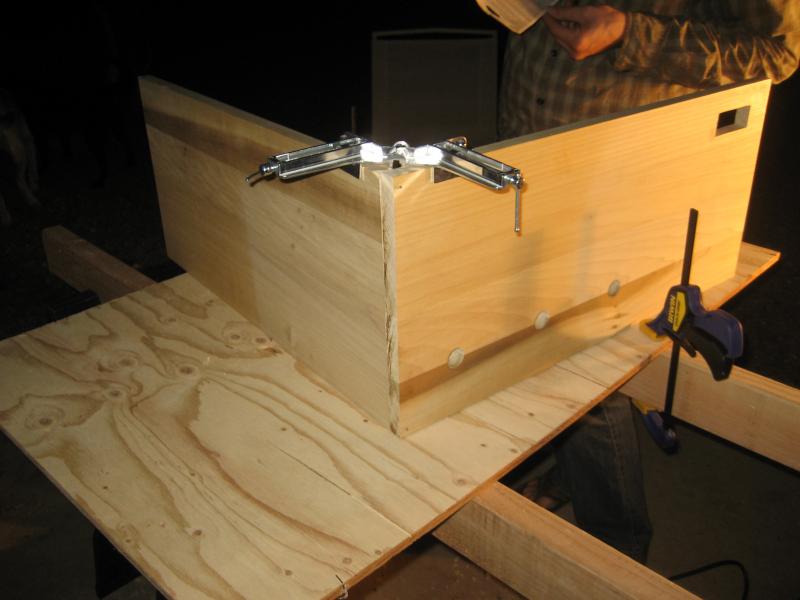
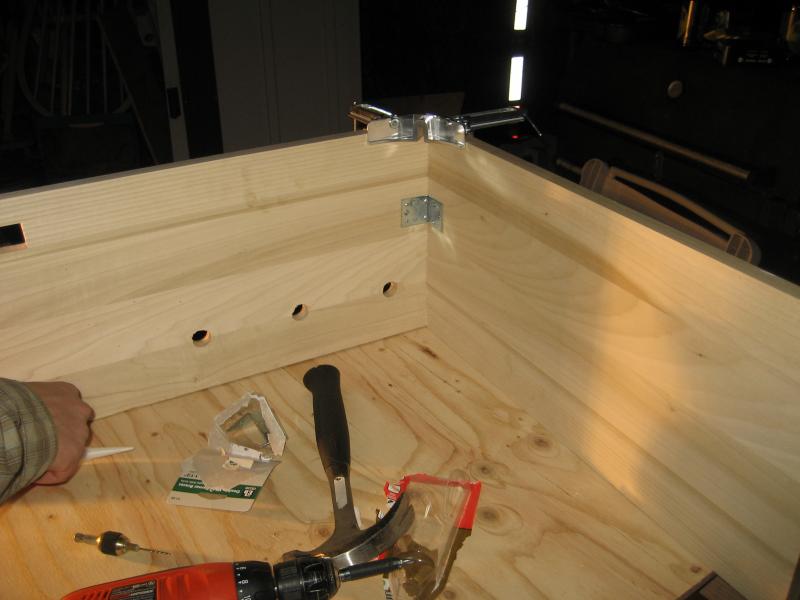
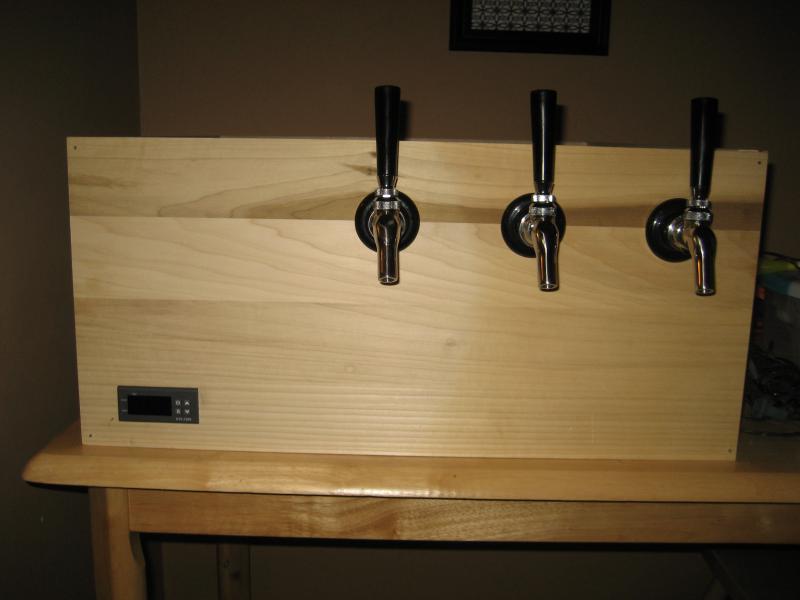
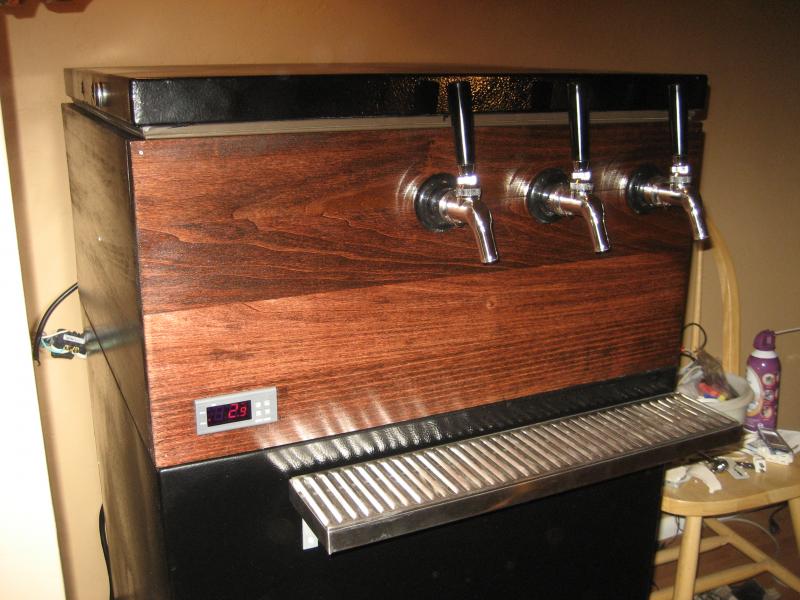
I built the collar out of 1x12 poplar using butt joints. I had toyed with the idea of using mitre joints, but because I suck at carpentry and I couldn't get access to a 12" mitre saw, I thought the former was a better choice. I think in the end it will still look nice. I glued the butt joints together using Liquid Nails, then held them together with a 90 degree vice while I drilled pilot holes for the finishing nails (wanted to make sure they went in smoothly). Then I installed angle brackets to secure the joint together.

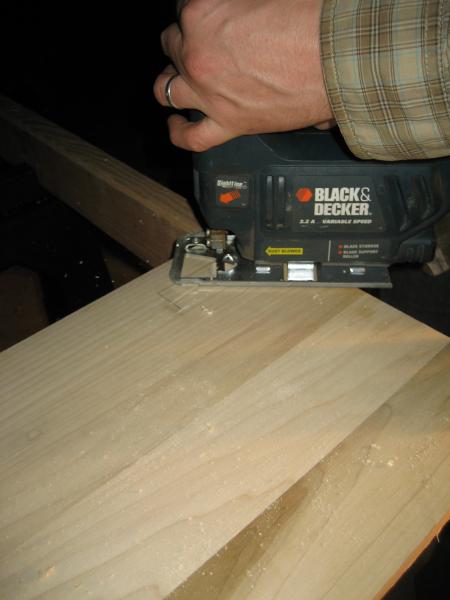
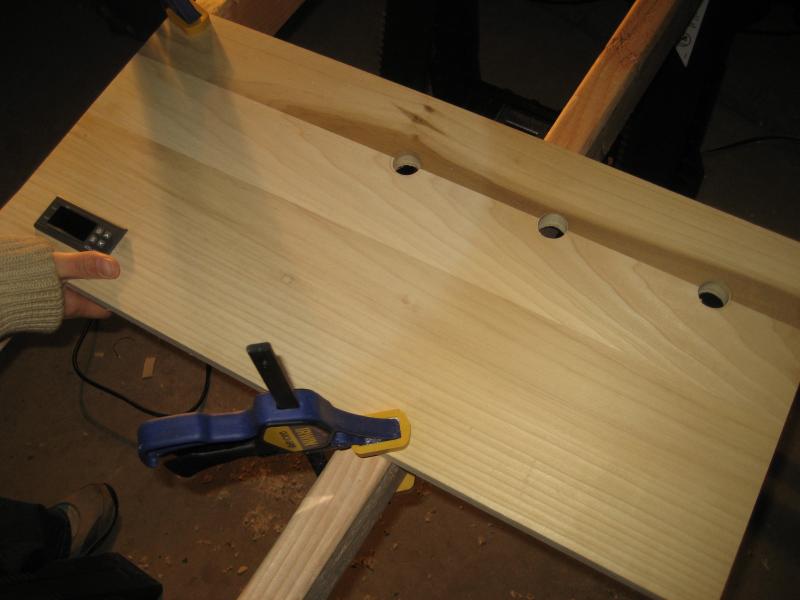
The holes for the taps were drilled using a 7/8" spade bit and the hole for the temperature controller (I went with the cheapo ebay aquarium version) was cut using a jigsaw.

IMG_8602.jpg


IMG_8603.jpg


IMG_8596.jpg


IMG_8599.jpg


IMG_8607.jpg
 
Taps and temp controller are dry fitted. Next up is staining and mounting. I will post when the work is completed.
 
Looks great. I just picked up one of these from craigslist for $30 and want to do the same.

Is there a reason you went with such a high collar? I have a carboy and a corny in mine right now with no collar and there would be more than enough room with like 1x8's or maybe even 1x6's.
 
Is there a reason you went with such a high collar? I have a carboy and a corny in mine right now with no collar and there would be more than enough room with like 1x8's or maybe even 1x6's.

When I was looking through other threads, someone mentioned that they wished they would have gone with a higher collar, even up to 12". So that's what I went with. However, if I could redo it, I would probably go with about 6-8". It's really difficult to get stuff off the bottom (and clean). I have had to use one of those reacher things that the elderly use to pick things up that I have dropped inside. But that said, having any kind of collar on there makes it difficult to reach the bottom for cleaning, etc unless you put the hinge on the collar instead of the lid.
 
Where is your power wire for the ebay aquarium temp controller going through? I just got one of those waiting for delivery and am undecided on where to mount it.
 
That thing is crazy tall! Gonna be a pain in the ass loading full kegs in o_O. Otherwise looks good though. I'm starting to wish I would have painted mine. The white is ugly lol.
 
Where is your power wire for the ebay aquarium temp controller going through? I just got one of those waiting for delivery and am undecided on where to mount it.


I have a 16 gauge cord running from the wall which goes through the back of the collar and provides power to the temp controller. There is a second cord that runs from the controller back to the collar to a standard wall outlet (which receives power when the temp controller is switched) so that I can just plug the freezer cord into that. That way I avoid having to splice wires in the stock cord.
 
That thing is crazy tall! Gonna be a pain in the ass loading full kegs in o_O. Otherwise looks good though. I'm starting to wish I would have painted mine. The white is ugly lol.

Yeah, it is a little tall. Oh well, live and learn. I will probably have to use step ladder and maybe second set of hands. No big deal. I can also put hinges on the collar in the future if it's too much hassle.

I'm glad I painted mine. Turned out pretty well.
 
I can also put hinges on the collar in the future if it's too much hassle.

That's what I did eventually with mine. It makes it easier for me to huff kegs in and out with a questionable back.

I used the existing strong hinges to attach the 12" collar to my freezer and bought some self-closing cupboard hinges to attach the freezer lid to the top of the collar. It's handy for opening and fiddling with the gauges instead of raising the whole collar.

Yours looks much nicer though since I used construction-grade wood and painted it. If I can find a deal on some decent wood I'll remake it in the future with a nice stain, but it's functional.
 
I have a tall collar too. It is difficult to get kegs in and out, but it's doable. The biggest problem I ran into was cooling the taps and lines. I had all kinds of foaming issues until I added a fan to the underside of the lid. Made a huge difference. I added a squirrel cage fan and pointed it right at the taps. It draws air up from the bottom of the freezer and blows it around pretty good.
 
I have a tall collar too. It is difficult to get kegs in and out, but it's doable. The biggest problem I ran into was cooling the taps and lines. I had all kinds of foaming issues until I added a fan to the underside of the lid. Made a huge difference. I added a squirrel cage fan and pointed it right at the taps. It draws air up from the bottom of the freezer and blows it around pretty good.

If you are going to go with a collar of 6" I'd recommend going with a dual hinge setup. That way you can lift the collar and taps out the the way when changing out kegs.
 
Assuming you have three corny kegs in there based on the three taps. Would you have been able to fit all three in there without the collar? In other words is there a compressor hump in the freezer that limits space?
 
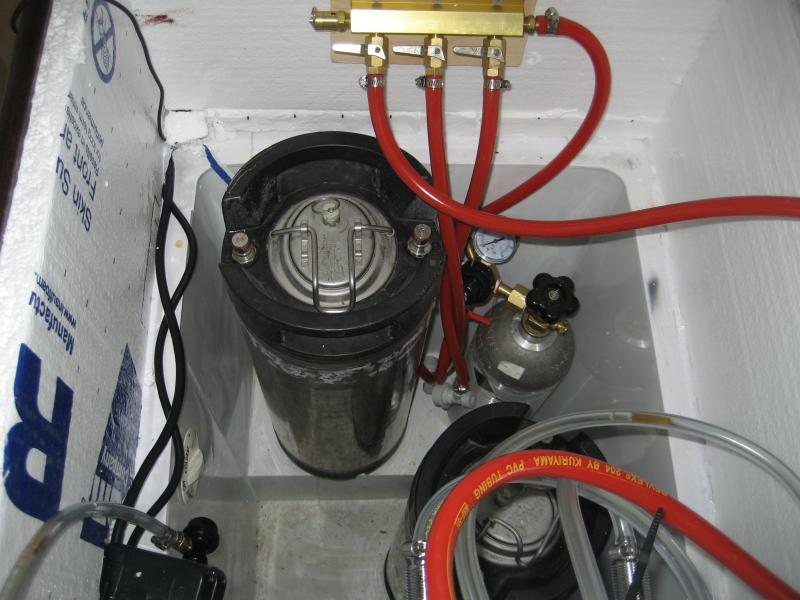
Amy chance of getting a pic of the inside with kegs? I'd like to see how everything fits.
It looks great. I plan on taking on an identical project. Thanks for the info.
 
Assuming you have three corny kegs in there based on the three taps. Would you have been able to fit all three in there without the collar? In other words is there a compressor hump in the freezer that limits space?

No, I could only fit 2 without a collar.
 
Amy chance of getting a pic of the inside with kegs? I'd like to see how everything fits.
It looks great. I plan on taking on an identical project. Thanks for the info.

If I remember, I'll do it tomorrow. Just remember, every freezer is different. This one is an older model and looks a little different than newer 5 cf models (mine is tall and narrow, others are shorter and wide).
 
If I remember, I'll do it tomorrow. Just remember, every freezer is different. This one is an older model and looks a little different than newer 5 cf models (mine is tall and narrow, others are shorter and wide).


Great. Please forgive this total noob question...but I'm just getting into these builds. How is the collar secured to the freezer base? Are there different ways of going about this? Thanks!
 
Great. Please forgive this total noob question...but I'm just getting into these builds. How is the collar secured to the freezer base? Are there different ways of going about this? Thanks!

No worries. I used liquid nails. Others have used other methods like caulk. Take a look through other keezer builds to get a feel for what you want to do (there are tons...). You can also put hinges on the lid and the collar. In this case you wouldn't need to secure it, but rather insulate it with weather stripping.
 
Is this one of the chests that has a tall step on one side for the compressor, etc? Yea, it'd be real nice to see the pic of the inside. With and w/o the kegs
 
Is this one of the chests that has a tall step on one side for the compressor, etc? Yea, it'd be real nice to see the pic of the inside. With and w/o the kegs

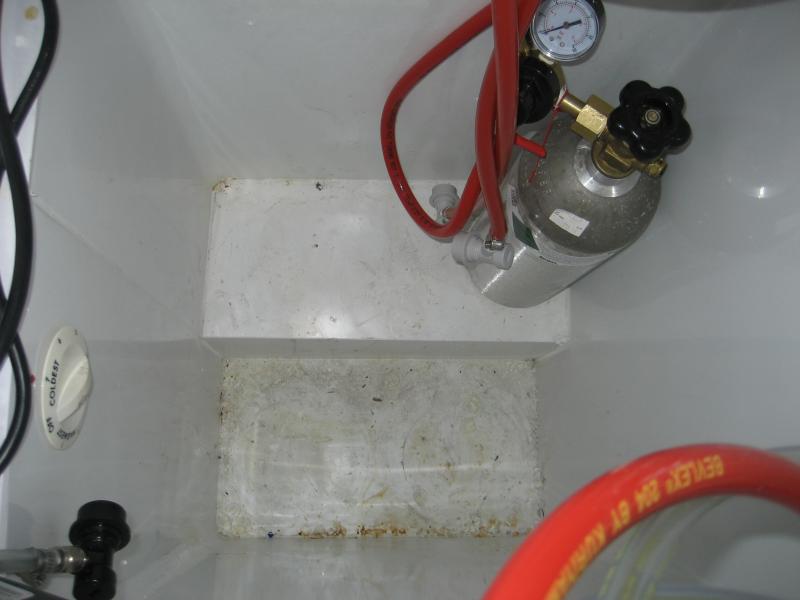
Here is a pic without the kegs (it's a bit dirty in there...and a pain to clean) and two with two kegs in different positions. I only have two at present, but I was able to fit a 1/6 bbl keg of commercial beer in there as well.

IMG_9206.jpg


IMG_9208.jpg


IMG_9211.jpg
 
Do you have the make/model of this freezer? From your pictures it appears to be narrower than other chest freezers. One of the reasons I went with a mini fridge over a chest freezer is so that it would fit in my tiny dining room. Something like yours may fit in its place. Having three taps instead of two would be great. Plus, a keezer would be easier to deal with when changing out kegs and adjusting CO2 pressure. Could you post the exterior dimensions? Thanks!
 
Do you have the make/model of this freezer? From your pictures it appears to be narrower than other chest freezers. One of the reasons I went with a mini fridge over a chest freezer is so that it would fit in my tiny dining room. Something like yours may fit in its place. Having three taps instead of two would be great. Plus, a keezer would be easier to deal with when changing out kegs and adjusting CO2 pressure. Could you post the exterior dimensions? Thanks!

It's a Norge. I don't have the model number (the sticker got lost during the re-paint). Not sure if they make them anymore. I would guess it's about 15 years old. This model is 2'x2' and 35" high stock and 2'x2' and 47" high with the collar.
 
I'd like to find the guy that named the product "Liquid Nails" and smack him.

Wood glue is what's needed for gluing joints together. Simple Elmer's Glue works fine for gluing joints together.

Liquid Nails is good for gluing panels onto things. But it's not good for joints.
 

Latest posts

Back
Top