
GroovePuppy
Well-Known Member
- Joined
- Sep 29, 2008
- Messages
- 1,734
- Reaction score
- 7
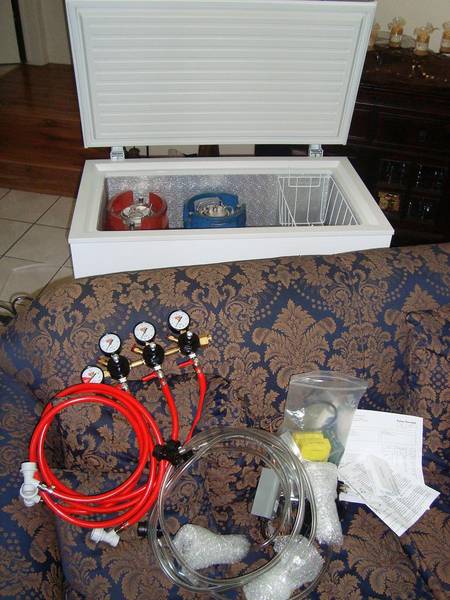
Here's how I built my keezer over the holidays. I started with a Lowes 7cuft freezer which I picked up for $180 plus tax. To that I added the HK230S 3 keg kit from kegconnection.com tweaked to give three regulators, plus and external controller, spare o-rings, lube etc. for another $475 or so.
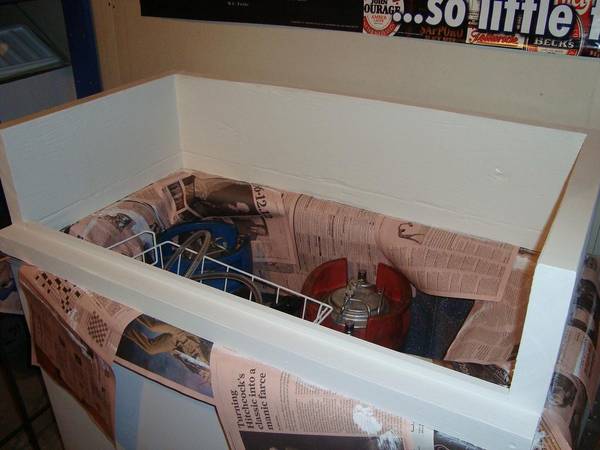
The freezer takes 4 ball-locks on the floor exactly! The fourth is a snug fit. It then has capacity for a fifth on the hump which is now full depth.
I had a couple of goals.
1) Minimize damage to the freezer to preserve the warranty as far as possible.
2) Keep the collar off the lid. Minimize weight and allow the keezer to be pushed close to a wall.
3) Don't add extra height to lift full kegs over.
4) Make room for a fifth keg.
5) Keep it simple! I have limited tools and talent, plus it's for the garage.
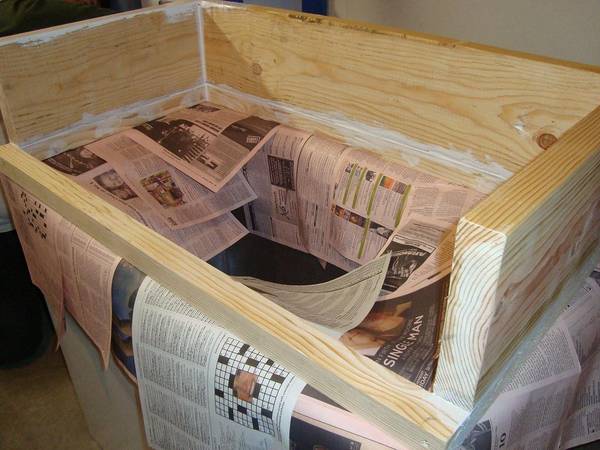
First thing I did was make a sub-collar from 2x2.

Next I added three sides on top of the sub-collar from 2x8. This gives a 9" collar overall with only an inch and a half added to my keg-lifting height. All seams were then caulked to seal them.
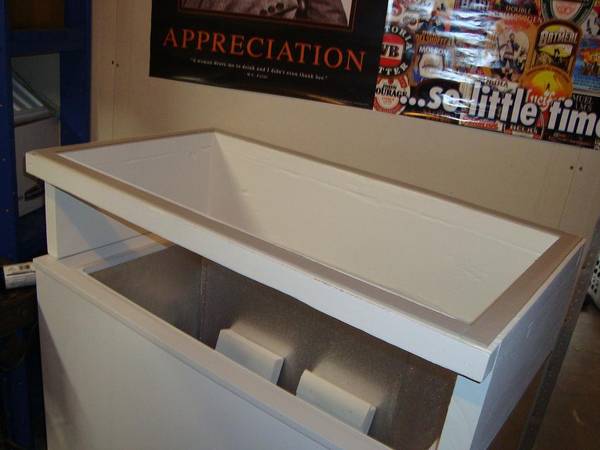
I added some moulding for the doors to butt against then paint the whole thing for some half attempt at aesthetics.
I added a strip of foam tape under the collar to seal it to the freezer walls.
I found some plates at Ace Hardware that fit the hinge bolt hole pitch on the rear of the freezer. I used these to fasten the collar to the freezer.

I also added four straightened right-angle brackets inside. For these I made small holes in the freezer rim, the only modification to the actual freezer. I figure I can caulk them if I ever un-keezer the thing.
I also added the doors to the front. These move out of the way easing the loading/unloading process. Three holes in one door accommodate the taps I bought for now. Foam all around the door opening and between the door should ensure a good seal.

Add the taps and shanks. Still need to add a magnetic catch for the door but it works for now.

And we're done!

Whole thing for under $700. I should be pulling my first beer this weekend.
The freezer takes 4 ball-locks on the floor exactly! The fourth is a snug fit. It then has capacity for a fifth on the hump which is now full depth.
I had a couple of goals.
1) Minimize damage to the freezer to preserve the warranty as far as possible.
2) Keep the collar off the lid. Minimize weight and allow the keezer to be pushed close to a wall.
3) Don't add extra height to lift full kegs over.
4) Make room for a fifth keg.
5) Keep it simple! I have limited tools and talent, plus it's for the garage.
First thing I did was make a sub-collar from 2x2.
Next I added three sides on top of the sub-collar from 2x8. This gives a 9" collar overall with only an inch and a half added to my keg-lifting height. All seams were then caulked to seal them.
I added some moulding for the doors to butt against then paint the whole thing for some half attempt at aesthetics.
I added a strip of foam tape under the collar to seal it to the freezer walls.
I found some plates at Ace Hardware that fit the hinge bolt hole pitch on the rear of the freezer. I used these to fasten the collar to the freezer.
I also added four straightened right-angle brackets inside. For these I made small holes in the freezer rim, the only modification to the actual freezer. I figure I can caulk them if I ever un-keezer the thing.
I also added the doors to the front. These move out of the way easing the loading/unloading process. Three holes in one door accommodate the taps I bought for now. Foam all around the door opening and between the door should ensure a good seal.
Add the taps and shanks. Still need to add a magnetic catch for the door but it works for now.
And we're done!
Whole thing for under $700. I should be pulling my first beer this weekend.

