spittybug
Well-Known Member
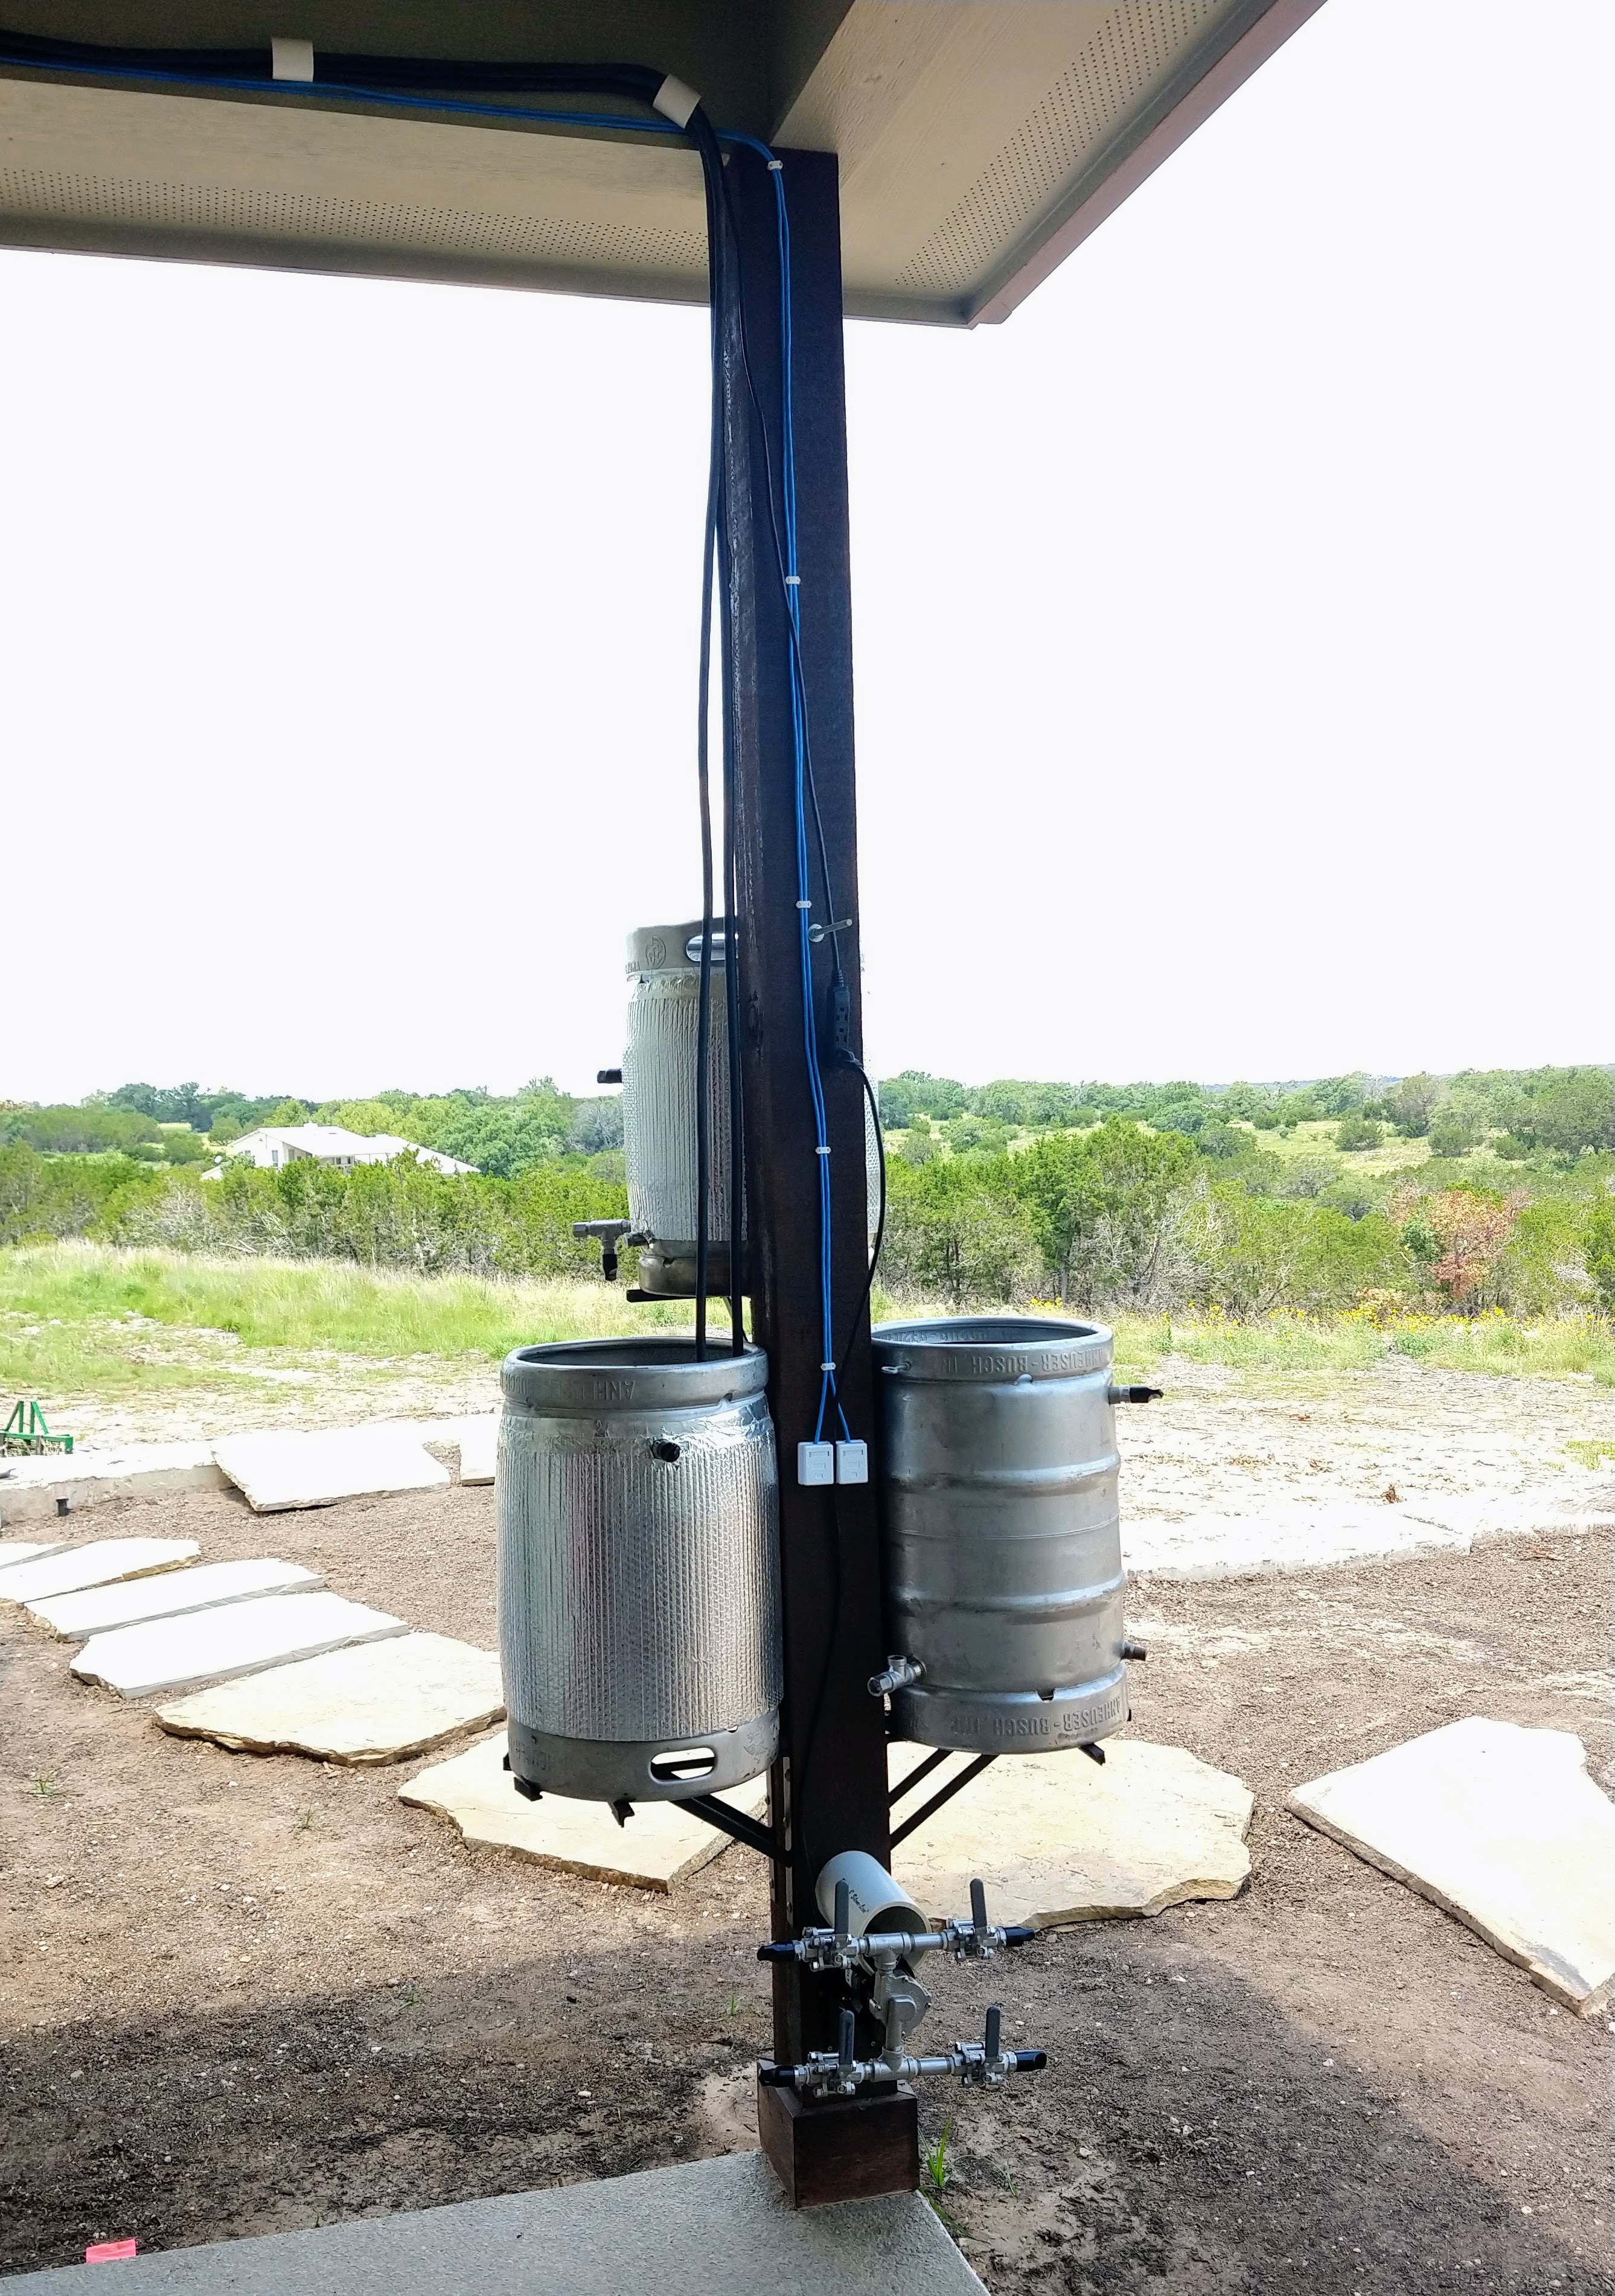
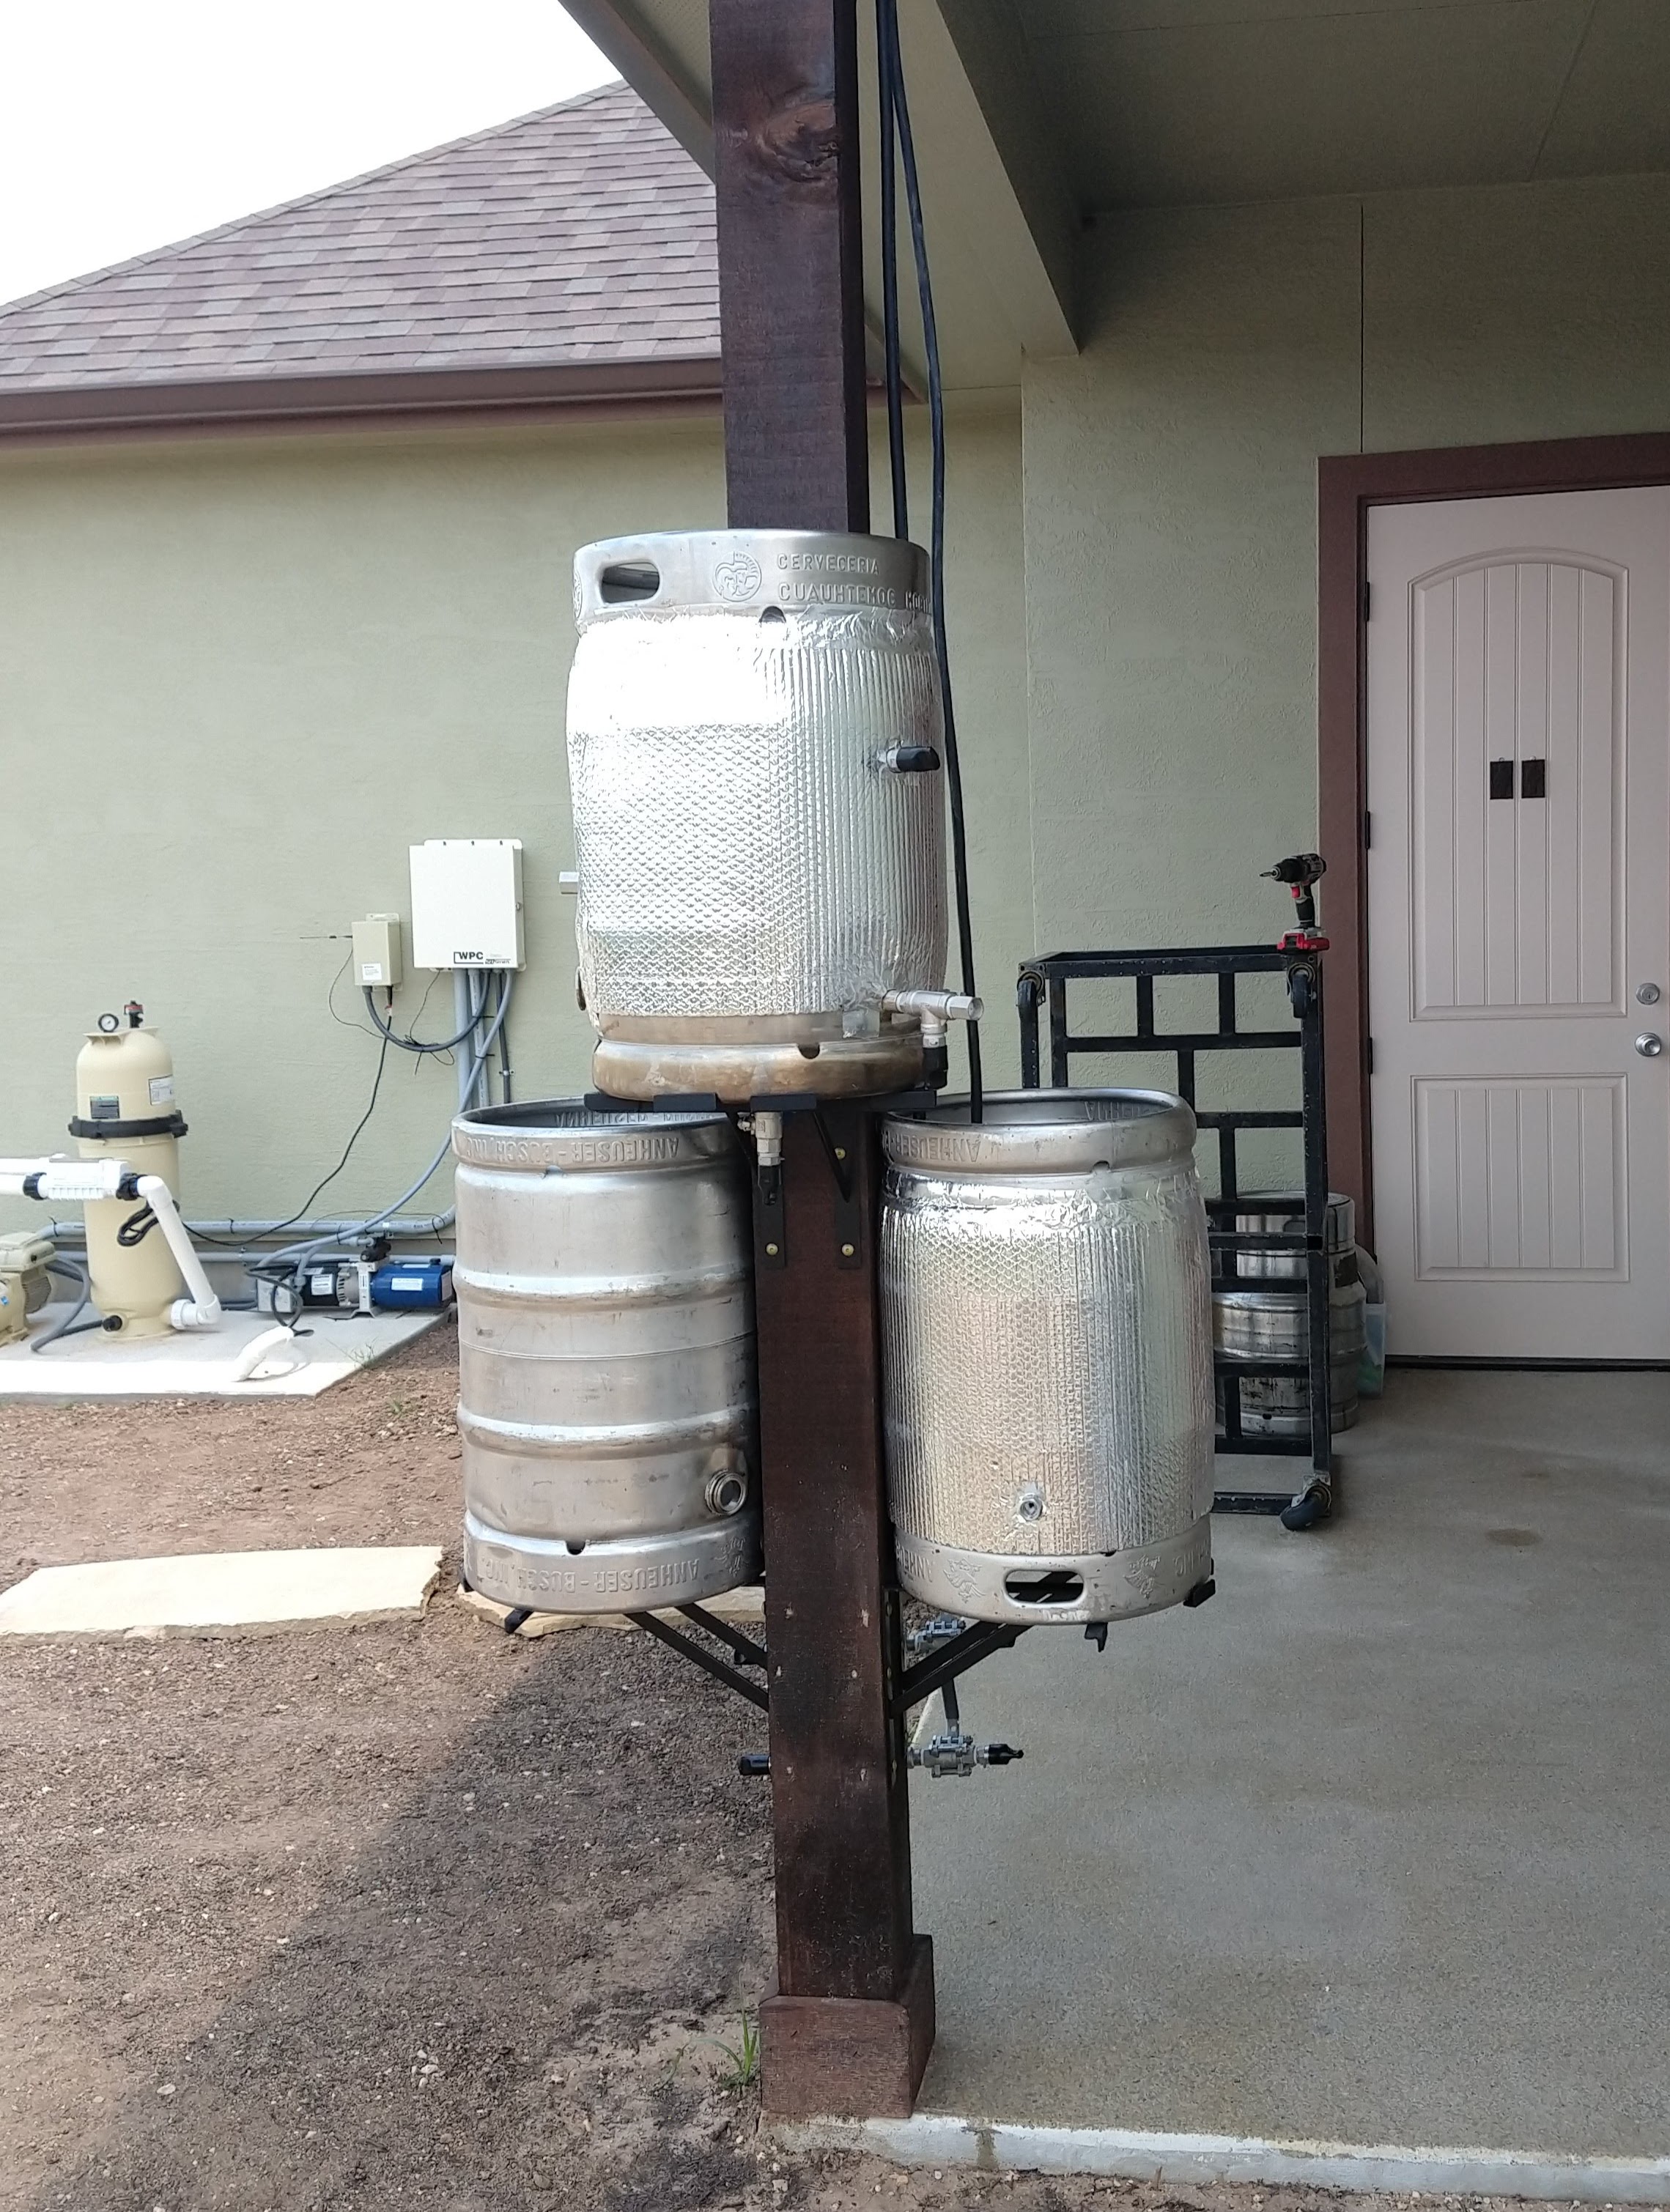
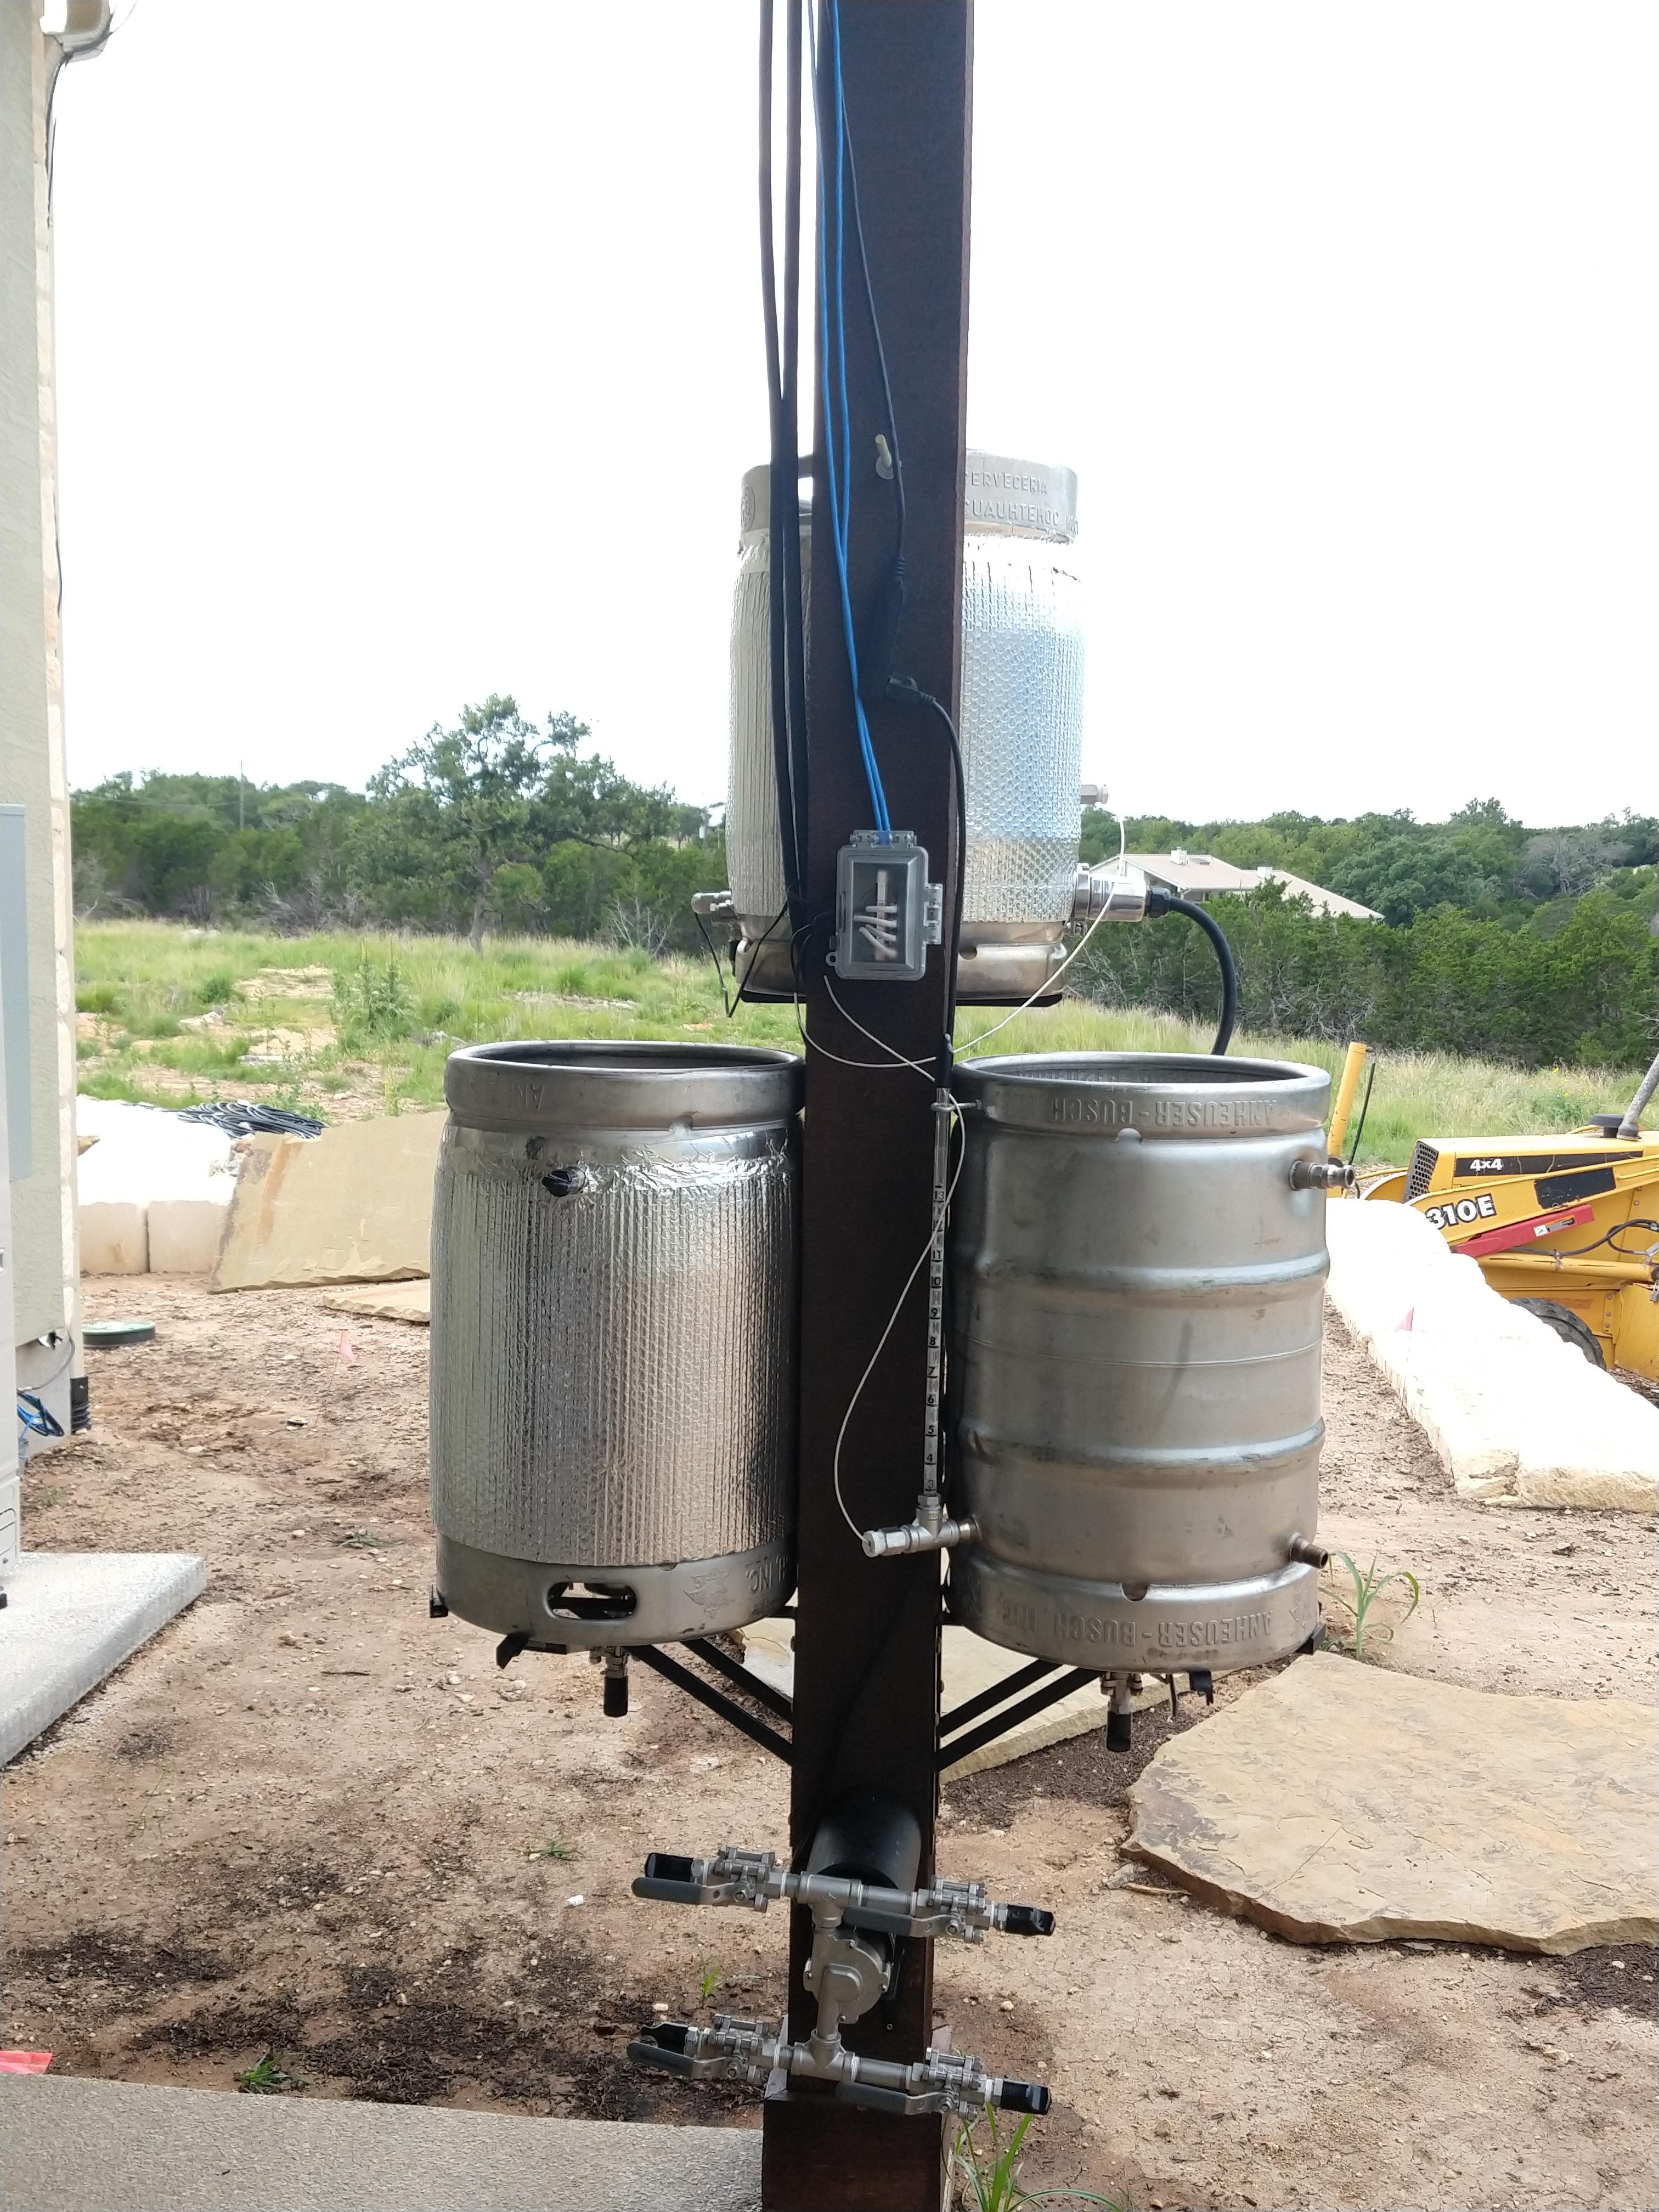
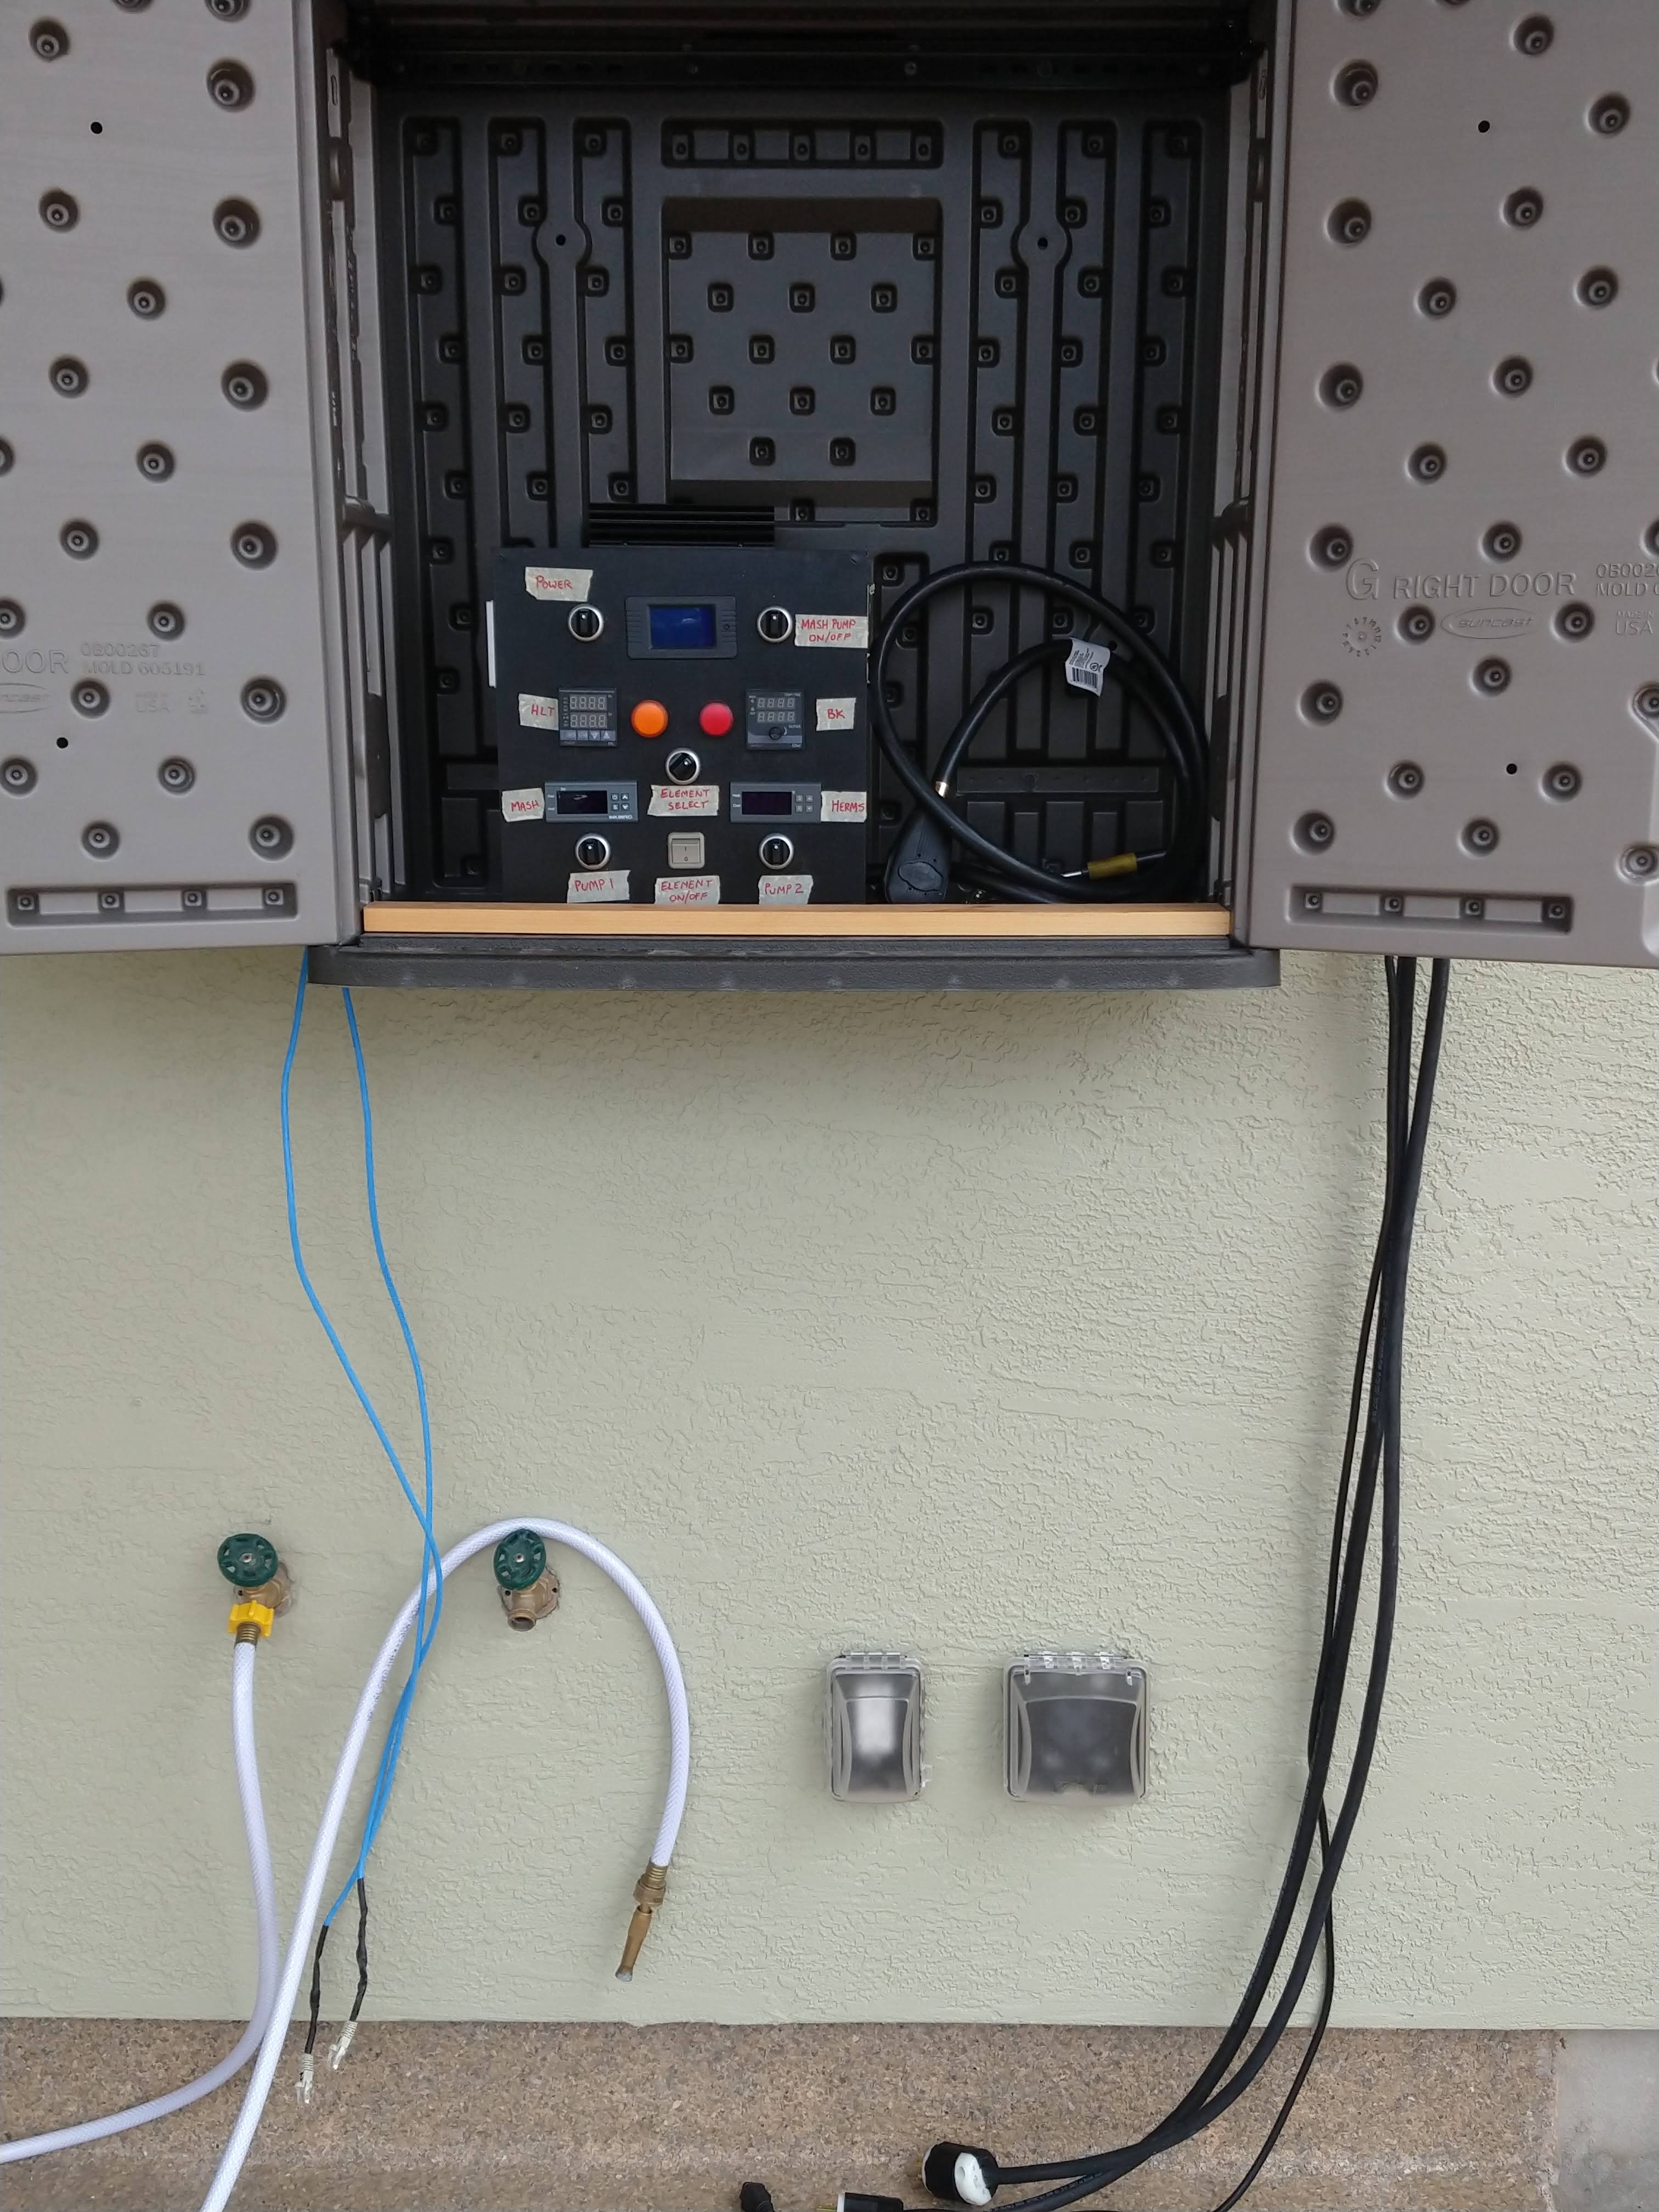
When I built the new house I made sure that I had a brew porch outside with the water and electric I need. So far all I've done is use my existing 1 tier rolling steel cart with my 3 keg all electric system. The cart was necessary when I needed to roll in and out of the garage, but not anymore. I'm weighing options. I can build a 'counter top' that mounts to the side of the house and to one of the porch support poles. Straightforward, but takes up a lot of room. I've been thinking long and hard about a vertical system. Since it doesn't need to be mobile in any way and since I have a covered porch above me, I was thinking of a stout metal pole with a foot plate bolted to the concrete. The top could be mounted to the joist in the porch ceiling. Think stripper pole..... I could then weld/bolt heavy brackets to the 3 kegs and mount them to different sides/heights of the pole. I'm all electric, so no need for burner stands. Pump & control panel could be mounted on pole. Electrics could run through pole.
What does a keg weigh, ~40 lbs empty, ~170 lbs absolutely full? With good bolts/brackets on the top and bottom rims of the kegs, that wouldn't be tough at all. Kegs on opposite side of pole would even help offset any deflection, but a good thick walled piece of square tubing anchored top and bottom wouldn't be going anywhere.....
This seems too simple, what am I missing? Has anyone done this?


") Thanks.
Thanks.