
Last week I received my new Grainfather in the mail and thought that I'd do a bit of a write-up incase anyone is interested.
First a bit of back-story. I've been brewing for about 2 years using a sort of partial brew in a bag method. I was living in a tiny London flat and could only really do 1 or 2 gallon brews where I would stick my brewpot in the oven to try and mash at a constant tempereture. It kind of worked, I would always top up my brews with extract as I knew I'd get nowhere near the kind of accuracy or control required to do this method All Grain.
A couple of years later and I've moved to New Zealand and have a whole lot more room. However my job involves me moving around a lot so I wanted to buy a new setup that was reasonably compact so that I could ship it on if my situation changes. I went to the Wellington Beervana festival and saw the Grainfather being promoted and I was instantly interested. I lack the tools/ability to put together my own automated rig and have always dreamt of a pump-operated setup, so I promised it to myself as an early Christmas present.
The original run sold out quite early so I was down for the second batch which started shipping in early December. I got my delivery last Saturday (the 13th December) and put together the parts before going to the local Homebrew shop to pick up some other essentials and ingredients. When in London the only option was through homebrew websites so this was a real luxury to have freshly milled grain.
The Kit:

The box! Painstakingly dragged up the huge hill outside of my house
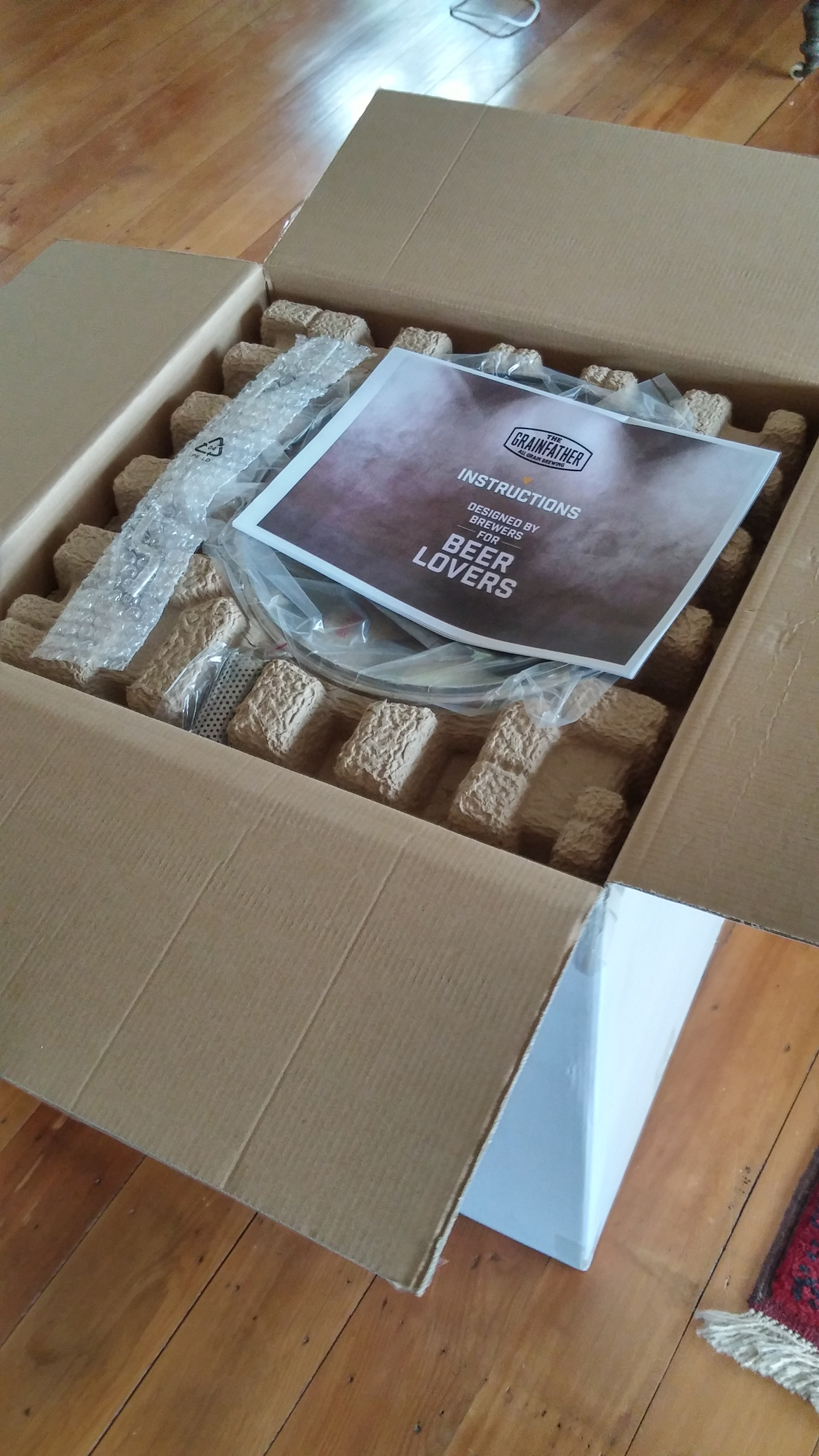
Nicely packaged

Parts list

All of the components that come with the kit. From the left that is:
Glass lid
False bottom and 'top bottom' that goes on-top of the grain bed when mashing
Grain basket
Removable handle to lift up grain basket
Some of the various parts to assemble including discharge pipe, recirculation pipe and overflow pipe
The Grainfather body
Temperature controller
Contra-flow cooler

The temp controller in removable splash-proof casing. During the cleanup process you will be removing this several times so it's important that it's quite robust

The inside of the temp-controller casing. Sorry about the really crappy quality of the photo but I was trying to hold it open with one hand while taking the photo with the other. I think the model number on the controller was 'STC-200', it looked almost identical to the STC-1000 that I used before. The wiring inside is very neat and tidy and one thing that I plan to explore later is trying to customise or hack into this setup to provide more automated temp controlling (at the moment all changes to target temp are manual). If it would help anyone I can try and get a better photo of this.

The false bottom and 'top bottom'. The rubber rim to the top bottom seems to fall off quite a lot and is pretty tricky to guide into the grain kettle while there is mash temperature water in there. One of the hints I've since read suggests wetting the rubber before trying to slide it into the kettle, so I'll try this next time.

The discharge pipe, recirculation pipe, overflow fittings and chiller attachments.

The pump filter. Doesn't screw in, is just pushed into place over the pump inlet so I was worried it might fall off if hit by the grain basket, however the kettle is designed so that the inner basket never reaches that level. So seems quite secure.

Inside of the grain basket with measures

Some specs on the pump. The cover is quite easy to remove.

These are the fixtures to attach the contra-flow chiller to your sink tap/faucet or garden hose.

This is the chiller unit itself. Hot wort goes in at the top which is connected to the discharge pipe. Flow rate can be controlled with the copper tap. Blow pipe is connected to cold water, hot water comes out of the red pipe and cold wort comes out of the bottom.

Some spec. Sorry really hard to read but the figures are:
Total Weight - 10kg (22lb)
Capacity - 30L (7.9 US Gal)
Dimensions - 733 x 386mm (29 x 15 inch)
Stainless Steel Grade - 304
Magnetic drive pump - 6 watt, 1800 RPM
Power -
NZ/AU/UK - 220-240V 2000W
US/Canada - 120V 1600W

Suggested mash water calculation

Step mashing guide

Sparge water calculation
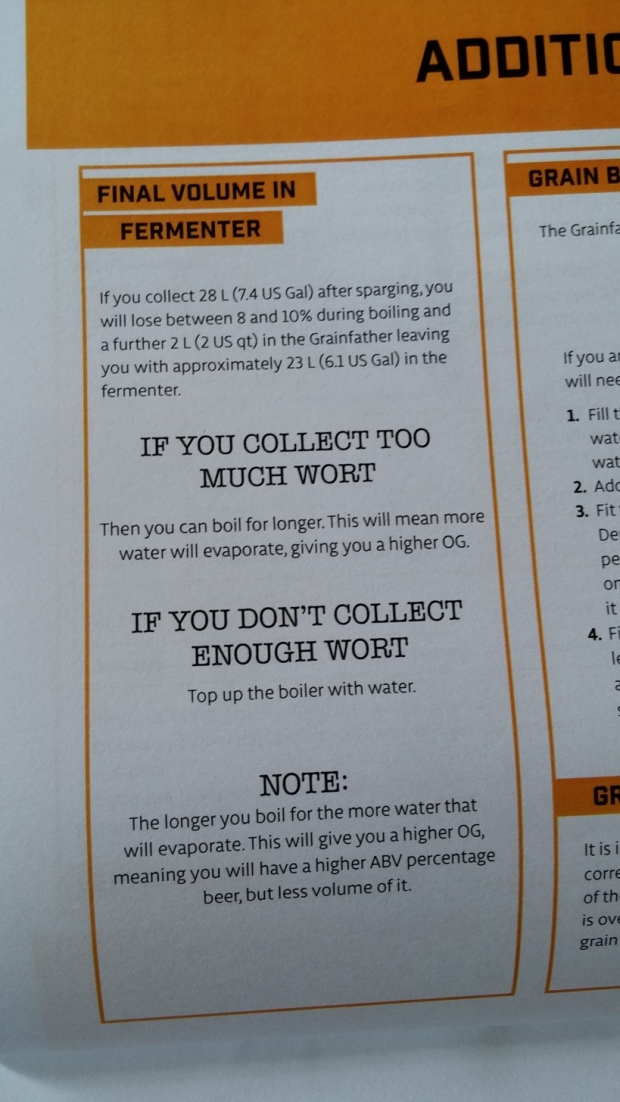
Final volume calculations. 8-10% boil loss per hour and 2L lost in headspace (pump etc)

Some helpful brew calculations
The Recipe:
I've never brewed all-grain before and it had been about 8 months since my last brew due to relocation so I wanted to try and keep things simple. I went with a recipe from the Grain Father website:
http://www.grainfather.co.nz/#!single-post/c73d/C1692A13-2817-417
7-9D3F-ADD65729E543
Red Dingo Red IPA
EXPECTED BREW FIGURES
OG: 1.070
FG: 1.020
IBU: Approx. 60
ABV: 6%
Volume: 20L
INGREDIENTS
4.5kg Bairds Maris Otter
1kg Weyermann Melanoiden Malt
500g Bairds Caramalt
400g Bairds Pale Crystal
200g Bairds Dark Crystal
50g Dingemans Special B Malt
20g of Pacific Jade at 60 minutes
30g Galaxy at 10 minutes
60g Galaxy at 0 minutes
100g Galaxy dry hop
METHOD
Mash at 67 degrees C for 60 minutes with 21.5 L of water. Mash out at 75 degrees C for 10 mins after the 60 minute mash.
Sparge at 75 degrees C and then boil for 90 mins
After 30 minutes add 20g of Pacific Jade to the boil
After 75 minutes add 1 teaspoon of irish moss
After 80 minutes add 60g of Galaxy hops
After 90 minutes turn off the heat and add 100g of Galaxy hops to the whirl pool
Cool rapidly and transfer to your sanitised fermenter
When the wort is between 20-23 degrees C add 2 packets of Mangrove Jacks M79 Burton Union Ale Yeast and ferment at 19 degrees C for 7 days.
After 7 days add 100g worth of Galaxy hops to the fermenter (in a hop bag weighed down with sanitised marbles if you dont want as much hop mess).
Leave dry hops in for 5 days.
Transfer beer into another fermenter and transfer into a fridge or somewhere cool for 5 days for it to naturally clear (adding finings is optional)
Keg or bottle as usual.
I had never been able to get fresh liquid yeast before in London (the only places to buy are online) so having a very local homebrew store http://www.thebrewhouse.co.nz/ for freshly milled grain, yeast and hops was a real treat. So I swapped the suggested Mangrove Jacks yeast for some WYeast American Ale 2 (1272).
The Process
First up I assembled the kit. It only takes 5 minutes or so and is really easy. However I didn't tighten some parts enough and when I first started pumping liquid through I had a few leaks. This was down to user-error though and they stopped when I went back and tightened the various components.
As for actual build quality I'm pretty impressed by the kit and its various components. Everything seems nicely designed and quite sturdy, maybe the only part I'm a little disappointed in is the discharge pipe. This attaches to the kettle with a single screw and is probably the most used part of the whole kit. You have to attach/detach the recirculation pipe and chiller several times during a brew and the screw had a tendancy of getting loose. It feels a bit flimsy and I can imagine it being the first part to fail on an otherwise quality piece of gear.
Another part I wasn't overly keen on was the temperature control box. It has a nice build quality but needs to be removed when cleaning/emptying the kettle. The power supply, power output to heating element and pump and the temperature probe all need to be disconnected before removing the box. This might just be nitpicking but I'd hate to wear out these inputs by constantly attching/detaching them so I might look into some other way of holding the box inplace so that I don't need to remove it when emptying the last wort/trub out of the kettle.
As instructed by the user guide I then began cleaning the assembled kit to remove any factory grime/remaining chemicals. The guide suggests using their proprietary cleaning fluid however I couldn't get any on short notice so I bought some Sodium Percarbonate from the brew shop and tried using that. The process involves adding 7.5L (1.98 US Gal) of water to the boiler and heating it to 60C (140F). Hot water from my kitchen tap comes out at 41C and so with the 2K heating element being used it took 4min20sec to bring this 7.5L up to 60C. I added the sodium percarbonate and as per the instructions I ran it through the c-flow chiller for 5 mins and then 10 mins through the recirculation arm.
The temperature jumped up and down by 1 or 2 degrees during this peroid but I'd imagine that is mainly due to the small amount of liquid in the kettle. The pump itself is pretty quiet and the flow seemed reasonable. I then emptied this cleaning fluid and refilled the kettle with 7.5L of clean water and recirculated it through the c-flow chiller (5 mins) and the recirulation arm (10 mins).
Now I could finally start brewing. Probably the biggest issue with the Grainfather is that it doesn't control sparging or maintaining the sparge water temperature. The manual suggests pre-heating your sparge water with the Grainfather before mashing and then keeping it hot until sparge time, however the only container I had available was my plastic bucket fermentation vessel. I had no idea how much temperature would dissipate from this during the 90 minute mash so I boiled up the 12L of sparge water required by this recipe in the Grainfather kettle (I did 14L as there is a 2L loss in the kettle) from 16C (my ambient cold water temperature) up to 100C on the 'Boil' setting and with the 2k heating element engaged and it took 43 mins to reach temperature. I transferred this to the FV with the pump and then refilled the kettle with the 21.5L of mash water. With the 2L of leftover 100C sparge water the 19.5L of 16C water that I added made the initial temperature 29C. I brought this up to 65C with the unit set to Mash and the 2k heating element engaged. This took 30 minutes.
This was when the first big problem struck. The water was giving off a very heavy chlorine smell and I wasn't sure if this was just due to the Wellington water source, or if I hadn't cleaned out the factory chemicals or my sodium percarbonate cleaner well enough. I checked the sparge water and it had the same smell. Tasting it gave a pretty harsh chlorine taste but I didn't have enough time to reheat all of my water and so I continued on, hoping that it wouldn't linger. In hindsight I wish I had just recleaned the unit and replaced the water but we'll get to that later...
I added my 6.65kg of grain to the grain basket, mixing to avoid dry clumps. As I said before this was my first attempt at an all grain recipe and the consistency of the mash seemed very thick to me.

It was the consistency of a thin porridge, and this might have caused issues later on. I continued by switching the heating element to 500W mode and pushed on the top bottom. This was quite tricky as the mash water was so warm and the plastic rim of the top bottom has a tendancy to stick or fall off. In the end I think I may have compressed the grain bed too much. When I then turned on the pump to circulate the wort it took a couple of minutes for the temperature to stabilise, however the wort seemed to be going down the overflow pipe more than soaking through the grainbed. I forgot to film what was going on but this video from another user shows pretty much what was happening:
So for my next brew I will try a slightly thinner mash and fit the top bottom properly so that there is less compression of the grain bed. The fact that the mash was so thick leads me to believe that the formula in one of the images above might not be accurate in every circumstance. I imagine that the way the grain is milled would have an effect on how much mash water you want to use for example.
After mashing for 60 minutes I turned the heating element to 2k mode and changed the target temperature to 75C. This only took 2 minutes to step up without the pump turned on (turning on the pump while the 2k element is on reduces the power of the pump to a small dribble).
After mashout I used the removable handle to lift the grain basket out of the wort and then rotated it by about 30 degrees. This locks the grain basket above the kettle and is one of my favourite features. It feels very sturdy and handles the heavy, soaked grain really well. This does however mean that the top of the grain basket is above a normal working surface height, so there is no way to gravity feed the sparge water unless you raise the sparge water above the top of the grain basket, which is pretty high.
At this point I checked the plastic FV bucket that contained my sparge water and the temperature dropped to... 50C! Catastrophe! I knew I would lose some heat but didn't guess it would go that low. I now needed some way to regain 25C quickly in 12L of water that is sitting in a plastic bucket... I had to resort to filling my tea kettle with the sparge water, boiling it and then re-adding it to the sparge water. This took probably 10 or 12 fillings and was a complete nightmare. Suffice to say I need a better method next time. I'll probably buy a large stock pot or a cooler and use that to keep the water in. The other big issue I had was that I didn't have a glass or electronic thermometer on me (I forgot to buy one at the homebrew shop) and so had to quickly wire one up with my Arduino unit, and LCD and a One-wire thermocouple that I had lieing around. This wasn't exactly ideal and just added to the problems I was having.
All in all I can say that my first real experience with sparging was a nightmare, and is probably the area that I'm going to think of most when preparing my next brew on the Grainfather. Eventually I hope to build some sort of HERMS unit to control and then pump in the sparge water from a secondary vessel, but until then I'm afraid it's still a very manual process. During all of this I also managed to somehow end up with 29L in the kettle whereas I should have had 28L.
I'd be tempted to do an experiment to see how much efficiency is gained by doing the sparge. If it's a difference of only a few percent I'd be tempted to skip the process and just add a bit more grain. Another day however...
My grain was now sparged and drained into the kettle and so I removed the grain basket and turned the temperature controller to 'Boil' and the heating element to 2k. Unfortunatly by this point I was a bit exhausted and stressed out by the sparging process and so I didn't record how long it took to bring up the wort to boil. Once it got to a rolling boil however it was fine:

I stirred the proteins back into the wort and it didn't come close to boiling over, which was a relief. After 30 mins I added my first hop additions in a hop bag (my first time using pellets, I was amazed at how much they absorbed and turned to green goo). The rest of the boil was pretty uneventful and I added some whirlfloc tablets 15 minutes before the end.
Once boiling was complete I added my 0 minute hop additions and connected the contra-flow chiller to the discharge pipe. I ran the boiling wort through this for 10 minutes to clean the pipes again and then turned off the heating element.
The next problem was again due to user error. I hadn't checked the tap/faucet in my kitchen sink and had wrongly assumed that one of the 3 chiller connecters that shipped with the unit would affix to my tap. This wasn't the case and so I had to stand and hold the cold water input connecter against the tap for the whole chilling process, meaning I couldn't get a full flow rate or I'd risk splashing water everywhere. I've since realised that my tap has a bit that can be removed, exposing the threading that the connectors require... Hindsight is a beautiful thing. This unfortunatly meant that cooling took waaaaaay longer than it should have and my timings for cooling are pretty unnacurate. I brought the wort down to 25 degrees very quickly, in under 25 minutes but then realised that the cold wort output pipe was too too far into the kettle, beside the pump input. This meant that it was just recirculating the colder water through and the still hot, near boiling water was on the surface. This meant adjusting the output pipe and the display on the temperature controller jumped from 23C to 75C... Not what I wanted to see when my hand was half numb from holding the cold water input pipe against my kitchen tap. After another 45 mins or so the water was properly chilled.
I then transferred this wort into my sterilised FV bucket and sprinkled in the smack-pack of yeast. OG was 1.066, a little off of the 1.070 in the recipe but after the nightmare sparging experience I was quite happy with this. By this point I had been building, cleaning and brewing for almost 10 hours and I was exhausted. The whole day was a bit of a mess but I'd say this is in no way due to the fault of the Grainfather, more my own mistakes that I was making, and essential equipment I didn't have around.

Cleaning then involved going through the same steps as earlier, running the sodium percabonate through at 60C and rinsing out.
I had to leave to go on holiday the next day so I checked the FV in the morning but there was no noticable krausen yet. My flatmate checked for me a few days later and said there was an inch or two of 'foam' on top of the wort and so I was relieved that fermentation had begun.
I got back to my house a week later and the krausen had fallen, but not dissapeared like I am used to. After a bit of research this sounds like normal behaviour for American Ale 2 yeast.

I took a sample which was now reading 1.020 but was still a little bit cloudy. This is the aim gravity in the recipe but I think it still has a little bit of fermenting still to do as it seemed pretty active.
Tasting the sample however... BAND AID. Nightmare, the chlorine flavours were still there and very evident. I've thrown in the dry hops in an attempt to overpower those off-flavours but I'm a little bit disheartened. Maybe more fermenting and maybe a slightly heavier carbonation will help, but as a first experiment it might be a bit ruined.
Overall I had a lot of fun, and have several ideas of how to improve the second batch. I'm going to heat the tap water again and see if the chlorine flavour is still there. If it is I'm going to try a complete rinse-out. Then some campden tablets. If that still doesn't work I'll try bottled water. I think the Grainfather itself is a great piece of kit, and for the price, the size, and the ease of use it's a great option for starting to get into the daunting world of all-grain and semi-automated brewing.
First a bit of back-story. I've been brewing for about 2 years using a sort of partial brew in a bag method. I was living in a tiny London flat and could only really do 1 or 2 gallon brews where I would stick my brewpot in the oven to try and mash at a constant tempereture. It kind of worked, I would always top up my brews with extract as I knew I'd get nowhere near the kind of accuracy or control required to do this method All Grain.
A couple of years later and I've moved to New Zealand and have a whole lot more room. However my job involves me moving around a lot so I wanted to buy a new setup that was reasonably compact so that I could ship it on if my situation changes. I went to the Wellington Beervana festival and saw the Grainfather being promoted and I was instantly interested. I lack the tools/ability to put together my own automated rig and have always dreamt of a pump-operated setup, so I promised it to myself as an early Christmas present.
The original run sold out quite early so I was down for the second batch which started shipping in early December. I got my delivery last Saturday (the 13th December) and put together the parts before going to the local Homebrew shop to pick up some other essentials and ingredients. When in London the only option was through homebrew websites so this was a real luxury to have freshly milled grain.
The Kit:
The box! Painstakingly dragged up the huge hill outside of my house
Nicely packaged
Parts list
All of the components that come with the kit. From the left that is:
Glass lid
False bottom and 'top bottom' that goes on-top of the grain bed when mashing
Grain basket
Removable handle to lift up grain basket
Some of the various parts to assemble including discharge pipe, recirculation pipe and overflow pipe
The Grainfather body
Temperature controller
Contra-flow cooler
The temp controller in removable splash-proof casing. During the cleanup process you will be removing this several times so it's important that it's quite robust
The inside of the temp-controller casing. Sorry about the really crappy quality of the photo but I was trying to hold it open with one hand while taking the photo with the other. I think the model number on the controller was 'STC-200', it looked almost identical to the STC-1000 that I used before. The wiring inside is very neat and tidy and one thing that I plan to explore later is trying to customise or hack into this setup to provide more automated temp controlling (at the moment all changes to target temp are manual). If it would help anyone I can try and get a better photo of this.
The false bottom and 'top bottom'. The rubber rim to the top bottom seems to fall off quite a lot and is pretty tricky to guide into the grain kettle while there is mash temperature water in there. One of the hints I've since read suggests wetting the rubber before trying to slide it into the kettle, so I'll try this next time.
The discharge pipe, recirculation pipe, overflow fittings and chiller attachments.
The pump filter. Doesn't screw in, is just pushed into place over the pump inlet so I was worried it might fall off if hit by the grain basket, however the kettle is designed so that the inner basket never reaches that level. So seems quite secure.
Inside of the grain basket with measures
Some specs on the pump. The cover is quite easy to remove.
These are the fixtures to attach the contra-flow chiller to your sink tap/faucet or garden hose.
This is the chiller unit itself. Hot wort goes in at the top which is connected to the discharge pipe. Flow rate can be controlled with the copper tap. Blow pipe is connected to cold water, hot water comes out of the red pipe and cold wort comes out of the bottom.
Some spec. Sorry really hard to read but the figures are:
Total Weight - 10kg (22lb)
Capacity - 30L (7.9 US Gal)
Dimensions - 733 x 386mm (29 x 15 inch)
Stainless Steel Grade - 304
Magnetic drive pump - 6 watt, 1800 RPM
Power -
NZ/AU/UK - 220-240V 2000W
US/Canada - 120V 1600W
Suggested mash water calculation
Step mashing guide
Sparge water calculation
Final volume calculations. 8-10% boil loss per hour and 2L lost in headspace (pump etc)
Some helpful brew calculations
The Recipe:
I've never brewed all-grain before and it had been about 8 months since my last brew due to relocation so I wanted to try and keep things simple. I went with a recipe from the Grain Father website:
http://www.grainfather.co.nz/#!single-post/c73d/C1692A13-2817-417
7-9D3F-ADD65729E543
Red Dingo Red IPA
EXPECTED BREW FIGURES
OG: 1.070
FG: 1.020
IBU: Approx. 60
ABV: 6%
Volume: 20L
INGREDIENTS
4.5kg Bairds Maris Otter
1kg Weyermann Melanoiden Malt
500g Bairds Caramalt
400g Bairds Pale Crystal
200g Bairds Dark Crystal
50g Dingemans Special B Malt
20g of Pacific Jade at 60 minutes
30g Galaxy at 10 minutes
60g Galaxy at 0 minutes
100g Galaxy dry hop
METHOD
Mash at 67 degrees C for 60 minutes with 21.5 L of water. Mash out at 75 degrees C for 10 mins after the 60 minute mash.
Sparge at 75 degrees C and then boil for 90 mins
After 30 minutes add 20g of Pacific Jade to the boil
After 75 minutes add 1 teaspoon of irish moss
After 80 minutes add 60g of Galaxy hops
After 90 minutes turn off the heat and add 100g of Galaxy hops to the whirl pool
Cool rapidly and transfer to your sanitised fermenter
When the wort is between 20-23 degrees C add 2 packets of Mangrove Jacks M79 Burton Union Ale Yeast and ferment at 19 degrees C for 7 days.
After 7 days add 100g worth of Galaxy hops to the fermenter (in a hop bag weighed down with sanitised marbles if you dont want as much hop mess).
Leave dry hops in for 5 days.
Transfer beer into another fermenter and transfer into a fridge or somewhere cool for 5 days for it to naturally clear (adding finings is optional)
Keg or bottle as usual.
I had never been able to get fresh liquid yeast before in London (the only places to buy are online) so having a very local homebrew store http://www.thebrewhouse.co.nz/ for freshly milled grain, yeast and hops was a real treat. So I swapped the suggested Mangrove Jacks yeast for some WYeast American Ale 2 (1272).
The Process
First up I assembled the kit. It only takes 5 minutes or so and is really easy. However I didn't tighten some parts enough and when I first started pumping liquid through I had a few leaks. This was down to user-error though and they stopped when I went back and tightened the various components.
As for actual build quality I'm pretty impressed by the kit and its various components. Everything seems nicely designed and quite sturdy, maybe the only part I'm a little disappointed in is the discharge pipe. This attaches to the kettle with a single screw and is probably the most used part of the whole kit. You have to attach/detach the recirculation pipe and chiller several times during a brew and the screw had a tendancy of getting loose. It feels a bit flimsy and I can imagine it being the first part to fail on an otherwise quality piece of gear.
Another part I wasn't overly keen on was the temperature control box. It has a nice build quality but needs to be removed when cleaning/emptying the kettle. The power supply, power output to heating element and pump and the temperature probe all need to be disconnected before removing the box. This might just be nitpicking but I'd hate to wear out these inputs by constantly attching/detaching them so I might look into some other way of holding the box inplace so that I don't need to remove it when emptying the last wort/trub out of the kettle.
As instructed by the user guide I then began cleaning the assembled kit to remove any factory grime/remaining chemicals. The guide suggests using their proprietary cleaning fluid however I couldn't get any on short notice so I bought some Sodium Percarbonate from the brew shop and tried using that. The process involves adding 7.5L (1.98 US Gal) of water to the boiler and heating it to 60C (140F). Hot water from my kitchen tap comes out at 41C and so with the 2K heating element being used it took 4min20sec to bring this 7.5L up to 60C. I added the sodium percarbonate and as per the instructions I ran it through the c-flow chiller for 5 mins and then 10 mins through the recirculation arm.
The temperature jumped up and down by 1 or 2 degrees during this peroid but I'd imagine that is mainly due to the small amount of liquid in the kettle. The pump itself is pretty quiet and the flow seemed reasonable. I then emptied this cleaning fluid and refilled the kettle with 7.5L of clean water and recirculated it through the c-flow chiller (5 mins) and the recirulation arm (10 mins).
Now I could finally start brewing. Probably the biggest issue with the Grainfather is that it doesn't control sparging or maintaining the sparge water temperature. The manual suggests pre-heating your sparge water with the Grainfather before mashing and then keeping it hot until sparge time, however the only container I had available was my plastic bucket fermentation vessel. I had no idea how much temperature would dissipate from this during the 90 minute mash so I boiled up the 12L of sparge water required by this recipe in the Grainfather kettle (I did 14L as there is a 2L loss in the kettle) from 16C (my ambient cold water temperature) up to 100C on the 'Boil' setting and with the 2k heating element engaged and it took 43 mins to reach temperature. I transferred this to the FV with the pump and then refilled the kettle with the 21.5L of mash water. With the 2L of leftover 100C sparge water the 19.5L of 16C water that I added made the initial temperature 29C. I brought this up to 65C with the unit set to Mash and the 2k heating element engaged. This took 30 minutes.
This was when the first big problem struck. The water was giving off a very heavy chlorine smell and I wasn't sure if this was just due to the Wellington water source, or if I hadn't cleaned out the factory chemicals or my sodium percarbonate cleaner well enough. I checked the sparge water and it had the same smell. Tasting it gave a pretty harsh chlorine taste but I didn't have enough time to reheat all of my water and so I continued on, hoping that it wouldn't linger. In hindsight I wish I had just recleaned the unit and replaced the water but we'll get to that later...
I added my 6.65kg of grain to the grain basket, mixing to avoid dry clumps. As I said before this was my first attempt at an all grain recipe and the consistency of the mash seemed very thick to me.
It was the consistency of a thin porridge, and this might have caused issues later on. I continued by switching the heating element to 500W mode and pushed on the top bottom. This was quite tricky as the mash water was so warm and the plastic rim of the top bottom has a tendancy to stick or fall off. In the end I think I may have compressed the grain bed too much. When I then turned on the pump to circulate the wort it took a couple of minutes for the temperature to stabilise, however the wort seemed to be going down the overflow pipe more than soaking through the grainbed. I forgot to film what was going on but this video from another user shows pretty much what was happening:
So for my next brew I will try a slightly thinner mash and fit the top bottom properly so that there is less compression of the grain bed. The fact that the mash was so thick leads me to believe that the formula in one of the images above might not be accurate in every circumstance. I imagine that the way the grain is milled would have an effect on how much mash water you want to use for example.
After mashing for 60 minutes I turned the heating element to 2k mode and changed the target temperature to 75C. This only took 2 minutes to step up without the pump turned on (turning on the pump while the 2k element is on reduces the power of the pump to a small dribble).
After mashout I used the removable handle to lift the grain basket out of the wort and then rotated it by about 30 degrees. This locks the grain basket above the kettle and is one of my favourite features. It feels very sturdy and handles the heavy, soaked grain really well. This does however mean that the top of the grain basket is above a normal working surface height, so there is no way to gravity feed the sparge water unless you raise the sparge water above the top of the grain basket, which is pretty high.
At this point I checked the plastic FV bucket that contained my sparge water and the temperature dropped to... 50C! Catastrophe! I knew I would lose some heat but didn't guess it would go that low. I now needed some way to regain 25C quickly in 12L of water that is sitting in a plastic bucket... I had to resort to filling my tea kettle with the sparge water, boiling it and then re-adding it to the sparge water. This took probably 10 or 12 fillings and was a complete nightmare. Suffice to say I need a better method next time. I'll probably buy a large stock pot or a cooler and use that to keep the water in. The other big issue I had was that I didn't have a glass or electronic thermometer on me (I forgot to buy one at the homebrew shop) and so had to quickly wire one up with my Arduino unit, and LCD and a One-wire thermocouple that I had lieing around. This wasn't exactly ideal and just added to the problems I was having.
All in all I can say that my first real experience with sparging was a nightmare, and is probably the area that I'm going to think of most when preparing my next brew on the Grainfather. Eventually I hope to build some sort of HERMS unit to control and then pump in the sparge water from a secondary vessel, but until then I'm afraid it's still a very manual process. During all of this I also managed to somehow end up with 29L in the kettle whereas I should have had 28L.
I'd be tempted to do an experiment to see how much efficiency is gained by doing the sparge. If it's a difference of only a few percent I'd be tempted to skip the process and just add a bit more grain. Another day however...
My grain was now sparged and drained into the kettle and so I removed the grain basket and turned the temperature controller to 'Boil' and the heating element to 2k. Unfortunatly by this point I was a bit exhausted and stressed out by the sparging process and so I didn't record how long it took to bring up the wort to boil. Once it got to a rolling boil however it was fine:
I stirred the proteins back into the wort and it didn't come close to boiling over, which was a relief. After 30 mins I added my first hop additions in a hop bag (my first time using pellets, I was amazed at how much they absorbed and turned to green goo). The rest of the boil was pretty uneventful and I added some whirlfloc tablets 15 minutes before the end.
Once boiling was complete I added my 0 minute hop additions and connected the contra-flow chiller to the discharge pipe. I ran the boiling wort through this for 10 minutes to clean the pipes again and then turned off the heating element.
The next problem was again due to user error. I hadn't checked the tap/faucet in my kitchen sink and had wrongly assumed that one of the 3 chiller connecters that shipped with the unit would affix to my tap. This wasn't the case and so I had to stand and hold the cold water input connecter against the tap for the whole chilling process, meaning I couldn't get a full flow rate or I'd risk splashing water everywhere. I've since realised that my tap has a bit that can be removed, exposing the threading that the connectors require... Hindsight is a beautiful thing. This unfortunatly meant that cooling took waaaaaay longer than it should have and my timings for cooling are pretty unnacurate. I brought the wort down to 25 degrees very quickly, in under 25 minutes but then realised that the cold wort output pipe was too too far into the kettle, beside the pump input. This meant that it was just recirculating the colder water through and the still hot, near boiling water was on the surface. This meant adjusting the output pipe and the display on the temperature controller jumped from 23C to 75C... Not what I wanted to see when my hand was half numb from holding the cold water input pipe against my kitchen tap. After another 45 mins or so the water was properly chilled.
I then transferred this wort into my sterilised FV bucket and sprinkled in the smack-pack of yeast. OG was 1.066, a little off of the 1.070 in the recipe but after the nightmare sparging experience I was quite happy with this. By this point I had been building, cleaning and brewing for almost 10 hours and I was exhausted. The whole day was a bit of a mess but I'd say this is in no way due to the fault of the Grainfather, more my own mistakes that I was making, and essential equipment I didn't have around.
Cleaning then involved going through the same steps as earlier, running the sodium percabonate through at 60C and rinsing out.
I had to leave to go on holiday the next day so I checked the FV in the morning but there was no noticable krausen yet. My flatmate checked for me a few days later and said there was an inch or two of 'foam' on top of the wort and so I was relieved that fermentation had begun.
I got back to my house a week later and the krausen had fallen, but not dissapeared like I am used to. After a bit of research this sounds like normal behaviour for American Ale 2 yeast.
I took a sample which was now reading 1.020 but was still a little bit cloudy. This is the aim gravity in the recipe but I think it still has a little bit of fermenting still to do as it seemed pretty active.
Tasting the sample however... BAND AID. Nightmare, the chlorine flavours were still there and very evident. I've thrown in the dry hops in an attempt to overpower those off-flavours but I'm a little bit disheartened. Maybe more fermenting and maybe a slightly heavier carbonation will help, but as a first experiment it might be a bit ruined.
Overall I had a lot of fun, and have several ideas of how to improve the second batch. I'm going to heat the tap water again and see if the chlorine flavour is still there. If it is I'm going to try a complete rinse-out. Then some campden tablets. If that still doesn't work I'll try bottled water. I think the Grainfather itself is a great piece of kit, and for the price, the size, and the ease of use it's a great option for starting to get into the daunting world of all-grain and semi-automated brewing.
Last edited by a moderator:
")
