Big Mouth Bubbler- Solution to the bad lid seal problem

Homebrew Talk - Beer, Wine, Mead, & Cider Brewing Discussion Forum

Help Support Homebrew Talk - Beer, Wine, Mead, & Cider Brewing Discussion Forum:

This site may earn a commission from merchant affiliate links, including eBay, Amazon, and others.
I just realized that this was for the plastic BMB's. On the Glass BMB's the original top was also screw on, but didn't have a separate ring and insert. It was all one piece. Also, in the original ones, the hole in the top was a really weird size. No stopper I have will fit it right.

I just finished a batch using the new universal top. It stayed in sort of, but I had to keep pushing it down further. It never came all the way out, but I'm sure it was leaking somewhat.

After using it, I definitely think your idea to combine a screw on outer ring with the new silicone gasket is a great idea. I just don't see how to combine the parts I have for the glass BMB to make it work.
 
I ordered another BMB plus the new universal lid. I just checked my other BMB and I'm wondering this: Couldn't you use a spring clamp on each side to hold the universal lid in place so it wouldn't pop up? Or even just tiny c-clamps on each side to hold it in place? You can buy little tiny c-clamps where the opening is no more than an inch.

Or, failing that, some sort of entwined rubber band system that links under the lip of the BMB mouth?

There's a lip under the mouth of the BMB--it would seem to me that there is something there on which to get a purchase, thus something to hold the lid in place.

View attachment 333351

View attachment 333352

My new BMB and new universal lid is supposed to show up today. I'll try these things out and report back.

An update on this. I tried both clamps but it turns out the lip on the BMB does not provide enough surface for a grip.

I bought one of the universal lids and I have it on a BMB containing a brew I did this afternoon. One thing is for sure--without that ring to hold it down, it's darned hard to lift the BMB without a harness.

At least so far the universal lid appears to be staying put w/o the ring or any other system of holding it in place.
 
Sometimes expense is the best economy.

If the clamps don't work, the liquid gasket doesn't work, the seran wrap doesn't work, you'll find that it would have far cheaper (especially in time) to just do it the way I explained. Sounds like I'm selling something here and of course I'm not, I was just trying to help out others with the same problem.

Further, if you look at post #1, there is a solution there that does not require the cutting. I've made 12 carboys worth of beer with them and they work flawlessly (3 20g batches). Either of the solutions I proposed will make you feel better about your fermentor than having a bunch of clamps hanging off of it.

Good luck. It would be nice to see a better solution that what I presented. I'll be watching for that.

The glass BMB's are different and the solutions in the first couple of posts do not apply. The blue rings from the plastic BMB's do not fit on the glass versions. The lovely mockup shown in post #13 looks better than it works since the silicone gasket does not really have a top level to be held in place by the threaded cover. A possible solution would be to cut the center section of the threaded cover out, thus creating the equivalent of the ring to secure the modified universal lid (see post #1). I am reluctant to do this because I have not seen replacements for the original threaded covers if it doesn't work out. As I said in an earlier post, the O-ring worked for me.
 
I experienced an issue with my 6.5 plastic Bubbler lid not sealing. I purchased a silicone baking mat. I traced the lid on it and cut some gaskets. It was cheap…about $12, I cut several gaskets and they seal well.
 
I haven't read all 9 pages but when my BM Bubbler started leaking I used a piece of Glad Press and Seal (sanitized) over the bottle opening and lid threads. Punched a hole in the center where the air lock would be. Screwed on the cap. Viola! no more leak. Same procedure has worked every time. It basically works like plumbers thread tape.

(I won't buy another bubbler)
 
First off, this is my first post on the forums. I have been using this site for years for what seams like every brew day and project I've done. Sooooo helpful! Since I have found it so helpful, I think it's time for me to start giving some input and maybe try to help others out just as everyone here has done. So here goes nothing, ha.

I too am having leaking problems on the two 6.5 gallon glass Evo 2 carboys. Which got replaced because the original Big Mouth Bubbler carboys cracked. Which was not surprising once I saw the thickness of the glass. No more than 1/16" thick I'd say. Anyways, I've contacted Northern Brewer a couple times about the Evo 2's and they have said "they have done a fair amount of testing" and "they shouldn't leak at all." So since they are of no help it's time for another DIY. My favorite.

I'm lucky enough to have the original lids from from the previous carboys which thread right onto the new Evo 2's. And for anyone that is wondering as I did, the lids for the plastic carboys are smaller than the lids for the glass carboys. So I'm going to try and modify the lids similar to the way you modified the lids for the plastic carboys and hopefully post up pictures since I know we all like those.

Here's some to start!

IMG_3005.jpg


IMG_3006.jpg
 
First off, this is my first post on the forums. I have been using this site for years for what seams like every brew day and project I've done. Sooooo helpful! Since I have found it so helpful, I think it's time for me to start giving some input and maybe try to help others out just as everyone here has done. So here goes nothing, ha.

I too am having leaking problems on the two 6.5 gallon glass Evo 2 carboys. Which got replaced because the original Big Mouth Bubbler carboys cracked. Which was not surprising once I saw the thickness of the glass. No more than 1/16" thick I'd say. Anyways, I've contacted Northern Brewer a couple times about the Evo 2's and they have said "they have done a fair amount of testing" and "they shouldn't leak at all." So since they are of no help it's time for another DIY. My favorite.

I'm lucky enough to have the original lids from from the previous carboys which thread right onto the new Evo 2's. And for anyone that is wondering as I did, the lids for the plastic carboys are smaller than the lids for the glass carboys. So I'm going to try and modify the lids similar to the way you modified the lids for the plastic carboys and hopefully post up pictures since I know we all like those.

Here's some to start!

I see your plan and I think that will work. Good luck and let us know your progress. Thanks for the pics!

Oh, and welcome (finally) to the forum.
 
I have 5 of the plastic BMB original lid units. I like them immensely. Dislike having to crank them down like a gorilla.
I am interested in the rectangular Speidel units. While they are more expensive they seem much better in quality. The question here is that there seems to be no discussion on them and it makes me wonder if they are not what they look to be. Anyone using these and can you offer opinion?
 
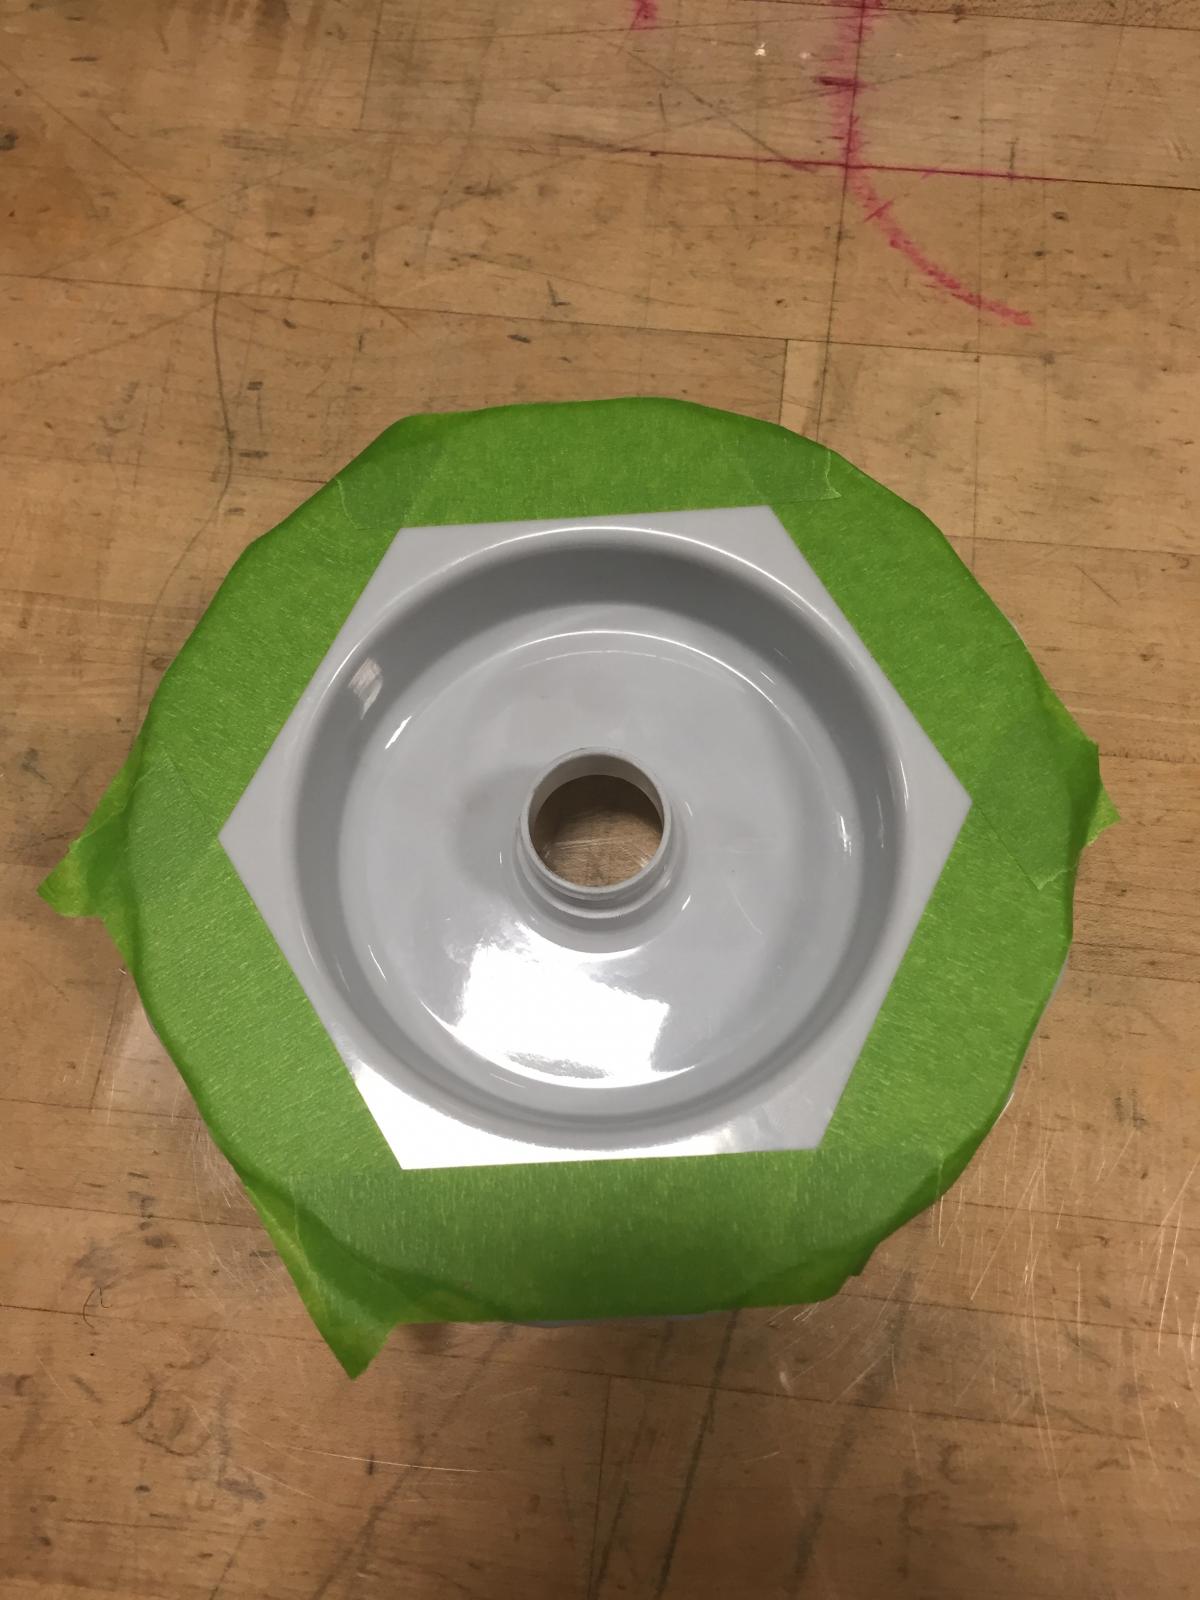
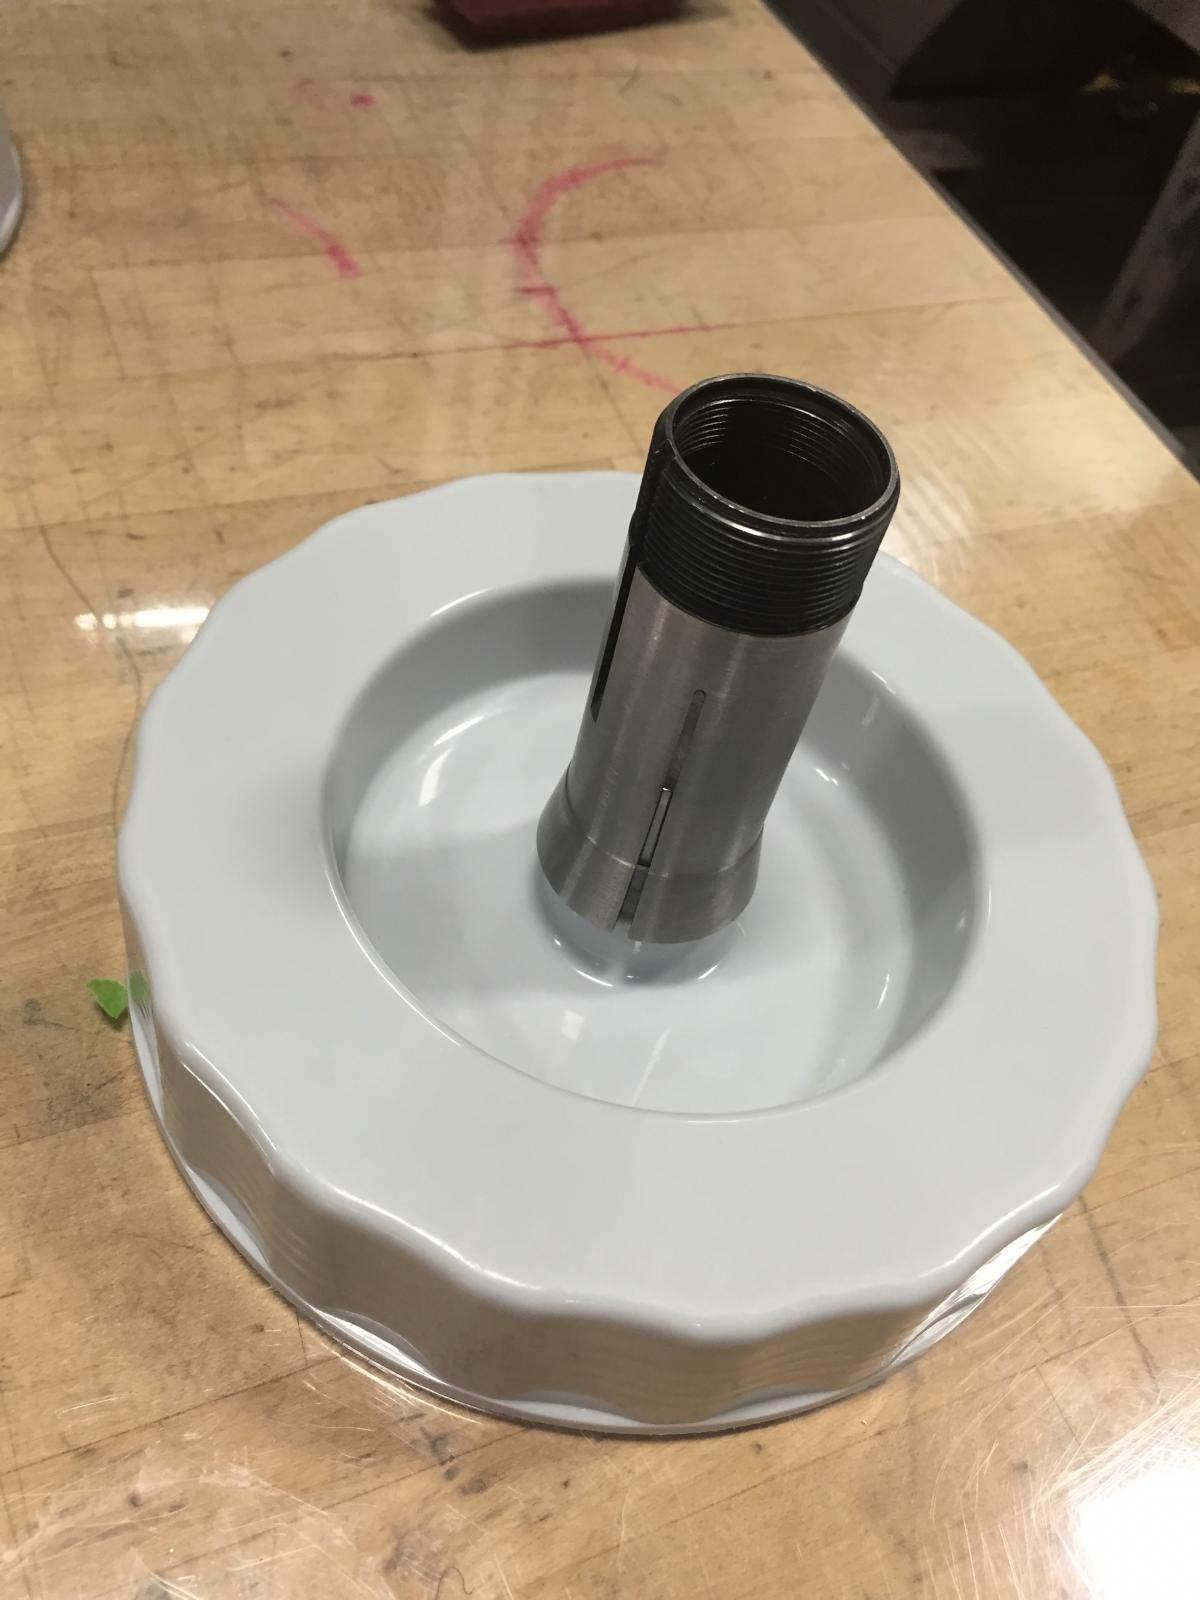
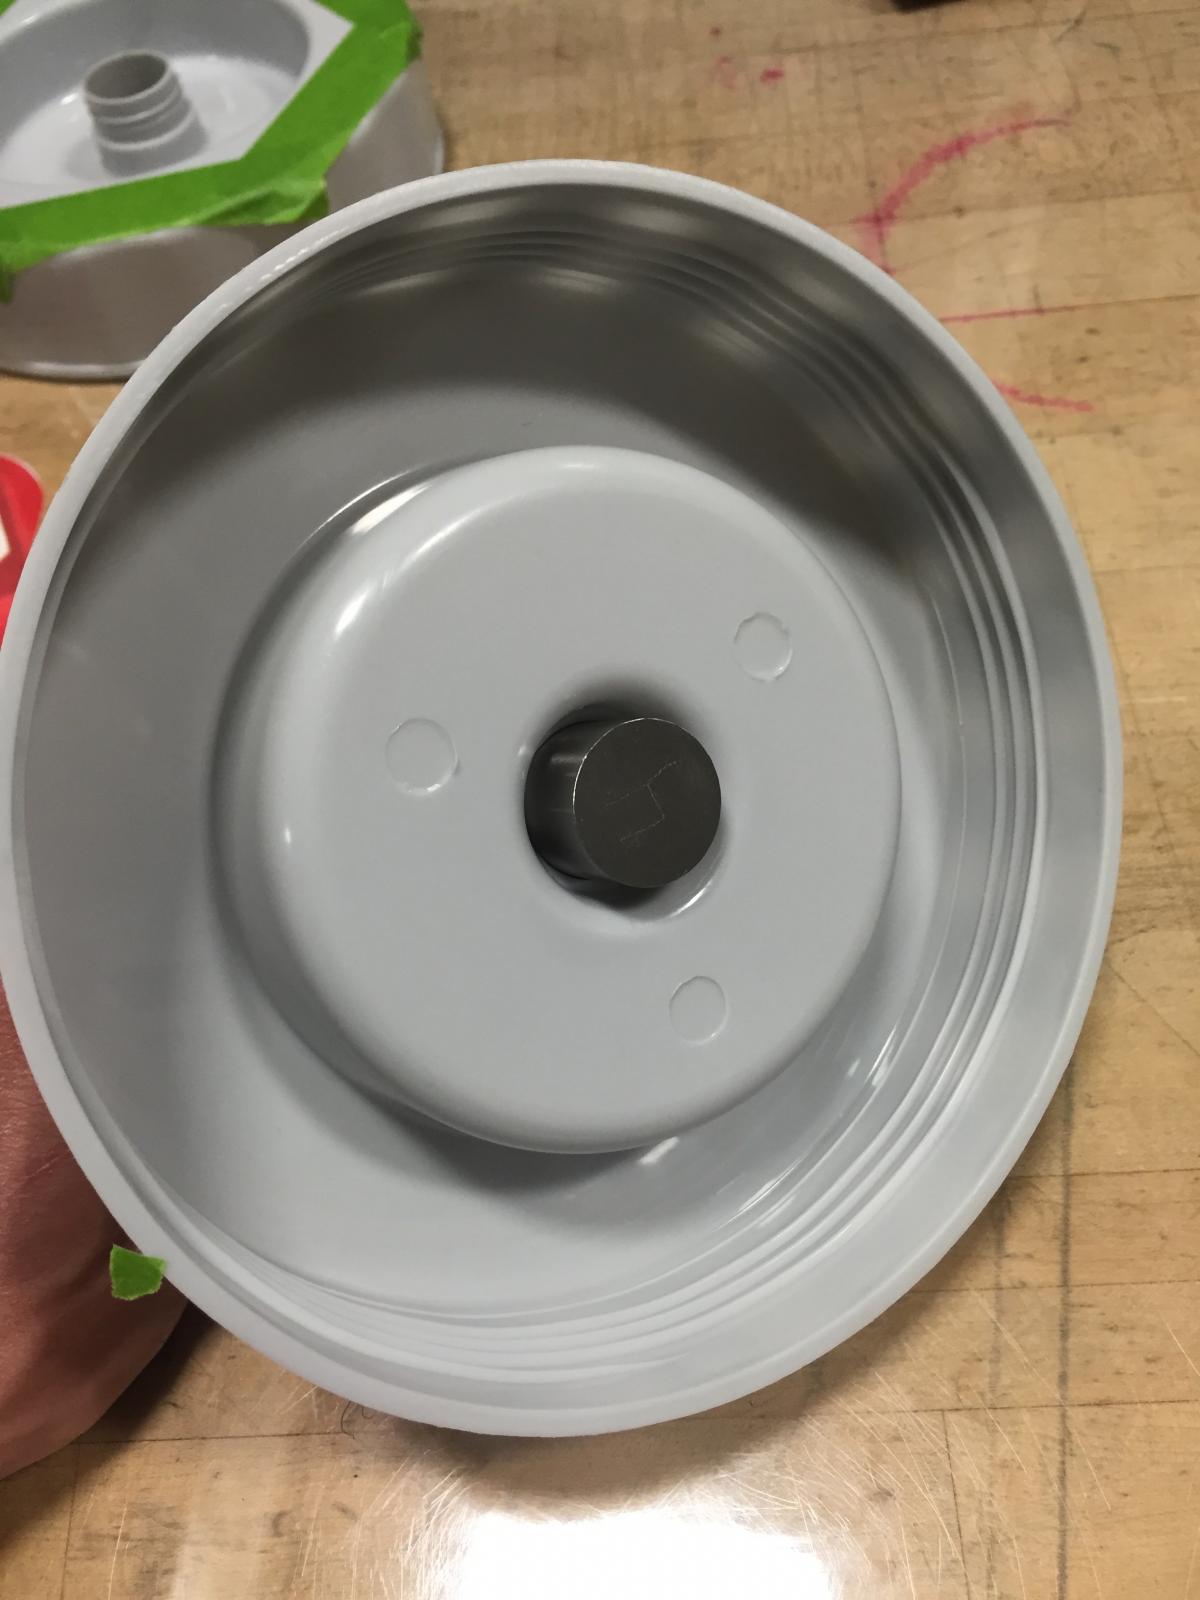
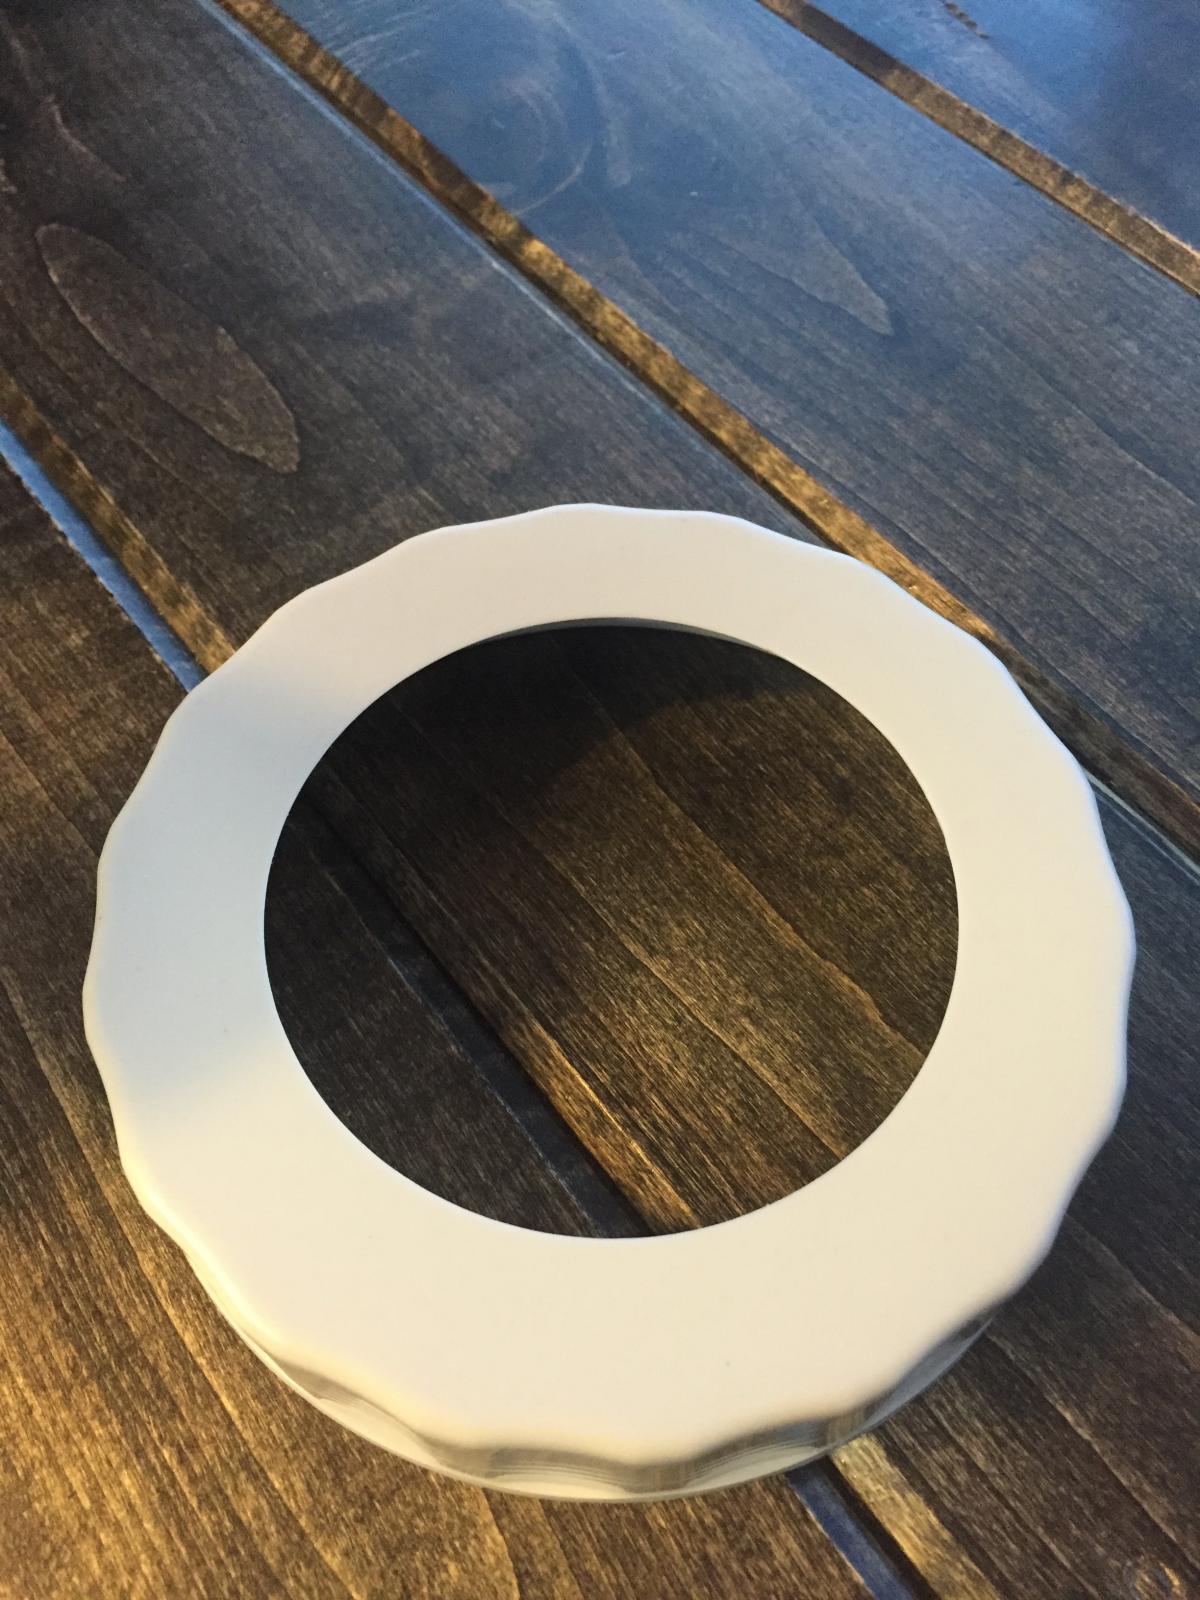
Made some progress today. I was going to cut the first generation lids with a dremel and make six straight cuts (see first picture) since it's hard to make dremels cut circles, ha. But I figured I would take them to my work and see if I could chuck them up in the lathe and make a nice round cut. I'm a little OCD at times and figured a circle would look much better. And what do ya know...I now have 2 lids that have a hole big enough to fit the Evo 2 lid.

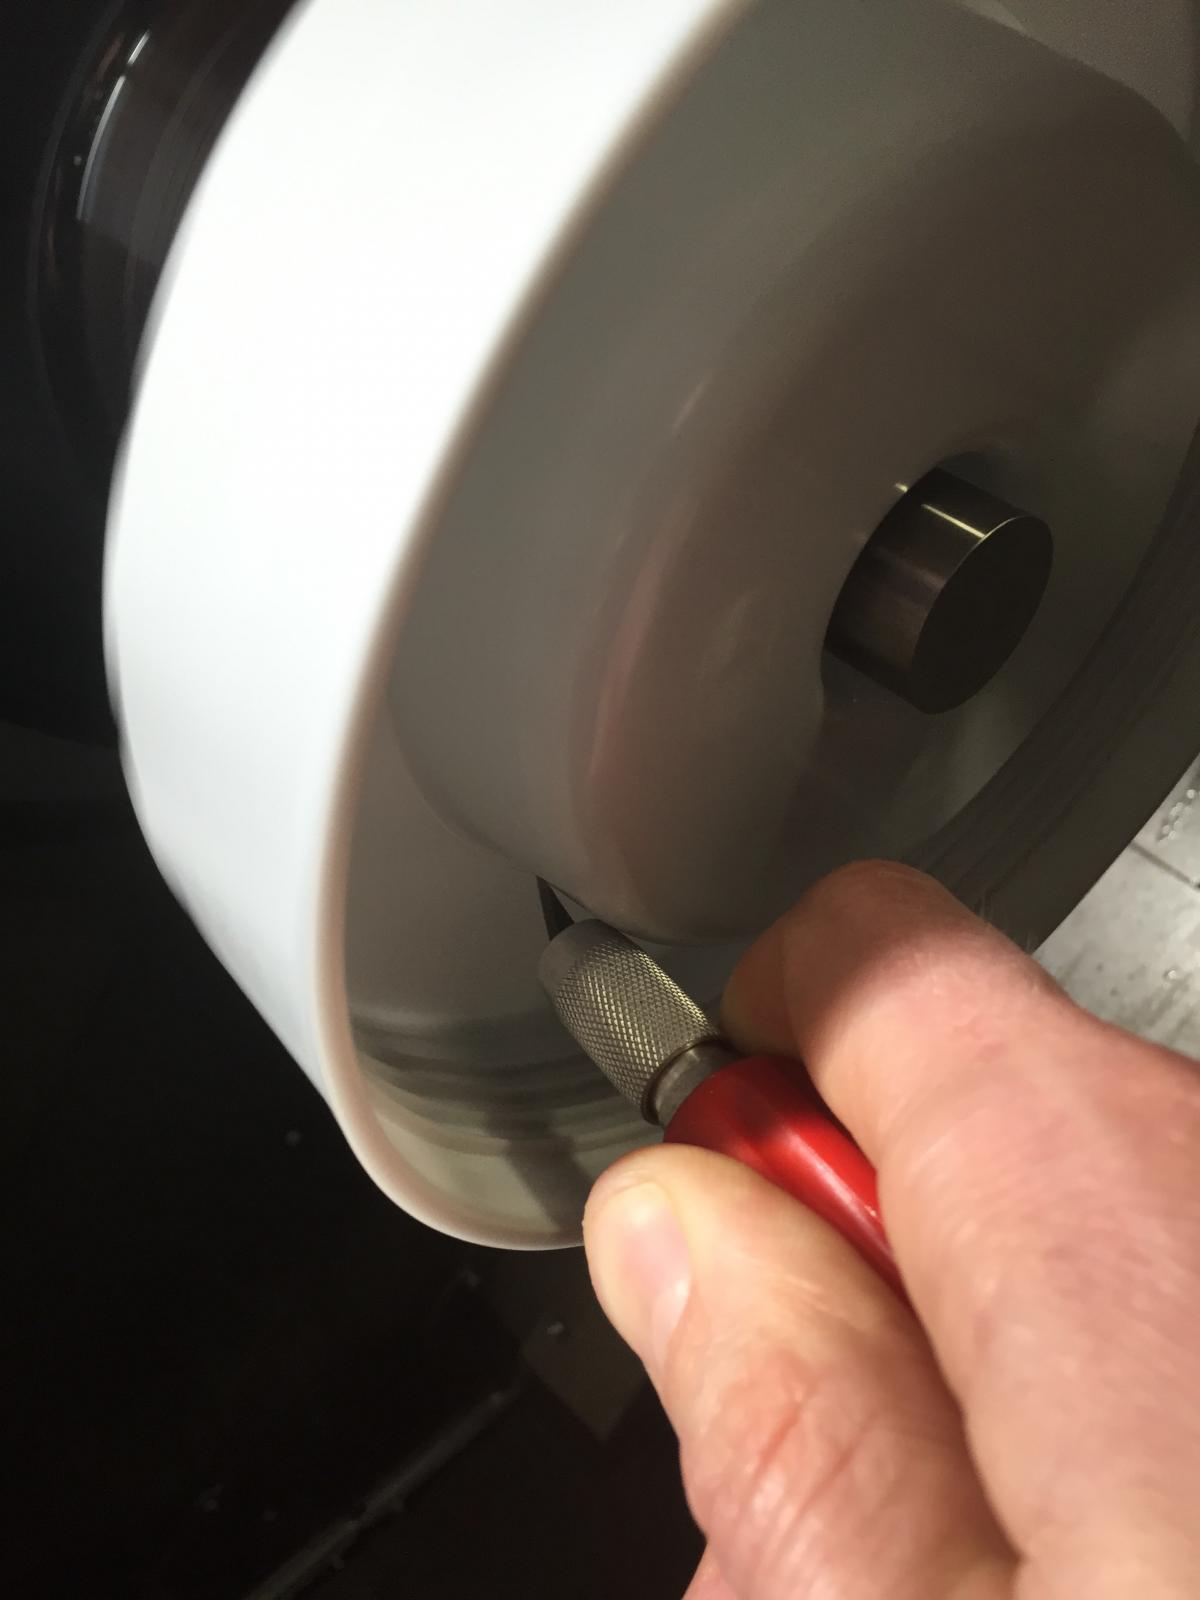
Anyone that has access to a lathe and would like to try the same thing, I just fit the threaded end of the lid in a 5C collet and then fit the tightest fitting pin inside the airlock gasket hole. You'd hate to collapse the plastic when clamping so find a good fitting pin and use minimal clamping pressure. I then pulled the lower turret up so I could rest my hand on it and used an exacto knife to slowly work through the lid. Cut through it in a matter of seconds with a very clean cut.

Now all I have to do is let the beer finish fermenting and then modify the Evo 2 lids. The lid is bigger than the diameter of the threads so I'll have to turn them down a bit to allow the first generation lids to thread on.

Should be another week and a half. Keep ya'll posted!

IMG_3008.jpg


IMG_3009.jpg


IMG_3010.jpg


IMG_3013.jpg
 
Also on a side note to anyone that has the glass Evo 2's but does not have the first generation lids you can probably get them from Northern Brewer free of charge. I sent them another email about my leaky lids and they are sending over 2 of the first generation lids to replace the new ones. Even though I'm probably just going to cut them up it is nice to have some back ups.
 
Also on a side note to anyone that has the glass Evo 2's but does not have the first generation lids you can probably get them from Northern Brewer free of charge. I sent them another email about my leaky lids and they are sending over 2 of the first generation lids to replace the new ones. Even though I'm probably just going to cut them up it is nice to have some back ups.

I just want to make sure I understand your plan. I understand that you are cutting out the middle part of the original lid which I'm assuming will leave you the outer ring of the original lid with a nice clean hole in the middle. Is the plan to use the new universal lid and then screw this modified lid down over the top to keep the universal lid in place?
 
I just want to make sure I understand your plan. I understand that you are cutting out the middle part of the original lid which I'm assuming will leave you the outer ring of the original lid with a nice clean hole in the middle. Is the plan to use the new universal lid and then screw this modified lid down over the top to keep the universal lid in place?

Yea that's his plan. The problem is that the threaded ring he just modified won't fit over the new universal lid - the universal is larger by about 1/4". I used a jigsaw to cut mine down a bit.
 
I just did the jigsaw cut to the universal lid and it slips in and out of the dark blue screw on lid but boy is it a bugger to get all the way down. Did I do something wrong?
 
I just did the jigsaw cut to the universal lid and it slips in and out of the dark blue screw on lid but boy is it a bugger to get all the way down. Did I do something wrong?

Which part is difficult to get down? The universal lid, or the threaded ring?

If it's the ring, make sure you push the universal lid all the way in first (by hand). Then put the ring on and screw it down.
 
Well the universal lid is kind of a pain to seat all the way down but it's really the screw down lid. It is really tough to screw down. Maybe I didn't shave enough off the universal lid?
 
Not at all. If I just use the standard configuration it's easy.

Well then, just push the universal down and screw it on. It's possible the silicone gasket is squirting out and interfering.

I've done twelve of them now since I posted this. In fact, that's actually at least 24 times I'm screwed mine down (because I add gelatin and possibly dry hops). No problem, but sometimes I have to twiddle the ring a bit due to the silicone gasket interfering.
 
I think I found why only one of my 2 new glass BMB's did not seal. It was my first brew with them, and on brew day I cleaned one and a friend cleaned the other. Anyways, now that the brew is done and beer is out, I notice 1 is only half as thick at the top!

One of them has a 1/2" lip while the other is only 1/4". How is that possible? Best I can tell they feel about the same weight. I believe they are both EVO 2's as they have the gallon markings. Version 1 did not have these right?

Does anyone else with multiples have this same issue?

Not sure I follow smarch. What lip?
 
The flat surface where the lid makes contact with the glass. One of my carboys is twice as wide as the other.

That's exactly what happened to mine. The first glass evo that I got had a thicker wall size. It was so wide, that the universal top wouldn't even fit into it. They send me a new EVO and it was fine. I was thinking the same thing, how can they be so far off. The outer diameter is the same and therefore the screwon original lid will fit both. Its only the inner diameter that is different.

I'm planning to use the original lid for one of them and the new universal lid for the other.
 
I think I found why only one of my 2 new glass BMB's did not seal. It was my first brew with them, and on brew day I cleaned one and a friend cleaned the other. Anyways, now that the brew is done and beer is out, I notice 1 is only half as thick at the top!

One of them has a 1/2" lip while the other is only 1/4". How is that possible? Best I can tell they feel about the same weight. I believe they are both EVO 2's as they have the gallon markings. Version 1 did not have these right?

Does anyone else with multiples have this same issue?

Yes indeed. My first EVO II had the thicker glass and my replacement has the thinner. Both dimensions are the same as you reported.
 
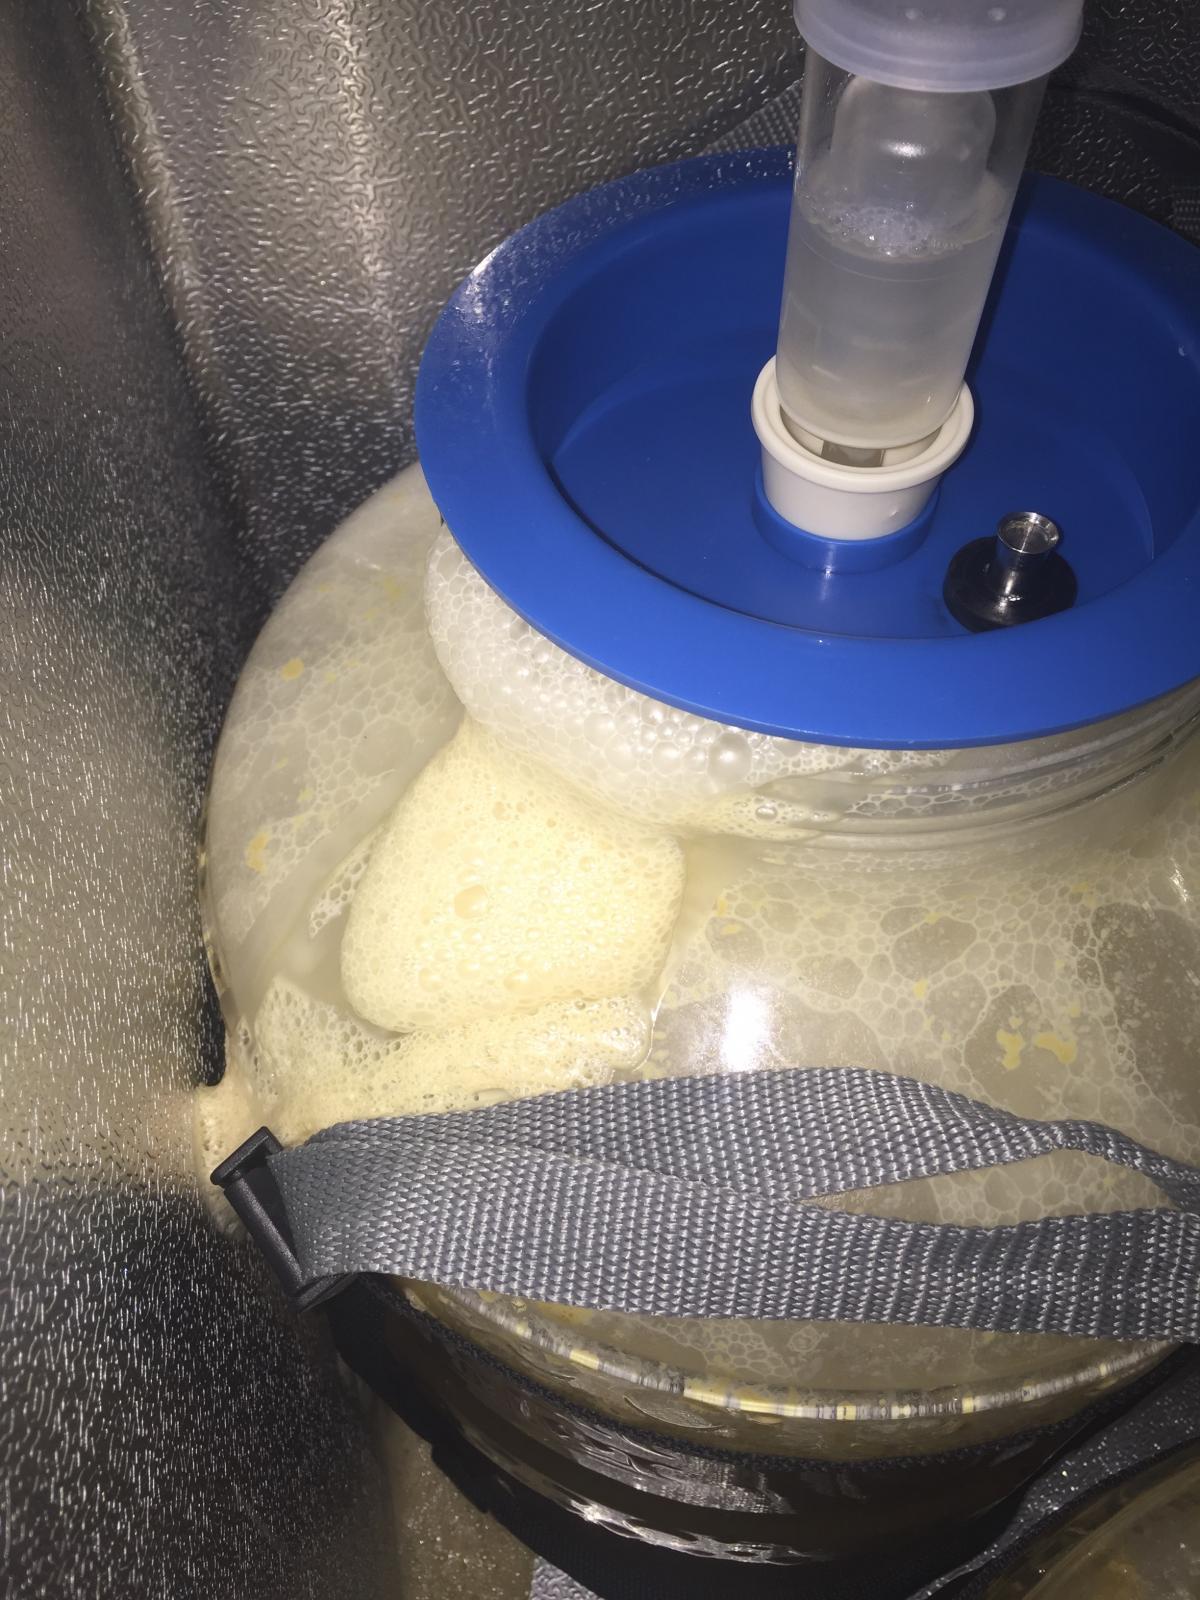
Is that airtight? Where does the air enter to replace the beer that's coming out?

Haha, I guess it's not airtight - if it was, this thread wouldn't exist.

I've used this contraption at least a dozen times. I'm not sure where the air is entering the carboy - probably under the white plastic lid piece there. I don't screw the blue ring tight - it's just barely threaded onto the bubbler to keep the assy in place.

Now that you mention it though, I'll probably drill a 1/8" hole in the plastic white piece just to avoid a headscratcher later. I don't use those white pieces during fermentation since I replaced them with the universal gasketed lids. For people who do use the white original lid and wanted to do something similar, just drill a 1/8" small hole in the stopper.
 
Passedpawn, just got my plastic BMB with the standard lid about a month ago and had the same sealing issues. Tried using plastic wrap and cranking it down and nothing worked. I ordered the universal lid and followed your method. Trimmed it down on my bandsaw and finished it with my sander. I also trimmed off the uppermost silicone rib and it then would screw all the way down. Sealed like a dream. Thanks for the well documented DIY fix!
 
Passedpawn, just got my plastic BMB with the standard lid about a month ago and had the same sealing issues. Tried using plastic wrap and cranking it down and nothing worked. I ordered the universal lid and followed your method. Trimmed it down on my bandsaw and finished it with my sander. I also trimmed off the uppermost silicone rib and it then would screw all the way down. Sealed like a dream. Thanks for the well documented DIY fix!

Thanks for the tip. I might remove that rib too. It does get in the way when screwing down sometimes. I'll probably just trim with scissors. Funny, I didn't think of that until you mentioned it. Doh!
 
It's like 4" or 4.5". I ordered one. I was wondering if the lid would fit the BMB. That would be interesting. You can buy the lid separately. I'll report back when mine shows up.

I think the 2-piece lid design is the way to go but the BMB was executed so poorly. What the BMB lid needs is something like a recessed groove for an O-ring. You put that on to get a seal and then use the blue collar to snug it down onto the BMB. The Fermonster has a 1-piece lid with the seal built in. Maybe a bit of keg lube around the rim of the Fermonster will help the lid to cinch down a little tighter to hold the seal better.
 
Is that airtight? Where does the air enter to replace the beer that's coming out?

Haha, I guess it's not airtight - if it was, this thread wouldn't exist.

I've used this contraption at least a dozen times. I'm not sure where the air is entering the carboy - probably under the white plastic lid piece there. I don't screw the blue ring tight - it's just barely threaded onto the bubbler to keep the assy in place.

Now that you mention it though, I'll probably drill a 1/8" hole in the plastic white piece just to avoid a headscratcher later. I don't use those white pieces during fermentation since I replaced them with the universal gasketed lids. For people who do use the white original lid and wanted to do something similar, just drill a 1/8" small hole in the stopper.

And here is where we call "fork = caskBreather(thread);" :)


Edit: found it--
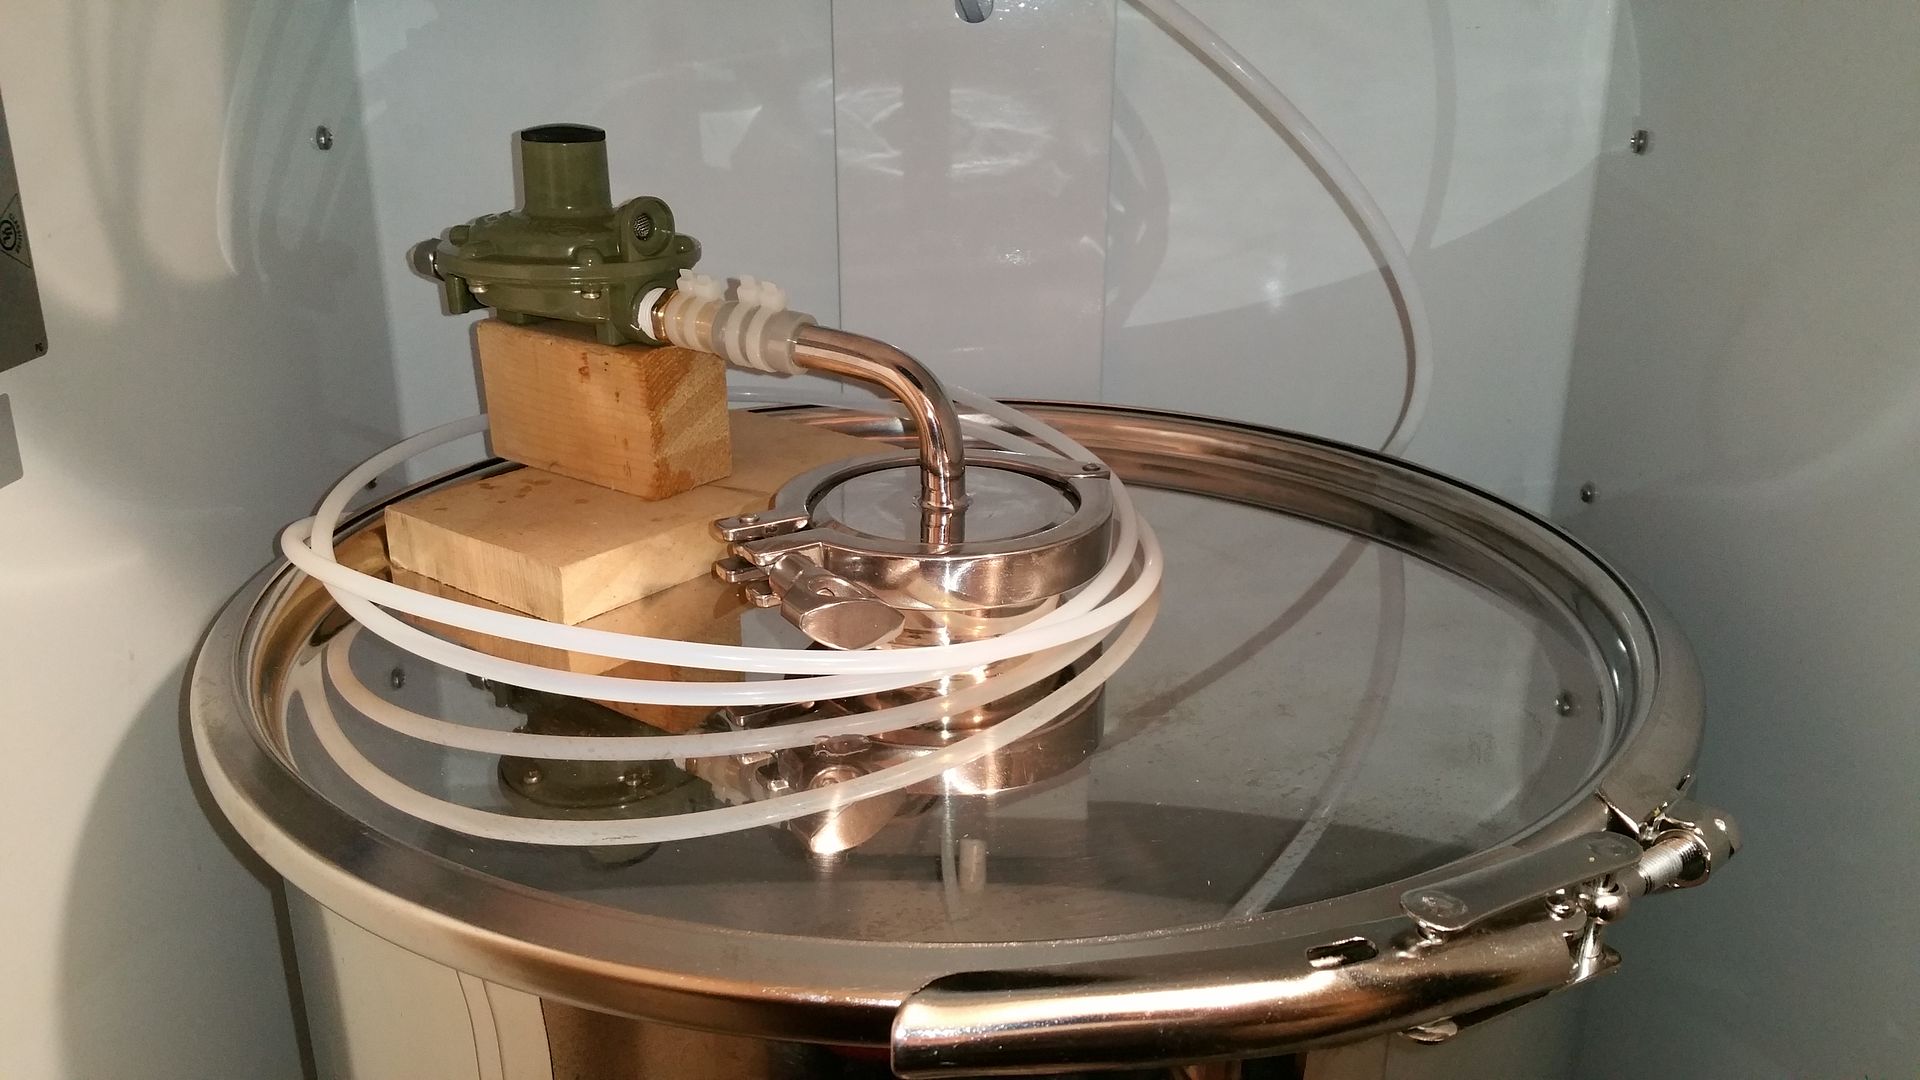
I use a low pressure propane regulator which puts 0.4 psi on the fermenter during crashing. Nothing goes in but CO2.

20151216_160255_zpsu5lql3tc.jpg

This concept may work for racking also and you don't have to poke holes in anything. So to speak...

or just put a direct line from the CO2 tank and push with a little PSI.
 
And here is where we call "fork = caskBreather(thread);" :)


Edit: found it--

This concept may work for racking also and you don't have to poke holes in anything. So to speak...

or just put a direct line from the CO2 tank and push with a little PSI.

Haha. I'm not trying that hard :) The purists out there might like to push the beer out with CO2 to completely avoid oxidation. I used to do that, but I'm not a purist anymore.
 
So, it looks like the OP used better bottle lids.

How can I fix these lids without a better bottle lid? First time using these lids, I checked on em this morning and the lid had started to come off.. :(
 
I am experiencing the dreaded "improved" BMB lid popping off. So frustrating after years of using the original design with no issues. Passedpawn...I'm going to use your solution but where can I get a supply of the threaded collars? M-W claims they are no longer made?
 
Back
Top