Today I decided it was time to drill the hole in the keg and solder a lock nut to it. Enough anxious procrastination.
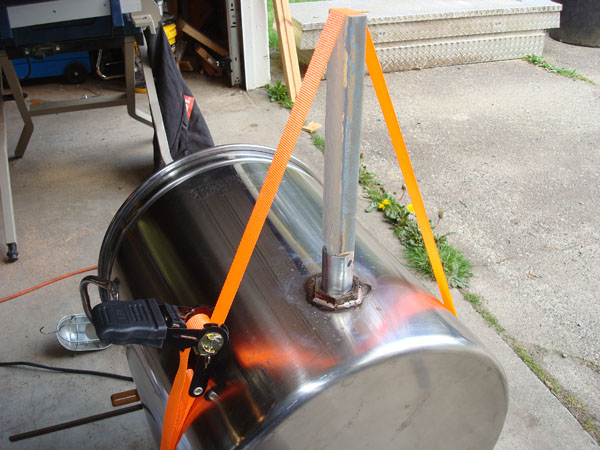
I center punched the location of the hole and drilled a 13/64" pilot hole. This was just the first reasonable bit I found.
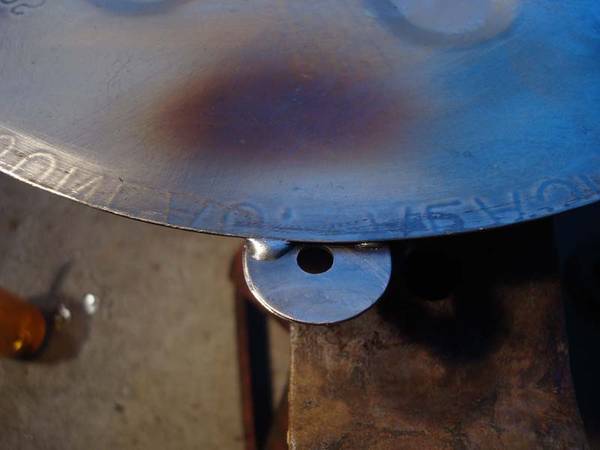
Then on to the real drilling. A few days ago I bought a 1-1/4" hole saw for this project. I had been debating how to cool and lubricate the saw. I decided to use plain water. Someone else had done that here on HBT and it went well. I, however, did not have a helper nearby to spray water while I drilled, so I filled a coffee can with water. I dipped the saw in the water and leaned fairly hard on the drill. I tried to go slow and it was mostly successful. At the first sign of steam, after 4-6 seconds of drilling, I stopped and dunked the saw again. It took about five minutes to finish with the hole saw. The saw had wobbled a little so the hole was slightly larger than 1-1/4".
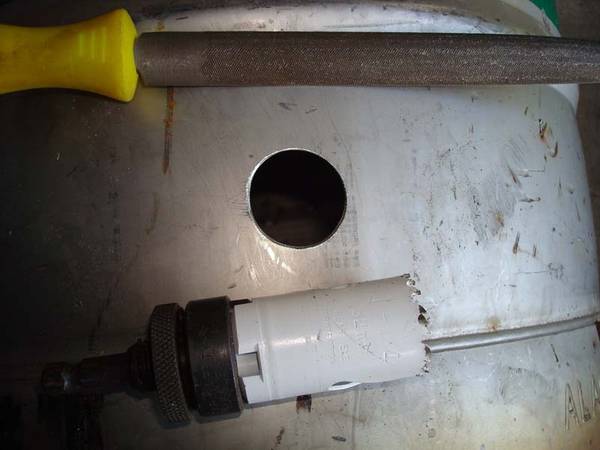
I dressed the hole with a half-round file and now it was closer to 1-5/16" than 1-1/4". It turned out to be a good size though. Here's a picture of it at this stage.
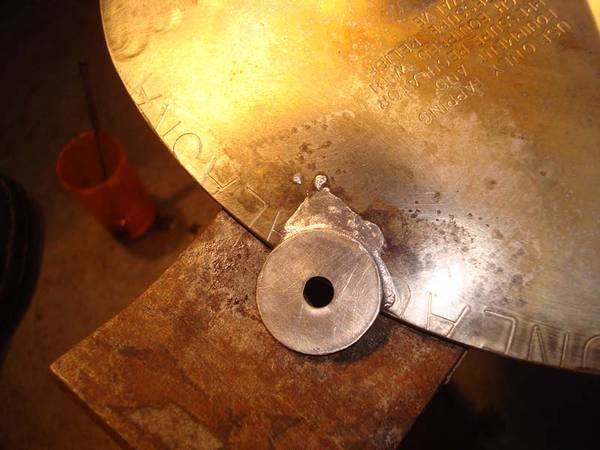
I needed to practice before doing the nut. Two years ago when I converted the keg I had silver brazed three steel tabs on the lid to hold it in place while I was heating the runoff. The tabs were a little too short so the lid did not stay on very securely. I decided to add the "washer" I had just cut out of the keg. I sanded it with 180 grit emery cloth, also the lid got this treatment. After that I wiped them down with acetone. Then, after three (3) hours of looking, I finally located the Stay Brite #8 solder so I could continue. I even went to work to look for it. Sigh.
I worked at the front of the garage with the double door open. I applied liquid Stay Clean flux with an acid brush from the welding supply store, both to the washer and to the lid.
I heated with a MAPP torch, first several inches away from the washer, then progressively circled in closer. The flux boiled and started to turn color. Before the solder would melt the flux had turned as dark as stout. I applied a second dose of flux wich cleaned up much of the burnt flux. After a little more heat the solder flowed easily and I quit.
After several minutes of cooling I wiped down the lid with a wet rag. It removed most of the gunk. The next picture shows the lid after the wipe down. On the left you can see a small cup I used to hold a little flux and the brush.
The next picture shows the bottom of the lid. The solder had flowed fairly well also here. You can see an area a couple of inches beyond the washer where I had applied too much heat.
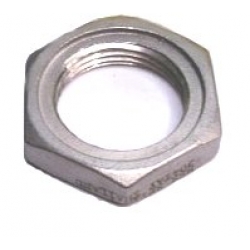
Next I cleaned up the hole in the same way with emery cloth and acetone. The lock nut is cast and has a rough surface; it is almost impossible to get it super clean with emery cloth. It would turn out well anyway. It got the acetone wipe down, and here it is prepped and ready for flux.

The nut was a lot harder to solder than the washer. I had to walk around the keg to get to all six sides. The flux discolored even more this time. I applied a liberal second dose of flux which helped a lot to clean it up. Solder melted and flowed in under the nut. A couple of places needed more persuasion with a third application of flux, but that did the trick.
I had to move the nut back to the center of the hole several times because I had bumped it. It would be better to clamp that nut in place for soldering.
I let it cool a little less this time and got after it with a wet rag while it was still hot enough to sizzle. Much gunk came off this way. Then I used a small stainless steel wire brush from BernzOmatic. It cleaned the solder joint beautifully and gave it a burnished look. It did not touch the dark flux stains though.
The next picture shows the keg being leak tested. It was water tight. All the joints looked good but there had been a few runs and other mishaps farther from the nut. You can still see the dark flux stains. The solder filled the larger gaps on the left and right sides well. The gaps are larger here because of the curvature of the wall. This is a feature of the Stay Brite #8 solder; it fills large gaps better than the standard offering. Supposedly it is so because it has 6% silver while the standard version has 4%.

After an hour and no leaks I declared it a success. I got out the emery cloth and it easily removed the flux stains.
After this picture was taken I used a cold chisel and removed a few errant solder blobs. Now I need to re-passivate (?) the surface where I sanded. I don't remember what to use, but I think it is an acid of some type.
So in summary, I think the MAPP gas torch is overpowered for this application. Perhaps that is why I had such hard time with the flux burning. It did the job though.
This method creates a compact installation of the heater element. If it is leak free in the first test, it should remain so for a very long time.
I wouldn't call this easy, but after some practice it will become easier.
I center punched the location of the hole and drilled a 13/64" pilot hole. This was just the first reasonable bit I found.
Then on to the real drilling. A few days ago I bought a 1-1/4" hole saw for this project. I had been debating how to cool and lubricate the saw. I decided to use plain water. Someone else had done that here on HBT and it went well. I, however, did not have a helper nearby to spray water while I drilled, so I filled a coffee can with water. I dipped the saw in the water and leaned fairly hard on the drill. I tried to go slow and it was mostly successful. At the first sign of steam, after 4-6 seconds of drilling, I stopped and dunked the saw again. It took about five minutes to finish with the hole saw. The saw had wobbled a little so the hole was slightly larger than 1-1/4".
I dressed the hole with a half-round file and now it was closer to 1-5/16" than 1-1/4". It turned out to be a good size though. Here's a picture of it at this stage.
I needed to practice before doing the nut. Two years ago when I converted the keg I had silver brazed three steel tabs on the lid to hold it in place while I was heating the runoff. The tabs were a little too short so the lid did not stay on very securely. I decided to add the "washer" I had just cut out of the keg. I sanded it with 180 grit emery cloth, also the lid got this treatment. After that I wiped them down with acetone. Then, after three (3) hours of looking, I finally located the Stay Brite #8 solder so I could continue. I even went to work to look for it. Sigh.
I worked at the front of the garage with the double door open. I applied liquid Stay Clean flux with an acid brush from the welding supply store, both to the washer and to the lid.
I heated with a MAPP torch, first several inches away from the washer, then progressively circled in closer. The flux boiled and started to turn color. Before the solder would melt the flux had turned as dark as stout. I applied a second dose of flux wich cleaned up much of the burnt flux. After a little more heat the solder flowed easily and I quit.
After several minutes of cooling I wiped down the lid with a wet rag. It removed most of the gunk. The next picture shows the lid after the wipe down. On the left you can see a small cup I used to hold a little flux and the brush.
The next picture shows the bottom of the lid. The solder had flowed fairly well also here. You can see an area a couple of inches beyond the washer where I had applied too much heat.
Next I cleaned up the hole in the same way with emery cloth and acetone. The lock nut is cast and has a rough surface; it is almost impossible to get it super clean with emery cloth. It would turn out well anyway. It got the acetone wipe down, and here it is prepped and ready for flux.
The nut was a lot harder to solder than the washer. I had to walk around the keg to get to all six sides. The flux discolored even more this time. I applied a liberal second dose of flux which helped a lot to clean it up. Solder melted and flowed in under the nut. A couple of places needed more persuasion with a third application of flux, but that did the trick.
I had to move the nut back to the center of the hole several times because I had bumped it. It would be better to clamp that nut in place for soldering.
I let it cool a little less this time and got after it with a wet rag while it was still hot enough to sizzle. Much gunk came off this way. Then I used a small stainless steel wire brush from BernzOmatic. It cleaned the solder joint beautifully and gave it a burnished look. It did not touch the dark flux stains though.
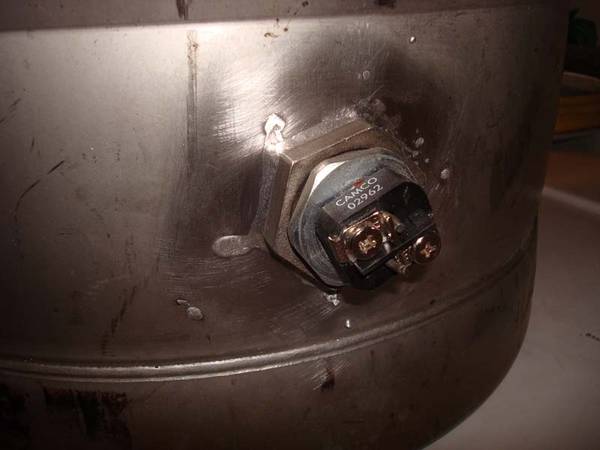
The next picture shows the keg being leak tested. It was water tight. All the joints looked good but there had been a few runs and other mishaps farther from the nut. You can still see the dark flux stains. The solder filled the larger gaps on the left and right sides well. The gaps are larger here because of the curvature of the wall. This is a feature of the Stay Brite #8 solder; it fills large gaps better than the standard offering. Supposedly it is so because it has 6% silver while the standard version has 4%.
After an hour and no leaks I declared it a success. I got out the emery cloth and it easily removed the flux stains.
After this picture was taken I used a cold chisel and removed a few errant solder blobs. Now I need to re-passivate (?) the surface where I sanded. I don't remember what to use, but I think it is an acid of some type.
So in summary, I think the MAPP gas torch is overpowered for this application. Perhaps that is why I had such hard time with the flux burning. It did the job though.
This method creates a compact installation of the heater element. If it is leak free in the first test, it should remain so for a very long time.
I wouldn't call this easy, but after some practice it will become easier.