
Update Oct 6th: IT'S ALIVE! Updated this first post with all the details!!
Found a 3 cu ft mini fridge on our local classifieds a while back, $20, thought I'd pick it up and see if I can convert it to a small kegerator. Well it turned out to be too small for 2 kegs, and too short for just one, so: why not strip out the compressor, coils, freezer tray and move it to my own custom built box!
Had I known how much super static tiny foam balls I'd be dealing with, I might have not bothered but it is pretty fun exploring by dismantling. :rockin:
Nothing without some pictures:
Here's a shot of the fridge with my fermentation bucket for size comparison:

Here's the inside before any work is done:

I managed to just pop the back super-thin steel plate off, it was stuck on by just the expanding foam insulation. Chipping away at this slowly with a random metal flange and a screwdriver, reveals the cold side of the lines:

There's two hot-side lines from the compressor, one left and one right, presumably there's side wall heat dispersing coils on both sides and perhaps a line across the top too. So, took my Dremel with a cutoff wheel very gently to the inner liner, which was super thick near the front of the fridge, and cut a line across one side. Not deep, barely into the foam at all, just enough to cut the plastic.
Peeled all that plastic back, and started cutting foam out in cubes until I found the lines in the wall. You can see the line that comes from the compressor at the bottom, this goes to the front of the fridge, snakes up the side along the front edge and goes into the loops you see there. The silver stuff is metallic tape of some sort, cuts easily, and it's just the same copper tube beneath it.

The line does indeed go into the roof of the fridge, so I think there's coils up there too. That's a shame because it's much harder to work bent over like that. Might move it onto the workbench for that part.
One full side exposed:

Found a GREAT way to get through the thick plastic near the outer edge: my dremel with the spiral cutting bit, and a guide set to only a 1/4 inch or so depth. Ran it down the side and had a super fast, super smooth, no worries cut done in 20 seconds. Compared to 20 minutes of sawing on the other side...

I confirmed that the sort of metal box and tray the compressor sits in is just calked to the fridge sides so I can easily break the calk, remove the screws that hold it to the fridge body, free up the lines on the top and other side, cut the hot side lines from the tape and pull. That should pull the whole whack of stuff out.
I'm really trying to enjoy the journey on this and not worry so much about getting to the finish fast, or even what the finished product will look like. I would really like to build an exactly sized, single tap kegerator, in a custom box. I don't need it, but could be a neat piece to build and own. Super small footprint is what I'd like.
I'll post more as I progress on the dismantle and build up!
Update April 9th! - I've managed to get the compressor, the evaporator tray and it's line, and all of the copper heat dispersion lines out of the fridge! It now looks like this:

The bottom pan was screwed onto the folded under sides of the fridge, and that pan was screwed onto the compressor mount plate. Had to bend some metal to get the bottom pan detached from the compressor mount plate, which also meant that the coils had zero support, they'd just be hanging off the compressor. That's no good, way too bendy for my liking. So I've strung the unit up on my bench to keep things somewhat upright:

I presume it's still in working order, as nothing was kinked and I was very gentle with the removal of the foam from around the lines and the eventual removal of the compressor and assorted bits. Now I need to finalize what I'm doing with it, which may be a dual zone fermentation chamber. I also have a Danby DWC283 with no refrigerant in it (came to be busted, for free). I'd like to either use it entirely, or pull the nice LED thermostats and control modules from it to combine with this compressor into a new box. We'll see!
I'll continue to update here when I'm next working on it, of course.
Update July 3rd! - Still keeping this project in mind, however it's transitioned to a "build a fermentation chamber" project. I'd like two zones, and I have a lot of parts stripped from a free wine fridge that had a blown compressor. The challenge now is to form the working compressor and bits I stripped from the fridge into a usable shape that still allows the hot side coils to disperse their heat and to be tucked into as small a space as possible.
Here's where I'm at with that so far:

I was able to bend the hot side coils pretty easily by hand but just for good measure to prevent kinks I made my bends around a full unopened tube of calking. That works pretty well! I did a good bit of bending the really thin copper tube (wire?) after the expansion valve at the end of the hot side coils. That was an easy way to sort of twist around an entire side of the coils.
Still some shifting to do with the coils and need a way to nicely secure them, possibly TO something, something metal perhaps...but otherwise it looks like it'll work!
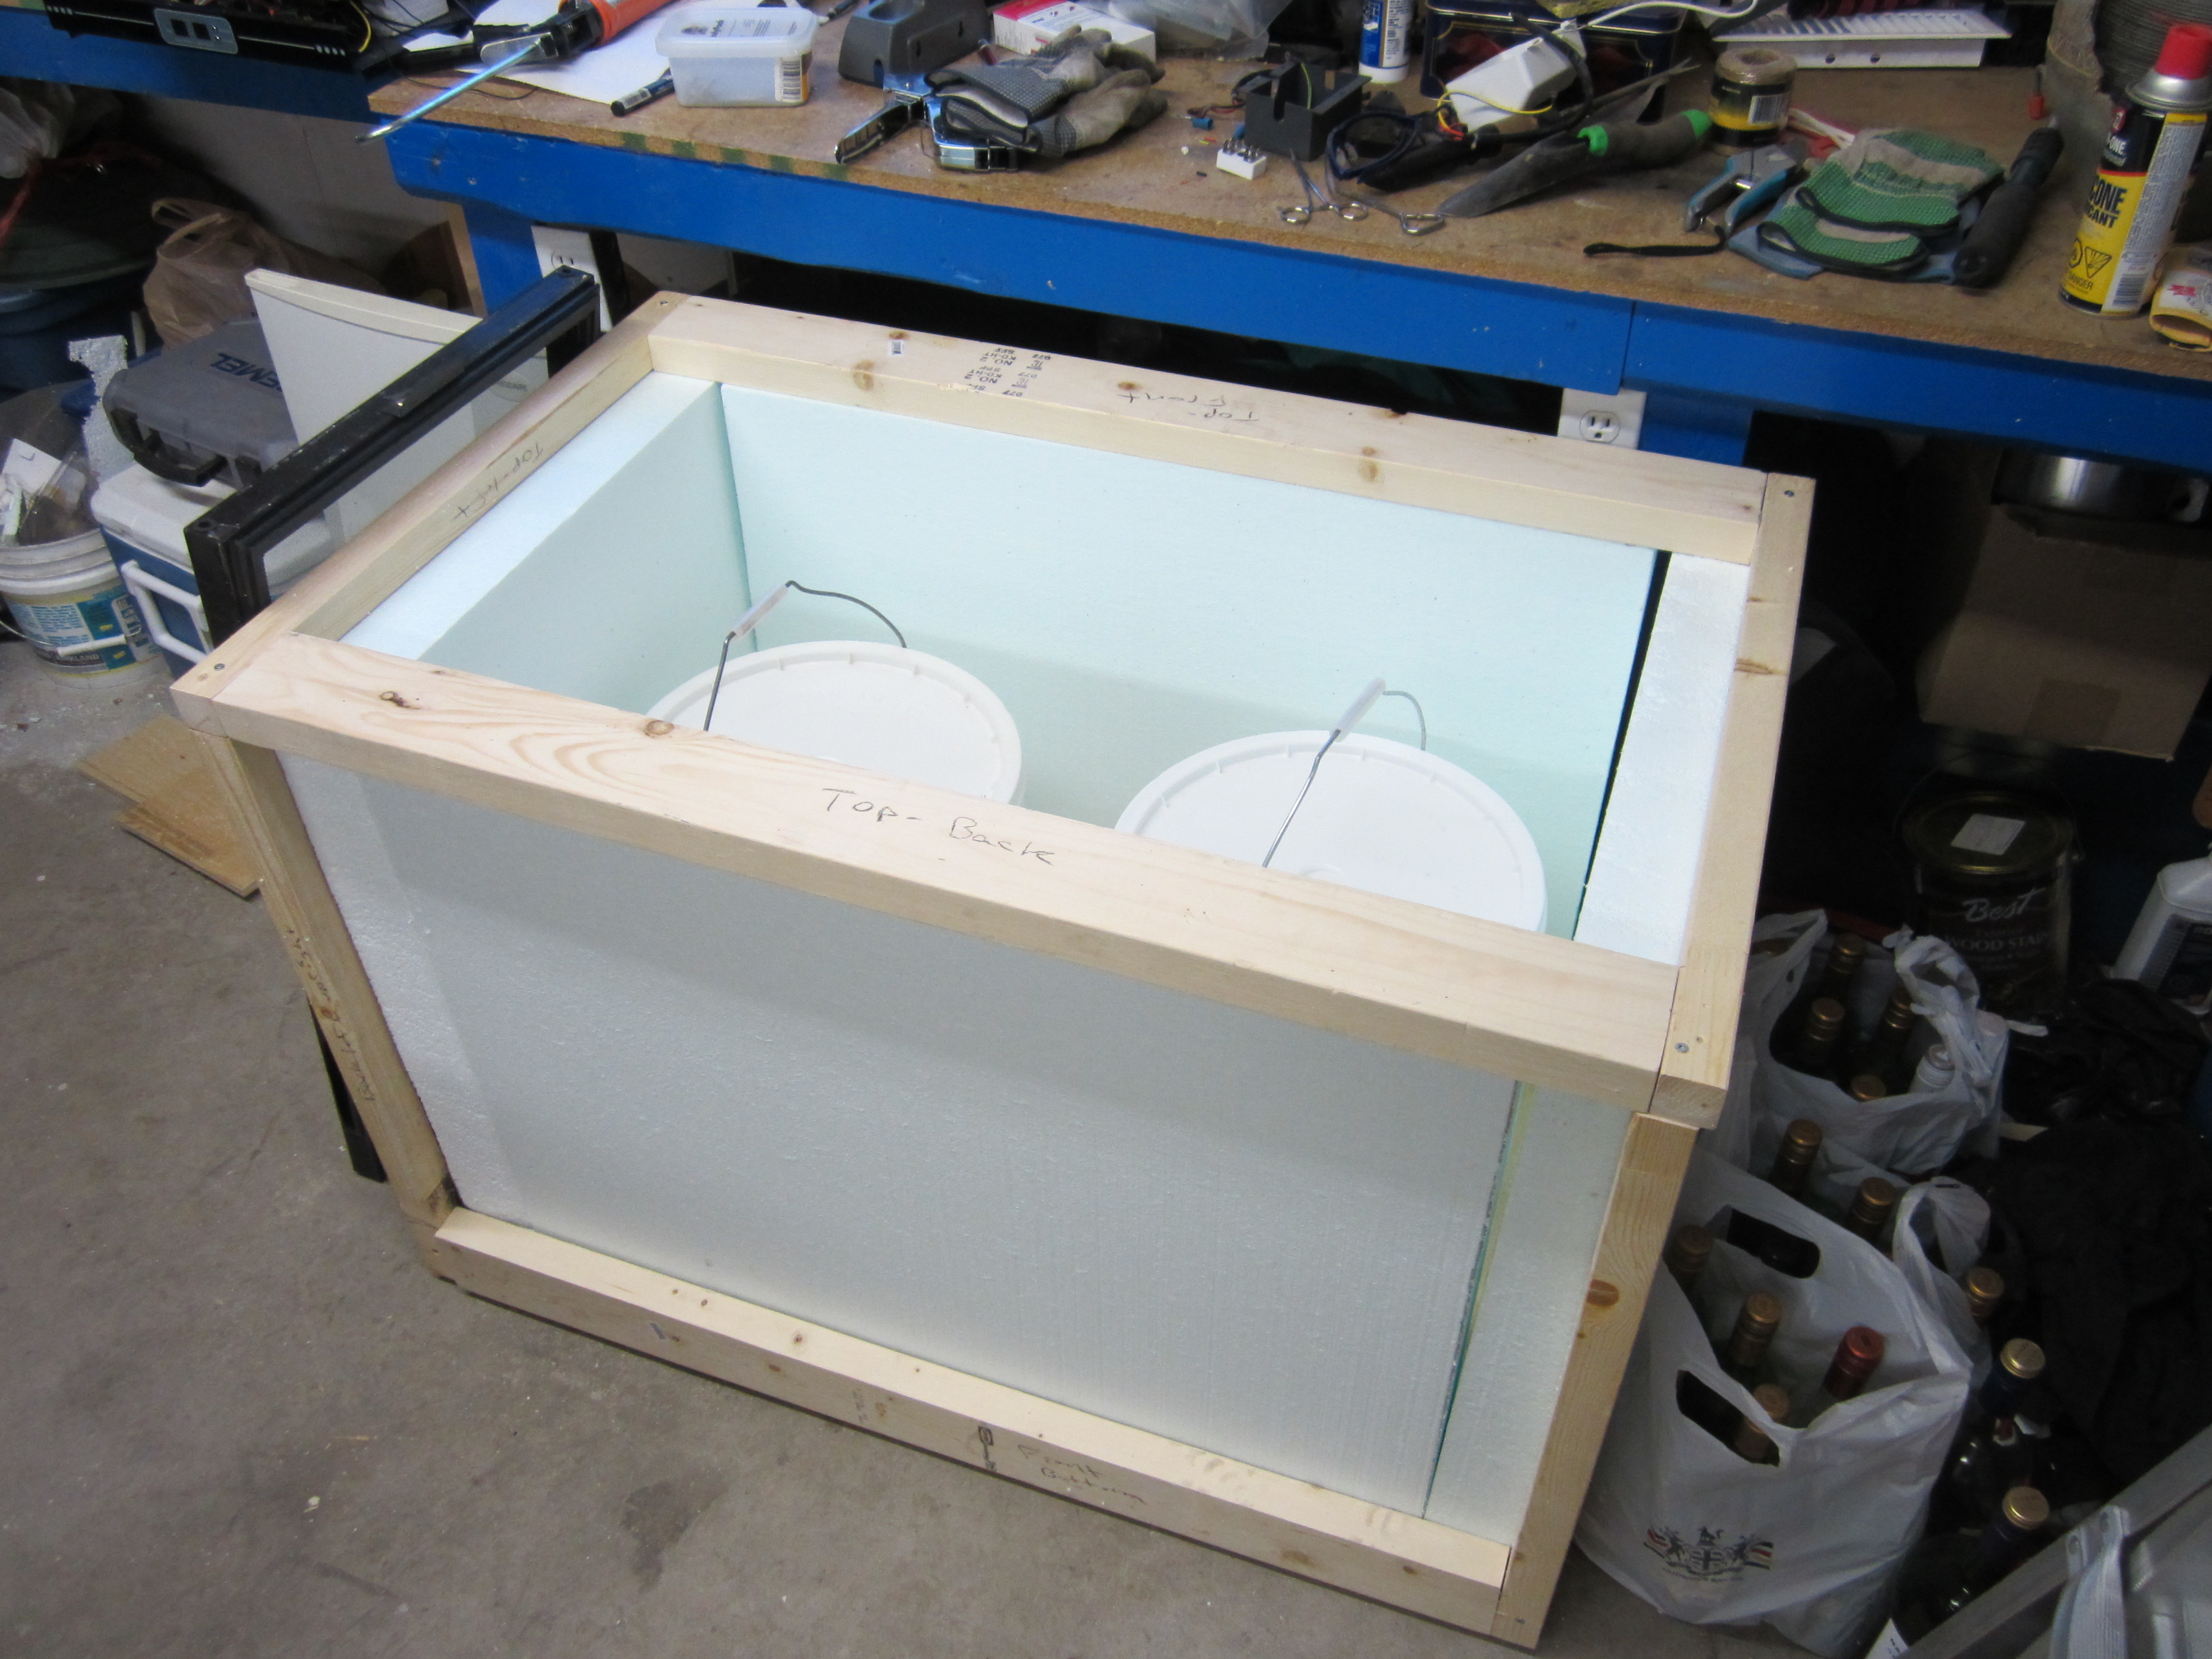
Update October 4th! - Progress! I've purchased roughly $80 in materials to build a 2-chamber, single zone (for now) fermentation chamber. This includes 3 inch 'Plastispan' insulating foam (r-15'ish). It fits two fermenter buckets with a bit of room to spare, it could hold a corny keg, or a carboy or two. Here's the not-sealed and no-top pics:

and
Update October 6th! - IT'S ALIIIIIIIIVE! It's not polished or presentable yet, but it's wholly functional and is undergoing a test to see how well it holds temperatures, and if there'll be moisture troubles off the condenser.
I mounted the compressor to the side of the box, the cold side is insulated and running into the chamber. The hot side I managed to bend around the corner and sandwich it all between the outer plywood shell and an inner thin board I placed in that side to protect the foam, keep the hot stuff off of it, etc.
Here's some shots:
First, the compressor mounted to the side, bit shoddy mounting system but it holds it fine.
Then here's the hotside in it's plywood sammich:

Salvaged wine fridge door hung, opens fine, rests on the door hinges when open so I can leave it open if I want, and a good shot of the compressor side:

And finally the condenser with the top open:

So far so good, I hooked the old thermostat from the original fridge up for now and have used the course adjust screw on it to make it shut off at 63, checking in on it periodically here to see how my bucket of water is doing") I sealed all the interior edges with aluminum HVAC tape, put a liner down - just some spare thin plastic sheeting I had kicking around, made sort of a pan out of it. Only concern now is for air leaks and for moisture, unsure if I'll need to line the whole thing with plastic to keep the foam dry.
I sealed all the interior edges with aluminum HVAC tape, put a liner down - just some spare thin plastic sheeting I had kicking around, made sort of a pan out of it. Only concern now is for air leaks and for moisture, unsure if I'll need to line the whole thing with plastic to keep the foam dry.
It's alive, I'm so stoked!
Found a 3 cu ft mini fridge on our local classifieds a while back, $20, thought I'd pick it up and see if I can convert it to a small kegerator. Well it turned out to be too small for 2 kegs, and too short for just one, so: why not strip out the compressor, coils, freezer tray and move it to my own custom built box!
Had I known how much super static tiny foam balls I'd be dealing with, I might have not bothered but it is pretty fun exploring by dismantling. :rockin:
Nothing without some pictures:
Here's a shot of the fridge with my fermentation bucket for size comparison:
Here's the inside before any work is done:
I managed to just pop the back super-thin steel plate off, it was stuck on by just the expanding foam insulation. Chipping away at this slowly with a random metal flange and a screwdriver, reveals the cold side of the lines:
There's two hot-side lines from the compressor, one left and one right, presumably there's side wall heat dispersing coils on both sides and perhaps a line across the top too. So, took my Dremel with a cutoff wheel very gently to the inner liner, which was super thick near the front of the fridge, and cut a line across one side. Not deep, barely into the foam at all, just enough to cut the plastic.
Peeled all that plastic back, and started cutting foam out in cubes until I found the lines in the wall. You can see the line that comes from the compressor at the bottom, this goes to the front of the fridge, snakes up the side along the front edge and goes into the loops you see there. The silver stuff is metallic tape of some sort, cuts easily, and it's just the same copper tube beneath it.
The line does indeed go into the roof of the fridge, so I think there's coils up there too. That's a shame because it's much harder to work bent over like that. Might move it onto the workbench for that part.
One full side exposed:
Found a GREAT way to get through the thick plastic near the outer edge: my dremel with the spiral cutting bit, and a guide set to only a 1/4 inch or so depth. Ran it down the side and had a super fast, super smooth, no worries cut done in 20 seconds. Compared to 20 minutes of sawing on the other side...
I confirmed that the sort of metal box and tray the compressor sits in is just calked to the fridge sides so I can easily break the calk, remove the screws that hold it to the fridge body, free up the lines on the top and other side, cut the hot side lines from the tape and pull. That should pull the whole whack of stuff out.
I'm really trying to enjoy the journey on this and not worry so much about getting to the finish fast, or even what the finished product will look like. I would really like to build an exactly sized, single tap kegerator, in a custom box. I don't need it, but could be a neat piece to build and own. Super small footprint is what I'd like.
I'll post more as I progress on the dismantle and build up!
Update April 9th! - I've managed to get the compressor, the evaporator tray and it's line, and all of the copper heat dispersion lines out of the fridge! It now looks like this:
The bottom pan was screwed onto the folded under sides of the fridge, and that pan was screwed onto the compressor mount plate. Had to bend some metal to get the bottom pan detached from the compressor mount plate, which also meant that the coils had zero support, they'd just be hanging off the compressor. That's no good, way too bendy for my liking. So I've strung the unit up on my bench to keep things somewhat upright:
I presume it's still in working order, as nothing was kinked and I was very gentle with the removal of the foam from around the lines and the eventual removal of the compressor and assorted bits. Now I need to finalize what I'm doing with it, which may be a dual zone fermentation chamber. I also have a Danby DWC283 with no refrigerant in it (came to be busted, for free). I'd like to either use it entirely, or pull the nice LED thermostats and control modules from it to combine with this compressor into a new box. We'll see!
I'll continue to update here when I'm next working on it, of course.
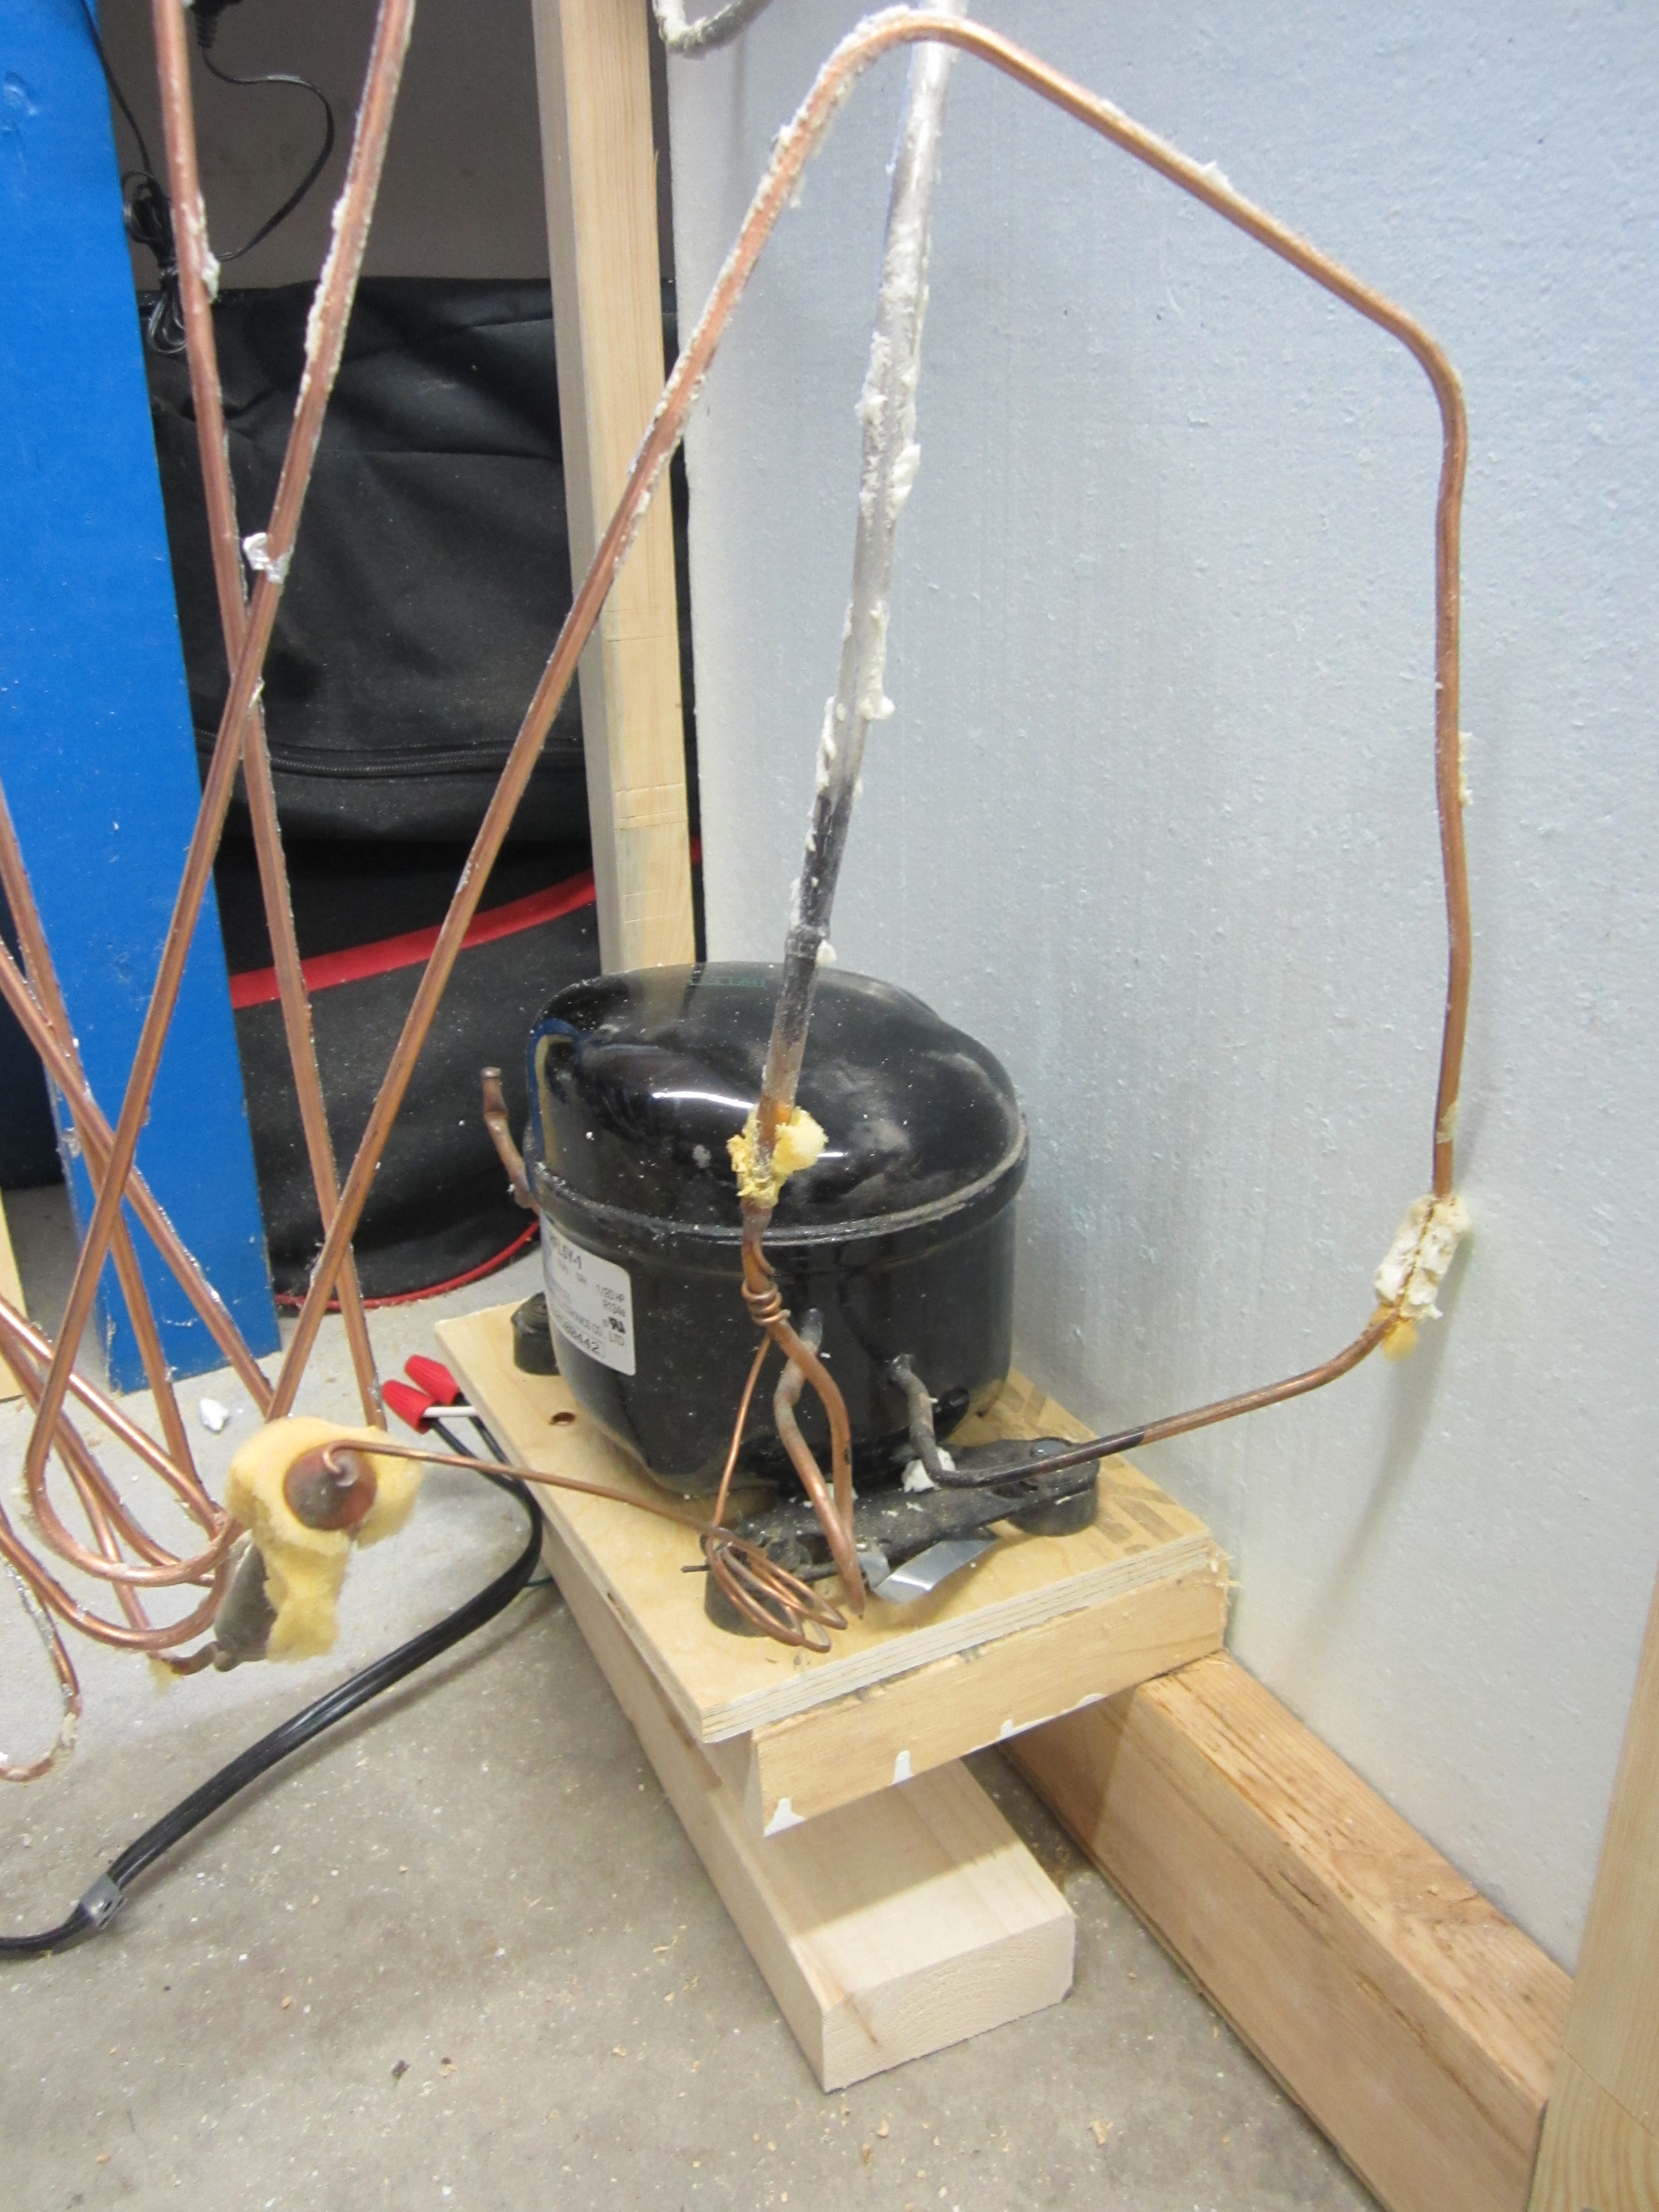
Update July 3rd! - Still keeping this project in mind, however it's transitioned to a "build a fermentation chamber" project. I'd like two zones, and I have a lot of parts stripped from a free wine fridge that had a blown compressor. The challenge now is to form the working compressor and bits I stripped from the fridge into a usable shape that still allows the hot side coils to disperse their heat and to be tucked into as small a space as possible.
Here's where I'm at with that so far:
I was able to bend the hot side coils pretty easily by hand but just for good measure to prevent kinks I made my bends around a full unopened tube of calking. That works pretty well! I did a good bit of bending the really thin copper tube (wire?) after the expansion valve at the end of the hot side coils. That was an easy way to sort of twist around an entire side of the coils.
Still some shifting to do with the coils and need a way to nicely secure them, possibly TO something, something metal perhaps...but otherwise it looks like it'll work!
Update October 4th! - Progress! I've purchased roughly $80 in materials to build a 2-chamber, single zone (for now) fermentation chamber. This includes 3 inch 'Plastispan' insulating foam (r-15'ish). It fits two fermenter buckets with a bit of room to spare, it could hold a corny keg, or a carboy or two. Here's the not-sealed and no-top pics:
and
Update October 6th! - IT'S ALIIIIIIIIVE! It's not polished or presentable yet, but it's wholly functional and is undergoing a test to see how well it holds temperatures, and if there'll be moisture troubles off the condenser.
I mounted the compressor to the side of the box, the cold side is insulated and running into the chamber. The hot side I managed to bend around the corner and sandwich it all between the outer plywood shell and an inner thin board I placed in that side to protect the foam, keep the hot stuff off of it, etc.
Here's some shots:
First, the compressor mounted to the side, bit shoddy mounting system but it holds it fine.
Then here's the hotside in it's plywood sammich:
Salvaged wine fridge door hung, opens fine, rests on the door hinges when open so I can leave it open if I want, and a good shot of the compressor side:
And finally the condenser with the top open:
So far so good, I hooked the old thermostat from the original fridge up for now and have used the course adjust screw on it to make it shut off at 63, checking in on it periodically here to see how my bucket of water is doing
I sealed all the interior edges with aluminum HVAC tape, put a liner down - just some spare thin plastic sheeting I had kicking around, made sort of a pan out of it. Only concern now is for air leaks and for moisture, unsure if I'll need to line the whole thing with plastic to keep the foam dry.It's alive, I'm so stoked!

