Hi all! I'm a broke college student and it's starting to get hot here so I wanted to convert a freezer I found into a fermentation chamber for temperature control. This whole process took about a month between buying everything bit-by-bit and doing small parts here and there between work and school.
I'm so extra excited considering I'll now be able to make even better beer!
Here's the parts list (prices rounded up):
Chest Freezer: $FREE
10' Poplar 1x4: $8
Spray paint: $8 (two white, one green)
Liquid Nails: $3
Silicone seal: $3
Weather stripping: $4
Screws: $2
CHI Company Temp Controller: $35
-----------------------------------------
GRAND COLLEGE-FRIENDLY TOTAL: $63
Time for photos! I'm quite proud of this, especially since it was done in a tiny garage in a tiny townhouse. However I'm not proud of the crappy photo quality I get from my phone
I thoroughly enjoy photo threads, though, so I hope everyone enjoys this!
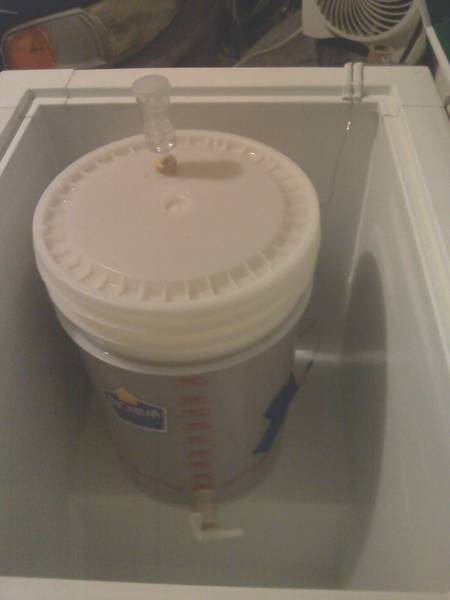
Removed the lid. Inside isn't huge but big enough for a bucket, a corny and/or some bottles

Removed the little clips that hold the inside-cover in place so the collar can sit flush on the lid. Used Liquid Nails to secure the inside-cover.

Cutting the collar using a basic miter box, each end cut at a 45-degree angle. It took some time and a bit of elbow grease but after some sanding it looked goooood. Liquid Nails, once again, used to attach each side.

Painting the collar a nice dark green. Rust-o-Leum FTW. Also, soccer ball for drying-time entertainment... even in the color of my favorite club (LA Galaxy!)

Using brake drums (that I have neglected to install for a while now) as weights while I seal the collar to the lid with my old friend Liquid Nails.

Painting the lid

Painting the body. I'm pretty proud of my painters tape skills!

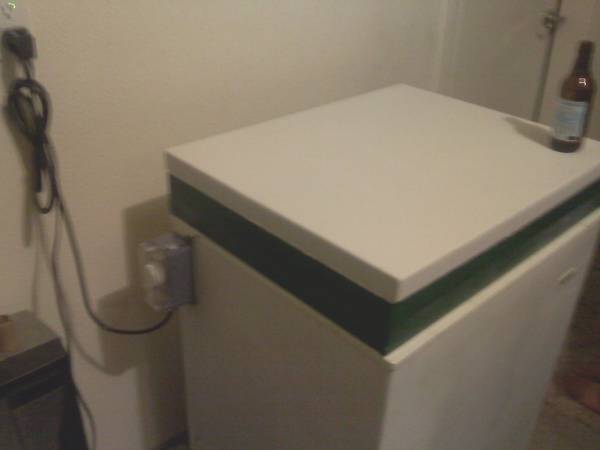
Time for weather stripping... and a brew.

Weather stripping on, applying silicone caulking to where the collar and lid meet

I'm so extra excited considering I'll now be able to make even better beer!
Here's the parts list (prices rounded up):
Chest Freezer: $FREE
10' Poplar 1x4: $8
Spray paint: $8 (two white, one green)
Liquid Nails: $3
Silicone seal: $3
Weather stripping: $4
Screws: $2
CHI Company Temp Controller: $35
-----------------------------------------
GRAND COLLEGE-FRIENDLY TOTAL: $63
Time for photos! I'm quite proud of this, especially since it was done in a tiny garage in a tiny townhouse. However I'm not proud of the crappy photo quality I get from my phone
I thoroughly enjoy photo threads, though, so I hope everyone enjoys this!
Removed the lid. Inside isn't huge but big enough for a bucket, a corny and/or some bottles
Removed the little clips that hold the inside-cover in place so the collar can sit flush on the lid. Used Liquid Nails to secure the inside-cover.
Cutting the collar using a basic miter box, each end cut at a 45-degree angle. It took some time and a bit of elbow grease but after some sanding it looked goooood. Liquid Nails, once again, used to attach each side.
Painting the collar a nice dark green. Rust-o-Leum FTW. Also, soccer ball for drying-time entertainment... even in the color of my favorite club (LA Galaxy!)
Using brake drums (that I have neglected to install for a while now) as weights while I seal the collar to the lid with my old friend Liquid Nails.
Painting the lid
Painting the body. I'm pretty proud of my painters tape skills!
Time for weather stripping... and a brew.
Weather stripping on, applying silicone caulking to where the collar and lid meet