Temperature Controlled Burners, Brutus, Banjo BG14, Piloted Honeywell Valve Questions

Homebrew Talk - Beer, Wine, Mead, & Cider Brewing Discussion Forum

Help Support Homebrew Talk - Beer, Wine, Mead, & Cider Brewing Discussion Forum:

This site may earn a commission from merchant affiliate links, including eBay, Amazon, and others.
Anyone want to walk me through the temperature calibration for these controllers ? I can't find my instructions. :mad:
 
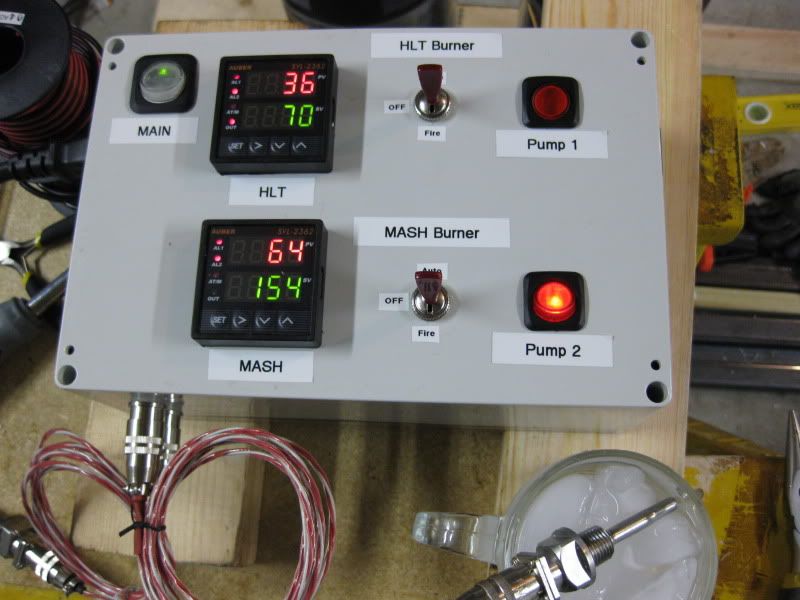
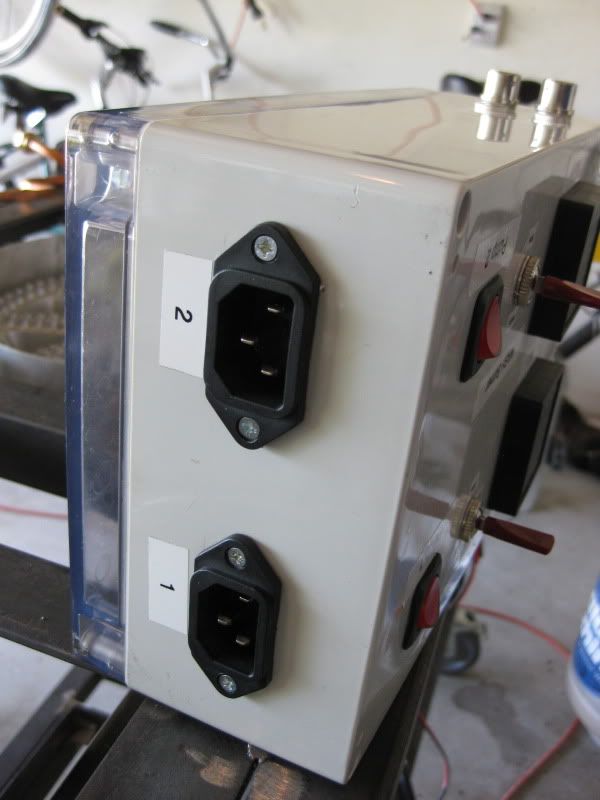
Just a followup.. I got the HOA switches wired in and everything is working great. The center "Off" position kills the solenoid valve power, the top "Auto" position allows the PID to control the solenoid valve, and the bottom "Fire" position sends power directly to the solenoid valve to open (ignoring the PID).

Here's the control panel:

IMG_0027.jpg


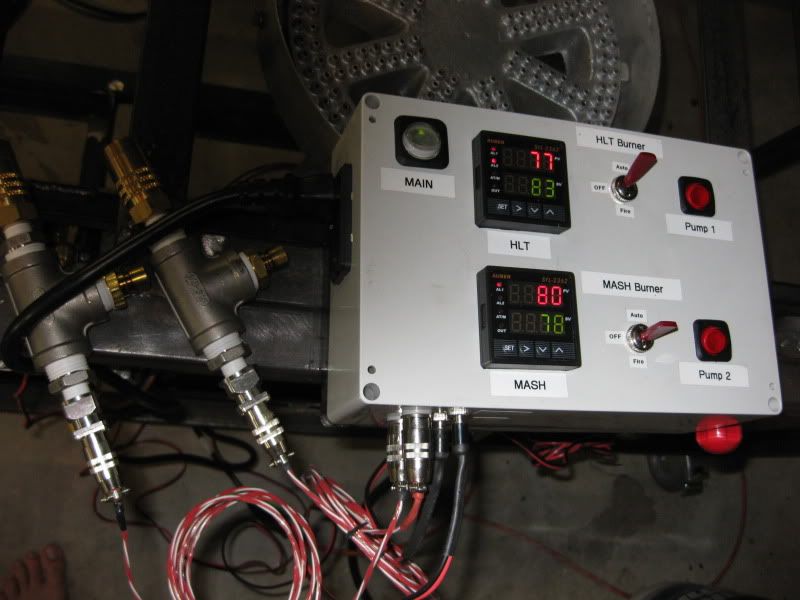
Testing with the RTD tees (Lonnie Mac style):

IMG_0005.jpg


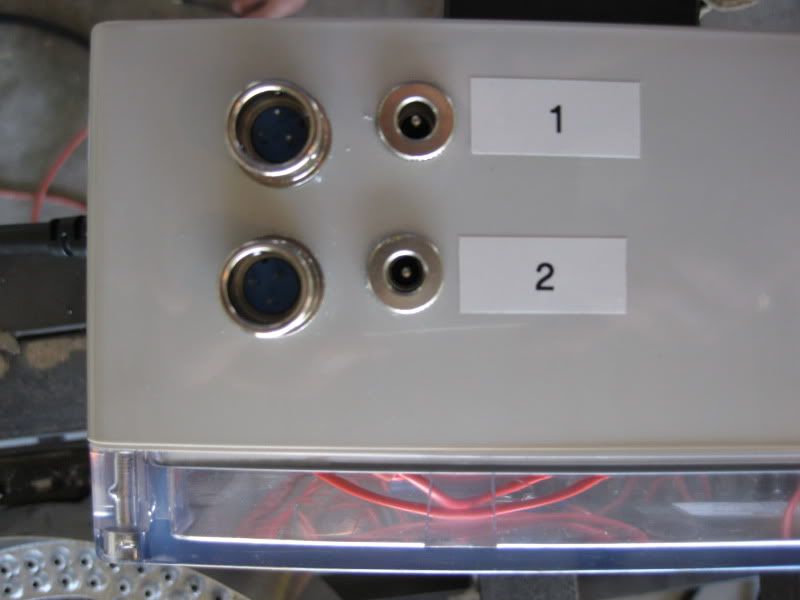
The RTD inputs and valve power outputs (24V):
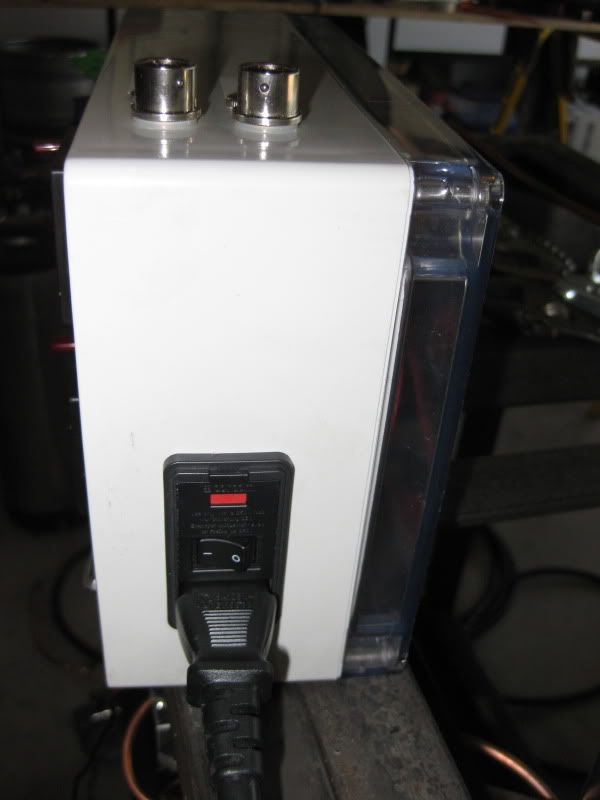
IMG_0012.jpg


Power in:

IMG_0013.jpg


Pump power out without the covers (I'm planning to swap these out with the female version anyway, for safety's sake):

IMG_0014.jpg


The control panel wiring. The box I used has a clear back, so this is looking in the back of it:
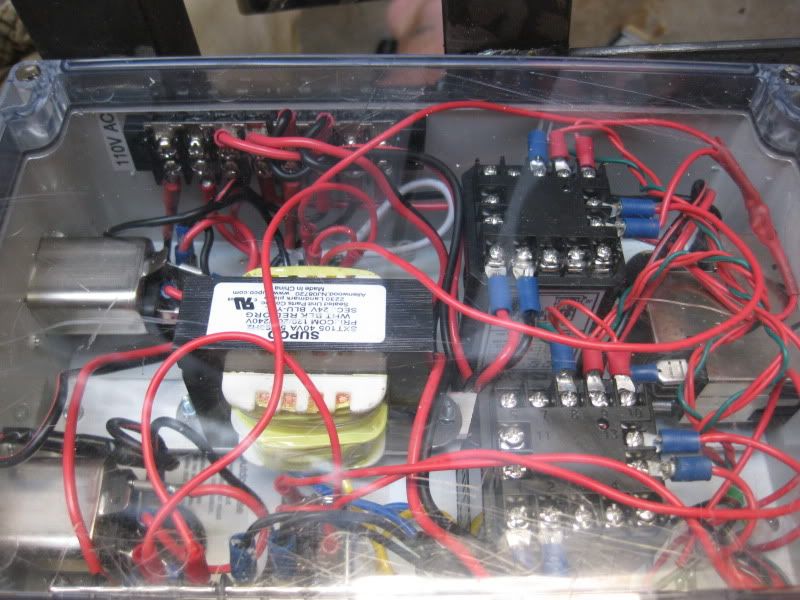
IMG_0011.jpg


From left to right:
- 2 x output power modules 110V (pumps)
- 110V Terminating block (top)
- 110V to 24V Transformer, 40VA (middle)
- 24V Terminating block (bottom)
- 2 x SYL-2362 PIDs from Auber (in on/off mode)
- Input power module 110V (fused).
- The HOA switches are on either side of the transformer.

--
Josh

I like the power modules. Where did you get those from? I have a similar build. Nice job!
 
I like the power modules. Where did you get those from? I have a similar build. Nice job!

Those I got from a local electronics store. You can get them online at Jameco, and other places. Female connectors like this one are nice for your output to the pumps (since those are live):

http://www.jameco.com/webapp/wcs/stores/servlet/Product_10001_10001_1954640_-1?CID=PDF

Mine are filtered, but that is not required. You want to use a Male connector for the Power-IN, since the cord itself is live.

They have a whole page of them here:

http://www.jameco.com/Jameco/catalogs/c103/p134.pdf

And the cords to go with them are here:

http://www.jameco.com/Jameco/catalogs/c103/p133.pdf

Most of the catalog items are clickable to the product pages. Post some pics of your control panel!

--
Josh
 
Hmm... they should be calibrated already. Are you sure your RTD connections are ok?

The instruction manual is here:

http://auberins.com/images/Manual/SYL-2362%20instruction%201.6.pdf

--
Josh

Josh,

I have a rig similar to yours. How do you have yours programmed? Do you do the Autotune and let the valves cycle on and off to keep it at the set value (SV) or do you have the control mode set to on/off control (At = 0) and let the temp drop below a certain number of degrees (SV-Hy setting) and then kick on the valve and shut off when it reaches a certain temp above the set value (SV+Hy)? I have the same Honeywell valves and worry about them getting killed by continuously cycling on and off in the Auto mode (At=3).

Let me know your thoughts and the results you are getting from your rig. I apprediate it!
 
How do you have yours programmed? Do you do the Autotune and let the valves cycle on and off to keep it at the set value (SV) or do you have the control mode set to on/off control (At = 0) and let the temp drop below a certain number of degrees (SV-Hy setting) and then kick on the valve and shut off when it reaches a certain temp above the set value (SV+Hy)? I have the same Honeywell valves and worry about them getting killed by continuously cycling on and off in the Auto mode (At=3).

I'm sorry I don't know what the "At" parameter is that you mentioned.

I do have OutY set to 4 which uses J2 as On/off control relay contactor output. I have the Hysteresis set for 2 degrees.

The auto-tune feature is interesting, now that I look at it, but I can see your concern with wearing out the honeywells in PID mode (Outy=2). I'd be curious to see what PID parameter values (P, i, d, SouF, ot) the auto-tune comes up with for this application (mashing, for example). If it seemed like a tolerable pulse frequency for the honeywells, I might switch to that method actually.

--
Josh

Actually that I look back. You have the SYL-2362 controller and I have the 2342. The parameters are a little different. When my rig is completely up and running, I might try the "Auto-tune" and see how it works. I'm just not sure a furnace valve is up to being opened and closed every 60 seconds or whatever it comes up with. On the flip side, it would help keep a consistent temp and probably be more efficient with using the propane.

I've used Love controllers but have no experience with the Auber's.

Karl
 
There is no calibration per se. You can make adjustmenys to the PID parameters. Is that what you mean?

You can call it "adjusting the paramiters". If it was in say 150* water it showed 156* so I called it re calibration.
 
I'm in the planning stages of my brutus build and I was just wondering (I think it is) if these are a complete replacement for the ASCO valves and not a redundant backup? I ask this because I was reading a post the other day and he used these in line with the ASCO valves.

Thanks
 
The honeywell valves do not need an ASCO solenoid valve installed after the furnace valve as it opens and closes when powered. If you use a self powered BASO H19 pilot safety valve then the ASCO valve is needed for gas flow control to burner. It is easier to use the honeywell VR8200 valve than the self powered valve route, and much cheaper, typically $85 for valve, pilot, and thermocouple.
 
Thanks Kladue. So one other question, Should I get a PID with an SSR or a relay? I assume a relay since I do not need rapid/constant switching. IE. electric rims tube.

Do you have a diagram for this setup?
 
Thanks Kladue. So one other question, Should I get a PID with an SSR or a relay? I assume a relay since I do not need rapid/constant switching. IE. electric rims tube.

Do you have a diagram for this setup?

If you are simply switching the 24 VAC to the Honeywell Gas Valve the PID with the relay will be fine.
 
Sawdust,
I was looking at this post where you drew a schematic for another member:

https://www.homebrewtalk.com/f51/wiring-auber-pids-brutus-build-123326

It looks like just the solenoid valve is run by the PID. Could I run the output of terminal 5 to a distribution block and from there run one line to the March pump and the other to a 24v transformer? This way (I assume) you can kick on the pump and the burner at the same time. Or is it recommended to run the pump continuously?

Yes you can.
 
Awesome, so do you continually run your pump?

Sawdust, why did you go with the RIMS tube and not a direct fired system? Just wondering what the advantages of one method vs the other is. I originally was going with a RIMS tube but then decided to go down this path with the automated burners. I'm sure I'll get this thing running then want to switch again.

I recirculate until I sparge. I automated my HLT and BK.
 
So, do you need a Honeywell ignition unit, i.e., P/N S8610U to make the VR8200 work or is a PID all that's necessary?
 
So, do you need a Honeywell ignition unit, i.e., P/N S8610U to make the VR8200 work or is a PID all that's necessary?

PID or any other control device (Love, PLC, switch) is all you need, VR8200 is a standing pilot unit.

100_5058.jpg


The S8610U is used with an intermittent pilot unit, VR8204
The VR8204 has a pilot valve and a main valve control voltage input, three wire system.

Gas_Valve.jpg


Cheers,
ClaudiusB
 
Ok I have a problem. The gas valve will not open. the pilot light stays lit in the on position and i have 24v to the gas valve but it wont open?

so we are clear it is the same Honeywell 8200 thermostat

The "TR" terminal goes to terminal 14 (24v+) and terminal 13 goes to the positive side of the transformer

The "TH" terminal goes to the negative side of the transformer

I only have 2 wires to the 2 terminals on the valve right ?
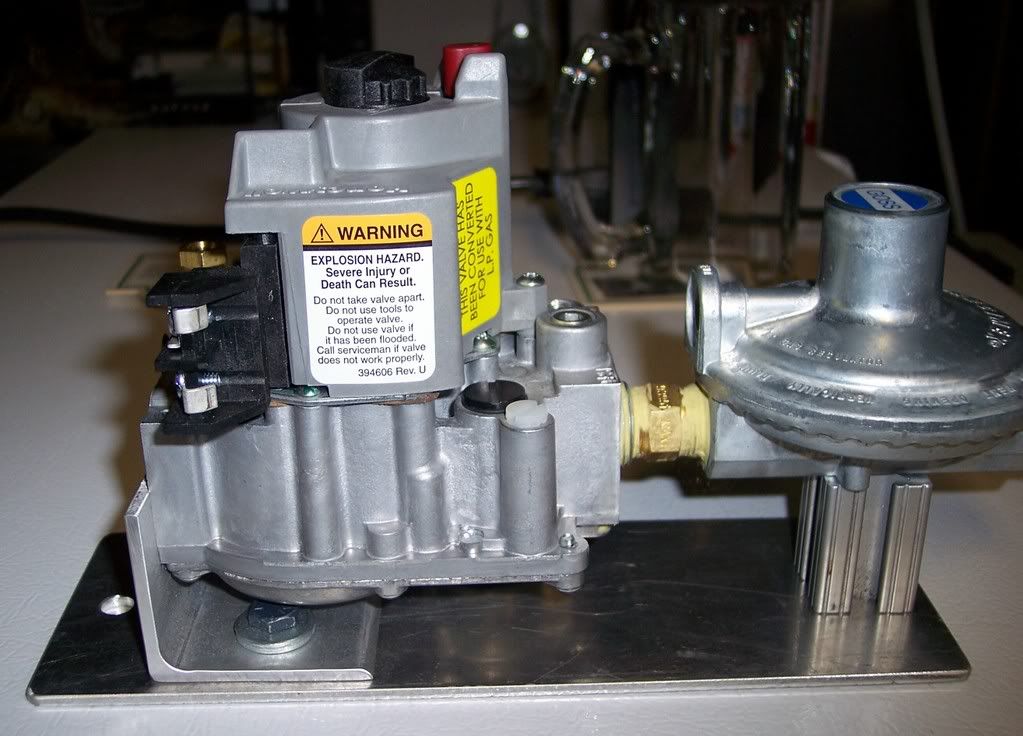
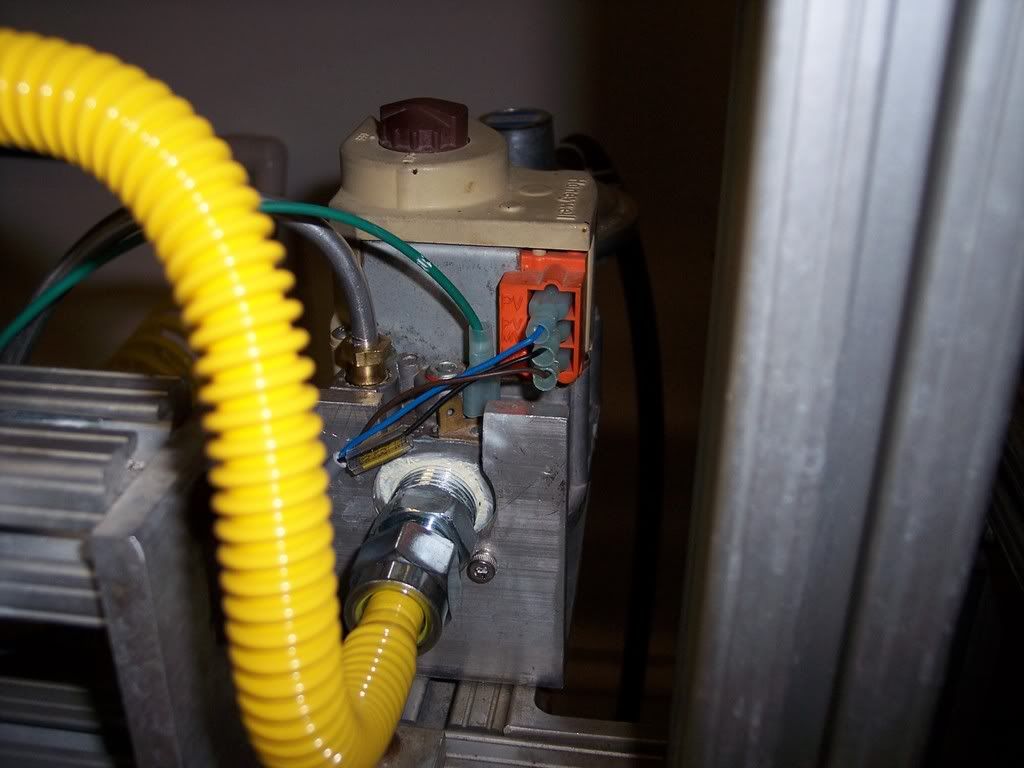
Just wanted to confirm this is the correct way to wire the valve??
 
Guys, this thread has been very helpful and I am at the point of where HI SALENITY was when he couln't get the gas valves to open. Here's what I understand:

The gas valve will click when I switch the HOA to H (bypassing the PID), but no gas comes out. That's because I have an adjustable 0-30 psi regulator and I need to be at or below 0.5 psi coming. As kladue pointed out, the valves shut above 0.5 psi to prevent accidents.

Can I dial my regulator back (using a gauge that I would have to add) to get it under 0.5 psi? My reason for doing that is that I am using Lonnie Mac's gas beam approach (and not black pipe like Jlandin) and once I am done with the mash in and sparge, I just need to boil and I can turn up the boil pressure and forget about the other burners.


The orifice you are talking about drilling out to 3/32....the is the brass fitting with the small hole that screws into the end of the BG14, right? (I know this sounds stupid but I want to be sure and not have to wait for parts I screwed up.)


You guys spoke of a LP conversion kit for the pilot. I didn't get a conversion kit that I could find...it it necessary to have one or will I have such a small flame that the thermocouple won't work?

Thanks, Bernie
 
Backing a high pressure regulator down to .5 PSI usually is not a good thing, the response is so bad that when the pressure is right and the valve opens it will not maintain pressure and the burner pops and goes out. Sell the high pressure regulator and get a Marshall 290 from a RV supply house and save the time trying to make the high pressure work. If you do not want to drill the burner orifice out, the folks at Williams brewing supply will be glad to sell a conversion valve for that purpose. As to the pilot propane orifice, usually a small metal piece in the bag with the pilot burner, a couple wrenches and 5 minutes to change so the flame will burn blue, not white or yellow and soot up the thermocouple. If you do find it here is a link to a place to buy one http://www.pexsupply.com/Honeywell-390686-1-LP-Orifice-for-Pilot-Burners-Q314-Q345-Q3450-Q3451-Q3452. Here is the instruction book for the pilot which shows changing the orifice http://customer.honeywell.com/techlit/pdf/PackedLit/69-0519.pdf, good luck with the build.
 
Bernie,

Here is a great thread that you should take a look at if you havent already:) Go to post #80 for a detailed parts list, this might help your in your shopping adventures:)

https://www.homebrewtalk.com/f51/my-new-brew-system-brutus-10-some-nice-modifications-172927/

Edit: I see you have been on Josh's thread:)

Guys, this thread has been very helpful and I am at the point of where HI SALENITY was when he couln't get the gas valves to open. Here's what I understand:


The gas valve will click when I switch the HOA to H (bypassing the PID), but no gas comes out. That's because I have an adjustable 0-30 psi regulator and I need to be at or below 0.5 psi coming. As kladue pointed out, the valves shut above 0.5 psi to prevent accidents.

As for your regulator, the valves you are using do require 11" W.C. of pressure to properly operate. So your 0-30 adj reg will work fine for the BK burner, however if you want the MT & HLT to be fired off of Honeywell valves you will need another regulator(11" W.C.) plumed downstream to lower the pressure for them(Honeywell Pilot Valves).


Can I dial my regulator back (using a gauge that I would have to add) to get it under 0.5 psi? My reason for doing that is that I am using Lonnie Mac's gas beam approach (and not black pipe like Jlandin) and once I am done with the mash in and sparge, I just need to boil and I can turn up the boil pressure and forget about the other burners.

Here is a link to Brewers hardware they sell a regulator and LP orifice that you need to run your burners.


The orifice you are talking about drilling out to 3/32....the is the brass fitting with the small hole that screws into the end of the BG14, right? (I know this sounds stupid but I want to be sure and not have to wait for parts I screwed up.)

See above link


You guys spoke of a LP conversion kit for the pilot. I didn't get a conversion kit that I could find...it it necessary to have one or will I have such a small flame that the thermocouple won't work?

Yes it is necessary to have the proper Honeywell Valve conversion kit to switch from LNG to LP gas. Here is a link to www.pexsupply.com Their valves come with the conversion kit, at least when I ordered mine they did:)
That should cover your questions, let us know if you still are having troubles.

Cheers
 
Kevin - Thanks for the quick response!

I'll get a Marshall.

I found my LP pilot propane orifices and will add them tonight. Thanks for the install link....just what I needed.

Now for the orifice, it is the brass fitting that goes into the end of the BG14, right?

(I have 3/32 drill bits and a drill press so I am ready to go there too!)

Bernie
 
Kevin - I have converted my valve over to LP.

With all these answers, I am probably just a Marshall reg and some gas valve flow adjustments away from getting this to run. Then, on to the PID controlled heating and I should be able to brew soon!

Thanks, Bernie
 
Thanks to Josh (jlandin), Kevin and PuckeredPenguin...I was able to fire up and drive my Brutus from the control panel. I need to get the PID controller side up (and haven't tried it yet but plan to so do today or tomorrow.)


I was concerned about the BG14 burners working with low pressure but they work like a charm.:mug:

Thanks again,

Bernie
 
Ok, I know this is an old tread but can anyone tell me if I would need a single Marshall 299 regulator or will I need one for each burner? I want the ability to run the HLT and Mash at the same time. I'm going to keep the boil kettle at high pressure.

If I needed two due to only having a max output of 90,000 BTU could I go with the M.B. Sturgis 108220 https://mbsturgis.com/rv-propane-hoses-sturgi-stays-quick-disconnects-regulators/rv-regulators/two-stage-lp-regulator.html which has a max output of 400,000 BTU?

Thanks
 
Just for anyone else looking for the info I did purchase the MB Sturgis 108220 regulator and it works great for supplying two low pressure BG14's. Save a little money by purchasing one regulator instead of two (one for each burner).
 
I big shoutout to kladue! I was scratching my head for a while to figure out how to wire two zip ports for my wok burners. Found a google archive from 2010 by kladue for panel wiring and figured it out.
 

Latest posts

Back
Top