You are using an out of date browser. It may not display this or other websites correctly.
You should upgrade or use an alternative browser.
You should upgrade or use an alternative browser.
5-1/2 foot DIY Hood for approx. $75
- Thread starter deprecated
- Start date

Help Support Homebrew Talk - Beer, Wine, Mead, & Cider Brewing Discussion Forum:
This site may earn a commission from merchant affiliate
links, including eBay, Amazon, and others.
Liquid leaks or exhaust leaks? Either way some silicon seal would probably fix it.
Yeah, mostly keep getting liquid leaks from the seam on the vent fan. Just need to pull it all apart and get a good bead in there and tape the outside.
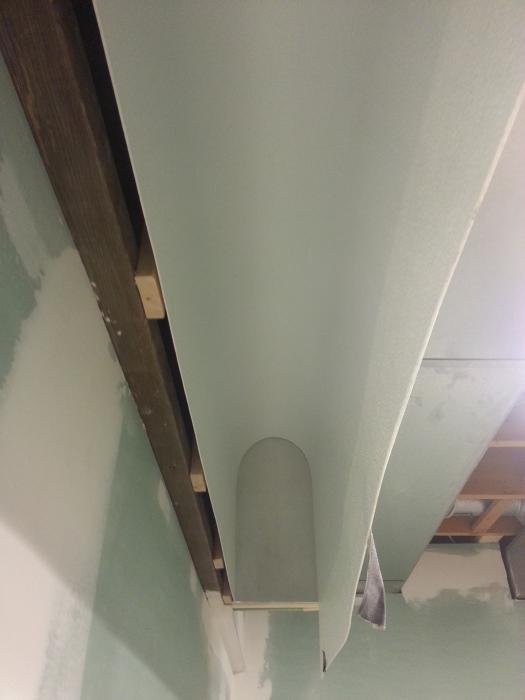
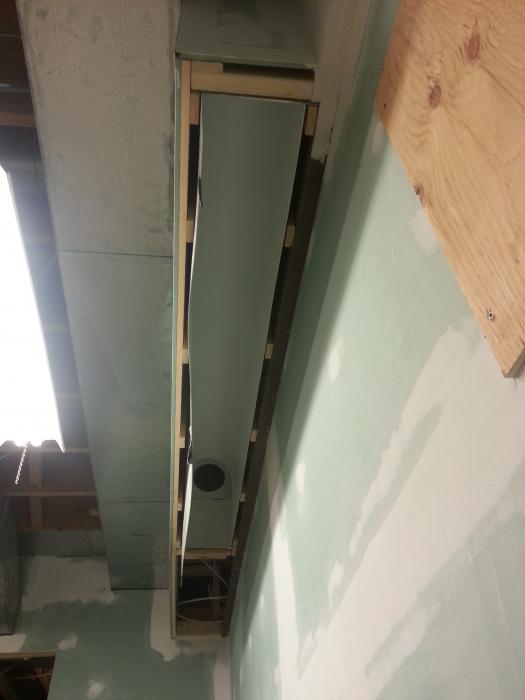
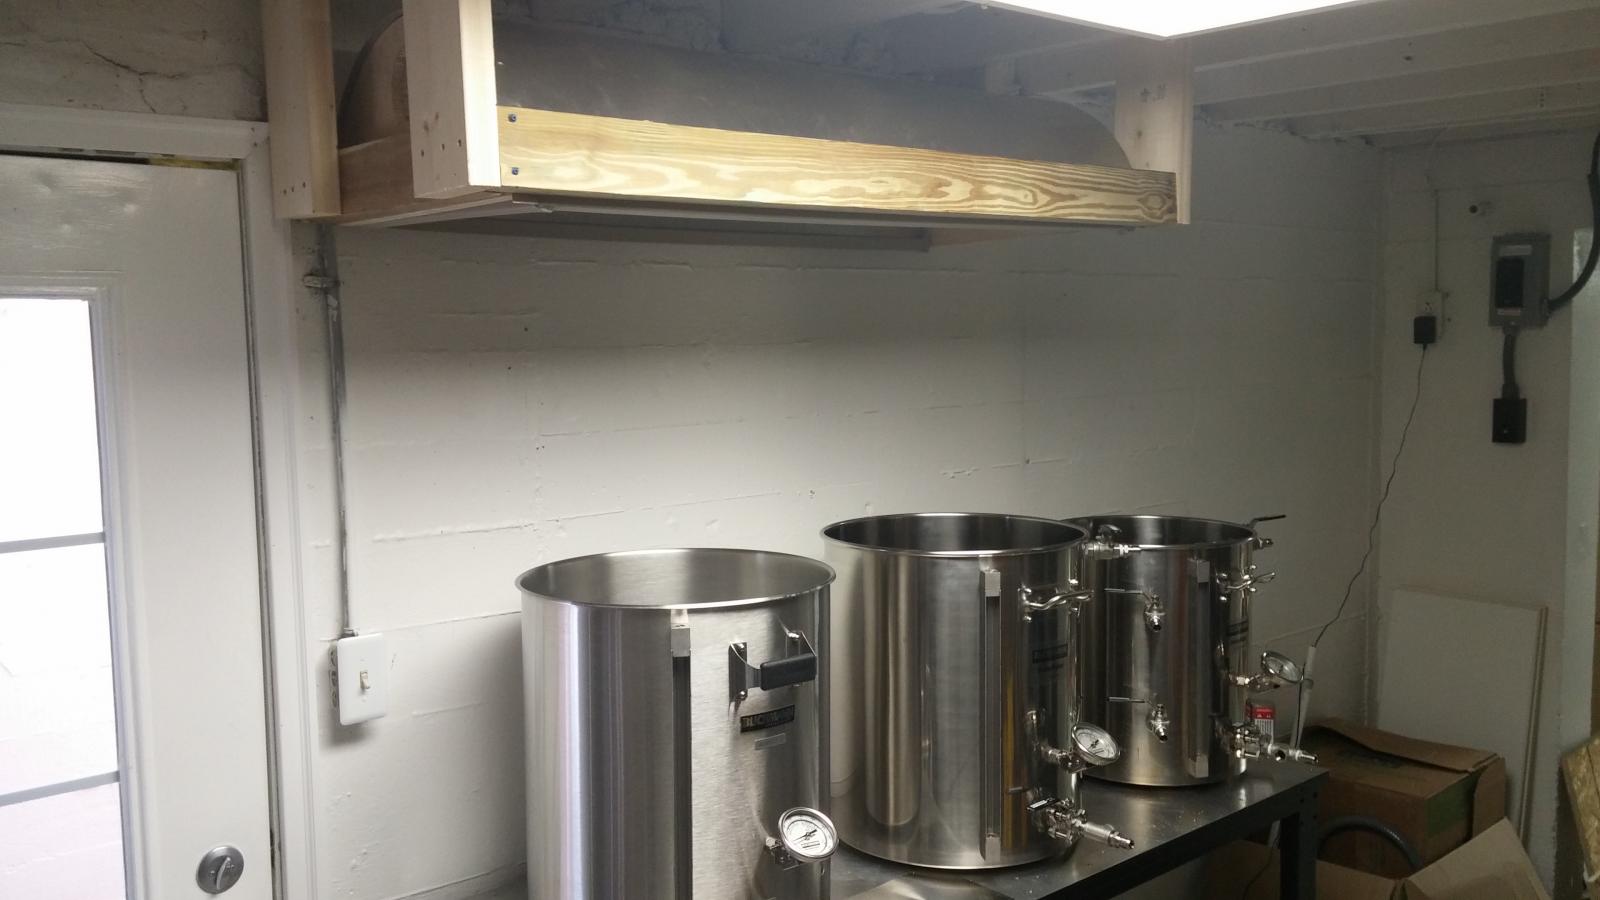
I pulled it off. The hood I framed is 8 inches from front to back, about 7 feet long, and 20 inches high. I cut the FRP on the table saw to 7 feet long, jammed it up into the framing and it makes a perfect round arc at the top leaving about 6 inches to trim off the front length. Pulled it out a little and trimmed with a jig saw. Nice solution - better than the all aluminum flashing I had planned originally. For the record, it took that 4-ish inch radius it took to get it in there without any cracking or any apparent abuse. SOLID! The end pieces are aluminum flashing glued with contact cement to plywood. Its a 6-inch duct and will be attaching a 400CFM fan. Will trim it with PVC moulding and caulk with silicone. One step closer to completing the electric brewery!


Last edited:
drksky
Well-Known Member
- Joined
- Feb 8, 2013
- Messages
- 362
- Reaction score
- 52
Once that is done, drop your 2x4 rectangular frame onto the hood. At this point you can work in your J-Channel between the FRP and 2x4's to catch condensation.
I like the design. What do you mean by "drop the rectangular frame onto the hood"? How is the rectangle joined to the rest of the assembly? Just screwed to the end pieces?
I like the design. What do you mean by "drop the rectangular frame onto the hood"?
Poor explanation on my part. I attached the larger piece of FRP to the end caps with the lathe screws and then dropped the already assembled 2x4 frame over the hood. It would be just as easy (easier?) to assemble the 2x4 frame around the hood.
How is the rectangle joined to the rest of the assembly? Just screwed to the end pieces?
Exactly. It's not a very good picture but if you look at the last pic of my first post, I think you can see where it's screwed in.
drksky
Well-Known Member
- Joined
- Feb 8, 2013
- Messages
- 362
- Reaction score
- 52
Exactly. It's not a very good picture but if you look at the last pic of my first post, I think you can see where it's screwed in.
Ah yes, I see that now. So the FRP isn't attached to the frame on the front and back? No issues with stability?
Ah yes, I see that now. So the FRP isn't attached to the frame on the front and back? No issues with stability?
There are a few lathe screws from the inside of the hood into the frame, but those are just to hold the J-channel in place. There aren't any stability issues as the FRP once attached to the endcaps is very rigid and relatively light. Of course you want to suspend or hang it by the 2x4 frame.
kpr121
Well-Known Member
Great build! I am in planning stages of vent hoods and this might be the one I go with! Does anyone know how well FRP takes painting? Like the picture with the wood frame stained the same as brewstand, but would prefer black instead of white surround. Im guessing some spray paint made for plastic would work.
Great build! I am in planning stages of vent hoods and this might be the one I go with! Does anyone know how well FRP takes painting? Like the picture with the wood frame stained the same as brewstand, but would prefer black instead of white surround. Im guessing some spray paint made for plastic would work.
I'm sure it would be fine. Now that you mention it...I think I have some plastic paint around here somewhere...

SleepyCreekBrews
Well-Known Member
Any kind of spray paint should be fine .
FPR is typically made with non-directional fiberglass matte impregnated with a mixture of clay and 2-part polyester resin. ...Not unlike what boats are made of.
Sand it, clean it, shoot it.
FPR is typically made with non-directional fiberglass matte impregnated with a mixture of clay and 2-part polyester resin. ...Not unlike what boats are made of.
Sand it, clean it, shoot it.
part16john
Well-Known Member
My hood inspired by this thread. Used an aluminum piece that I had left over.


drksky
Well-Known Member
- Joined
- Feb 8, 2013
- Messages
- 362
- Reaction score
- 52
What are you guys using to cut the FRP board? Jigsaw seems a little too rough of a cut?
For the straight cuts, I used a utility knife to score it good, then snapped it, just like cutting drywall. Edges aren't perfectly smooth, but clean up well with some light sanding. For the hole, I used a jigsaw with a finish wood blade.
For the straight cuts, I used a utility knife to score it good, then snapped it, just like cutting drywall. Edges aren't perfectly smooth, but clean up well with some light sanding. For the hole, I used a jigsaw with a finish wood blade.
Used a blade and scored like you said to knock the first big chunk off and then because I had some extra tried my jigsaw. Actually went through very clean so used that the rest of the way.
For the straight cuts, I used a utility knife to score it good, then snapped it, just like cutting drywall. Edges aren't perfectly smooth, but clean up well with some light sanding. For the hole, I used a jigsaw with a finish wood blade.
I used a table saw. It made a clean cut that didn't need any sanding. Got a little itchy - I did get the feeling I liberated a lot of glass particles into the air, though ... wear a mask.
Sent from my iPad using Home Brew
Been trying to up load pics but not able to. I have built one of these hoods over the weekend. I went with an 8 in fan with a higher than needed cfm. I did this because it is in the garage and figured I may need the extra cfm to kepp thing dry when the humidity rises. Thanks for the thread!
Still need to mount the motor and hang it
View attachment 1458697535172.jpg
View attachment 1458697560616.jpg
View attachment 1458697597506.jpg
View attachment 1458697639666.jpg
View attachment 1458697665846.jpg
View attachment 1458697535172.jpg
View attachment 1458697560616.jpg
View attachment 1458697597506.jpg
View attachment 1458697639666.jpg
View attachment 1458697665846.jpg
Was able to get it hung by myself this evening. Just need to add duct.
View attachment 1458787820240.jpg
View attachment 1458787820240.jpg
I have a variable control for mine. I'm not sure if I need it yet but I plan to use this for more than brewing and won't need full power all the time.
Painted the whole garage and made the hood match.
View attachment 1466990096827.jpg
View attachment 1466990123377.jpg
View attachment 1466990151908.jpg
View attachment 1466990226665.jpg
View attachment 1466990096827.jpg
View attachment 1466990123377.jpg
View attachment 1466990151908.jpg
View attachment 1466990226665.jpg
waldorfian
New Member
- Joined
- Jul 28, 2015
- Messages
- 4
- Reaction score
- 0
how did you attach the vinyl hose to the J-channel? Epoxy a plastic hose barb?
What a great idea. Glad I saw this thread. Just moved my operation inside in the basement. Wife is already complaining about the smell.... What's wrong with the smell? I would like to vent out. I have a couple of questions. I am fairly close to my water gas water heater. It has a vent that goes out the top and vents out, I would assume on the roof somewhere. Do you think it would be ok to tap into that pipe for this hood? Also, I do BIAB and have a pulley set up over my kettle, are any of you dealing with pulleys?
I am fairly close to my water gas water heater. It has a vent that goes out the top and vents out, I would assume on the roof somewhere. Do you think it would be ok to tap into that pipe for this hood?
NO!
Many reasons, but short answer no, do not modify an existing chimney to vent your brewery. You want to be sure that water heater exhaust stack properly vents the combustion gases safely out of the house, do not tamper with it.
It could be very dangerous.
NO!
Many reasons, but short answer no, do not modify an existing chimney to vent your brewery. You want to be sure that water heater exhaust stack properly vents the combustion gases safely out of the house, do not tamper with it.
It could be very dangerous.
That's what I thought and why I asked....
waldorfian
New Member
- Joined
- Jul 28, 2015
- Messages
- 4
- Reaction score
- 0
how is the fan housing actually attached to the vent hood. Can't make it out in the pictures.
how is the fan housing actually attached to the vent hood. Can't make it out in the pictures.
On mine it's attached to the extra 2x4s. Then I just caulked around the outer edge to get a good seal
waldorfian
New Member
- Joined
- Jul 28, 2015
- Messages
- 4
- Reaction score
- 0
thanks for the pics Dolomieu. So you have the fan housing thru the hole in the plywood end of the hood and not attached other than with caulking? The hole I cut for the fan is slightly too large so it isn't a friction fit even.
Your pics are kinda dark (sorry for being picky) so I can't really see how you attached the fan housing to the 2x4 wood structure. The metal brackets supplied with my Vortex fan are too long for the hood that I built. I guess I need to modify them to work.
Your pics are kinda dark (sorry for being picky) so I can't really see how you attached the fan housing to the 2x4 wood structure. The metal brackets supplied with my Vortex fan are too long for the hood that I built. I guess I need to modify them to work.
thanks for the pics Dolomieu. So you have the fan housing thru the hole in the plywood end of the hood and not attached other than with caulking? The hole I cut for the fan is slightly too large so it isn't a friction fit even.
Your pics are kinda dark (sorry for being picky) so I can't really see how you attached the fan housing to the 2x4 wood structure. The metal brackets supplied with my Vortex fan are too long for the hood that I built. I guess I need to modify them to work.
Yeah sorry about that. Don't apologize, no need. The hole I cut was also slightly larger the the fan. That gave me plenty of play when connecting the ducting on the other side. Once it was all set up, the last thing I did was the caulk. The fan housing is just screwed to the 2x4s. If you look at the other pics you will see I had to lay the 2x4 on its side to get the proper alignment. This may not be the best way, it was just fairly easy to set it up this way at the time.
I'll look through my pics and see if there is a better one. I'm currently in the airport so I can't just go take another one.
Found these. Maybe they will help a bit more than the others. There are a couple more bit it was being a pita to upload for some reason.
View attachment 1474218241991.jpg
View attachment 1474218268274.jpg
View attachment 1474218241991.jpg
View attachment 1474218268274.jpg
waldorfian
New Member
- Joined
- Jul 28, 2015
- Messages
- 4
- Reaction score
- 0
Okay I see. My fan didn't come with a mounting point on the bottom. It has two metal straps with a 90 degree bend near the end with a couples holes drilled through. I had to offset my 2x4 lower yo allow the straps to sit right. Got it all attached now. Still loose in the hole of the hood though. Gonna either aluminum tape it or caulk it as you have done. thanks for your posts and support.
CerberusMut
New Member
- Joined
- Mar 6, 2021
- Messages
- 1
- Reaction score
- 0
Found these. Maybe they will help a bit more than the others. There are a couple more bit it was being a pita to upload for some reason.
View attachment 370451
View attachment 370452
Looking to build my Hood Vent soon.. Just a couple of questions because I like your approach.
1. After all this time do you still use/ like this approach?
2. I have the same exhaust fan, any moisture issues building up in the fan case?
3. Is that FRP paneling on the inside just curved, sealed on the ends?
4. Did you put in a J channel for the drip and if so do you have a tube running down into a sink/drain?
Thanks in advance..
Any chance in a million you can reattach the pictures? Specifically the measurements? I can no longer open them.I'll post some pictures later tonight of my finished hood.
Costs are approximate:
$32 - FRP
$ 5 - Lath screws
$12 - 2x4's
$14 - Plywood half-sheet
$12 - Vinyl J-Channel
---
$76
Cut two plywood end caps that are half-circles with a 15.25" radius. This dimension allows the 4' end of the FRP sheet to be fully utilized.
Cut your FRP pieces to match your end caps. I screwed rectangular pieces of FRP to the plywood end caps then routered around the edges to get the FRP lined up with the plywood as closely as possible. Probably best to cut your duct hole in one end cap before attaching FRP, then jigsaw or router out FRP in hole.
Your larger piece of FRP should be 66.5" (96" - 30.5") long by 48" wide. With someone assisting start at bottom of your half-circle plywood end cap and screw the 48" side of the FRP into it every 6 inches or so.
Once that is done, drop your 2x4 rectangular frame onto the hood. At this point you can work in your J-Channel between the FRP and 2x4's to catch condensation.
I've not determined yet how I'm going to seal the J-Channel mitered joints, so any suggestions would be great.
View attachment 86542
View attachment 86544
View attachment 86545
View attachment 86546
- Joined
- Sep 17, 2021
- Messages
- 276
- Reaction score
- 231
From 10 years ago? I note that only one post of how it worked out and that was that it leaked, uh, condensed all over the place. I f you build one of these, it must be as small as possible, and have the highest cfm fan you can get with practically no line distance. or it will just be a condensing hood. the grow fans ain't nearly enough
Similar threads
- Replies
- 1
- Views
- 785
- Replies
- 10
- Views
- 3K

