makomachine
Well-Known Member
I'm hoping mine arrives in thenext couple of weeks. I've got a trip I'm taking and hope it's here when I get back. I have a Citra Pale Ale, American Wheat, Strawberry Blonde, and Schwarzbier to brew!

Would one of you kindly post the diameter of the spigot on the 50L model? I'm trying to determine what ID hose can be attached to it. I'm guessing .5" but I can't tell for sure.
Thanks in advance.
Are you wanting to add a hose to the inside or outside? If outside, I use a 3/8" ID braided line on mine.
beradthefish said:On the outside. I would want to use a .5" ID hose on the output. Thorsten told me it's only 10mm but it's threaded and can be replaced. What's unclear is the thread size and diameter.
Ahhh. I can't help you with that as I don't know how to measure thread size. Are you thinking of removing the spout and adding a hose and pump?
")
Right. Optimally it would be a 1/2" hose barb off the spigot. All academic, I don't own one of these as of right now
See post #552 back in this thread hfk2 has a pic of his with a hose and pump hooked to it. He should chime in here shortly with your answer.


Brewing my first beer on the Braumeister today.
10 gallons of Bee Cave Haus Pale Ale.
I've been kegging other batches and generally doing other things, while I'm brewing.
 Now the two week wait... And I thought waiting for a Russian Imperial to finish was bad!
rlhvegas said:Well I took the plunge! After reading this thread and some rearranging of finances, I placed my order Friday for a 20l system with thermal jacket! I'm so excited!
Received my 20l Braumeister last week and had "First Brew" on Sunday.
Went with the 70200x45 from International Configurations for power. A little pricey but nice - gives me GFI, a switched outlet and no need to mod the cord.
Brewed in the kitchen which I haven't done since my extract days. So nice to be indoors (it rained all day) with a sink and hot water. Day went without a hitch. Hit ~80% efficiency with a quick sparge after lifting the malt pipe, no stirring just poured over the top plate. Going to try including the sparge water in the initial mix and see what that gets me.
Purchased the insulating jacket and copper hood based on comments that the heating on the 20l unit is a little anemic. Jacket is a _tight_ fit but nicely made. The copper hood is built like a brick - really thick gauge copper. With both in place I got a really solid rolling boil. Measured the max heat output at 1 degree C per minute (1.8F/min) with 25 liters.
I'm very impressed and one happy camper. Overall the most pleasant brew session I have had in years.
-Chris
Chris - opened up my 20L unit with the intent of cutting the cord and modifying but cant bring myself to do it! Would taking the 7200X45 and placing in a box wired to the drier plug work as an interface that can be moved? Thinking about future locations and possibly tying this switched box to a future stand build.
SB to 7200X45 in box wired to drier cord to drier outlet
How are things going for you on the wort clarity front?
Just took time, finally cleared out after a couple months.
Used my Therminator on the last batch and things are clear out of the fermenter. I suspect I wasn't getting a good cold break with the Speidel chiller. It's a thing of beauty but it's not much of a chiller. Not sure if the walls are too thick or there isn't enough length but it's going to be replaced. Haven't decided if I'll stick with the Therminator or build/buy another cooper immersion chiller. The plate chiller is just a pain to deal with compared to an immersion chiller IMHO.
-Chris


Hello-
I know that there has been a lot of discussion on keeping the filters in place. It seems the two best situations are to use ss wire to "sew" the filter to the false bottom piece or to use ss paperclips to cli the two together. I used the SS wire trick on my last brew, and while it was effective it was a complete PITA to set up and take apart. SS paperclips are rather difficult to find and I wonder if the added clips would make the false bottom just a touch too wide to fit easily into the malt pipe. (I have a small dent in my malt pipe from shipping and the false bottom piece always hits that on the way in and out. I can't help but wonder what would happen if I have six or eight clips attached to the false bottom.)
Anyway... has anyone tried using small magnets to hold the filter and false bottom together? I think this solution would have the advantages of being quick to set up and take apart, not adding to the circumference of the false bottom, as well as not trashing the filter from repeatedly sewing the filter in place. Possible downsides to this solution that I see are: potential to knock the magnets off whilst stirring the grain, not using enough magnets and allowing grain to slip by the filter around the edges, and whether or not magnets are food safe.
Can anyone see a downside to this solution? Has anyone tried it? What type of magnets would be food safe?
Yambor, I'm missing your cool videos. Any news at the BM front?
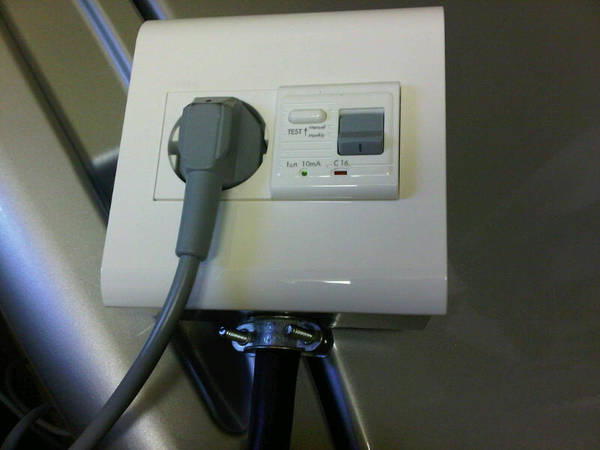
Here's a couple picts of my install of the 70200X45 from International Configurations. The components are actually made by Legrand. There's a green led that lights up when the receptacle has power. I keep it switched off unless I'm brewing.
-Chris

Enter your email address to join: