Pulling a hole for tri-clamp fitting

Homebrew Talk - Beer, Wine, Mead, & Cider Brewing Discussion Forum

Help Support Homebrew Talk - Beer, Wine, Mead, & Cider Brewing Discussion Forum:

This site may earn a commission from merchant affiliate links, including eBay, Amazon, and others.

dmfa200

Well-Known Member
Joined
Feb 20, 2010
Messages
529
Reaction score
9
Location
Madison
Learned this technique from a guy that does sanitary welding.
Doing this makes it possible to reach the backside of a weld and address any imperfections that may arise.
Just slapping a fitting on top and welding I have found is easy but does not look as good either.
To tell you the truth, this method proved to be even easier than expected, and the result is a more professional look and completely sanitary weld.

I did this work for a local brewery that wanted to be a be able to push a five gallon pitch of yeast into their fermentors, instead of their usual method of pitching from the top on a ladder. They have 40 bbl fermentors so it's about 15 feet at the top.

The tool is simply a piece of steel with an 8 degree taper on it. A hole drilled thru the center and a piece of all-thread tack welded to it with a nut on the end. Now that I think about it, the nut is not necessary.
The other part of the tool is just a piece of pipe capped on the end with an over sized nut welded on top for the all-thread to pass thru. Again the nut is optional, but that's how I constructed it.

The cone passes thru the hole from the inside with the pipe portion of the tool sitting over the hole. The all-thread passes thru the capped pipe, and the cone is pulled thru the hole by turning the nut on the all-thread until the entire cone passes thru the wall of the keg

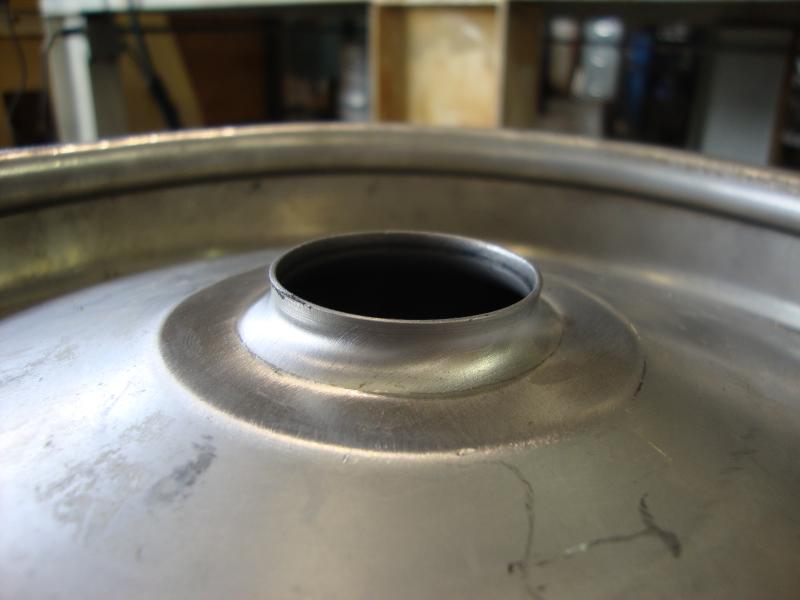
To pull the hole I drilled a 7/8" hole and de-burred the hole and smoothed the edges so the metal would not tear while the cone was pushing it's way thru the hole. The result is a flanged 1 3/8" ID hole to match the ID of the fitting to be welded to the keg.

DSC01907.jpg


DSC01918.jpg


DSC01921.jpg


DSC01933.jpg


DSC01938.jpg
 
The first photo is of the tool
the second is the the hole after being pulled
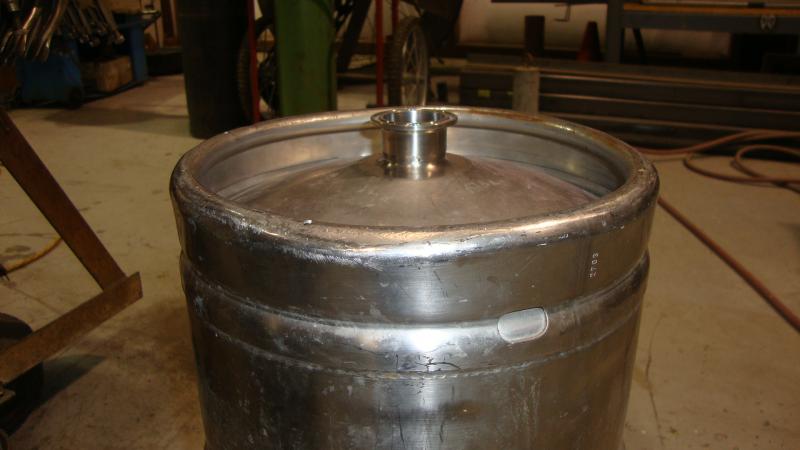
third is the fit of the fitting to the hole
of course the finished weld
and lastly the inside of the fitting after blending the weld

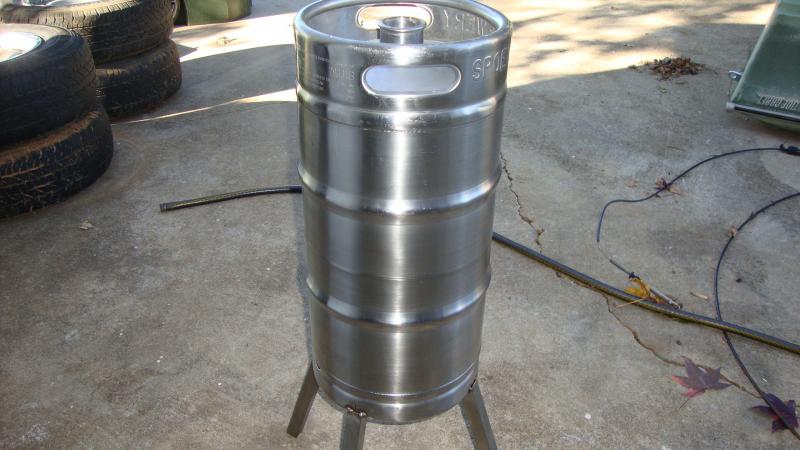
The yeast vessel almost finished with legs tack welded welded.
The fitting is welded on the bottom of the keg.

And another photo of the bottom.

DSC01942.jpg


DSC01930.jpg
 
Nice job. At first I wondered why bother putting a tri-clamp in the bottom instead of flipping the keg over, but now I see.

Thanks

Yeah, the guy wanted it out the side at the bottom, but told him it would work better off the bottom. It allows the contents to empty completely.
 
dmfa200, I just posted about doing something very similar with 1/2 couplers. I am now thinking about trying out with tri clamps so your post is very helpful!

PS What kind of keg is this? Did you weld those together too?
 
that is a slim line 1/4 barrel... fairly new in the industry, or at least fairly new to be adopted as a replacement for old squatty quarters.
 
That was a really nice looking bead on your weld! How long did it take you to get to that level?

~M~
 
That was a really nice looking bead on your weld! How long did it take you to get to that level?

~M~

Well, I've been welding for 22 years now so I'm not really sure when I reached the particular level your asking about.
Thing is my skills have progressed over the years.
I started off stick welding structural steel, then mig, and flux core.
After about 6 years of that, I got into pipe welding so I had to learn tig, and up my skills in stick welding.
In the pipe welding trade it's said that you really aren't a real pipe welder till you have about 5 years under your belt. This is where I honed my tig welding skills.
For the last 5 years I've been working for an aerospace company.
I'm sorry but it's not that definite.
To tell you the truth, welding is a unique skill. Some people pick it up very quickly, and some will just never "get it"
 
dmfa200 said:
Learned this technique from a guy that does sanitary welding.
Doing this makes it possible to reach the backside of a weld and address any imperfections that may arise.
Just slapping a fitting on top and welding I have found is easy but does not look as good either.
To tell you the truth, this method proved to be even easier than expected, and the result is a more professional look and completely sanitary weld.

I did this work for a local brewery that wanted to be a be able to push a five gallon pitch of yeast into their fermentors, instead of their usual method of pitching from the top on a ladder. They have 40 bbl fermentors so it's about 15 feet at the top.

The tool is simply a piece of steel with an 8 degree taper on it. A hole drilled thru the center and a piece of all-thread tack welded to it with a nut on the end. Now that I think about it, the nut is not necessary.
The other part of the tool is just a piece of pipe capped on the end with an over sized nut welded on top for the all-thread to pass thru. Again the nut is optional, but that's how I constructed it.

The cone passes thru the hole from the inside with the pipe portion of the tool sitting over the hole. The all-thread passes thru the capped pipe, and the cone is pulled thru the hole by turning the nut on the all-thread until the entire cone passes thru the wall of the keg

To pull the hole I drilled a 7/8" hole and de-burred the hole and smoothed the edges so the metal would not tear while the cone was pushing it's way thru the hole. The result is a flanged 1 3/8" ID hole to match the ID of the fitting to be welded to the keg.

This is a very slick technique!! Just so I am clear, the all thread is roughly 7/8" in diameter and the largest, smooth section of the cone plug is 1 3/8" to match the diameter of the triclover fitting??
 
No, the all-thread appears to be 1/2". The hole drilled is 7/8" and the large end of flare tool Is 1-3/8".
 
Is there a general rule of thumb for how large a hole should be drilled for the final diameter? I am surprised you do not split the SS...
 
Is there a general rule of thumb for how large a hole should be drilled for the final diameter? I am surprised you do not split the SS...

I don't think there is a rule for starting diameter.
I started with a 1" hole but wanted the flare to be taller so I went to a 7/8"
As long as you smooth the edges of the hole real well you could probably go even smaller.
I haven't tried any other sizes yet, although I do have another tool for 1/2" ferrules. So I guess a little trial and error is all I can say to use.
I did 4 practice pulls on the cut out top of a beer keg with a 7/8" hole to make sure the metal would not tear, and every one came out perfect so that's what I used.
 
Back
Top