Rehabbing an old monster freezer

Homebrew Talk - Beer, Wine, Mead, & Cider Brewing Discussion Forum

Help Support Homebrew Talk - Beer, Wine, Mead, & Cider Brewing Discussion Forum:

This site may earn a commission from merchant affiliate links, including eBay, Amazon, and others.

BasementBrewmistress

Well-Known Member
Joined
Sep 18, 2011
Messages
147
Reaction score
5
Paid too much for an old, nasty 15' cu freezer on Craigslist. Been reading threads on restoration, including JoeC's Monsterator, but there doesn't seem to be a consensus on dealing with rust.

Wondering if I can just clean it up with soap/bleach and use this for rust abatement? Or do I still have to sand it?

It's in the garage now, but will unfortunately/eventually go on a covered patio (that was another thread) unless my husband figures out how to fit in through the sliding glass door.

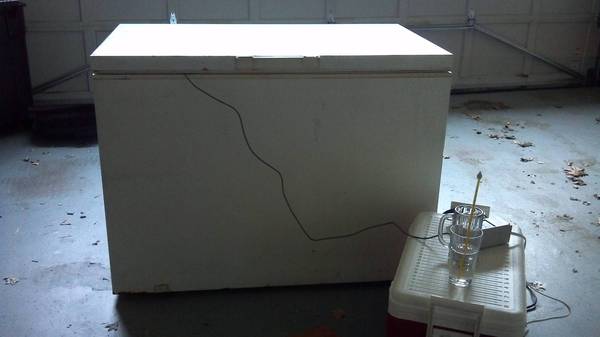
Not sure how this whole conversion thing will turn out....

freezer_front.jpg

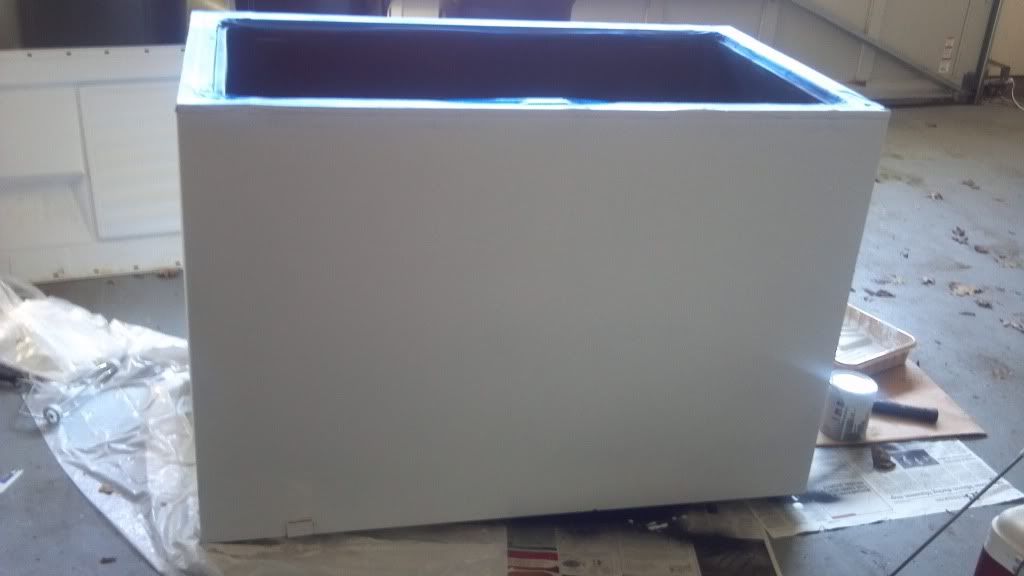
As you can see, it's dirtier than it is rusty.

freezer_rear.jpg

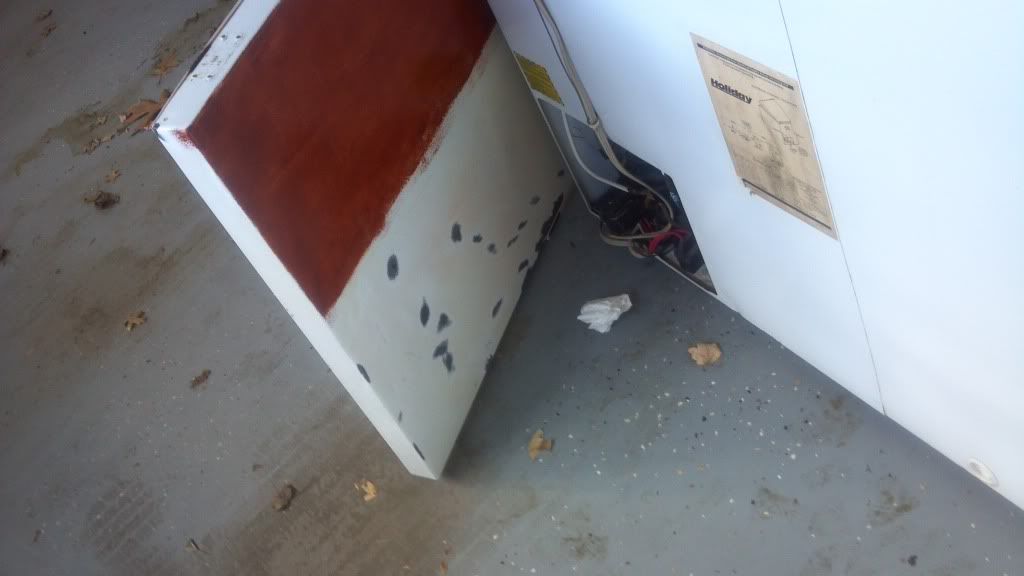
A bit more rust on the backside...seal is very moldy.

freezer_interior.jpg

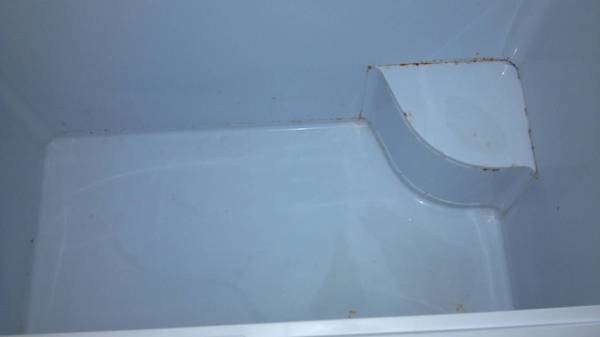
Rust on the floor along the floor and edges.
 
Wondering about the rust myself. I've got a TON in my fermentation chest freezer.
 
Is yours a preexisting problem or from condensation (or both)? I noticed mine had a good sized pool of water after holding above freezing for a few days.

Unless I hear otherwise, I'm going to pick up a quart of Rust-Oleum from Lowes tomorrow and try treating with that. Will let you know how it works.

Mine had rust when I bought it off Craigslist, but it's gotten MUCH worse ever since. I've noticed quite a bit of condensation in there at times. I'm sure that damp rid stuff would help, but I don't know how to treat the already rusting areas to stop it from spreading. Anxious to see how yours works out.
 
I'm guessing you are wanting to deal with the rust so you can paint it? If you came into my paint store with this problem here is what I would advise.

1. You need to remove all loose rust. Stiff wire brushes work the best. Sand paper is the next most common method.
2. Next I would clean any dirt off the rest of the areas that still have paint on them and going to be top coated when you address the rusty spots.
3. Next if the newly cleaned areas with existing paint are shiny I would dull the surface by sanding. Then make sure and remove all dust from sanding.
4. Prime the area with a primer that is an oil based, rust inhibitive primer.
5. Top coat with a rust inhibitive top coat. At least two coats.
6. Make sure that you let the paint cure at least a week before putting the freezer into regular use. Paint will be dry to touch but not fully hardened for at least a week possible longer at lower temperatures.

Make sure you are in well ventilated areas when using oil based paints. If you are in a garage and open the door make sure since it is winter you are reading the back of the can for the application temperatures. Paint applied outside this temperature range will surely fail. Keep in mind application temperature is both and and the surface temp of what you are painting.

Hope this helps and was what you were looking for. Feel free to post any follow up questions and I will try to answer them.
 
Is there a chemical substitute for sanding? To be frank, washing the freezer today made me want to pop a few Vicodin and take a nap. Under different circumstances, I'd do exactly what you recommended.

We'll figure something out if there's no alternative. Just trying to avoid unnecessary pain and suffering.
 
Yes there are liquid sanders, they should be in the section with the paint solvents. Make sure that read the instructions as most of them are time sensitive how long you have to wait before you can paint/prime and how long you have to wait before it wears off.
 
Do you have an electric sander? Or a angle grinder you can put a wire wheel on - even a drill with wore wheel? They'll save you tons of effort.
 
Thanks for the suggestion. Used a wire brush attachment with my cordless drill. Works ok on stripping small sections of paint and taking the surface rust down. Not so great on the big stuff.

Tried naval jelly (sitting about 45 mins) on the deeper rust spots, but it doesn't seem to be doing anything. I decided to do another section with the Rustoleum rusty metal paint. Will see if the rust creeps back through.

My joints are feeling pretty angry, so I'm trending towards skipping the sanding and just laying down the Rustoleum rusty metal primer. If I was 100%, I'd sand the whole thing, then prime it.
 
I'm an idiot. When I sanded some of the rust spots, they turned black - does this mean they'd already been treated and the surface rust returned?

I'm going to scrub off the naval jelly today once the garage heats up. Hopefully it'll be warm enough to prime the so I can work on the interior rust this weekend.
 
I have the same freezer posted to CL in Des Moines for free and I can't get anyone to come pick it up. If there are any brewers in the DSM Iowa area that want a freezer just like the one pictured above, shoot me a PM.
 
Use rustoleum rust reformer on the very rusty areas. It comes in a small (8oz?)white bottle. You paint it on with a brush, don't dip the brush back into the bottle it's moisture activated and you will ruin the whole bottle. Pour it in a small cup to paint out of. Use just a thin layer, it will turn from white to purple to black. I have used it and it works great. You can then prime and paint on top after a couple days curing. Don't sand it after it's treated. You can find it at walmart and home depot.
 
Thanks for the suggestion! Couldn't find the bottle, but they did carry an aerosolized version at Home Depot. It should be warm enough tomorrow to try it out.

In your experience, do I need to be worried about fine particles screwing up the paint job or other objects in the garage?
 
Haven't been able to do much work due to the low temps.

We were able to take advantage of a warm day last week to remove the lid and seal. Also hooked up a wire brush to the drill and hit most of the external rust. I rinsed off any remaining naval jelly and applied Rust Reformer to the treated and/or sanded spots when dry. I elected to do the interior with naval jelly followed by a full coat of Rust Reformer (as opposed to spot treatment), but in retrospect that was more work than necessary.

A single spray can was enough to spot treat the lid and exterior and paint 3/4 on the interior. Would've loved to find this in a regular paint can rather than aerosol. So far, I really like the Rust Reformer. My only beef is the only color is black - since the finished exterior will be white.

Keezer_rustrehab1.jpg

Here's the exterior looking very ghetto after spot treating with Rust Reformer

Keezer_rustrehab2.jpg

First can got me through the spots on the lid, exterior, and 2/3 of the interior

keezer_primed_interior.jpg

Here's the primed interior...might do another primer coat before spraying with bed liner
 
Not sure if anyone's still reading, BUT I figure maybe keeping this updated will help someone in the future.

Anyway, got the first coat of primer on the lid and body exterior yesterday. The metal primer has great coverage. I'd selected what I thought was grey primer to cover the black splotches (treated areas), but it comes out of the can as an off-white. I'm really pleased with the coverage. Also, I'm happy to say the rust hasn't yet peeped through where it's been treated.

keezer_whiteprimecoat2.jpg


Check out the before and after on the lid:
Before
keezer_primercomparison.jpg

After
keezer_whiteprimecoat1.jpg


There will be a second coat of primer for the lid/exterior, followed by semi-gloss white top coat.

The plan for the interior is to use bedliner on top of the rust reformer to create a durable, watertight (hopefully) seal.

I'm not sure what do with the underside of the lid. The existing foam is usable, but I wonder if it's worth replacing with better insulation. Thoughts?
 
Please do keep updating! I have a project freezer sitting in the garage in a similar condition waiting for warmer weather so that I can start to tackle it's issues.
 
A couple of updates:

I broke the POS plastic lid handle, and am replacing it with a nicer stainless one from Lowes. While I'm at it, I'm replacing all the pellet foam with Great Stuff. As soon as that cures, the new handle will go on. After that, I'll be able to reattach the lid liner with new screws and add the (new) gasket.

Also, the first top coat is on the exterior and inside was painted with bedliner paint. I'll probably do a second top coat and put everything back together. The plan is to have this thing running on Sunday. When my husband has more time off, we'll build a wooden base with casters.

In phase 2 (Spring/Summer) we'll add a red oak collar and 3-4 taps with space for the 40L fermenter. Eventually, I'd like to have a total of 6-7 taps, but our pipeline isn't there yet.
 
Phase 1 is pretty much complete - I really screwed up on the handle and reattaching the plastic lid liner, so jury-rigged a solution until we have time to add the collar/taps. So it's not as nice as it would have been at this stage, but hey, it works. The exterior is 100% better, and I have yet to see rust reappear in the treated areas (knock on wood).

Operational_Brewstar.jpg


For now, I have the magnetic tool/drip/picnic tap tray on the inside left, 4 kegs and a 5# CO2 canister on the floor. The CO2 + regulator will fit on the compressor hump, but I feel better with it on the floor. I/we will build a hanging basket for brew supplies which frees up enough space on the floor for cold crashing and bottles.

Brew_stash.jpg


Once we figure out a long-term space for the freezer, I'll attach the temperature controller to the external surface with heavy-duty velcro. I plan to rig internal lighting (hence my efforts to retain the plastic lid liner) and an indicator light to show when the compressor is running (assuming this thing ends up living outside).

Last, but not least, I have major ideas for decorating this thing. I'm an Air Force brat and want to have a Wild Weasel patch painted (or a decal) on the lid...surrounded by the various wild weasel aircraft (e.g., F-105). This would be a tribute to our brewery (Wild Weasel) and thanks to my father for his support. On the collar, I think I'll have USAF, USMC, and Army crests. It probably sounds tacky, but I'd like this to look decent.
 
looks great, ive got a freezer that could use som rust reformer. did you have any odors before you painted it and did the painting cover it up? Im still trying to get rid of an awful odor, just picked up an ozone generator off craigslist to help remedy it
 
looks great, ive got a freezer that could use som rust reformer. did you have any odors before you painted it and did the painting cover it up? Im still trying to get rid of an awful odor, just picked up an ozone generator off craigslist to help remedy it

What kind of odor does it have (mold, chemicals, or something dead)? I'm by no means an expert, however, I would bleach bomb your freezer twice -- inside AND out -- if you haven't already, then leave it open until it's ready to go into service. You might also want to consider replacing the seal if it harbors dirt and/or odors. O
 
dead animal odor. my neighbor found a freezer at his work that he said would be free. i decided to try and tackle the clean up. ive bleached it a few times so far, replace the insulation in the door, and soaked the seal in bleach. its slowly dissipating...
 
That blows. If you can't find the culprit I hope whatever died is long gone and it's just taking a while for the smell to go away. On the bright side, you scored a free freezer and the smell will go away...eventually.
 
Mine was funky when I first got it. What I did was Lysol they living daylights out of it and then took a 9x13 casserole filled with baking soda and then I plugged it in to freeze out anything growing that the Lysol missed. It took a few weeks but the funk and the smell of the lysol eventually went away and I now have an awesome funk free keezer.
 
There's no progress on this due to a number of issues.

I recommend adding a coat of white paint over the black bed liner. While I love the look, it makes it really tough to spot and remove mold/mildew. I'm getting a LOT of condensation near the lid, likely from the frequent opening and closing.
 
Back
Top